


4
537495-001
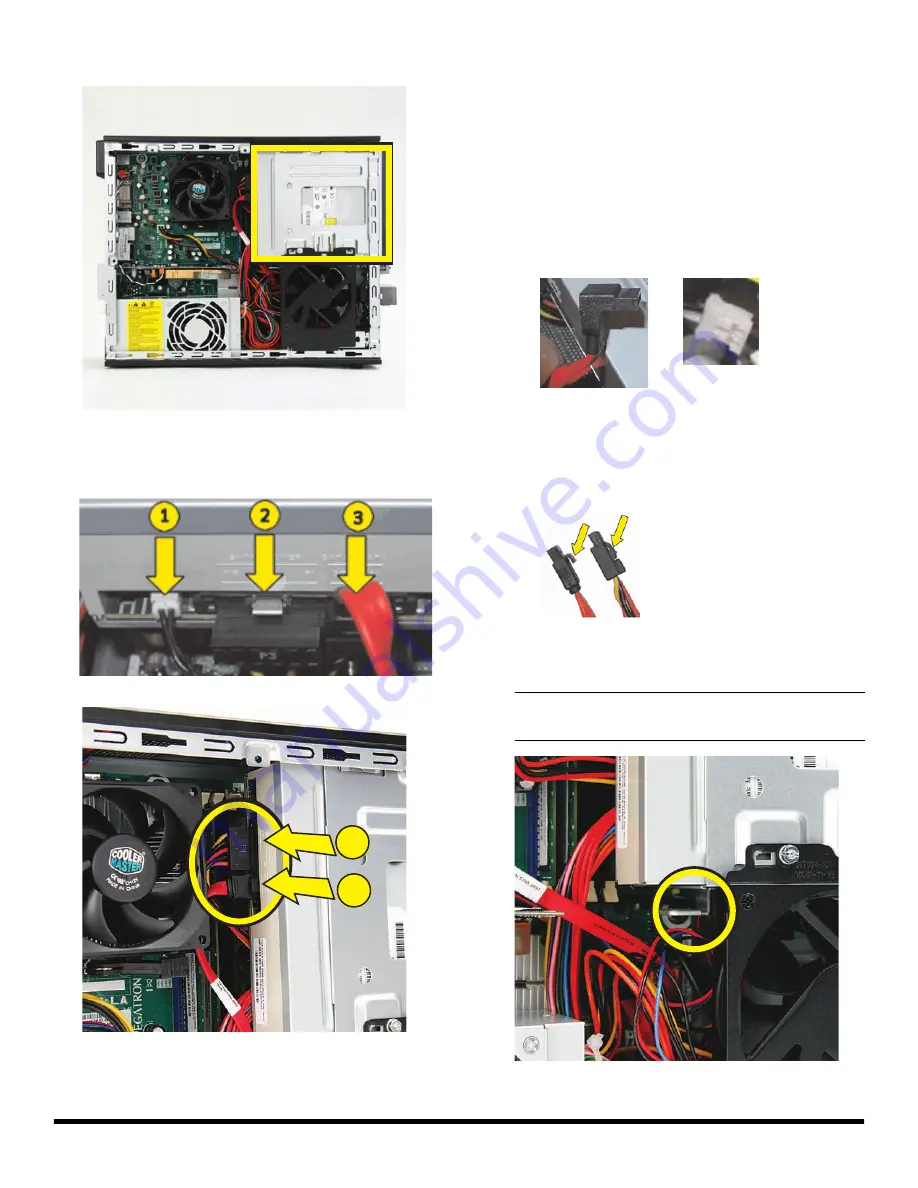
— Removing and Replacing the CD/DVD Drive
8
Locate the CD/DVD drive inside the computer.
9
Locate the cables connected to the back of the drive.
Your drive may have three or two cables.
10
Disconnect the cables from the drive:
The plugs on the cables are keyed and can be
inserted only when aligned properly with the
connector on the drive.
In addition, some plugs have a latch that must be
pressed or squeezed to release the plug while pulling
it from the connector.
Plugs without a latch:
For a plug without a latch, pull the plug straight
out from the connector.
Plugs with a latch:
For a plug with a latch, press the latch in the
center of the plug, and then pull the plug from the
connector.
11
Locate the metal latch that secures the drive in
the cage.
1
2
NOTE:
The style of latch may vary by computer
model.
Summary of Contents for s5120f - Pavilion - Slimline
Page 1: ...Printed in Upgrading and Servicing Guide ...
Page 2: ......
Page 3: ...Removing and Replacing the Front Panel ...
Page 8: ...6 537498 001 Removing and Replacing the Front Panel ...
Page 9: ...Removing and Replacing the CD DVD Drive ...
Page 17: ...Removing and Replacing the Hard Disk Drive ...
Page 31: ...Removing and Replacing an Add in Card ...
Page 38: ...8 537497 001 Removing and Replacing an Add in Card ...
Page 39: ...Removing and Replacing the System Fan ...
Page 46: ...8 537499 001 Removing and Replacing the System Fan ...
Page 47: ...Removing and Replacing Memory ...