background image

59

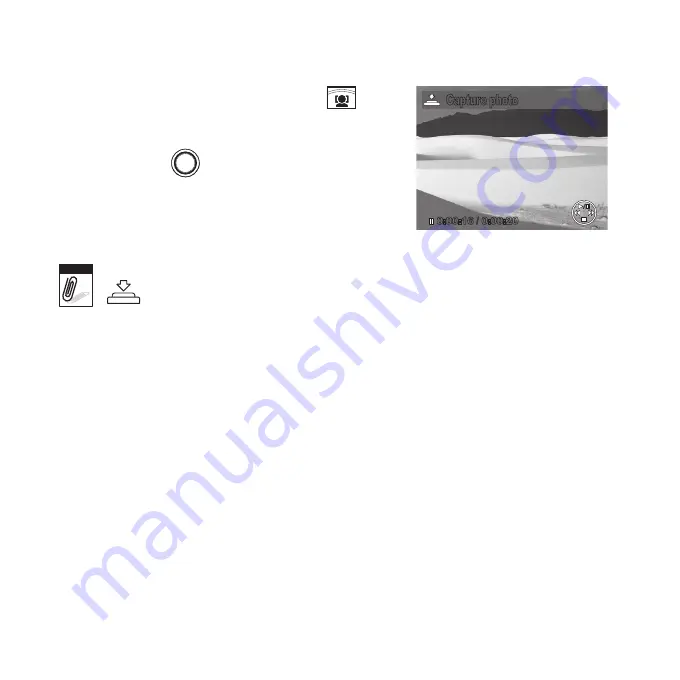
To capture screenshot image from a video clip

During playback of video, press the 

1. 

 key to 

pause playback on your desired video frame to 

capture.

Press the 

2. 

 button to capture screenshot.

The camera will automatically stop playback. 

3. 

The LCD monitor displays the captured image in 

Single navigation mode.

0:00:16 / 0:00:20

Capture photo

Note

This feature does not function when the memory card is full or the folder cannot be created. The 

 icon does not appear on the screen either.

Summary of Contents for PW550

Page 1: ...HP PW550 Digital Camera User Manual ...

Page 2: ......

Page 3: ...rmation vi Battery Information vii Using this Menu vii Photography Terms and Definitions viii Package Contents 1 Getting Started 2 Attaching the Wrist Strap 2 Inserting the Battery 2 Inserting an SD SDHC Memory Card 3 Charging the battery 4 Camera Memory 5 Camera Views 6 Front View 6 Back View 6 Top View 7 Bottom View 7 Left Right View 7 Initial Settings 10 Setting the Language 10 Using Setup Menu...

Page 4: ... mode of audio clips 18 Changing the LCD Monitor Display 19 Using Shooting Functions 21 Shooting Image 21 Taking Photos 21 Using the Stabilizer 21 Setting the Zoom Control 22 Zoom buttons 22 Using Flash 24 Setting the Focus Mode 24 Using the Function Menu 26 Shooting Mode 26 Resolution 27 Quality 27 EV Compensation 27 White Balance 28 ISO 29 Metering 30 Color Mode 31 Shooting Menu 32 Setting the S...

Page 5: ...m 47 Setting the Date Time Imprint 49 Setting Instant Review 50 Recording Videos 51 Setting the Video Quality 52 YouTube Mode 53 Recording Voices 54 Using the Viewing Functions 55 Viewing in Single Navigation 55 Viewing thumbnails 55 Zooming images 57 Playing Videos 58 To capture screenshot image from a video clip 59 Playing Voice Recording 60 Playing Voice Memo 61 Deleting an Photo Video Audio 62...

Page 6: ...iv Modify Color 69 Crop 71 Resize 73 DPOF 74 PictBridge 75 Making Connections 76 Connecting the Camera to a PC 76 Connecting the Camera to a Printer 77 Troubleshooting 78 Getting Help 79 ...

Page 7: ...mits are designed to provide reasonable protection against harmful interference in a residential installation This equipment generates uses and can radiate radio frequency energy and if not installed and used in accordance with the instructions may cause harmful interference to radio communications However there is no guarantee that interference will not occur in a particular installation If this ...

Page 8: ...ation Trademark Recognition Windows 2000 XP Vista Windows 7 are registered trademarks of Microsoft Corporation in the United States and or other countries Macintosh and Mac OS are registered trademarks of Apple Inc In addition all other companies or product names are trademarks or registered trademarks of their respective companies Safety and Handling Precautions Camera Information Do not take apa...

Page 9: ...or additional details Inserting the battery upside down can cause damage and in an extremely rare event can result in an explosion When the camera is used for an extended period of time it is normal for the camera body to feel warm Using this Menu Symbols used in this manual are explained below Note This indicates useful information when using your camera Warning This indicates warning message tha...

Page 10: ... may or may not be a physical folder in a file system Analog to Digital Converter A D or ADC A circuit that converts an analog signal having a continuously varying amplitude to a digitally quantized representation using binary output signals aspect ratio cf image aspect ratio pixel aspect ratio auto white balance AWB With auto white balance the camera attempts to determine the color temperature of...

Page 11: ...ic camera to produce specified camera output signal characteristics using the methods described in the referenced standard The ISO speed should correlate with the highest exposure index value that provides peak image quality for normal scenes JPEG Joint Photographic Experts Group An image compression method defined in ISO IEC 10918 1 protocol Defined mechanisms for exchanging data between devices ...

Page 12: ...ackage Contents Please check the contents of your camera package It should contain Digital camera Li ion battery Wrist strap USB cable Warranty Card User Manual and Software installation Quick Start guide ...

Page 13: ...amera Inserting the Battery Follow these instructions to insert the NP45 Lithium ion Li ion battery into the battery compartment If the battery is already installed make sure to power off the camera before removing and inserting a recharged or new battery Please read Battery Information before inserting removing battery If the battery is already installed make sure to power off the camera before 1...

Page 14: ...y Card Expand your camera s storage by using SD or SDHC memory cards Open the SD card compartment at the bottom of the 1 camera Insert the SD SDHC card into the memory card slot with 2 the metallic contacts facing the front side of the camera Push the SD SDHC card into the memory slot until it 3 clicks into place Close the SD card compartment 4 ...

Page 15: ... your package is not fully charged You need to charge the battery before using the camera Insert the battery into the battery charger 1 Connect the battery charger to the adaptor 2 Plug the adaptor to the main outlet 3 C H A R G E Please charge the battery at least 2 5 hours for the initial use Beyond the initial use please charge your battery until the LED indicator on your charger turns green ...

Page 16: ...utomatically saves all images videos and audio clips in the external storage card The icon indicates the camera is using SD card Warning Not all cards may be compatible with your camera When purchasing additional cards please check the card specifications Please use class 4 rated SD SDHC or greater to ensure optimal operation You can ensure optimal compatibility by purchasing HP brand SD cards ...

Page 17: ...a Views Front View Flash Self Timer LED AF Assist Lamp Zoom Lens Microphone Back View Func Delete 2 Shooting Video Record Playback 1 LCD screen Zoom buttons Menu 4 Operation Lamp SET 4 way navigation control 3 ...

Page 18: ...7 Top View Shutter button Power button Bottom View Battery SD card compartment Left Right View Strap ring USB ...

Page 19: ...te an image video or audio clip Button 3 Navigation Control The 4 way Navigation Control and the button allows you to access the various menus available from the On Screen Display OSD Further functions of these buttons are as follows Face Tracking Rotate Button Macro Button SET Button Flash Button Display Button Button 4 Menu button Press the button to enter the setup settings menu Press the butto...

Page 20: ...ng Rotate In Menu mode press to navigate through the menu and submenu selections 1 In Shooting mode press to turn the face tracking function on and off 2 In Playback Video Audio mode press to Start Pause video or audio playback 3 In Playback photo mode press to rotate the image clockwise 90 degrees by each 4 press of the button This feature is applicable for still images only Display Down In Playb...

Page 21: ... in Shooting or Playback mode The Setup menu allows you to configure general camera settings To go to Setup Menu Press 1 to launch the Shooting Playback Menu Use the 2 or key to change the menu tab to Setup menu Use the 3 or key to move through the menu selections To select an item press the 4 button or Camera Sounds Auto Power Off Display Timeout Date Time Language File Numbering 1min OFF Change ...

Page 22: ... to capture images and record audio clips Shooting mode can be further set to mode options like auto and scene selection modes Video Record mode Set to Video Record mode to record videos Playback mode Set to Playback mode to view or edit photos review video and audio clips ...

Page 23: ... 2 to launch Shooting mode Menu Select 3 Shooting Mode and then press to enter submenu Select a mode 4 Press the 5 button to apply selected mode OFF OFF Shooting Mode Self Timer Burst AEB AF Area Sharpness Note Use the 4 way navigation control to move through the menu selections ...

Page 24: ...ash settings Please see page 24 for additional details 3 Self Timer Burst Indicates Self Timer Burst settings 4 Zoom indicator Displays zoom Please see pages 22 and 23 for additional details 5 Shots remaining Indicates the remaining shots available 6 Battery Indicates battery level 7 Storage media Indicates current storage media in use 8 Date Time Imprint Indicates date time imprint is enabled Ple...

Page 25: ...s that the camera is shaking 19 Macro Indicates macro is enabled Please see page 24 and 25 for additional details 20 Exposure Displays exposure settings Please see page 42 for using manual exposure mode 21 Face tracking Indicates face tracking is enabled Please see pages 40 for additional details 22 White balance Displays white balance settings Please see page 28 for additional details 23 Metering...

Page 26: ...s 3 Voice memo Indicates voice memo is attached Please see page 68 for additional details 4 Button intro Indicates the button to press on the camera to play a video or audio file 5 File Number Indicates the current image file number and the total files in the camera 6 Battery Indicates battery level 7 Storage media Indicates storage medium in use 8 Recording information Displays the image details ...

Page 27: ...Indicates the file is a video 4 Button intro Indicates the button to press on the camera to play a video or audio file 5 File Number Indicates the current image file number and the total files in the camera 6 Battery Indicates battery level 7 Storage media Indicates SD memory cad in use Indicates internal camera memory is in use 8 Shooting information Displays the image details of the current file...

Page 28: ...17 No Item Description 10 Key indicator Indicates the buttons to press on the camera to apply the functions 11 Played time Indicates played time 12 Playing status Displays playing status ...

Page 29: ... camera to play a video or audio file 4 File no Total no Indicates the file number over the total number of files in the storage card 5 Battery Indicates battery level 6 Storage media Indicates used storage memory 7 Shooting information Displays shooting information of the file 8 Volume Indicates volume settings 9 Key indicator Indicates the buttons to press on the camera to apply the functions 10...

Page 30: ...on Full OSD on OSD off Note The OSD information may vary depending on the shooting mode type The following icons if enabled are still displayed on the LCD even when OSD off or Guide lines on AEB Face tracking Self Timer Burst and Macro Use the Guide lines to properly set image for capture Typically these guide lines are used to help vertical and horizontal alignment of the photograph ...

Page 31: ...57 2009 01 01 01 57 SET 12M 1 30 1 30 F 3 0 F 3 0 0EV 0EV SET 12M ISO 400 27 27 27 27 2009 01 01 01 57 2009 01 01 01 57 OSD on Full OSD on OSD off Note LCD display cannot be changed in the following situations Manual exposure mode Recording video or audio clips Playing video or audio clips Playing slide show ...

Page 32: ...isplayed See Image 2 Fully press the 4 button to capture image Note When the shake warning icon appears hold the camera steadily Image 1 307 307 ISO AUTO 0 0EV 0 0EV 12M Image 2 ISO AUTO F 3 0 F 3 0 1 30 1 30 Using the Stabilizer The Stabilizer function helps reduce blurred images caused by shaking Enable the Stabilizer in the Setup Menu as described on page 32 1 Use the 2 or keys to go through th...

Page 33: ...m out Press to zoom in To adjust Digital Zoom options Press 1 in shooting mode and activate digital zoom see Image Activate digital zoom 2 Press the 3 T button to optically zoom in to the maximum until it stops Release the button 4 Press the 5 T button again to switch to digital zoom automatically Zooming continues x5 0 x5 0 Saturation Contrast Digital Zoom Date Time Imprint Instant Review OFF Int...

Page 34: ...307 307 x5 0 x5 0 ISO AUTO 0 0EV 0 0EV 12M optical zoom To adjust Optical Zoom Press the 1 to zoom in out The zoom indicator appears on the LCD monitor 2 x5 0 x5 0 Note Digital zoom is not activated in recording video ...

Page 35: ... activated in recording video or continuous shooting Note Flash function is only available in shooting still images but not available in Burst and AEB modes Setting the Focus Mode To set the Focus mode Press the button repeatedly until the desired focus mode icon is displayed on the lower left corner of the LCD monitor Macro button ...

Page 36: ... camera is set to normal mode there is no icon displayed on the screen Macro This mode is designed for close up photography If Macro is enabled you can capture the detail and sharpness of a very close image Pan Focus The camera focuses on every object Infinity The camera focuses on distant objects Macro enabled 307 307 12M ...

Page 37: ...the menu The My Menu options bar as shown in the image to the right displays the last six shooting scene modes that were selected The Menu bar as shown in the image to the right displays the available options for each selected shooting scene mode Menu bar Menu options Program N 12 M AWB ISO AUTO 0 EV Shooting Mode It shows the selected mode from Menu options bar Program N 12M AWB ISO AUTO 0 EV ...

Page 38: ... available settings for still images are as follows Best Fine and Normal Fine N 12M AWB ISO AUTO 0 EV EV Compensation In extreme lighting condition the auto exposure function may not set for the correct exposure for optimal picture quality The manual 0 EV option allows you to adjust the exposure value to the desired level Available for still images only To adjust EV settings press the or key to in...

Page 39: ...nny conditions Cloudy Ideally used for cloudy conditions Tungsten Ideally used for indoor photos with tungsten or halogen lighting without a flash Fluorescent H Ideally used for indoor photos with blue tinted fluorescent lighting Fluorescent L Ideally used for indoor photos with red tinted fluorescent lighting Manual Used when light source cannot be specified Press the shutter button for the camer...

Page 40: ...in dim conditions and a lower ISO setting in brighter conditions Available settings are Auto 50 100 200 400 800 1600 3200 ISO 3200 only available in 3M 16 9 2M VGA Auto N 12M AWB ISO AUTO ISO AUTO ISO 50 ISO 100 ISO 200 ISO 800 ISO 400 0EV Note If the Stabilizer is enabled ISO is automatically set to Auto and cannot be adjusted To adjust ISO disable Stabilizer first ...

Page 41: ...preview on the LCD monitor changes synchronously Multi N 12M AWB ISO AUTO 0EV Icon Item Description Multi The camera measures the exposure readings from multiple points in the subject area Center The camera measures the average light from the entire frame but gives more importance to the values near the center Spot The camera selects the exposure value based on the center of your picture ...

Page 42: ...amera records normally V Vivid The camera captures the image with more contrast and saturation emphasizing on the bold colors S Sepia Images are captured in sepia tones BW B W Images are captured in black and white R Vivid Red Images are tinted red Ideally used to record images like flowers and cars to make them more vivid G Vivid Green Images are tinted green Ideally used to record images like mo...

Page 43: ...The Shooting menu allows you to change modes and setup other capture settings Press 1 to launch the Shooting Menu Use the 2 or key to move through the menu selections To select an item press 3 Change the submenu settings using the 4 way 4 navigation control Press the 5 button to save and apply settings OFF OFF Shooting Mode Self Timer Burst AEB AF Area Sharpness Setting the Shooting Scene Mode Set...

Page 44: ...ws manual adjustment to the aperture value The camera automatically selects the shutter speed to match the brightness See Page 41 for details Shutter Priority This mode allows manual adjustment to the shutter speed The camera automatically selects the aperture value to match the brightness See Page 41 for details Manual Exposure This mode allows manual adjustment to the shutter speed and aperture ...

Page 45: ...est results and to reduce image blurring the use of a tripod for this mode is strongly recommended Fireworks This feature slows shutter speed to capture fireworks explosions For best results and to reduce image blurring the use of a tripod for this mode is strongly recommended Snow This scene mode is used when you re shooting against a bright background such as snow or sand This will enable the ca...

Page 46: ...oft Flowing Water This feature enhances smooth effects like water or silk Food This scene mode is designed to capture pictures of food The Camera is set to macro mode focus and other parameters to increase saturation for enticing food images Building This feature enhances the edges of captured images Text This scene mode enhances the black and white contrast normally used when capturing text image...

Page 47: ... faces to capture portraits photos without the help of others When over two faces are detected AF is automatically activated The camera starts count down and captures a picture in two seconds Video This mode is used to record video clips Slide the mode selector switch to the Video icon to enable this mode Voice REC This mode is used to record audio clips Slide the mode selector switch to the Voice...

Page 48: ...center of the screen To activate Smile Capture Select 1 from the Scene Mode submenu Focus the camera on the subject to capture 2 The smile capture icon blinks every second and 3 the white focus frame turns green to denote camera activity When a smile is detected the camera will 4 automatically take a shot of the image The camera displays a white frame when a face is detected 8 M 307 307 Note When ...

Page 49: ... mode Face tracking is automatically enabled To activate Intelligent Scene Select 1 from the Scene Mode submenu Focus the camera on the subject to capture 2 The camera detects the shooting conditions and 3 switches to an appropriate scene mode Press the shutter button half way down to focus 4 the subject The frame turns green to indicate focus is set Press the shutter button to take the shot 5 The...

Page 50: ...Macro This mode is set when There is no face detected The focus distance is within the macro range This mode can only be detected when you press the shutter button half way down Backlight This mode is set when the EV setting greater than 2 5 Backlight Portrait This mode is set when a face is detected with an EV setting greater than 2 5 Night Scene This mode is set when There is no face detected Th...

Page 51: ...ored or deleted from memory Select 1 from the Scene Mode submenu 307 307 12M Face tracking is automatically enabled Detected faces are framed Press the shutter button half way down to focus the subject The frame turns green to 2 indicate focus is set Press the shutter button to capture the image The image is automatically saved unless 3 the camera detects that the subject blinked Save image Cancel...

Page 52: ...ed press the button to confirm setting 307 307 12 F 3 0 F 3 0 A Adjust SET M Displays the aperture value Using Shutter Priority Mode Shutter Priority mode allow users adjust the shutter speed The camera automatically sets the aperture value to match the brightness of the scene To manually change the shutter speed press the button then use the to manually adjust the speed When finished press the bu...

Page 53: ...tter speed options or Use the or keys to select the aperture value options Use the 4 or keys to increase or decrease the aperture or shutter speed values Press the 5 to exit the adjustment mode Press the shutter button to capture the image 6 307 307 F 3 0 F 3 0 1 30 1 30 12 Adjust SET M Displays the aperture and shutter speed value Note Pressing the shutter button half way will also display the di...

Page 54: ...s 10 secs 2 secs 2 shots Burst Off 10 2 x2 OFF Shooting Mode Self Timer Burst AEB AF Area Sharpness Icon Item Description 10 10 Secs Self Timer Sets a 10 seconds delay to capture image after pressing the shutter button 2 2 Secs Self Timer Sets a 2 seconds delay to capture image after pressing the shutter button x2 2 Shots Self Timer Performs delay and capture twice Performs a 10 second delay and t...

Page 55: ...t 0 3EV The final photo is then captured at 0 3EV The AEB setting is reset to off when the camera is switched out of Photo Record mode or is powered off Shooting Mode Self Timer Burst AEB AF Area OFF OFF Sharpness On Off OFF ON Setting the AF Area This camera has 2 AF Automatic Focus settings Each setting changes the focus behavior of the camera Shooting Mode Self Timer Burst AEB AF Area OFF OFF S...

Page 56: ...e Spot The focus area is fixed on the center spot Setting Sharpness These settings will enhance or soften details of the photo Shooting Mode Self Timer Burst AEB AF Area Sharpness OFF OFF High Medium Low The table below shows the available Sharpness settings Icon Item Description High Sharpens the image Medium Medium sharpness Low Softens the image ...

Page 57: ...aturation setting for rich colors and a lower setting for muted tones Saturation Contrast Digital Zoom Date Time Imprint Instant Review OFF OFF High Medium Low The table below shows the available Saturation settings Icon Item Description High Enhances saturation Medium Medium saturation is applied Low Reduces saturation ...

Page 58: ... Low Setting the Digital Zoom This feature controls the digital zoom mode of your camera This camera uses Optical Zoom before Digital Zoom When the optical zoom reaches 5X the camera will utilize digital zooming if enabled Digital Zoom is set to Off by default Saturation Contrast Digital Zoom Date Time Imprint Instant Review OFF Intelligent Zoom Standard Zoom Off OFF ...

Page 59: ...till images only Standard Zoom Enlarges all image sizes up to a maximum of 5x but the image quality deteriorates Off Uses the optical zoom only Note Digital Zoom is not available in Smile Capture Video Intelligent Sence Portait Night Portait Blink Detection Love Portait modes and Voice Recording modes The maximum Intelligent zoom scale varies depending on the image type and resolution ...

Page 60: ...Time Imprint functions are as follows Available for still images only May slow down AEB continuous shooting when Date Time Imprint is enabled in AEB Burst mode If Date Time Imprint is enabled digital zoom is automatically turned off In vertical or rotated images the date and time on your photos still appear horizontally Saturation Contrast Digital Zoom Date Time Imprint Instant Review OFF OFF Satu...

Page 61: ...view function will display the captured photo immediately after shooting it for 1 second Saturation Contrast Digital Zoom Date Time Imprint Instant Review OFF OFF Saturation Contrast Digital Zoom Date Time Imprint Instant Review OFF OFF On Off OFF ON ...

Page 62: ...Timer Burst AEB AF Area Sharpness OFF OFF 0 00 16 Note When the maximum capacity for a single video has been reached simple press the shutter button again to continue recording The camera will automatically stop recording when the memory capacity is full Digital zoom is not available in video recording Sound cannot be recorded while pressing the control Auto Power Off is not available in video rec...

Page 63: ...shown below Use this function to adjust the resolution and quality of video clips N AWB 640 640 320 16 9 High Quality Image Quality Matrix The higher the image quality the higher the amount of the data used per second average bit rate the smoother the playback video Video Quality Average Bit Rate 720 x 400 4 8Mbps 640 x 480 4 8Mbps 320 x 240 4Mbps ...

Page 64: ...t uploaded video lengths range 1 to 5 minutes Therefore when recording video using the YouTube mode the following applies Recorded videos are set to YouTube standard resolution of 640 X 480 Recording automatically stops when the file reaches 100 MB Recorded videos in the YouTube mode are stored following the DCF rule however videos are saved in a specific folder named _UTUBE To record a YouTube vi...

Page 65: ...ect 1 Voice The Voice Recording screen layout is displayed on the LCD monitor Press the 2 button to start recording Press the 3 button again to stop recording 0 00 16 Note Voice recording will automatically stop when the maximum memory capacity is full ...

Page 66: ...he steps below Adjust the Mode switch to set or turn on the camera to Playback mode 27 27 27 27 2009 01 01 01 57 2009 01 01 01 57 SET M 12 27 27 27 27 2009 01 01 01 57 2009 01 01 01 57 SET 27 27 27 27 2009 01 01 01 57 2009 01 01 01 57 SET Still Image Video Audio Clip Viewing thumbnails Press the 1 W button to view 9 image thumbnails Use the navigation controls to move through the items 2 Press the...

Page 67: ... Description Voice Memo Indicates that a voice memo is attached to the image Video Indicates a recorded video The image displayed is the first frame of the video clip Locked File Indicates that the image has been locked Locked files cannot be edited or deleted Voice Record Indicates a voice recording file File Error Indicates an error file Image or video files that are not taken by this camera or ...

Page 68: ...on works with still images only Press to zoom out Press to zoom in In normal view push the zoom control up until desired zoom view The 4 arrows on the LCD monitor indicate that the image is zoomed in Press the button to close zoom view x2 0 ...

Page 69: ...to control volume Press the T button to increase volume Press the W button to decrease volume Press the 4 key to pause playback Press the key again to resume When paused the play info will remain on screen except WT Note The play info except the WT icon will be displayed when the video is paused during REW FF or frame by frame modes Volume cannot be adjusted when paused or during REW FF modes ...

Page 70: ...o capture Press the 2 button to capture screenshot The camera will automatically stop playback 3 The LCD monitor displays the captured image in Single navigation mode 0 00 16 0 00 20 Capture photo Note This feature does not function when the memory card is full or the folder cannot be created The icon does not appear on the screen either ...

Page 71: ... voice recording During playback use the 4 to control volume The volume icon appears on the screen Press the T button to increase volume Press the W button to decrease volume WT 0 00 16 0 00 20 Press the 5 key to pause playback Press the key again to resume When paused the play info will remain on screen except WT Press the 6 key to stop the playback The LCD monitor displays the image in Single na...

Page 72: ...key to play the voice recording During playback use the 4 to control volume Press the T button to increase volume Press the W button to decrease volume Press the 5 key to pause playback Press the key again to resume When paused the play info will remain on screen except WT Press the 6 key to stop the playback The LCD monitor displays the image in Single navigation mode 1 30 1 30 F 3 0 F 3 0 0EV 0E...

Page 73: ... the camera to Playback mode View 1 photo videos audio clips in Single navigation mode Use the 2 or key to scroll the display When the desired 3 photo video audio clip is displayed on the LCD monitor press the Delete button A confirmation selection appears on screen 4 Select 5 Delete Press the 6 button to delete Delete Cancel Note Locked files cannot be deleted at any time When you try to delete a...

Page 74: ...playback settings To go to Playback Menu Set the camera to Playback mode 1 Press 2 to launch the Playback Menu Change the submenu settings using the 4 way 3 navigation control Press the 4 button to save and apply settings View Slideshow Delete Protect Remove Red Eyes Voice Memo Modify Color ...

Page 75: ...Use the 5 or key t to move through the options Select whether to Continue or Exit the slideshow Press the 6 button to apply selected option View Slideshow Delete Protect Remove Red Eyes Voice Memo Modify Color To change slideshow settings From the Slideshow menu use the 1 or key to move through the selections Select Interval setting Press the 2 or key to adjust Select Transition setting Press the ...

Page 76: ...ct Section To delete a photo video audio clip From the Playback menu select 1 Delete The Delete submenu is displayed on the LCD 2 monitor Select available settings This image Select one file to delete Voice Memo Only Delete only the attached voice memo the image is retained in the memory Multi Images Select multiple files to delete at the same time All Delete all files Delete Cancel ...

Page 77: ...iles From the Playback menu select 1 Protect The Protect submenu is displayed on the LCD 2 monitor Select available settings This image Select one file to lock Multi Images Select multiple files from the thumbnail view to lock Lock All Lock all files Unlock All Unlock all files View Slideshow Delete Protect Red eye Correction Voice Memo Modify Color This image Multi Images Lock All Unlock All ...

Page 78: ...launch the Playback 3 menu Select 4 Remove Red Eyes Select 5 Start Press the 6 button to start correction View Slideshow Delete Protect Remove Red Eyes Voice Memo Modify Color Remove Red Eyes Start Cancel Remove Red Eyes Overwrite Save changes Cancel Steps 5 and 6 Step 7 After completing Remove Red Eyes a menu selection appears Select whether to 7 Overwrite Save and replace the old file with the n...

Page 79: ...oll and select an image to attach voice memo to Press the 3 button to launch the Playback menu Select 4 Voice Memo Select 5 Start and then press the button to start recording View Slideshow Delete Protect Remove Red Eyes Voice Memo Modify Color 30 sec 30 sec Start Cancel Time left n seconds for recording Select Stop and then press the 6 button to stop recording Note When you record voice memo to a...

Page 80: ...ss the 3 button to launch the Playback menu Select 4 Modify Color The Photo Edit submenu appears ModifyColor Medium N S R BW Neg View Slideshow Delete Protect Remove Red Eyes Voice Memo Modify Color Press the 5 or key to scroll and select an option As you move through the selection the preview on the LCD monitor changes synchronously The succeeding table shows the available settings Icon Item Desc...

Page 81: ... and white Neg Negative Image appears to be the opposite of the original image Mosaic Image is saved with mosaic tiles R Vivid Red Image is saved with reddish tint G Vivid Green Image is saved with greenish tint B Vivid Blue Image is saved with bluish tint ...

Page 82: ...to trim Press the 3 button to launch the Playback menu Crop Resize Startup Image DPOF Select Crop The Trim screen layout is displayed on the LCD monitor 4 Use the 5 control to change size Use the navigation controls to move the position of the trimmed area SET 5M Current image size Enlarged image 4 way indicator Display area Shows the approximate location of the displayed area Press the 6 to save ...

Page 83: ...d changes is selected a new photo file will be created leaving the original photo as is Select Cancel to abort any edits that were made and to exit the Crop function 8 Note Crop function is not available for photos with image size set to 3 2 16 9 and VGA All images will be trimmed in 4 3 ratio regardless of its original image ratio ...

Page 84: ...displayed on the LCD monitor Select size among 8M 5M 3M and VGA 5 Available size settings may vary depending on original image size Unavailable settings appear as gray icons in Resize submenu Overwrite Save changes Cancel Resize After selecting size a menu selection appears Select whether to 6 Overwrite Save and replace the old file with the new one Save Changes Save the new file as a new one Canc...

Page 85: ...service or use a DPOF compatible printer To set DPOF Press the 1 button to launch the Playback menu Select 2 DPOF The submenu appears Available settings are as follows This Image Select a single image to mark All Mark all images in the memory card Reset Reset all DPOF settings to initial default settings Crop Resize Startup Image DPOFThis Image All Reset Note You can specify up to 99 copies for DP...

Page 86: ... camera to a PC Print images with a PictBridge compatible printer directly To activate PictBridge Connect your camera to a PictBridge compatible printer using the USB cable See illustration below Note If the printer does not support date time imprint the date time imprint function will be disabled in PictBridge ...

Page 87: ...tos videos and audio files to your PC Connect the camera to a PC using the USB cable 1 Turn on the camera 2 The PC detects the connection The internal memory of camera and memory card 3 display as removable drives in the file manager No image is displayed on the LCD monitor ...

Page 88: ...necting the Camera to a Printer You can print your photos directly using a PictBridge compatible printer Turn on your camera 1 Set PictBridge settings 2 Connect the camera to the printer using the USB cable 3 ...

Page 89: ...lays Memory full Memory card is full Replace the memory card with a new one or delete unnecessary images LCD screen displays File locked This file is locked Unlock the file LCD screen displays Card locked The memory card is protected Remove the card and slide the write protect switch to it s unlock position LCD screen displays CARD HAS WRONG FORMAT The memory card is protected Remove the card and ...

Page 90: ...ginal dated sales receipt as proof of purchase and the issued RMA number You will be responsible for shipping charges when shipping the product to the service center The service agent will provide you with an address and you will also be responsible for any shipping charges to the warranty service center Once your product is received by this service center a replacement unit will be shipped back t...

Page 91: ...rench Italian 41 18009686 UK English 44 2073652400 North America United States English 1 866 694 7633 Canada English and French 1 866 694 7633 Country Language City Number México Español Mexico City 52 55 1204 8185 Guadalajara 52 33 1031 3872 Monterrey 52 81 1107 2639 Venezuela Español Caracas 58 212 335 4574 Colombia Español Perú 57 1 508 2325 Perú Español Lima 51 1 705 6232 Chile Español Santiag...

Page 92: ......

Page 93: ...P N 7525C00134A ...

Reviews: