Prerequisites
•
•
Procedure
1.
Enter the PDU IP address in Google Chrome and login to the PDU using the credentials.
2.
Navigate to the Network Settings page and enable RESTapi Access Configuration.
3.
Click
Save
, and then confirm and apply changes.
The PDU reboots.
4.
Open
POSTMAN
app.
5.
Add the basic authentication header that is required for all the query requests.
• For
GET
request, enter the URL request, basic authentication header with username and password,
and then query the request.
• For
POST
request, include the json object type with the basic authentication header.
a.
Query the URL
http://{pdu_ip} /redfish/v1/SessionService/Sessions
, along with
the two headers (basic auth and json object type) and the following body:
{
"username":"admin",
"password":"123456789"
}
b.
Use the X-Auth Token from the response body along with the other two headers and basic
authentication for any POST request.
• For
DELETE
request, enter the URL for session or users you want to delete, along with the basic
authentication and send information.
Network Time Protocol and date/time settings
You can set the internal on the PDU either manually or by linking to a Network Time Protocol (NTP) server.
Procedure
1.
Set the internal clock in one of the following ways:
• Manually
◦ Use the calendar icon to select the date or enter the date in YYYY-MM-DD format.
◦ Enter the time in HH:MM:SS format, and then select the time format (for example 24-hour).
• Link to a Network Time Protocol (NTP) server
78
Remote configuration
Summary of Contents for HPE G2 Series
Page 16: ...3 Secure the tie wrap 16 Introduction ...
Page 20: ...20 Introduction ...
Page 23: ...Installing the PDU 23 ...
Page 25: ... Outlets facing the back of the rack Installing the PDU 25 ...
Page 26: ... Outlets facing the front of the rack 26 Installing the PDU ...
Page 28: ... Two mid height PDUs with outlets facing towards the center of the rack 28 Installing the PDU ...
Page 31: ... Half height Installing the PDU 31 ...
Page 35: ...Installing the PDU 35 ...
Page 37: ...2 Install the PDU in the rack frame Installing the PDU 37 ...
Page 47: ...3 Install the PDU Installing the PDU 47 ...
Page 49: ...Installing the PDU 49 ...
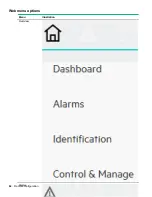
Page 64: ...Web menu options Menu Illustration Overview Alarms 64 Remote configuration ...
Page 65: ...Menu Illustration Help Table Continued Remote configuration 65 ...
Page 66: ...Menu Illustration Language 66 Remote configuration ...
Page 67: ...Menu Illustration Logs Remote configuration 67 ...
Page 68: ...Menu Illustration Settings 68 Remote configuration ...
Page 84: ...84 Remote configuration ...
Page 92: ...92 Configuring local access ...
Page 99: ...Local display 99 ...
Page 101: ...Local display 101 ...
Page 107: ...Local display 107 ...
Page 120: ...120 Connecting and configuring optional hardware ...

