


7.
Log in with administration privileges.
8.
Enter
sys upd lan
.
The following message displays.
System will enter upgrade mode after reboot
System Reboot now
Are you sure?(Y/N)
9.
Enter
Y
.
When the upload is complete, the system reboots automatically.
10.
It is not always required to update Web or Bootloader files when the firmware is updated. However, a
user can upload these file types in SSH.
a.
Log in to an FTP program.
b.
Overwrite the outdated files with the updated web files, found on the customer login at
or from your regional sales manager.
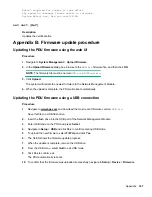
Updating the PDU Firmware using Bootloader mode
Procedure
1.
Navigate to
and download the most recent firmware version,
HPE.bin
.
2.
Save this file to a USB drive.
3.
Insert the USB drive into the USB port of the Network Management Module.
4.
Press
Select
to enter USB mode on the PDU.
5.
Navigate to
Setup
>
USB
and click
Yes
to confirm entering USB mode.
6.
To upload the new firmware, select
F/W Up
and click
Yes
.
7.
The OLED displays the firmware update progress.
8.
When the update is complete, remove the USB drive.
9.
To exit USB mode, select
Quit
from the USB menu.
10.
To confirm exit, click
Yes
.
11.
The PDU reboots automatically.
12.
To confirm the firmware uploaded successfully, navigate to
Setup
>
Device
>
Firmware
.
Firmware recovery with bootloader mode
Firmware, configuration files, and bootloader files are updated following the instructions listed, but each
update type must be done separately. Web files can be updated in conjunction with any of the other updates.
For example, you can update firmware and web files in a single step, but firmware and configuration files
must be done separately.
Appendix
149
Summary of Contents for HPE G2 Series
Page 16: ...3 Secure the tie wrap 16 Introduction ...
Page 20: ...20 Introduction ...
Page 23: ...Installing the PDU 23 ...
Page 25: ... Outlets facing the back of the rack Installing the PDU 25 ...
Page 26: ... Outlets facing the front of the rack 26 Installing the PDU ...
Page 28: ... Two mid height PDUs with outlets facing towards the center of the rack 28 Installing the PDU ...
Page 31: ... Half height Installing the PDU 31 ...
Page 35: ...Installing the PDU 35 ...
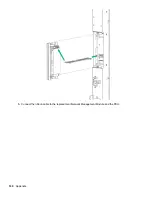
Page 37: ...2 Install the PDU in the rack frame Installing the PDU 37 ...
Page 47: ...3 Install the PDU Installing the PDU 47 ...
Page 49: ...Installing the PDU 49 ...
Page 64: ...Web menu options Menu Illustration Overview Alarms 64 Remote configuration ...
Page 65: ...Menu Illustration Help Table Continued Remote configuration 65 ...
Page 66: ...Menu Illustration Language 66 Remote configuration ...
Page 67: ...Menu Illustration Logs Remote configuration 67 ...
Page 68: ...Menu Illustration Settings 68 Remote configuration ...
Page 84: ...84 Remote configuration ...
Page 92: ...92 Configuring local access ...
Page 99: ...Local display 99 ...
Page 101: ...Local display 101 ...
Page 107: ...Local display 107 ...
Page 120: ...120 Connecting and configuring optional hardware ...


