


1-4
Preparing for Use
Installing the Signal Generator
Installing Front Handles and Rack Mount Flanges
You can attach handles to the front of the signal generator to facilitate
transportation of the instrument. Handles are available in a kit which can be
ordered when the signal generator is purchased (Option 1CN), or at any time
afterward. Assembly instructions are included with the kit. The kit part number is
listed in Table 1-2.
You can also rack mount the signal generator. Hardware is available in kits to
install rack mount flanges on the signal generator without or with handles. These
kits can be ordered when the signal generator is purchased (Options 1CM and
1CP), or at any time afterward. Assembly instructions are included with the kits.
The kit part numbers are listed in Table 1-2.
Providing Adequate Ventilation
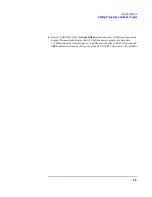
CAUTION
Ventilation Requirements: When installing the product in a cabinet, the
convection into and out of the product must not be restricted. The ambient
temperature (outside the cabinet) must be less than the maximum operating
temperature of the product by 4
°
C for every 100 watts dissipated in the cabinet.
If the total power dissipated in the cabinet is greater than 800 watts, then forced
convection must be used.
Cooling holes are located on the sides and bottom of the instrument cover and the
rear panel of the instrument. Do not allow these holes to be obstructed as they
allow air flow through the signal generator.
Table 1-2.
Front Handle and Rack Mount Flange Kits
Option
Description
HP Part Number
Option 1CN
Front Handle Kit
5063-9227
Option 1CM
Rack Mount Kit without Handles
5063-9214
Option 1CP
Rack Mount Kit with Handles
5063-9221
Summary of Contents for ESG Series
Page 3: ...ii ...
Page 29: ...1 12 Preparing for Use Verifying Signal Generator Operation ...
Page 43: ...2 14 Using Functions Saving and Recalling an Instrument State ...
Page 95: ...3 52 Troubleshooting HP Sales and Service Offices ...
Page 109: ...4 14 Front and Rear Panel Rear Panel Overview ...
Page 111: ...5 2 Hardkey and Softkey Reference ...
Page 135: ...5 26 Hardkey and Softkey Reference Ampl ...
Page 137: ...5 28 Hardkey and Softkey Reference Amplitude ...
Page 139: ...5 30 Hardkey and Softkey Reference Arrow Keys ...
Page 141: ...5 32 Hardkey and Softkey Reference Display Contrast Keys ...
Page 161: ...5 52 Hardkey and Softkey Reference FM ...
Page 169: ...5 60 Hardkey and Softkey Reference Frequency ...
Page 171: ...5 62 Hardkey and Softkey Reference Help ...
Page 173: ...5 64 Hardkey and Softkey Reference Hold ...
Page 175: ...5 66 Hardkey and Softkey Reference Incr Set ...
Page 195: ...5 86 Hardkey and Softkey Reference LF Out ...
Page 197: ...5 88 Hardkey and Softkey Reference Local ...
Page 199: ...5 90 Hardkey and Softkey Reference Mod On Off ...
Page 200: ...5 91 Hardkey and Softkey Reference Mode Mode This front panel key is reserved for future use ...
Page 201: ...5 92 Hardkey and Softkey Reference Mode ...
Page 203: ...5 94 Hardkey and Softkey Reference Numeric Keypad ...
Page 225: ...5 116 Hardkey and Softkey Reference Power Switch ...
Page 235: ...5 126 Hardkey and Softkey Reference Preset ...
Page 241: ...5 132 Hardkey and Softkey Reference Pulse ...
Page 245: ...5 136 Hardkey and Softkey Reference Recall ...
Page 247: ...5 138 Hardkey and Softkey Reference Return ...
Page 249: ...5 140 Hardkey and Softkey Reference RF On Off ...
Page 255: ...5 146 Hardkey and Softkey Reference Save ...
Page 275: ...5 166 Hardkey and Softkey Reference Sweep List ...
Page 311: ...6 10 Options and Accessories Upgrade and Retrofit Kits ...
Page 312: ...7 1 7 Operation This chapter is reserved for future use ...
Page 313: ...7 2 Operation ...
Page 322: ...8 9 Safety and Regulatory Declaration of Conformity Declaration of Conformity ...
Page 341: ...9 18 Specifications HP ESG Series Signal Generators Specifications ...


