


Replacing a low-profile PCI-Express card
An optional low-profile PCI-Express (PCIe) graphics card may be installed in the thin client. A riser card is
installed in this thin client by default.
WARNING!
To reduce the risk of personal injury or equipment damage from electric shock, hot surfaces, or
fire, disconnect the AC power cord from the AC outlet and allow the internal system components to cool
before you touch them.
To install a PCIe card:
1.
Remove/disengage any security devices that prohibit opening the thin client.
2.
Remove all removable media, such as USB flash drives, from the thin client.
3.
Turn off the thin client properly through the operating system, and then turn off any external devices.
4.
Disconnect the AC power cord from the AC outlet, and disconnect any external devices.
CAUTION:
Regardless of the power-on state, voltage is always present on the system board as long as
the system is plugged into an active AC outlet. You must disconnect the AC power cord to avoid damage
to the internal components of the thin client.
5.
Remove the stand from the thin client.
6.
Lay the unit flat on a stable surface with the right side up.
7.
Remove the thin client access panel. See
Removing and replacing the access panel on page 4
.
8.
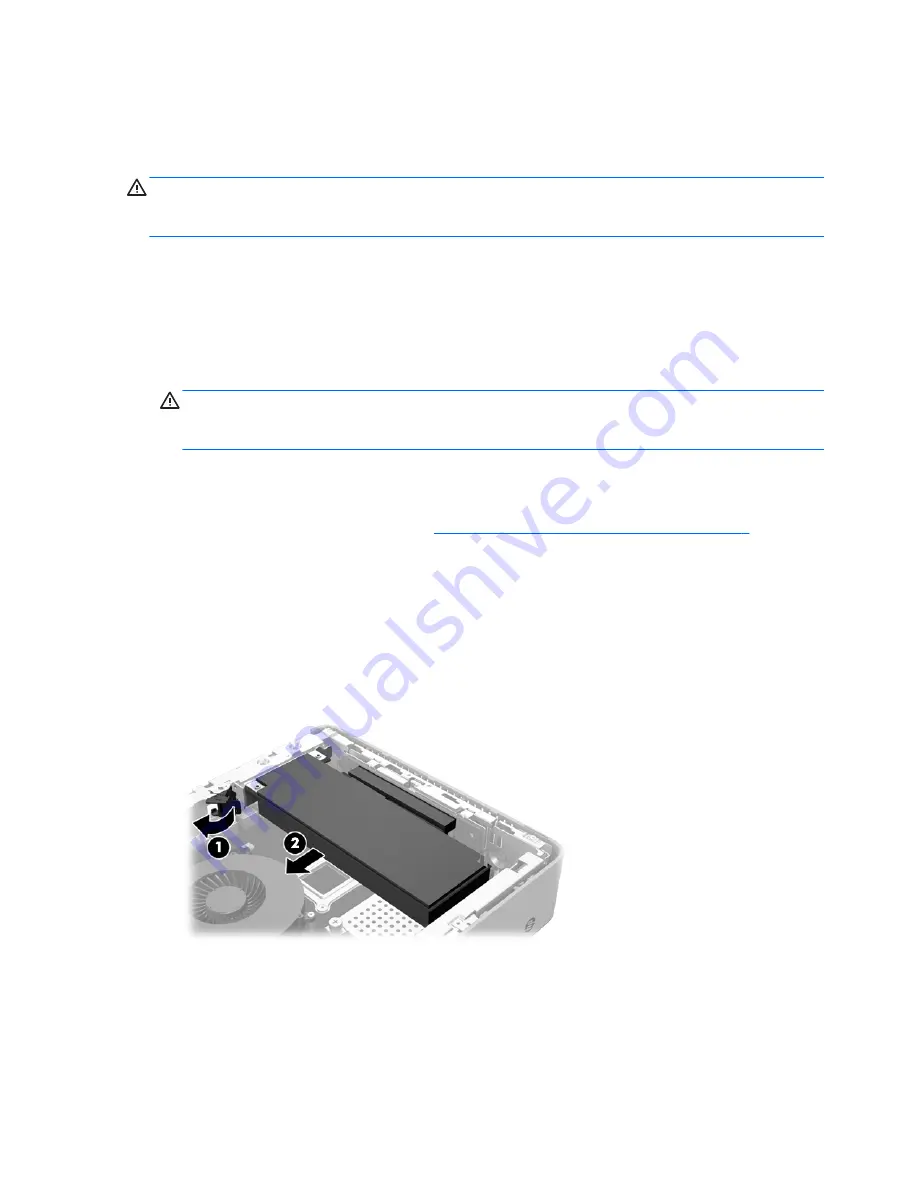
Locate the PCIe card on the system board.
9.
Press the latch down and move it to the left (1) to release the PCIe card.
10.
Carefully pull the PCIe card out of the socket (2). You may need to pull one side and then the other to
remove the card.
11.
If you are installing a PCIe card that requires an opening in the chassis, push the expansion slot cover out
of the rear I/O panel.
12.
Align the PCIe card connectors with the slot in the riser card and the metal tab at the end of the card with
the slot in the chassis. Press the PCIe card firmly into the slot in the riser card (1) until it is securely
seated and the tab is in the slot.
12
Chapter 2 Hardware changes


