background image

Working with Media

Removing a Roll from the Printer


3-31

Removing a Roll from the Printer

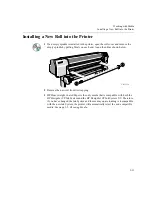
To unload media from the Take Up Reel see page 3-27, Unloading Media from the 
Take Up Reel
.

If the media button light is off, press Form Feed and Cut on the front panel.

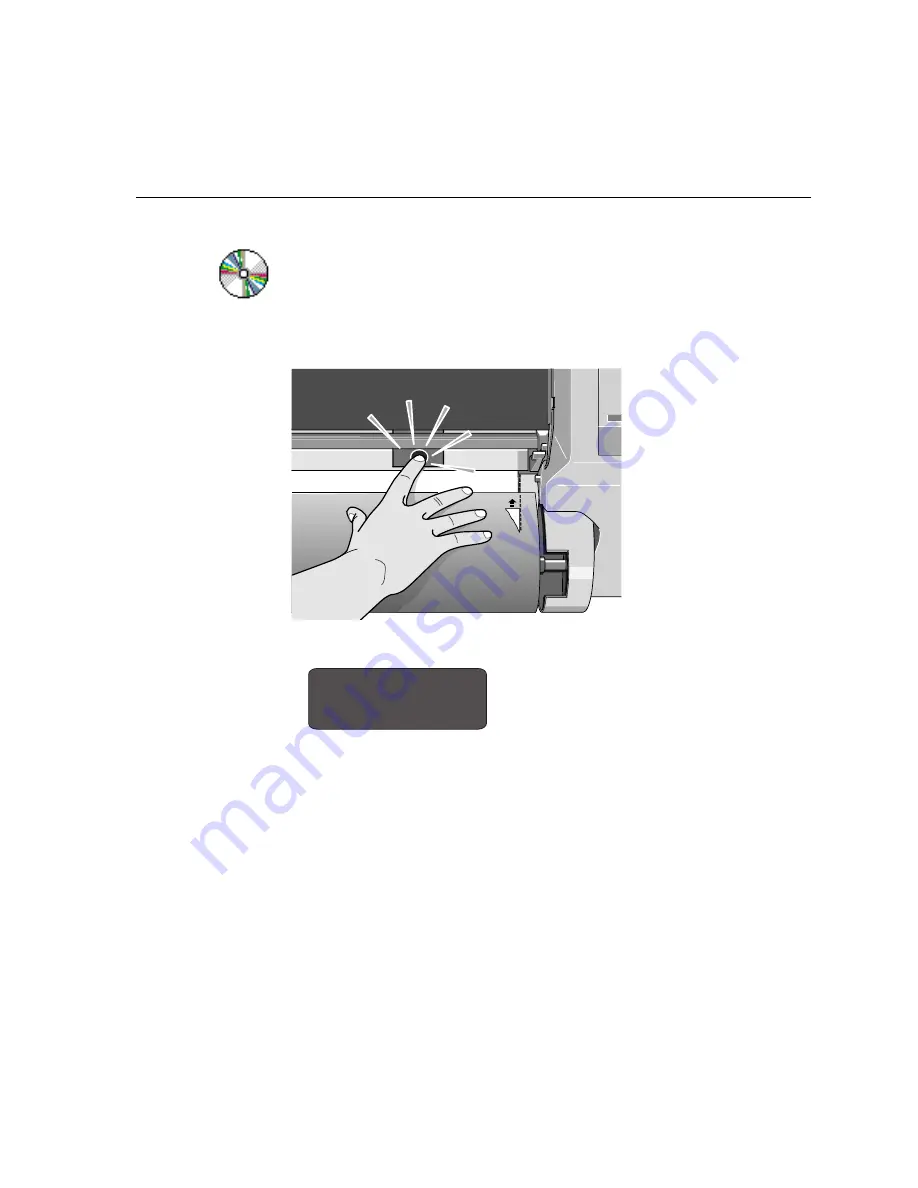
If the media button light is on, press the media button.

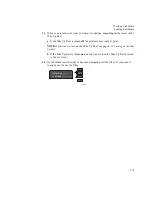
The front panel displays:

Open the roll cover and gently pull the media from the printer.

C472353a

C4704034

Remove media

Summary of Contents for DesignJet 3500CP

Page 1: ...HP DesignJet 3500CP Plotter Quick Start Guide ...

Page 2: ...ing a Roll 1 Installing a Roll 3 Loading Roll Media 6 Loading Sheet Media 13 Unloading Sheet Media 16 Print Speed and Quality 17 Setup for Illustrator 21 Setup for Powerpoint 26 Troubleshooting 29 Important Reminders 31 ...

Page 3: ...e Up Reel see page 3 27 Unloading Media from the Take Up Reel 1 If the media button light is off press Form Feed and Cut on the front panel 2 If the media button light is on press the media button 3 The front panel displays 4 Open the roll cover and gently pull the media from the printer C472353a C4704034 Remove media ...

Page 4: ...E Alternatively if the media roll is very long rest it horizontally on a table and unload the media on the table 7 You have completed removing the old roll media from the printer If you are not immediately loading another roll of media into the printer replace the endcap on the spindle and place the spindle back in the printer To load a new roll of media continue with the next section Installing a...

Page 5: ...w 2 Remove the new roll from its wrapping 3 HP Heavyweight Coated Paper is the only media that is compatible with both the HP DesignJet CP Ink System and the HP DesignJet CP Ink System UV Therefore if you have changed the Ink System and the media you are loading is incompatible with the new Ink System the printer will automatically reject the non compatible media See page 3 2 Choosing Media A B 12...

Page 6: ... media must wind clockwise as shown below 5 Alternatively if the media roll is very long rest it horizontally on a table and load the media on the table If the media stop falls off push it back in until it snaps into position 6 Push the end cap in making sure that the tabs are flush against the ends of the roll Push it far enough to be firm but do not use excessive force as this may result in brok...

Page 7: ... is to the right and the small endcap B to the left Push in firmly on both ends Make sure the media remains flush against the media stop The media must be positioned on the roll as shown above A B 12 305 mm 42 106 7mm 54 1 372m m 36 9 15m m 50 1 270m m 42 106 7mm 54 1372 mm 36 915m m 50 1270 mm Media Path C4723122 ...

Page 8: ... If the media is cut correctly go to step 3 WARNING The knife used in the next step is sharp Be sure the printer s wheels are locked Keep fingers clear of the cutting path Keep the knife away from children 2 Trim the leading edge of the media roll only if it is not straight a Pull the media over the top of the machine and lay it over the cutting track b Use the knife in the pocket located on the b...

Page 9: ...ading Roll Media 3 14 NOTE Make sure the media lever is in the raised position 3 Open the roll cover and pull out the media 4 Position the media 12 305 mm 42 106 7mm 54 1372m m 36 915mm 50 1270m m 40 45 cm C472330a C472370 ...

Page 10: ... printer 6 When the media is fed into the printer as far possible the media button light comes on The front panel displays 7 Make sure the media is aligned with dashed line as shown below C472371 C4704034 to continue Press Load Button to continue Press Load Button C472357 ...

Page 11: ...e printer 9 Press the key next to the front panel display to indicate you are loading a roll 10 Use the and keys until the display shows the type of media you are loading and then press the Enter key C472353 C4704029 Sheet load Roll load Enter Previous C4704030 SELECT MEDIA Coated paper Previous Enter ...

Page 12: ...r the media lever b Wind the media stop in the direction of the arrow shown below This is to take up any slack in the roll before aligning the media c The front panel displays C4704034 Lower Lever C4704130 roll cover nue C4723128a Im po m Im po mu i ioitru y Im po mu i ioitru y C4704034 edges to roll Pull Align ...

Page 13: ...media so that they are flush with the edges of the roll e When you have aligned the media lift the lever f The printer checks that the media is aligned properly If the alignment is successful the front panel displays 12 Close the roll cover and press the key Im po m Im po mu i ioitru y Im po mu i ioitru y C4723127 after aligning C4704131 C4704016 Lift lever after aligning Close roll cover Continue...

Page 14: ...turned off the printer is now ready to print NOTE If you want to turn on the Take Up Reel see page 8 12 Turning on the Take Up Reel b If the Take Up Reel is turned on and you want to load the Take Up Reel proceed to the next step 14 If your media is not straight or has been damaged press the key If you want to continue use the use the key C4704016 trim edge continue ...

Page 15: ...rst even if the width of your image is greater than its length Which side up As you load the sheet it is the side facing down on which the printer prints With most media types the two sides are different and so it is important to load the sheet correctly Loading a sheet 1 You cannot load sheet media if roll media is loaded If roll media is loaded refer to 3 31 Removing a Roll from the Printer 2 Ma...

Page 16: ... possible the media button light comes on 4 When you are satisfied that the media is positioned straight press the media button Only let go of the media when the printer begins to pull it in 5 Press next to the front panel display to indicate you are loading a sheet 12 305 mm 42 106 7mm 54 137 2mm 36 915 mm 50 127 0mm C472365 C472363 C472354b C4704035 Sheet load Roll load Previous Enter ...

Page 17: ...s the type of media you are loading Then press the Enter key For information on media types see page 3 2 Choosing Media 7 The printer moves the sheet in and out to check its size and alignment and then advances it to the start of the page C4704030 SELECT MEDIA Coated paper Enter Previous ...

Page 18: ...e has passed see page 3 45 Drying Time Take Up Reel off No drying time is necessary for some combinations of media types and print modes 2 Press the Form Feed and Cut button 3 Gently pull the sheet from the printer C4704024 Form Feed and Cut Cancel 12 305mm 42 1067mm 54 13 72m m 36 91 5mm 50 12 70m m C472364 ...

Page 19: ...a types are given on page 3 10 Combinations of Media Type and Print Mode The table below shows the effects of combinations of Print mode and media type on print speed and the amount of ink used when printing an image NOTE Printing on Backlit media takes the same time as Glossy or Vinyl media However it uses twice as much ink Print mode Coated Media Glossy Backlit and Vinyl Media Printing Time Ink ...

Page 20: ...ut and quality for your application The resolution at which your print will be printed is summarized in the table below NOTE The Economy setting enables you to print faster and so therefore is more economical in time However the amount of ink used is the same as Productivity Print Mode Resolution in dpi Monochrome Color Economy 300 x 300 300 x 300 Productivity 300 x 300 300 x 300 Photo 600 x 600 6...

Page 21: ...e front panel print mode key to toggle between the three print mode settings If your software raster imaging processor RIP system has print quality settings select your print mode from the RIP It should override the front panel settings See page 3 10 Combinations of Media Type and Print Mode and page 3 11 Using Coated Paper and Heavy Coated Paper with Productivity Mode for more information about a...

Page 22: ...Set the Print Mode for the desired quality from the Advanced Options of the Printer Properties window This software setting will override any settings on the front panel of the plotter ...

Page 23: ...e following example landscape poster 11 Longest Side 8 Shortest Side Example Page 11 Longest Side 8 Shortest Side 11 Longest Side 8 Shortest Side Example Page First Go to Document Setup in Adobe Illustrator 1 Select Use Print Setup 2 Select Print Setup ...

Page 24: ...In the Print Setup window In the Properties window 1 Select Landscape 2 Select Advanced 1 Select the Plotter 2 Select Properties ...

Page 25: ...e and skip the Postscript Custom Page size step Finally in the Postscript Custom Page Size window Then select OK in all windows 1 Select Postscript Custom Page Size 2 Select Edit Custom Page Size 1 Enter Shortest Dimension 2 Enter Longest Dimension 3 Select Short Edge First ...

Page 26: ...sing make sure the menu item View Æ Show Page Tiling has been selected If the printable area is still not visible or is off center The solid border is the total page size The dashed border indicates the printable area 1 Hold down the left mouse on the Hand Tool to select the Page Tool ...

Page 27: ...rest of the poster will be blank Note Illustrator will often not remember the printer settings when you reload the file so you may have to repeat the Print Setup steps each time you work on your poster if you want to see the correct printable area The solid border is the artboard or total page size Use the Page Tool to center the printable area dashed line on the artboard ...

Page 28: ... landscape poster 11 Longest Side 8 Shortest Side Example Page 11 Longest Side 8 Shortest Side 11 Longest Side 8 Shortest Side Example Page First Go to Page Setup in Powerpoint 1 Select Custom 2 Enter Longest Dimension 3 Enter Shortest Dimension 4 Select Landscape ...

Page 29: ...When you are ready to print select Print In the Properties window 2 Select Properties 1 Select HP DesignJet 1 Select Landscape 2 Select Advanced ...

Page 30: ...ipt Custom Page Size window Then select OK in all windows to print Note The maximum page size in Powerpoint is 60 x60 So if you would like a longer poster you re out of luck use Illustrator instead 1 Select Postscript Custom Page Size 2 Select Edit Custom Page Size 1 Enter Shortest Dimension 2 Enter Longest Dimension 3 Select Short Edge First ...

Page 31: ...om Powerpoint No solution Colors don t match the screen from Illustrator Try selecting Postscript 3 from the Print setup Change the document Color Mode to CMYK to better match the 4 available colors of the plotter Select Edit Æ Color Settings and try different options Make sure the plotter is performing a color test after loading glossy paper Poster is taking a long time to print As long as the pl...

Page 32: ...g process When pulling to align the edges to the roll make sure the end of the paper hangs down at least to the level of the roll Trouble printing from Powerpoint Use Adobe Illustrator Trouble printing from a Mac Use a PC Other problems Read the manual ...

Page 33: ...S THE CANCEL BUTTON on the plotter to save ink and paper Remember the costs o Coated paper 100 roll o Glossy paper 200 roll o Ink CMYK 125 color o Repairs 2000 technician visit Check the printers on your own computers to make sure you are not printing normal printer jobs to the plotter Press the media button when you are done with the plotter to unload the paper and help prevent normal print jobs ...

Reviews:

Related manuals for DesignJet 3500CP