background image

Installing Your Internal Drive

Step 5: Install the Drive

1-9

Figure 1.5  

Attaching the tray to the drive

Step 5: Install the Drive

Slide the drive into the open bay. If your computer does not use mounting 
hardware, check that the holes in the chassis are aligned with the holes in 
the side of the tape drive.

Do not secure the drive with screws at this stage because you may have to 
move the drive slightly to get the cables into place.

Position 1:

With the fixing screws in the 
frontmost holes, the front of the 
drive protrudes from the front of 
the cabinet.
Use position 1 if there is there is 
not enough depth in the cabinet 
for position 2.

Position 2:

With the fixing screws in the 
rearmost holes, the front bezel of the 
drive lies flush on the cabinet.
Use this position if there is enough 
depth in the cabinet.

dlt.book  Page 9  Monday, February 12, 2001  5:42 PM

Summary of Contents for C5658A - SureStore DLT 70e Tape Drive

Page 1: ...HP SureStore DLT Internal External Tape Drive DLT 40i e DLT 70i e DLT 80i e User s Guide ...

Page 2: ...ay for use with HP NetServer L series and a pair of rails for use with Compaq servers page 1 8 Step 5 Install the drive Slide the tape drive into the bay but do not fasten with screws yet page 1 9 Step 6 Attach power and SCSI cables Attach a spare power cable from the computer s internal power supply Attach the drive to a spare connector on the SCSI ribbon cable page 1 10 Step 7 Secure the drive S...

Page 3: ...ential damages including lost profits in connection with the furnishing performance or use of this material whether based on warranty contract or other legal theory November 1999 Part Number C1579 90905 Printed in the UK The DLTtape logo is a trademark of Quantum Corporation in the U S and other countries Windows is a U S registered trademark of Microsoft Corporation UNIX is a registered trademark...

Page 4: ...ve 1 12 On Completion 1 12 What Next 1 13 2 Installing an External Drive Before You Start 2 2 Step 1 Check the Drive s SCSI ID 2 5 Step 2 Attach Local Language Labels if Necessary 2 8 Step 3 Attach the SCSI Terminator 2 8 Step 4 Connect the SCSI Cable 2 8 Step 5 Connect the Power Cable 2 9 On Completion 2 10 Registering Your Tape Drive 2 11 What Next 2 12 3 Operating the Drive Front Panel HP SureS...

Page 5: ... 4 9 Storing Cartridges 4 9 Transporting Cartridges 4 9 5 Tape Cartridge Densities and Compression Density 5 2 Changing the Density and Compression for Writing 5 2 6 Troubleshooting HP TapeAssure 6 2 If the Self Test Fails 6 2 Other Problems 6 3 7 Product Specifications and Ordering Information Product Specification A 2 Ordering Information A 5 8 Customer Support Warranty B 2 Hewlett Packard Year ...

Page 6: ... describes how to install an internal HP SureStore DLT drive HP SureStore DLT 40i HP SureStore DLT 70i HP SureStore DLT 80i Note For an overview of the installation process see inside the front cover dlt book Page 1 Monday February 12 2001 5 42 PM ...

Page 7: ...ing cartridge HP SureStore DLT drive Compaq rails with screws DLTtapeIV cartridge Jumper kit five jumpers HP SureStore Tape CD ROM containing HP TapeAssure TapeAlert utilities UNIX Configuration Guide Warranty Registration Card and labels Front panel labels in different languages User s Guide Please discard unused languages in recycling bin HP NetServer L series tray HP SureStore DLT 40i only 50 6...

Page 8: ...tion or in the case of the HP SureStore DLT 80i an LVD low voltage differential HBA Two adjacent 5 inch half height bays in which to install the drive Note that the depth of the drive 228 3 mm 9 in behind the front bezel is greater than the depth of most 5 inch devices Make sure that the bays can accommodate this depth Mounting hardware To install the drive you may need to fix it to a set of rails...

Page 9: ...feel able to complete the better HP can meet your needs If you wish you may register your drive and choose not to receive any further information from HP If you have internet access register electronically as described below 1 Select the Warranty Registration topic on the HP SureStore Tape CD ROM 2 Select the Register on the Web link This links you to HP s Warranty Registration web site 3 Complete...

Page 10: ...nt SCSI configuration There are HP TapeAssure versions for Windows NT Windows 95 98 and NetWare To do this select HP TapeAssure from the Welcome page on the CD ROM Once HP TapeAssure is installed you can run it from the Programs menu in the Windows Start menu Note In Windows 95 98 or Windows NT you can install HP TapeAssure directly on the system to which the tape drive is connected In NetWare you...

Page 11: ...ings SCSI ID jumper block Front panel Side view of drive Disable parity A jumper set across these pins disables parity checking Normally you should leave this jumper OFF SCSI ID pins three pairs Remote ID present A jumper across these pins tells the host to read the SCSI ID from the SCSI ID pins Place a jumper across these pins if you want the drive to have an ID other than 5 HP SureStore DLT 40i ...

Page 12: ...Power SCSI bus terminators require power from at least one device on the bus HP SureStore DLT drives are set to provide termination power by default You should not need to change this If you do need to stop the drive from providing of termination power remove the jumper on the rightmost jumper pin block on the opposite side of the drive from the SCSI ID jumper block as shown in figure 1 4 Figure 1...

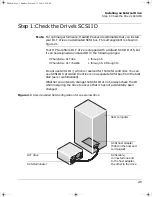
Page 13: ...computer you may have to disconnect the SCSI cable or power cable from other devices to maneuver the new drive into place If you have to do this make a note of their positions and connections so that you can replace them correctly later d Remove the front cover plates from two spare adjacent 5 inch half height bays of the computer Keep the screws for use in step 7 Step 4 Attach Mounting Rails or T...

Page 14: ...ve with screws at this stage because you may have to move the drive slightly to get the cables into place Position 1 With the fixing screws in the frontmost holes the front of the drive protrudes from the front of the cabinet Use position 1 if there is there is not enough depth in the cabinet for position 2 Position 2 With the fixing screws in the rearmost holes the front bezel of the drive lies f...

Page 15: ...omputer s internal power supply to the rear of the tape drive as shown in figure 1 6 Figure 1 6 Attaching the power cable and SCSI cable b Attach the SCSI cable SCSI connector Power connector Rear of drive SCSI connector Power connector Rear of drive HP SureStore DLT 40i HP SureStore DLT 70i and 80i dlt book Page 10 Monday February 12 2001 5 42 PM ...

Page 16: ...onnector to the tape drive Figure 1 7 HP SureStore DLT 40i only Attaching the SCSI adapter If you are using a new cable attach the end farthest from the terminator block to the host adapter and attach one of the connectors to the tape drive as shown in figure 1 6 If you are using an existing internal cable simply attach the drive to a spare connector on the computer s SCSI ribbon cable There may b...

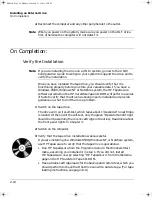
Page 17: ... provide guidance on what to do if there is a problem 1 Switch on the computer The drive will run its self test which takes about 13 seconds if no cartridge is loaded At the end of the self test only the green Operate Handle light should be lit assuming there is no cartridge in the drive Read more about the front panel lights in Chapter 3 2 Verify that the tape drive installation was successful If...

Page 18: ...M your backup software disks or your operating system disks See the appropriate README file in the DRIVERS directory on the HP SureStore Tape CD ROM for which drivers are available for your specific model What Next If the tape drive has passed the tests run by HP TapeAssure you can be confident that you have installed it correctly You are now ready to put it to regular use backing up your system S...

Page 19: ...Installing Your Internal Drive What Next 1 14 dlt book Page 14 Monday February 12 2001 5 42 PM ...

Page 20: ...describes how to install an external HP SureStore DLT drive HP SureStore DLT 40e HP SureStore DLT 70e HP SureStore DLT 80e Note For an overview of the installation process see inside the back cover dlt book Page 1 Monday February 12 2001 5 42 PM ...

Page 21: ...for each country Your power cable may differ from the illustration HP SureStore DLT drive Note the DLT 80e is narrower than the drive shown here HP SureStore Tape CD ROM containing HP TapeAssure TapeAlert utilities DLTtapeIV cartridge Cleaning cartridge SCSI terminator User s Guide Please discard unused languages in recycling bin UNIX Configuration Guide Power cable Warranty Registration Card and ...

Page 22: ...voltage differential SCSI HBAs If you want the full benefits of longer cable lengths and full speed compatibility with other LVD devices on the same bus choose an LVD compatible HBA An appropriate SCSI cable if the one supplied with the tape drive does not fit your computer The HP SureStore DLT 40e is provided with a 68 pin to 50 pin cable with active high byte termination Use this if your compute...

Page 23: ...sudden changes in temperature It should be reasonably free from dust and excessive humidity Do not place the drive on the floor near a door near a heavily traveled walkway or near a coffee machine Keep the drive away from laser printers and photocopiers where there could be a risk of toner entering the drive Avoid placing the drive on furniture that could get knocked For more details on the condit...

Page 24: ...e SCSI controller You can use SCSI ID 0 provided the drive is on a separate SCSI bus from the boot disk as is recommended Whether you intend to change the SCSI ID or not always check the ID when installing the drive to ensure that it has not accidentally been changed Figure 2 1 Recommended SCSI configuration for an external drive HP SureStore DLT 40e 1 through 6 HP SureStore DLT 70e 80e 1 through ...

Page 25: ...the Welcome page on the CD ROM and follow the instructions on the screen Once HP TapeAssure is installed you can run it from the Programs menu in the Windows Start menu Note In Windows 95 98 or Windows NT you can install HP TapeAssure directly on the system to which the tape drive is connected In NetWare you will need to install HP TapeAssure on the server from a client workstation running Windows...

Page 26: ...e number Do not use a pencil because particles of pencil lead might get into the drive Caution Both the computer and tape drive check the SCSI ID only at power on Always power cycle the drive and reboot the computer after you change the SCSI ID SCSI ID Power connector SCSI connector 1 Power switch SCSI connector 2 with terminator fitted Note HP SureStore DLT 70e drives have 68 pin thumb screw SCSI...

Page 27: ...or firmly in place The only situation in which you do not need to attach the terminator is if the drive is situated in the middle of the SCSI bus with some other device at the end This should not be the case if you follow HP s advice to place your DLT drive on its own on a dedicated SCSI bus in order to achieve optimal performance If you choose to ignore this recommendation plug the SCSI cable of ...

Page 28: ... devices will operate at their optimum speed If you connect only LVD devices the bus will operate in low voltage differential mode and Ultra2 speeds will be enabled You can use a combination of Ultra and Ultra2 devices Each device will operate at its optimum speed 1 Perform a normal system shutdown and turn off the computer and any connected peripherals Disconnect power cables from the outlet 2 At...

Page 29: ...ce on what to do if there is a problem 1 Switch on the tape drive The drive will run its self test which takes about 13 seconds if no cartridge is loaded At the end of the self test only the green Operate Handle light should be lit assuming there is no cartridge in the drive Read more about the front panel lights in Chapter 3 2 Switch on the computer 3 Verify that the tape drive installation was s...

Page 30: ... register electronically on the internet or you can use the Warranty Registration card that is provided with your drive In order to ensure your registration is complete there are a number of questions on the registration card and electronic form that are mandatory Other questions are optional However the more you feel able to complete the better HP can meet your needs If you wish you may register ...

Page 31: ...ve installed it correctly You are now ready to put it to regular use backing up your system See your backup application s documentation for instructions on how to back up and restore data Chapter 3 provides details of how to operate your drive Make sure you read Chapter 4 regarding the care of the drive and cartridges dlt book Page 12 Monday February 12 2001 5 42 PM ...

Page 32: ...3 Operating the Drive dlt book Page 1 Monday February 12 2001 5 42 PM ...

Page 33: ...e the new density you have selected through the Density Select button The new density will not take effect until the host instructs the drive to start writing at BOT Beginning of Tape See Chapter 5 Steady The tape is being written at a density other than its default density 3 Select Button Repeatedly press this button to select a new density at which to write the tape 4 Slot for Inserting Cartridg...

Page 34: ...tridge at a lower density for interchange with a lower capacity DLT drive See page 5 2 for details of how to do this and how to switch hardware data compression on and off 7 Tape in Use Light yellow Steady The tape is loaded and ready for use Flashing regularly The cartridge is being loaded unloaded or rewound Flashing irregularly A calibration read or write is in progress 8 Use Cleaning Tape Ligh...

Page 35: ...te the new density you have selected through the Density Select button The new density will not take effect until the host instructs the drive to start writing at BOT Beginning of Tape See Chapter 5 Steady The tape is being written at a density other than its default density 3 Select Button Repeatedly press this button to select a new density at which to write the tape 4 Slot for Inserting Cartrid...

Page 36: ...etails of how to do this and how to switch hardware data compression on and off 7 Tape in Use Light yellow Steady The tape is loaded and ready for use Flashing regularly The cartridge is being loaded unloaded or rewound Flashing irregularly A calibration read or write is in progress 8 Use Cleaning Tape Light yellow Steady The tape heads need cleaning Flashing The tape may be damaged 9 Operate Hand...

Page 37: ...e new density you have selected through the Density Select button The new density will not take effect until the host instructs the drive to start writing at BOT Beginning of Tape See Chapter 5 Steady The tape is being written at a density other than its default density 3 Select Button Repeatedly press this button to select a new density at which to write the tape 4 Slot for Inserting Cartridge 5 ...

Page 38: ...ils of how to do this and how to switch hardware data compression on and off 7 Tape in Use Light yellow Steady The tape is loaded and ready for use Flashing regularly The cartridge is being loaded unloaded or rewound Flashing irregularly A calibration read or write is in progress 8 Use Cleaning Tape Light yellow Steady The tape heads need cleaning Flashing The tape may be damaged 9 Operate Handle ...

Page 39: ...performs its self test which takes about 13 seconds At the end assuming no tape cartridge is in the drive the beeper will sound not on DLT 80 drives and only the green Operate Handle light will be lit 2 You are now ready to load a tape cartridge Press here to switch on Press here to switch off Press here to switch on Press here to switch off HP SureStore DLT 80 HP SureStore DLT 40e HP SureStore DL...

Page 40: ...on the rear panel of the drive Using the Cartridge Locking Handle Only operate the Cartridge Locking handle on the front of DLT drives when all the following have occurred The beeper has sounded not on DLT 80 drives The green Operate Handle light is lit steadily A further 5 seconds have elapsed If you try to lift the handle before the drive is ready to release the cartridge you will probably cause...

Page 41: ...idge will only go into the drive in the correct orientation see the diagram 4 Push the cartridge in firmly until it reaches a stop The cartridge will be flush with the front of the drive From this point the cartridge can only be removed by going through the unload steps on the next page 5 Push the Cartridge Locking Handle so that it swings down The Operate Handle light goes off The yellow Tape in ...

Page 42: ... immediately to protect it from dust 6 Push the Cartridge Locking Handle so that it swings down Caution Make a habit of pushing the handle down after you remove a cartridge If the tape drive is powered down with the handle up the drive will not accept a cartridge until you have pushed the handle down and up twice 1 Press the Unload button 3 Wait for the beeper to sound not on DLT 80 drives and the...

Page 43: ...lf Test No cartridge in the drive Only the green Operate Handle light is lit Cartridge in the drive Cartridge Locking Handle down 1 The Tape in Use light flashes while the drive loads the cartridge 2 The Tape in Use light stops flashing and stays lit the density and Compress lights show the tape cartridge s density When the Density Override light flashes you can select a new density if you need to...

Page 44: ... drive operates in a safe clean environment the only regular maintenance is to clean the tape heads This chapter tells you how to do this and also describes how to look after and store cartridges so that your data is safe dlt book Page 1 Monday February 12 2001 5 42 PM ...

Page 45: ...s 1 If there is a tape cartridge in the drive unload and remove it 2 Insert a cleaning cartridge Follow the normal procedure for inserting a cartridge see To load a tape cartridge on page 3 10 3 The drive automatically cleans the heads The more the cleaning cartridge has been used the longer this will take because the drive has to wind farther to a new portion of tape 4 When cleaning is complete T...

Page 46: ... If the Use Cleaning Tape light flashes while a tape cartridge is loaded The tape cartridge may be damaged Proceed as follows 1 If possible make a copy of any data on the cartridge you want to preserve onto a new cartridge To do this load the cartridge and restore the data to a temporary directory on your hard disk Then back up this temporary directory to a new tape cartridge Alternatively if the ...

Page 47: ...tridge from being erased or overwritten for example when you are restoring files from tape Note Only alter write protection when the cartridge is out of the drive It is possible to alter write protection while the cartridge is in the drive but it is not advisable Although the Write Protect light reacts immediately it may be some time before the new setting is recognized For example if the drive is...

Page 48: ...e right so that the orange indicator is hidden When the cartridge is loaded in the drive the Write Protect light will be off Taking Care of Data Cartridges Caution Using a damaged cartridge could put your data at risk and will damage the drive Inserting a faulty cartridge into a drive will damage the tape drive All faulty cartridges should be destroyed and must not be inserted into any other drive...

Page 49: ...lly important if the cartridge has been dropped 1 Gently turn the cartridge over several times and listen for loose parts If anything rattles even slightly scrap the cartridge it must not be inserted into any tape drive 2 Examine the cartridge casing for any signs of distortion or cracks If there are any faults with the cartridge scrap the cartridge it must not be inserted into any tape drive 3 Op...

Page 50: ...nserting a cartridge with a lost leader in the drive can damage the drive If the leader is lost in a cartridge the tape drive will not accept the cartridge It will make a flapping or scraping noise for a few seconds stop and repeat the process The noise is caused by the detached leader going around in the drive On the HP SureStore DLT 40 the left hand lights will be on and the right hand lights wi...

Page 51: ...o not stick labels onto a cartridge they may cause it to jam in the drive mechanism Use only the labels supplied with the cartridge To label a cartridge slide an identification label into the slot on the front of the cartridge see figure 4 4 Do not stick labels onto any part of the cartridge They could cause problems inside the drive Write on labels only with pens that do not produce debris Do not...

Page 52: ...quipment Keep cartridges out of direct sunlight and away from heaters Store cartridges in their plastic cases in an environment that satisfies the following conditions Temperature 18 C to 28 C 64 F to 82 F Relative Humidity 40 to 60 non condensing Free from dust Store cartridges vertically Transporting Cartridges Environmental Conditions Make sure there is no condensation in or on the cartridges A...

Page 53: ...Care of the Drive and Tape Cartridges Taking Care of Data Cartridges 4 10 dlt book Page 10 Monday February 12 2001 5 42 PM ...

Page 54: ... tape cartridges at different densities and with or without compression For optimum performance you should use the normal tape cartridge for your drive at its default setting with compression on If you do this you need not read this chapter dlt book Page 1 Monday February 12 2001 5 42 PM ...

Page 55: ...f it appends data to a tape cartridge that already contains data the drive will write at the same density as the existing data Changing the Density and Compression for Writing Caution If you load a tape cartridge that already contains data and then write with a new density all the existing data on the tape will be lost A new density can only be used when writing from Beginning of Tape BOT For the ...

Page 56: ...ftware compression This compresses the data before sending it Density Setting 2 6 GB 6 0 GB 10 0 GB 20 0 GB Tape Cartridge Native Compressed Native Compressed Type III 2 6 GB 6 0 GB 10 0 GB 20 GB No No DLTtape IIIxt No No 15 0 GB 30 GB No No DLTtape IV No No No No 20 0 GB 40 GB Density Setting 2 6 GB 6 0 GB 10 0 15 0 GB 20 0 GB 35 0 GB Tape Native Compressed Native Compressed Native Compressed Typ...

Page 57: ...n for Writing 5 4 to the drive instead of the drive compressing the data when it receives it Software compression is slower than using the drive s hardware compression facility but it can be equally effective in terms of capacity dlt book Page 4 Monday February 12 2001 5 42 PM ...

Page 58: ...riting to tape With DLTtape IIIxt and IV tape cartridges you can choose only to have compression on or off you cannot change the density HP SureStore DLT 70 With DLTtape IV cartridges you can select only 20 0 or 35 0 GB densities and choose to have compression on or off If you try to select another density the setting will change back to the default density 35 GB as soon as the drive starts writin...

Page 59: ...s Note HP SureStore DLT 40 only To select 15 GB density with a DLTtape IIIxt select the 10 GB light About two seconds after you have stopped pressing the button the new density setting will flash together with the Density Override light The current old density of the tape will be lit steadily The drive remembers this request to change density until one of the following occurs The drive writes from...

Page 60: ... lit After about two seconds the following happens The 2 6 GB light remains lit The density has not changed yet this light indicates the current density of data on the tape cartridge The 10 0 GB and Compress lights flash showing the density you have selected The Density Override light flashes indicating that a change is pending When the drive starts writing from Beginning of Tape the following hap...

Page 61: ...Tape Cartridge Densities and Compression Changing the Density and Compression for Writing 5 8 dlt book Page 8 Monday February 12 2001 5 42 PM ...

Page 62: ...uld do if you have problems with your drive or the backup process For further help try the Hewlett Packard Information Service on the World Wide Web http www hp com support dlt and http www hp com go tape dlt book Page 1 Monday February 12 2001 5 42 PM ...

Page 63: ...ur backup software to run a trial backup and restore If the Self Test Fails If no lights show 1 Check that the power cord is securely seated at both ends 2 Check that the power socket is switched on 3 Check that the drive is switched on press I on the power switch 4 If the drive still fails to show signs of life check the power socket with some other device which you know works 5 If the power sock...

Page 64: ...drive s SCSI connectors Is the SCSI cable firmly seated Is the correct SCSI terminator fitted and is it firmly seated Check the SCSI bus Is the SCSI cable firmly connected to the SCSI connector on the computer If there are other devices on the SCSI bus are their IDs all different If necessary change the ID of the drive or other devices Use HP TapeAssure on the HP SureStore Tape CD ROM to find deta...

Page 65: ...been put into Firmware Update mode If other problems occur for which you can find no cause Check the termination on the SCSI bus If the drive is the only device or the last device on the bus it must have a terminator fitted If some other device is last on the bus it should have a terminator fitted and the HP SureStore DLT drive should not HP SureStore DLT 40e only If the drive is connected to a 68...

Page 66: ...dix A Product Specifications and Ordering Information This chapter gives the specifications of the drives and lists part numbers for cartridges and SCSI cables dlt book Page 1 Monday February 12 2001 5 42 PM ...

Page 67: ...DLT 70 HP SureStore DLT 80 Linear Bit Density 81 633 bpi per track DLTtape IV 85 937 bpi per track DLTtape IV 98 250 bpi per track DLTtape IV Capacity 40 GB at 2 1 compression DLTtape IV 70 GB at 2 1 compression DLTtape IV 80 GB at 2 1 compression DLTtape IV Transfer Rates Native 1 5 MB s 5 0 MB s 6 0 MB s 2 1 Compression 3 0 MB s 10 0 MB s 10 0 MB s Speeds Read write Rewind Linear Search 110 ips ...

Page 68: ...ta transfers with parity HP SureStore DLT 70 Fast wide single ended SCSI 2 16 bit wide data transfers with parity HP SureStore DLT 80 Ultra wide SCSI 2 16 bit wide data transfers which can be used with both LVD low voltage differential and single ended host bus adapters Temperature 10 C to 40 C 50 F to 104 F Humidity 20 to 80 non condensing Altitude 0 m to 9 km 0 to 30 000 ft Temperature 40 C to 6...

Page 69: ... Application X Y and Z axes once in each axis Pulse Shape sine pulse Peak Acceleration 5g Duration 11 ms Application 10g in each axis 35s between shocks 60 shocks in total HP SureStore DLT 4 0 HP SureStore DLT 7 0 HP SureStore DLT 8 0 Head life hrs tape motion 10 000 30 000 30 000 MTBF hrs 100 duty cycle 200 000 200 000 250 000 Tape life passes 500 000 500 000 500 000 Safety UL listed to UL 1950 U...

Page 70: ...h connector to 50 pin low density bail connector suitable for attaching a DLT 40e to a computer with a high density narrow SCSI connector K2286 LVD SCSI interface cables for HP SureStore DLT 70e 80e drives 0 9m 68 pin high density screw connector to 68 pin high density screw connector C5687A 1 5m 68 pin high density screw connector to 68 pin high density screw connector C5726A HP SureStore DLT 40i...

Page 71: ...Product Specifications and Ordering Information Ordering Information A 6 dlt book Page 6 Monday February 12 2001 5 42 PM ...

Page 72: ...pendix B Customer Support This appendix describes Hewlett Packard s service and support arrangements warranty details and how to contact HP Customer Support dlt book Page 1 Monday February 12 2001 5 42 PM ...

Page 73: ...of time a refund of the purchase price may be given upon return of the product The warranty on your HP SureStore DLT drive does not apply to defects resulting from Improper or inadequate maintenance by the customer Customer supplied software or interfacing Unauthorized modification or misuse Operation outside the environmental specifications for the product Use of unsupported media Improper site p...

Page 74: ...not supplied by HP c unauthorized modification or misuse d operation outside of the published environmental specifications for the product or e improper site preparation or maintenance HP MAKES NO OTHER EXPRESS WARRANTY OR CONDITION WHETHER WRITTEN OR ORAL TO THE EXTENT ALLOWED BY LOCAL LAW ANY IMPLIED WARRANTY OR CONDITION OF MERCHANTABILITY SATISFACTORY QUALITY OR FITNESS FOR A PARTICULAR PURPOS...

Page 75: ...e years 1999 and 2000 including leap year calculations when used in accordance with the Product documentation provided by HP including any instructions for installing patches or upgrades provided that all other products e g hardware software firmware used in combination with such HP Product s properly exchange date data with it The duration of the Year 2000 warranty extends through January 31 2001...

Page 76: ...returning a drive refer to the list below for the correct telephone number to call When you call make sure that you have the following information available The product name and serial number see inside front cover Date of purchase A description of the product fault A contact name for details of the failure A contact telephone number Your shipping address The telephone service agent will verify th...

Page 77: ...b Site http www hp com support dlt Software drivers product and support information are available from HP s World Wide Web and FTP sites CompuServe Download software firmware and support documents discuss issues in user forums Address Go HPSYS Internet E mail To leave messages for HP SureStore technical support SureStore_Support hp com Messages are usually answered within 48 hours Contacting Custo...

Page 78: ...35 1000 Europe Mailing Address Hewlett Packard Nederland B V European Customer Support Center P O Box 58144 1040 HC Amsterdam The Netherlands America Online Bertelsmann Available in France Germany and the UK Address HP Bulletin Board Download software firmware and support documents leave messages for technical support Telephone 31 495 546 909 Settings 8 1 N 2 400 to 28 800 baud HP First Faxback Se...

Page 79: ... French 0800 55 1526 Switzerland German 0800 55 1527 United Kingdom English 0800 960271 Other European countries English 31 20 681 5792 Austria German 0660 6386 Belgium Dutch 02 626 88 06 Belgium French 02 626 88 07 Denmark English 3929 4099 Finland English 0203 47288 France French 04 50 43 98 53 Germany German 0180 5 25 81 43 Ireland English 01 662 5525 Italy Italian 02 2 641 0350 Netherlands Dut...

Page 80: ...nday Friday 7am 7pm Eastern Standard Time Telephone 03 9272 8000 China PRC Mailing Address Hewlett Packard Customer Support Center China World Trade Center No 1 Jian Guo Men Wai Avenue P O Box 9401 Beijing 100004 CHINA HP First Faxback Service Automated system to request product information or technical support documents to be faxed to you free of charge Available 24 hours a day Telephone 86 10 65...

Page 81: ...Maa Anandmai Marg Kalkaji Dehli 110 019 India E mail csc_india hp com Fax Machine 91 11 682 6041 Please include contact information the name of your HP product and the type of computer you have Telephone Support 91 11 682 6035 Indonesia Fax Machine Please include contact information the name of your HP product and the type of computer you have Fax Number 65 274 2033 Singapore Telephone Support Tel...

Page 82: ...nter 1F Yongsan Electronic Office 16 58 Hangangro 3 ga Yongsan gu Seoul Korea FTP Site Download software and firmware files as well as technical newsletters for dealers directly from the Internet IP Address NT Server 15 32 11 50 Remote access telephone number 02 3270 0808 Bulletin Board Download software firmware and support documents leave messages for technical support Telephone Hitel 02 762 022...

Page 83: ...n Board Download software firmware and support documents Telephone 09 356 3660 HP First Faxback Service Automated system to request product information or technical support documents to be faxed to you free of charge Available 24 hours a day Telephone 09 356 6642 Fax Machine Faxes are answered in 24 hours or less Fax Number 61 3 9272 4099 Australia Telephone Support Hours of Operation Monday Frida...

Page 84: ...er 65 274 2033 Telephone Support Hours of Operation Monday Friday 9 00 17 00 Telephone 65 272 5300 Taiwan ROC Mailing Address Hewlett Packard Customer Support Center 8F 337 Fu Hsing North Road Taipei 104 Taiwan R O C Bulletin Board Download software firmware and support documents leave messages for technical support Telephone 02 923 3233 Login First name HP Last name BBS HP First Faxback Service A...

Page 85: ...ntact information the name of your HP product and the type of computer you have Fax Number 65 274 2033 Singapore Telephone Support Telephone 66 02 661 4011 Vietnam Fax Machine Please include contact information the name of your HP product and the type of computer you have Fax Number 65 274 2033 Singapore Telephone Support Telephone 84 08 823 4530 dlt book Page 14 Monday February 12 2001 5 42 PM ...

Page 86: ...el HP SureStore DLT40 3 6 HP SureStore DLT70 3 4 HP SureStore DLT80 3 2 FTP site B 5 H handling tape cartridges 4 7 height A 2 Hewlett Packard Information Service 6 1 host computer not recognizing drive 6 3 humidity 4 9 conditioning cartridges 4 9 non operating limits A 3 operating limits A 3 storing cartridges 4 9 HVD 2 9 I ID external drive 2 5 internal drive 1 5 impact cartridges 4 9 inserting ...

Page 87: ...external drives 2 8 internal drives 1 7 SE 2 8 Select button 3 2 3 4 3 6 5 5 self test 3 8 3 12 failure 6 2 service agreements B 4 shock drive tolerance A 3 single ended SCSI 2 8 siting drives 2 4 software 1 13 2 4 2 11 software data compression 5 3 specifications electromagnetic emissions A 4 environmental A 3 interface A 3 performance A 2 physical A 2 reliability A 4 safety A 4 stabilizing see c...

Page 88: ...light 3 3 3 5 3 7 4 2 4 3 using a cleaning cartridge 4 2 V varying 4 9 verifying installation 1 12 2 10 vibration cartridges 4 9 drive tolerance A 3 W warranty 1 4 2 11 B 2 year 2000 B 3 weight A 2 width A 2 world wide web B 5 Write Protected light 3 2 3 4 3 6 4 5 flashing 6 4 write protecting a cartridge 4 4 WWW address 6 1 Y year 2000 warranty B 3 dlt book Page 3 Monday February 12 2001 5 42 PM ...

Page 89: ...Index 4 dlt book Page 4 Monday February 12 2001 5 42 PM ...

Page 90: ...with the limits for a Class 1 LED product set out in the international standard for safety of laser products TUV internal tape drives only This equipment must be supplied by a Safety Extra Low Voltage secondary circuit in accordance with DIN VDE 0805 During incorporation of the equipment all requirements of DIN VDE 0805 must be observed and obeyed Herstellerbescheinigung Diese Information steht im...

Page 91: ... in accordance with the instruction manual may cause harmful interference to radio communications However there is no guarantee that interference will not occur in a particular installation If this equipment does cause harmful interference to radio or television reception which can be determined by turning the equipment off and on you are encouraged to try to correct the interference by one or mor...

Page 92: ...aratus as set out in the radio interference regulations of the Canadian Department of Communications Le présent appareil numérique n émet pas de bruits radioélectriques dépassant les limites applicables aux appareils numériques de Classe B prescrites dans le règlement sur le brouillage radioélectrique édicté par le Ministère des Communications du Canada Canadian Standards Association Information S...

Page 93: ...e end of the SCSI cable to the free SCSI connector on the rear of the drive and secure the connector firmly in place Connect the other end of the cable to the computer s external SCSI connector HP SureStore DLT 40e only If you are installing the drive on a system that has a 68 pin wide SCSI connector use the 68 pin to 50 pin cable provided with the drive page 2 8 Step 5 Connect the power cable Con...

Reviews: