Remote control
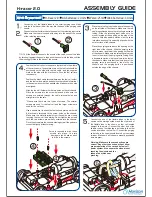
Step 1: Use the screwdriver to open the cover of
the battery compartment.
Step 2: Insert 3 new LR44 batteries with the
correct polarity positions.
Step 3: Use the screwdriver to close the cover
of the battery compartment.
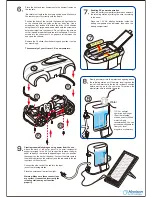
Activation of fuel cell and operation
Press the up, down buttons on the remote control to control forward and
backward motions of the car. Press the right button to keep the car
moving forwards. Press the button located in the middle to keep the car
moving backwards. Watch the car go! The car can turn when it moves
backwards. If the car runs slowly or cannot run with a fully charged
balloon, refer to the following step.
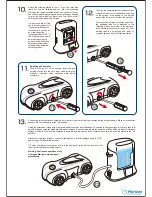
Turn the switch to “warm up” position. You can see the green light under
the gas storage cylinder flashing. Leave the car until it fully consumes the
hydrogen and activates the fuel cell. After the flashing light disappears,
turn the switch to the “off” position. Repeat refueling process again to fill
storage container with hydrogen.
It is estimated that on a full tank and after “warm up” the H-racer 2.0 will
run up to several minutes. Once the operation is complete and the
balloon is full, make sure you turn the hydrogen station to the “off”
position.
ON OFF WARM
UP
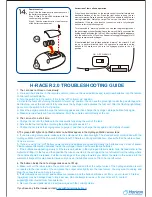
1. The car does not move or runs slowly:
a. Re-insert the batteries in the remote control or remove the used batteries and insert new batteries into the remote
control with correct polarity.
b. Turn the switch to “on” position, if it is in the “off” or “warm up” position.
c. Activate the fuel cell by turning the switch to "warm up" position. You can see the green light under the gas storage cylin-
der flashing. Leave the car until it fully consumes the hydrogen and activates the fuel cell. After the flashing light disap-
pears, turn the switch to the "on" position.
d. Press the purging valve to purge the remaining gases and then charge the hydrogen storage balloon fully again.
e. Make sure the wheels are free of obstacles. Point the remote control directly at the car.
2. The car runs for a short time:
a. Charge the car until the balloon in the tank swells fully along the wall of the tank.
b. Activate the fuel cell again or prolong the activation process as in 1.c.
c. Charge the car, press the purging valve to purge it, and then re-charge the car again until it is fully charged.
3.The green LED lights do not flash and/or no bubbles appear in the Hydrogen Station’s water tank:
a. If you are using solar panels, make sure the solar panel is in direct sunlight. The standard solar cell included with the
Hydrogen Station will fill the H-racer 2.0 after at least 10 minutes in strong sunlight. Also, check whether the cable connec-
tions are correct.
b. If you are using the "ON" battery power option and bubbles are appearing slowly the batteries may be out of power.
Please replace the alkaline batteries inside the Hydrogen Station with new alkaline batteries.
c. If the bubbles are appearing slowly or if there are no bubbles in the Hydrogen Station’s water tank, first add water to the
water tank filling it to the top and then position the tube connected to the syringe at the top left outlet from the tubing where
the bubbles should be released. Pull the inner plunge of the syringe towards you. Empty the water in the syringe into the
water tank. Repeat this step several times until you see the bubbles come out from the top left outlet.
4. The balloon inside the car's storage tank does not fill up:
a. Make sure all the tubes inside the car are well connected and that the output valve of the hydrogen station is well
connected to the input valve of the car (press the output valve tightly into the input valve). You may want to unplug and
plug the connectors once more to be sure.
b. If all connections are correct and bubbles are released, and the balloon still does not fill up - your H-racer 2.0 refuel-
ing system may be damaged due to improper use. Do not attempt to repair or fix your H-racer 2.0, contact
[email protected] for assistance.
c. Remove the used batteries and insert new ones with the correct polarity.
If you have any further issues contact
H-RACER 2.0 TROUBLESHOOTING GUIDE
Summary of Contents for H-racer 2.0
Page 6: ......


