background image

8

To clean Hose and Turbo Tool, wipe with a damp cloth. DO NOT submerge in water. 
Other cleaning tools may be washed in warm water with a detergent. Rinse and air dry 24 hours before using. 

HOW TO CLEAN TOOLS

4. MAINTENANCE

Familiarize yourself with these home maintenance tasks as proper use and care of your vacuum 
will ensure continued cleaning effectiveness. 
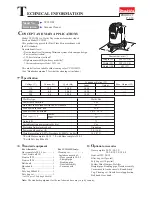
4.1 The System Check Indicator located at (A), alerts you to possible system performance issues.

A

4.1

Any other servicing should be done by an authorized service representative.
If appliance is not working as it should, has been dropped, damaged, left outdoors, or dropped into water, take it to a service center 
prior to continuing use.

Actual model may vary from images shown.

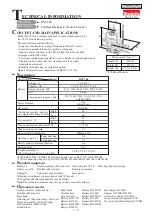
3.5 To return cord for storage, hold plug and press down 
Cord Release Pedal (B) on side of cord reel. 

3.5

B

WARNING

!

!

Hold plug when rewinding onto cord reel. Do not allow 
plug to whip when rewinding.

CORD REWIND AND STORAGE

PROBLEM

POSSIBLE CAUSE

POSSIBLE SOLUTION

If System Check 
Indicator is red:

1. Rinsable filter and/or filter made with HEPA 
media is dirty.

1. Clean rinsable filter and/or filter made with HEPA media 
- reference pg. 9 and 10

2. Dirt cup is full and/or clogged.

2. Empty dirt cup - reference pg. 9

3. Cyclone filter assembly is clogged.

3. Clean cyclone filter assembly per pg. 10.

3.4 Use the Hose and Turbo Tool (Tool varies per model) for stair cleaning.

STAIR CLEANING

CAUTION

!

Use extra care when cleaning on stairs. To avoid personal injury or damage, and to 

prevent the cleaner from falling, always place cleaner at bottom of stairs on floor. Do 

not place cleaner on stairs or furniture, as it may result in injury or damage. When using 

tools, always ensure handle is in the upright position.

3.4

!

Summary of Contents for WindTunnel 2 Whole House Rewind

Page 1: ...ID118502 R0 THIS PRODUCT IS INTENDED FOR HOUSEHOLD USE ONLY IF USED COMMERCIALLY WARRANTY IS VOID Espa ol p gina E1 IMPORTANT READ CAREFULLY BEFORE ASSEMBLY AND USE Questions or concerns For assistan...

Page 2: ...nter the complete model and Manufacturing Code in the spaces provided MODEL MFG CODE Hint Attach your sales receipt to this owner s manual Verification of date of purchase may be required for warranty...

Page 3: ...ord around sharp edges or corners Do not place product on cord Do not run appliance over cord Keep cord away from heated surfaces Do not unplug by pulling on cord To unplug grasp the plug not the cord...

Page 4: ...ringed area rugs or carpeted stairs during tool use Do not use sharp objects to clean out hose as they can cause damage With brushroll on do not allow cleaner to sit in one location for an extended pe...

Page 5: ...e screw behind handle into vacuum base 1 3 Wrap hose around top of hose guide located on the handle Insert the hose into hose tube until you hear a click ATTACH DIRT CUP 1 6 1 6 Place bottom of dirt c...

Page 6: ...height settings are recommended Hard floor setting for use on hard floors only Low through High settings Adjust depending on carpet type For high pile carpet use high carpet setting to ease pushing e...

Page 7: ...ck back into place push hose into hose tube until you hear a click ATTACH WAND AND TOOLS IMPORTANT Brushroll continues to turn while product is turned on and handle is in upright position To avoid dam...

Page 8: ...old plug and press down Cord Release Pedal B on side of cord reel 3 5 B WARNING Hold plug when rewinding onto cord reel Do not allow plug to whip when rewinding CORD REWIND AND STORAGE PROBLEM POSSIBL...

Page 9: ...seal the filter and cause a reduction in performance When using the vacuum for this type of dust empty the cup and clean the filters often 4 2 B Actual model may vary from images shown Remove dirt cup...

Page 10: ...n Fig 4 5 To reduce the risk of personal injury Unplug before cleaning or servicing Do not use vacuum without dirt cup or filters in place Do not use vacuum without dirt cup or filters in place 4 9 4...

Page 11: ...side is up 4 17 Remove the 6 screws as shown with a Phillips screwdriver 4 18 Pivot off bottom plate 4 19 Remove any debris and or hair from brushroll Replace the bottom plate aligning the screw holes...

Page 12: ...Lift off bottom plate A 4 22 Remove used belt from brushroll C then from motor shaft metal rod D and discard What to Buy Belt If desired additional belts can be purchased at Hoover com or 1 800 944 9...

Page 13: ...ION The motor and brushroll are equipped with bearings which contain sufficient lubrication for their lifetime The addition of lubricant could cause damage Do not add lubricant to motor or brushroll 4...

Page 14: ...mpty dirt cup Pg 9 3 Broken or worn belt 3 Replace belt Pg 12 4 Brushroll and or Hose clogged 4 Check Hose Pg 13 Check Brushroll Pg 11 5 Carpet height setting is incorrect 5 Set Carpet Height Adjustme...

Page 15: ...earest you For an automated referral of authorized service outlet locations call 1 800 944 9200 Do not send your vacuum to Hoover Inc Company in Glenwillow for service This will only result in delay I...

Page 16: ...the country in which the product was initially purchased and resales of the product by the original owner This warranty does not cover pick up delivery transportation or house calls However if you mai...

Reviews: