background image

UNPACKING

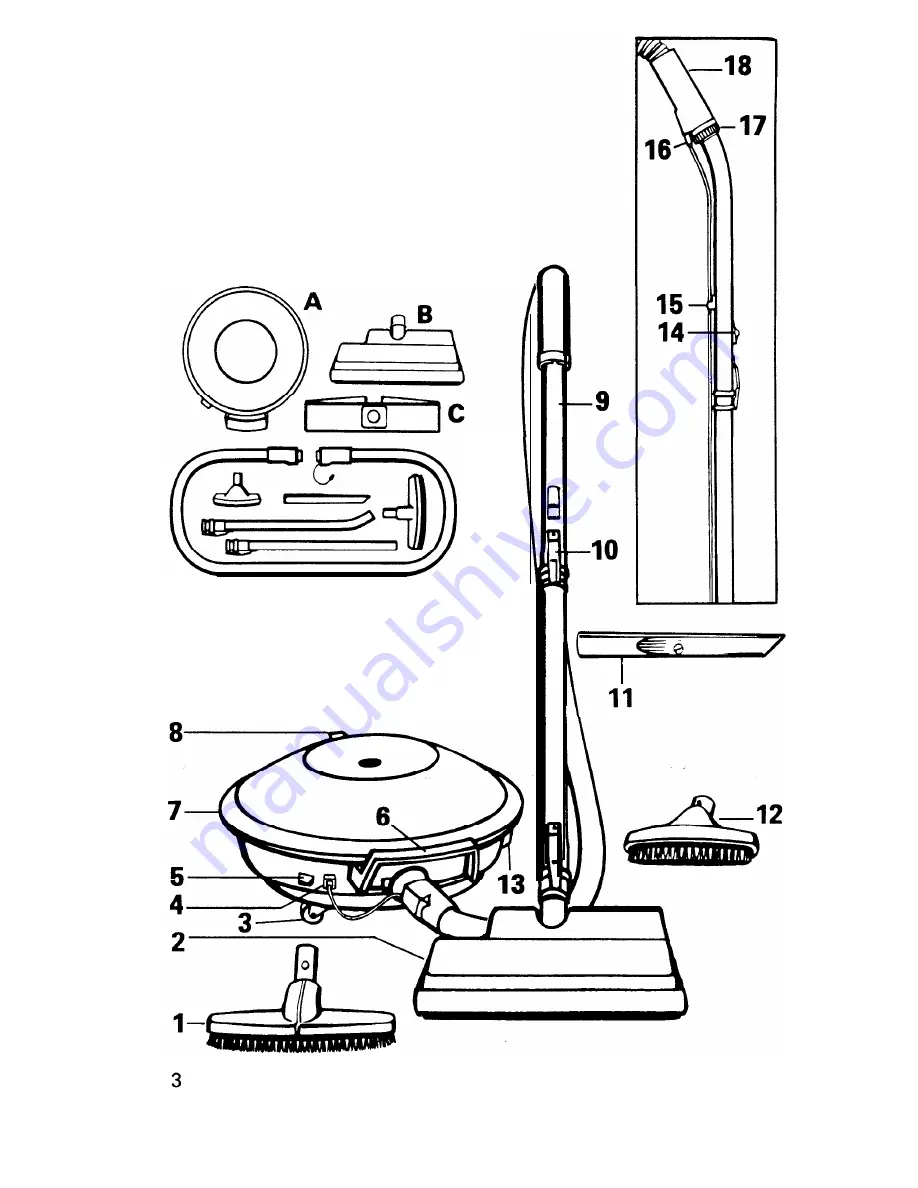
Unpack the cleaner from the

carton and identify the parts

shown. Remove and dispose

of the cardboard packing.
A. Canister cleaner

B. Power nozzle

C. Throw away bag

D. Extension wands, cleaning

tools and hose

D

The cleaner assembled will

look like the drawing below.

Summary of Contents for Celebrity QS S3181

Page 1: ......

Page 2: ...enter the model number and serial number in the spaces provided above and retain in a safe place The model number and serial number appear on the bottom of the cleaner Save Index Assembling Cleaner 5...

Page 3: ...ner They may damage the cleaner and the bag l Unplug cleaner when not in use Turn machine off at switch before unplugging l Always disconnect cord from electrical outlet before servicing the cleaner l...

Page 4: ...the carton and identify the parts shown Remove and dispose of the cardboard packing A Canister cleaner B Power nozzle C Throw away bag D Extension wands cleaning tools and hose D The cleaner assembled...

Page 5: ...o hose and power nozzle or cleaning tools Spring Latch locks extension wands Crevice Tool Multi Purpose Brush Cover Latch Suction Regulator should be closed for full suction Open regulator for easy cl...

Page 6: ...ep into the receptacle as possible To disconnect hose first remove hose cord plug from receptacle Then depress latch away from hose connection opening in clean er While holding latch turn the hose cou...

Page 7: ...To attach the hose to the exten sion wands rotate the plastic latch ring on the handle to accept the button projection on the curv ed wand Push the handle over the wand so that the button projection...

Page 8: ...t floors To clean these floors use the Wall Floor Brush It is suggested that you use the power nozzle with the Suction Regulator closed for full suction If the power nozzle is difficult to push open t...

Page 9: ...of suction power still occurs check nozzle for obstructions Disconnect cleaner from elec trical outlet and disconnect power nozzle from extension wands While holding nozzle push nozzle connector down...

Page 10: ...latch ring as shown to lock the tool in place To remove the tool reverse the above procedure The power cord leading from the hose connection to the receptacle on the cleaner base need not be connecte...

Page 11: ...to top How to store Cord wrap When cleaner is not in use wrap the cord around the cord storage hook located on the cover of the cleaner and the carrying handle Store the power nozzle with the handle...

Page 12: ...away bag and may cause it to burst even though it is only partially full of dirt When the cleaner is used to remove material of this nature the bag should be changed frequently Where to buy bags Bags...

Page 13: ...otor housing and open the folds of the bag to allow the bag to properly fill Make sure all four folds are open Note A bag that does not expand properly may restrict air flow In this event check the ba...

Page 14: ...anufactured that are similar in shape and size but are not designed for the HOOVER power nozzle Such belts do not operate the agitator correctly and may create stress which could damage your power noz...

Page 15: ...nozzle base at the agitator opening and push up the belt side of the agita tor Remove agitator and old belt Place one end of new belt around the motor pulley with lettering on outside of belt Then sl...

Page 16: ...to make sure belt is positioned properly The cover attaches at the front of the nozzle Place the notched edge at the front of the cover into the groove in the nozzle base While maintaining front conn...

Page 17: ...ness When replacing agitator brushes ask for HOOVER part No 48445017 How to replace agitator brushes Disconnect cleaner from elec trical outlet and disconnect power nozzle from extension wands Remove...

Page 18: ...r 4 Reassemble agitator parts Line up locator on end sections with slot on agitator Push end sections into position Screw on end plates and tighten 5 Should you accidentally dis place the bearing duri...

Page 19: ...n cleaner base and under neath handle 2 Broken or worn belt 2 Replace belt D Nozzle 1 Low cleaner suction 1 See Item B won t pick 2 Obstruction in nozzle 2 Remove foreign object up connector 3 Agitato...

Page 20: ...achine off at switch before unplugging from wall outlet When unplugging machine grasp plug not cord Always unplug power cord from wall outlet before servicing machine or attaching accessories Store ma...

Reviews: