Mounting the Unit on the Wall
Page 15
Combined Assembly - Single and Triple Modules
A combined wall assembly of single and triple modules allows you to create
units consisting of 2, 4 and 5 units. This procedure consists of the following
steps:
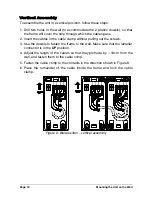
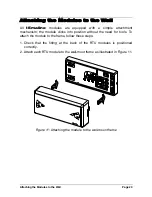
1. Drill the necessary holes in the wall (2 plastic dowels for each module), so
that the lower plate will cover the hole through which the cables pass.
2. Insert the cables in the cable clamp without pulling out the screws.
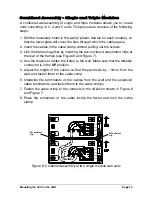
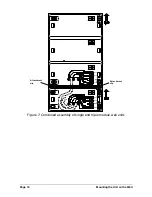
3. Link the frames together by inserting the two enclosed attachment clips at
the rear of the frames (see Figure 6 and Figure 7).
4. Use the dowels to fasten the frame to the wall. Make sure that the lamellar
connector is in the
UP
position.
5. Adjust the length of the cables so that they protrude by ~10cm from the
wall, and fasten them to the cable crimp.
6. Intertwine the terminators of the cables from the wall and the extension
cable terminators, and fasten them to the cable crimps.
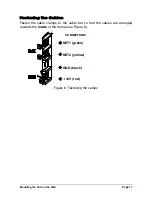
7. Fasten the cable crimp to the contacts in the direction shown in Figure 6
and Figure 7.
8. Place the remainder of the cable inside the frame and lock the cable
clamp.
NET1
NET2
GND
+12V
NET1
NET2
GND
+12V
At t achment
clip
At t achment
clip
Figure 6: Combined assembly of two single module wall units

