background image

5

ENGLISH

Cord Storage 
1.

This quick heater is equipped with Cord 
Storage (16). To securely store the Supply 
Cord (15), fully put it into the Storage (16) 
by pressing it through the hole.

2.

Before operating the quick heater make 
sure that the Supply Cord (15) is fully 
pulled out and extended.

Wall Assembly

If you would like to wall-mount the quick heater,
follow these instructions: 

1.

Slightly press a screwdriver onto the      
marking of the Wall-Mounting Support (2) 
and take the Support (2) off the quick 
heater.

2.

Make sure that the minimum Safety 
Distances (4) to walls, floors and ceilings 
are kept. 

3.

Drill holes of Ø 6 mm in the wall, using the
Support (2) as an assembly stencil. 

4.

Insert plugs of  Ø 6 mm into the holes and 
fix the Wall-Mounting Support (2) with two 
screws of Ø 5 mm. 

5.

Suspend the Opening for the Wall-
Mounting Support (1) onto the Support (2), 
until you hear a “click”. The quick heater is
now securely installed. 

6.

Choose the desired air flow position within 
the variable air flow range (5) by turning 
the quick heater into the desired position.  

7.

If you want to take the quick heater off the 
Wall-Mounting Support (2), make sure it is 
centered. Then follow instructions 
under 1. 

Operating Instructions

SH-771E Quick Heater with Thermostat Switch 
SH-772E Quick Heater with Power and 

Thermostat Switch  

SH-773E Quick Heater with Power and 

Thermostat Switch, Pilot Light and 
Wall-Mounting Support 

1.

Check that the Power Switch (7) is in      
off-position (10). Plug the Supply Cord (15)
into the outlet. 

Do not touch the Supply 

Cord (15) with wet hands.

2.

Check that the Air Inlet (14) and Outlet (6) 
are not covered. 

The Air Inlet (14) and 

Outlet (6) must not be covered during   
operation. 

3.

To operate the quick heater by use of the 
Power Switch (7) and/or Thermostat Switch
(9) follow the below instructions.                 

4.

Before removing or moving the quick 
heater turn the Power Switch (7) to the off-
position (10) and disconnect it from the 
electricity supply. 

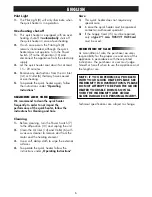
Power Switch 
1.

Turn the Power Switch (7) 

clockwise 

to one 

of the four settings: 

Off (10) 
Warm Air 1000 W
„Whisper-quiet operation“ (11)
Warm Air 1200 W   (12)
Hot Air 2000 W   (13)

2.

When the Power Switch (7) is in the Hot 
Air 2000W (13) position it cannot be 
turned further clockwise, only          
counter-clockwise. 

Thermostat Switch 
1.

If equipped with a Power Switch (7) make 
sure that it is turned to one of the heat      
settings. 

2.

Turn the Thermostat Switch (9) 

clockwise

to 

the highest setting 8 (18).

3.

When the desired room temperature is 
reached, turn the Thermostat Switch (9) 

counter-clockwise

until you hear a “click”. 

The quick heater stops operating. 

4.

Now turn the Thermostat Switch (9) a little 

clockwise

again. The quick heater will 

maintain the selected room temperature by 
automatically switching the quick heater on
and off. 

5.

The further you turn the Thermostat Switch 
(9) 

clockwise

, the higher the heating       

temperature. The highest setting 8 (18)   
corresponds to a room temperature of 
approx. 30 °C, the lowest setting 

(17) to approx. 5 °C.

6.

It is normal that the Thermostat will 

not

operate the quick heater when the room 
temperature is 

above 30 °C.

7.

When the room temperature is below 5 °C 
the quick heater will operate until the room 
temperature is above 5 °C. 

8.

When the Thermostat Switch is in position 
8 (18) it cannot be turned further         
clockwise, only counter-clockwise. 

Summary of Contents for SH-771E

Page 1: ...RISCALDAMENTO RAPIDO M A N U A L E D U S O GB D F NL E P I VÄRMEFLÄKT B R U K S A N V I S N I N G SVE PIKALÄMMITIN O H J E K I R J A Ε Γ Χ Ε Ι Ρ Ι Ι Ο Χ Ε Ι Ρ Ι Σ Μ ΟΥ HIZLI ISITICI K U L L A N I M TA L M AT L A R I БЫСТРОДЕЙСТВУЮЩИЙ НАГРЕВАТЕЛЬ ИНСТРУКЦИИ ПО ЭКСПЛУАТАЦИИ SZYBKI OGRZEWACZ POWIETRZA I N S T R U K C J A O B S U G I OHŘÍVAČ VZDUCHU K RYCHLÉMU VYTÁPĚNÍ N ÁV O D K P O U Ž I T Í FIN GR ...

Page 2: ...GNELSE SISÄLLYSLUETTELO ΠΕΡΙΕΧΟΜΕΝΑ FIHRIST Содержание SPIS TREŚCI OBSAH TARTALOMJEGYZÉK ˇ GB 4 7 10 14 17 21 24 28 31 34 37 40 43 46 50 54 57 64 D F NL E P I SVE FIN GR T RS PL CZ HU AR NOR DNK ENGLISH DEUTSCH FRANÇAIS NEDERLANDS ESPAÑOL PORTUGUÊS ITALIANO SVENSKA SUOMI EΛΛHNIKA TÜRKÇE ГАРАНТИЯ POLSKI CESKY MAGYAR NORSK DANSK ˇ ...

Page 3: ...3 13 3 4 8 7 6 14 16 15 1 2 5 17 18 9 12 11 10 ...

Page 4: ...tible material such as furniture cushions bedding paper curtains clothes at least 1 meter away from the quick heater 14 Keep the quick heater clean Make sure that the Air Inlet 14 and Outlet 6 are unobstructed Do not allow any objects to enter into the Air Inlet 14 and Outlet 6 Do not cover the quick heater This could cause overheating fire hazard or electric shock 15 Do not immerse the quick heat...

Page 5: ...ands 2 Check that the Air Inlet 14 and Outlet 6 are not covered The Air Inlet 14 and Outlet 6 must not be covered during operation 3 To operate the quick heater by use of the Power Switch 7 and or Thermostat Switch 9 follow the below instructions 4 Before removing or moving the quick heater turn the Power Switch 7 to the off position 10 and disconnect it from the electricity supply Power Switch 1 ...

Page 6: ... cleaning turn the Power Switch 7 to the off position 10 and unplug the unit 2 Clean the Air Inlet 14 and Outlet 6 with a vacuum cleaner to remove dust from the motor and the heating element 3 Use a soft damp cloth to wipe the external surfaces 4 To operate the quick heater follow the instructions under Operating Instructions Care 1 This quick heater does not require any special care 2 In case the...

Page 7: ...täcken möbler papper gardiner och kläder får inte förvaras närmare än 1 m från värmefläkten 14 Håll värmefläkten ren Kontrollera luftingången 14 och luftutgången 6 är öppna innan värmefläkten tas i drift Kontrollera att det inte finns några föremål i luftingången 14 eller luftutgången 6 Täck inte över värmefläkten Detta kan leda till överhettning brand eller strömstötar 15 Sänk inte ner värmefläkt...

Page 8: ... Luftingången 14 och luftutgången 6 måste alltid vara fria under driften 3 Använd nu driftreglaget 7 och termostatreglaget 9 för uppvärmning enligt beskrivningen nedan 4 När värmefläkten flyttas eller tas bort måste driftreglaget 7 vridas till AV 10 och stickkontakten lossas från vägguttaget Driftreglage 1 Med driftreglaget 7 kan man välja mellan 5 inställningar genom att vrida medsols AV 10 Varml...

Page 9: ...ontakten lossas från vägguttaget 2 Rengör luftingången 14 och luftutgången 6 med en dammsugare för att ta bort damm från motorn och värmeelementen 3 Rengör värmefläkten utvändigt med en mjuk och fuktig trasa 4 Starta värmefläkten på nytt enligt beskrivningen under Bruksanvisning Underhåll 1 Värmefläkten kräver inget särskilt underhåll 2 Kontakta en auktoriserad fackhandel om värmefläkten måste rep...

Page 10: ...rennbare materialer som puter sengetøy møbler papir gardiner klær må holdes minst 1 m borte fra hurtigvarmeren 14 Hold varmeventilatoren ren Forviss deg om at luftinntaks 14 og utløpsåpningen 6 er åpnet før hurtigvarmeren tas i bruk Ikke la noen gjenstander komme inn i luftinntaks 14 eller i utløpsåpningen 6 Ikke dekk til hurtigvarmeren Dette kan resultere i en overoppheting brann eller strømstøt ...

Page 11: ...psåpningen 6 ikke er tildekket Luftsinntaks 14 og utløpsåpningen 6 må alltid være fri når hurtigvarmeren er i gang 3 Bruk drifts dreiebryteren 7 og termostat dreiebryteren 9 for oppvarming som beskrevet nedenfor 4 Før du flytter eller setter bort hurtigvarmeren drei drifts dreiebryteren 7 på AV 10 og trekk støpselet ut av stikkontakten Drifts dreiebryter 1 Med drifts dreiebryteren 7 kan du ved å d...

Page 12: ... dreiebryteren 7 på AV 10 og trekk nettstøpselet ut av stikkontakten 2 Rengjør luftinntaks 14 og utløpsåpningen 6 med en støvsuger for å fjerne støv fra motoren og varmeelementet 3 Rengjør hurtigvarmeren utvendig med en myk fuktig klut 4 Ta hurtigvarmeren i bruk igjen som beskrevet under Bruksanvisning Vedlikehold 1 Hurtigvarmeren trenger ikke spesielt vedlikehold 2 Hvis hurtigvarmeren må reparere...

Page 13: ... bliver meget varm under drift over 80 C 175 F Brændbare materialer som puder sengetøj møbler papir gardiner tøj m m skal holdes mindst 1 m fra varmeblæseren 14 Hold varmeblæseren ren Sørg for at luftindgangs 14 og afgangsåbningen 6 er åbnet før varmeblæseren tages i brug Ingen genstande må komme ind i luftindgangs 14 eller afgangsåbningen 6 Varmeblæseren må ikke dækkes til Dette kan medføre overo...

Page 14: ...angs 14 og afgangsåbningen 6 ikke er tildækket Luftindgangs 14 og afgangsåbningen 6 skal altid være fri når varmeblæseren er i brug 3 Brug nu driftsdrejeomskifteren 7 og termostatdrejeomskifteren 9 til at styre opvarmningsfunktionen som beskrevet i det følgende 4 Før varmeblæseren flyttes eller pakkes væk skal driftsdrejeomskifteren 7 drejes på OFF 10 og netstikket trækkes ud af stikdåsen Driftsdr...

Page 15: ...Rengøring 1 Drej driftsdrejeomskifteren 7 på OFF 10 og træk netstikket ud af stikdåsen før du begynder at rengøre varmeblæseren 2 Rengør luftindgangs 14 og afgangsåbningen 6 med en støvsuger for at fjerne støv fra motoren og varmeelementet 3 Rengør varmeblæseren udvendigt med en blød fugtig klud 4 Tag varmeblæseren i brug igen som beskrevet under Driftsvejledning Vedligeholdelse 1 Varmeblæseren kr...

Page 16: ...vuodevaatteet huonekalut paperi verhot ja vaatteet on pidettävä vähintään 1 metri pikalämmittimestä 14 Pidä ilmankuumennustuuletin puhtaana Varmista että ilman tuloaukko 14 ja ilman poistoaukko 6 ovat auki ennen kuin alat käyttääa pikalämmintä Ilman tuloaukkoon 14 ja ilman poistoaukkoon 6 ei saa joutua minkäänlaisia esineitä Älä peitä pikalämmitintä Seurauksena saattaa olla ylikuumeneminen tulipal...

Page 17: ...ot 14 ja poistoaukot 6 eivät ole peitetyt Ilman tuloaukon 14 ja poistoaukon 6 on aina oltava vapaina lämmityksen yhteydessä 3 Käytä lämmitystä varten toiminnan kiertovalitsinta 7 ja termostaattkiertovalitsinta 9 seuraavalla tavalla 4 Kierrä toiminnan kiertovalitsin 7 asentoon POIS 10 ja vedä verkkopistoke irti pistorasiasta ennen kuin liikutat pikalämmitintä tai siirrät sitä pois Toiminnan kiertov...

Page 18: ... pikalämmittimen toiminto ei vahingoittuisi Puhdistus 1 Kierrä toiminnan kiertovalitsin 7 asentoon POIS 10 ja vedä verkkopistoke irti pistorasiasta ennen kuin aloitat puhdistusta 2 Puhdista ilman tuloaukko 14 ja poistoaukko 6 pölynimurilla Näin poistat pölyn moottorista ja lämmitysosasta 3 Pyyhi pikalämmitin myös pehmeällä kostealla liinalla 4 Ota pikalämmitin jälleen käyttöön kohdan Käyttöohje oh...

Page 19: ...65 ...

Page 20: ...Honeywell trademark is used by Kaz Inc under licence from Honeywell Intellectual Properties Inc www kaz com KAZ Hausgeräte GmbH Westerhaar 54 D 58739 Wickede Phone 49 0 23 77 9 28 90 SH 77xE OM 0 2003 06 04 ...

Reviews: