background image

13

Instalación del termostato

Cableado (sistema convencional - 
continuación)


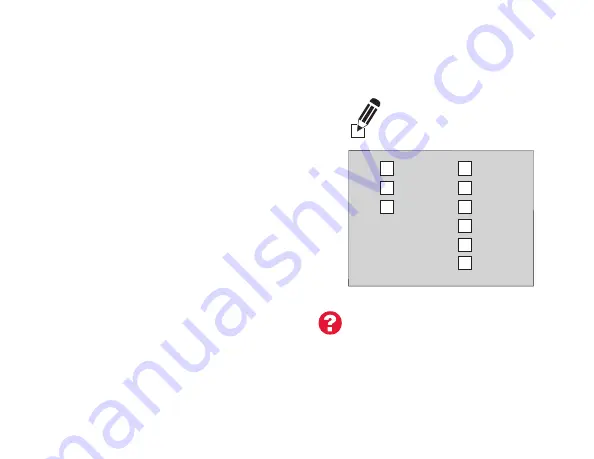
c  En la imagen de la derecha, revise  


  la casilla próxima a cada conexión.  


  Utilizará esta lista de comprobación  


  en el paso 9. 


d  Compruebe que el cable esté fijo  


  jalándolo con cuidado.  


e  Repita los pasos de la “a” a la “d” para  


  el resto de los cables. 


f  Introduzca el excedente de cables en  


  la abertura de la pared después de  


  haber instalado todos los cables. 


g  Continúe con la página 20.

¿Las etiquetas no coinciden?


Consulte las claves para la 
instalación de cableado alternativo 
en las páginas 16 y 17.

C

Rc

R

W-O/B 


W2-Aux/E 
Y2 


¡Importante!

Marque la casilla por cada 
cable que conecte. Necesitará 
esta información en el paso 9.

Summary of Contents for RTH9590

Page 1: ...User Guide Wi Fi Color Touchscreen Programmable Thermostat RTH9590 Wi Fi With Voice Control ...

Page 2: ...ect to the Internet to monitor and control your heating cooling system View and change your heating cooling system settings View and set temperature and schedules Receive alerts via email and get automatic upgrades requires Wi Fi set up and registration View outdoor temperature and humidity requires Wi Fi set up and registration Thermostat ID Card Wire labels User Guide ...

Page 3: ...Solutions you can remotely monitor and control the heating and cooling system in your home or business you can stay connected to your comfort system wherever you go Honeywell s Total Connect Comfort is the perfect solution if you travel frequently own a vacation home a business or manage an investment property or if you are simply looking for peace of mind ...

Page 4: ...old thermostat in the trash if it contains mercury in a sealed tube Contact the Thermostat Recycling Corporation at www thermostat recycle org or 1 800 238 8192 for information on how and where to properly and safely dispose of your old thermostat NOTICE To avoid possible compressor damage do not run air conditioner if the outside temperature drops below 50 F 10 C Need help Visit wifithermostat co...

Page 5: ...ting vacation hold home 47 Setting holiday event schedules business 48 Setting custom events business 49 Setting holiday schedule business 51 Setting holiday override business 52 Initiating occupancy mode business 53 Customizing screen color 54 Setting preferences 55 Cleaning the thermostat screen 56 Adjusting security settings 57 Software updates 58 Unregistering your thermostat 59 Smart Response...

Page 6: ...ch to display options Start here to set a program schedule Current schedule Change temperature setting and select temporary or permanent hold Indoor conditions Shows indoor temperature and humidity Current date and time Current status Shows system mode heat cool Outdoor conditions Outdoor temperature and humidity appear after registration ...

Page 7: ...uickly identify which thermostat is in control of a specific area Current schedule Touch an arrow to change temperature setting and set a temporary hold Override Touch to temporarily override the program schedule Indoor conditions Shows indoor temperature and humidity Current date and time Current status Shows system mode heat cool Outdoor conditions Outdoor temperature and humidity appear after r...

Page 8: ...programmed and ready to go as soon as it is installed and registered Install your thermostat Connect it to your home wireless network Register online for remote access Before you begin you may want to watch a brief installation video Use the QR Code at the front of this guide or go to wifithermostat com support 2 3 1 ...

Page 9: ... Drill and bits 3 16 for drywall 7 32 for plaster optional Hammer optional Electrical tape optional 1 Switch OFF power to your heating cooling system Important To protect your equipment switch OFF the power to your heating cooling system at the breaker box or the system switch or M31535 Circuit breaker box Heating cooling system power switch ...

Page 10: ...nnected 2a Take a picture of the wire connections for later reference 2b If no wire is connected to a terminal labeled C or no C terminal exists on the old thermostat view the Alternate Wiring videos at wifithermostat com support Important C wire is required and is the power source for your thermostat Without a C wire your thermostat will not power up Note You will need a picture of your wire conn...

Page 11: ...gnations not by wire color Tip If no tag matches a terminal designation write the appropriate letter on a blank sticky tag 4 Remove old wallplate Remove the old wallplate from the wall after all wires have been labeled and disconnected Blank tags Sticky tag Terminal designation C C MCR31537 Tip Wrap the wires around a pencil to prevent them from falling back into the wall ...

Page 12: ...tat Mount your new wallplate using screws and anchors included with the thermostat If necessary Drill 3 16 in holes for drywall Drill 7 32 in holes for plaster Note You may be able to use your existing wall anchors Hold the wallplate up to the existing anchors to check for alignment Installing your thermostat Wallplate ...

Page 13: ...our heating cooling system Check the video section at wifithermostat com Note Not all heating cooling systems label the 24 VAC common C Check your system manual or contact the manufacturer to find out which terminal is the 24 VAC common View the Alternate Wiring videos at wifithermostat com support Wiring For conventional heating cooling systems natural gas oil or electric furnace air conditioner ...

Page 14: ...rminal hole until it snaps into place If you need to remove a wire use a pen tip to press the terminal release and then pull wire out Note Refer to the wiring picture you took in Step 2 Tip To make it easier to slide the wire into place use a pen tip to hold down the terminal release Note The wiring for your application might be different than the wiring shown below Labels don t match See alternat...

Page 15: ...rify wire is firmly secured by gently pulling on wire e Repeat steps a d for all other wires f Push any excess wire back into the wall opening after all wires are installed g Continue to page 20 Labels don t match See alternate wiring keys on pages 16 17 Important Check the box for each wire you connect You will need this information in Step 9 C Rc R W O B Y G W2 Aux E Y2 L ...

Page 16: ... pen tip to press the terminal release and then pull the wire out Note Refer to the wiring picture you took in Step 2 Tip To make it easier to slide the wire into place use a pen tip to hold down the terminal release Note The wiring for your application might be different than the wiring shown below MCR34566 C K Rc R W O B Y G W2 Aux E Y2 L O Y G R C AUX Labels don t match See alternate wiring key...

Page 17: ...mp thermostat had separate wires on Aux and E connect the Aux and E wires and one end of a new piece of wire using a wire nut not included Then slide the other end of the new wire into the W2 Aux E terminal f Push any excess wire back into the wall opening after all wires are installed g Continue to page 20 Labels don t match See alternate wiring keys on pages 18 19 Important Check the box for eac...

Page 18: ... wiring Conventional System Use this if your wire labels don t match the terminal labels Note You must have a C wire or equivalent See page 11 See key to 1 2 on page 17 MCR34541 C R W Y G 2 1 2 C K Rc R W O B Y G W2 Aux E Y2 L W1 W2 Y2 RH 4 V Rc R C1 X B ...

Page 19: ...em 2 1 Do not use K terminal For future use If you have both an R and Rc wire unplug the jumper loop by pulling on the wire loop If your old thermostat had both R and RH wires connect the R wire to the Rc terminal the RH wire to the R terminal and unplug the jumper loop ...

Page 20: ...at Pump System Use this if your wire labels don t match the terminal labels Note You must have a C wire or equivalent See page 11 See key to 1 7 on page 19 MCR34542 C R O Y G 3 1 C K Rc R W O B Y G W2 Aux E Y2 L 4 5 6 AUX X X2 Y2 2 B 7 X B Rc R V VR 2 L F W W1 W2 ...

Page 21: ...een select Cooling Changeover Valve See page 69 If your old thermostat had an O wire and not a B wire attach the O wire to the O B terminal If your old thermostat had separate Y1 W1 and W2 wires check wifithermostat com for help If the old thermostat has separate wires on Aux and E use a wire nut to attach both wires to a separate wire Slide this third wire into the W2 Aux E terminal This is the s...

Page 22: ...69 2790ES 05 20 Installing your thermostat 7 Attach thermostat to wallplate Align the thermostat with the wallplate and then snap into place Thermostat Wallplate LEVEL HERE M34498 ...

Page 23: ...C wire is connected at the thermostat and at the heating cooling system 8b Make sure the heating cooling system door is firmly secured 8c Switch power back ON for your heating cooling system at the breaker box or its power switch M31544 or Circuit breaker box Heating cooling system power switch ...

Page 24: ...stat options to define your heating cooling system Language Home or Business You can customize other options later 9 Follow prompts on the screen to select appropriate options 9a Touch the language you want the thermostat to display then touch Next 9b Select Home or Business installation then touch Next Next Next ...

Page 25: ...talling your thermostat 9c Touch Next or name the thermostat location 9d Select what your thermostat will control and touch Next Note Touch the orange Help button on any screen for more information Next Next ...

Page 26: ...he system type determines other setup options Use the checklist from Step 6c to help make additional selections after you select system type 9g Touch Next after making selections on each screen 9h Touch Done on the last screen The thermostat displays an option to connect to your Wi Fi network Note Touch the orange Help button on any screen for more information Next ...

Page 27: ...eless networks Please wait after which it displays a list of all Wi Fi networks it can find Note If you cannot complete this step now touch I ll do it later The thermostat will display the Voice Control agreement Respond to that screen see page 27 and the thermostat will display the home screen Complete this process by selecting MENU Wi Fi Setup Continue with Step 2 2 Select the network 2a Touch t...

Page 28: ... home network password 2c Touch Done The thermostat displays Connecting to your network Please wait then shows a Connection Successful screen 2d Touch Next to display the registration information screen 2e Note your Thermostat MAC and Thermostat CRC You need these numbers to complete online registration Done OK ...

Page 29: ...e screen you will be prompted to read the Voice Control agreement and respond by pressing Yes to turn Voice Control on No to leave it off or Help for more information See page 43 for more information Note If you touch Done before you register online your home screen displays an orange alert button telling you to register Touching that button displays registration information and an option to snooz...

Page 30: ...ouch Disconnect from Network The thermostat will display a question to confirm your selection 4 Touch Yes to confirm that you want to disconnect from the network The thermostat will display the Wi Fi Setup screen 5 Touch OK to display the menu MENU Wi Fi Setup Disconnect from Network Yes ...

Page 31: ...haracters to spell out your home network password then touch Done 5 The thermostat displays Connecting to your network Please wait then a Connection Successful screen 6 Touch Next If your thermostat is registered you will see your signal strength and other status information Touch Done If the screen displays Register Online for Remote Access follow instructions on page 30 MENU Wi Fi Setup ...

Page 32: ...tat remotely you must have a Total Connect Comfort account Use the following steps 1 Open the Total Connect Comfort web site Go to mytotalconnectcomfort com View the Wi Fi Thermostat Registration video at wifithermostat com support Registering your thermostat online ...

Page 33: ...ate An Account 2a Follow the instructions on the screen 2b Check your email for an activation message from My Total Connect Comfort This may take several minutes Note If you do not receive a response check your junk mailbox or use an alternate e mail address 2c Follow activation instructions in the email 2d Log in ...

Page 34: ... thermostat package The IDs are not case sensitive U S Registered Trademark 2012 Honeywell International Inc 69 2723EFS 01 M S 04 12 Printed in U S A HONEYWELL MODEL RTH8580WF MAC ID MAC CRC 69 2723EFS 01 Thermostat ID Card Use the MAC ID and CRC ID to register this product at mytotalconnectcomfort com Carte d identification de thermostat Utilisez l identification MAC et l identification CRC pour ...

Page 35: ... registration screen will display a SUCCESS message You can now control your thermostat from anywhere through your laptop tablet or smartphone GET IT ON Download on iTunes Total Connect Comfort free app is available for Apple iPhone iPad and iPod touch devices at iTunes or at Google Play for all Android devices ...

Page 36: ...ime date is displayed 4 Touch Done to save or Cancel to ignore changes Note This thermostat will automatically update for daylight saving time if observed in your area and all date time information is stored If the thermostat is connected to Wi Fi and registered to Total Connect Comfort the current time is updated from the internet Fri Jun 14 2013 6 30 pm Done 30 ...

Page 37: ...h Done to save and exit On Fan is always on Automatic Fan runs only when the heating or cooling system is on Circulate Fan runs randomly about 35 of the time home use only Follow Schedule Fan controlled by program see pages 37 42 Note Touch Auto or On to temporarily override the programmed fan schedule FAN Done ...

Page 38: ...system Off Heating cooling systems are off Automatic Thermostat selects heating or cooling as needed depending on the indoor temperature Emergency Heat heat pumps with aux heat Controls auxiliary emergency heat Compressor is locked out 3 Touch Done to save and exit Note The Automatic and Emergency Heat system settings may not appear depending on how your thermostat was installed SYSTEM Done ...

Page 39: ...62 85 62 85 Return 6 00 pm 70 78 70 78 Sleep 10 00 pm 62 82 62 82 Cool Mon Fri Start time Heat Mon Fri Period Heat Sat Sun Cool Sat Sun Home Use Occupied 1 8 00 am 70 75 On Unoccupied 1 10 00 pm 55 85 Auto Occupied 2 12 00 am 70 75 On Unoccupied 2 12 00 am 55 85 Auto Cool Start time Heat Period Fan Business Use Period 2 is cancelled by default If you activate it the values shown above are default ...

Page 40: ...it to view the full schedule and make a quick adjustment Touch Guide Me to create a schedule by answering simple questions Touch I ll do it myself to manually create a program schedule See page 39 Note To reduce costs use the pre set Energy Saver settings described on page 37 MENU Create Edit Schedule ...

Page 41: ...If you selected I ll do it myself on the Create Edit Schedule screen page 38 follow these steps 1 Select the days to schedule touch Next 2 Touch Wake to set your Wake time for selected days Next 6 00 am Heat 70 Cool 78 Fan Auto WAKE ...

Page 42: ...res for the Wake period then touch Done 4 Touch other time periods Leave Return Sleep to set time and temperatures for each 5 Touch Done to save and exit Note Touch Delete Period to eliminate any unwanted time period Note Touch Fan Settings to customize fan settings for any time period Done ...

Page 43: ...n and the Hold Until time left side The schedule will resume when the Hold Until time expires 2 Touch Switch to Permanent Hold to keep the same temperature until you change it or resume the program schedule 3 Touch Cancel Hold at any time to resume the program schedule Switch To Permanent Hold ...

Page 44: ...verride Duration screen in Advanced Preferences page 64 Touch Override to use a pre set occupied temperature if a person uses the room during an unoccupied period The new temperature will be maintained for 1 hour and can be adjusted up to the maximum time set on the Override Duration screen in Advanced Preferences page 64 The programmed schedule will resume when the override timer expires Touch Ca...

Page 45: ...t options Voice On Off turns Voice Control on or off When off the thermostat functions as a regular thermostat Volume adjusts thermostat speaker volume Sensitivity changes the sensitivity of the thermostat s audio receiver The higher the number the more receptive the thermostat will be to a voice command but it will also be more likely to pick up something as a command that was not directed at the...

Page 46: ...he thermostat using Voice Control might be as follows 1 Hello Thermostat This phrase activates Voice Control 2 Hello Please say a command 3 Make it 5 degrees warmer cooler See full list of commands on page 45 4 One moment please changing setpoint to If thermostat does not respond at step 2 or 4 return to step 1 Note The voice commands for this thermostat are in English only ...

Page 47: ...oler Changes the temperature setting 4 degrees F Make it 1 10 degrees warmer cooler User selects temperature setting change between 1 and 10 degrees F I m feeling hot cold Changes the temperature setting 1 degree F What can I say Provides a list of available commands For current command list wifithermostat com voicecommands ...

Page 48: ...s 3 Touch p or q to view the status of all the equipment your thermostat is controlling Depending on how your thermostat was installed the Equipment Status screen can report data about the following systems Heating and cooling Fan Thermostat information MENU Equipment Status Done ...

Page 49: ...ouch MENU 2 Select Vacation Mode 3 Touch p or q to select the date you leave then touch Next for further scheduling details including times of day temperature settings return date and return settings 4 Review your selections on the last display and touch Done to save your settings Touch Back then Cancel to ignore the changes MENU Next Done Vaca on Mode ...

Page 50: ...liday Event Scheduler 3 Select the item you want to schedule Custom Events lets you set up other days for special schedules US and Canadian Holiday options let you select from a list of holidays commonly observed in each country 4 Make selections as prompted on each screen For more information see next two pages 5 Touch Done to save your settings MENU Custom events Holiday Event Scheduler ...

Page 51: ...tings to be maintained during a specific event You can set up an event for a specific date or day in a month The thermostat resumes normal scheduling after the event 1 Select Custom events from the Holiday Event Scheduler menu 2 Select Create a new event Custom events Create a new event ...

Page 52: ...mpted to select the start date settings end date and frequency for the event For Month Weekday you are prompted to select the month day of the week week of the month settings length of event and frequency of the event 4 Review the settings and touch Done to save them Touch Back then Cancel to ignore the changes Done Next ...

Page 53: ...2 Select Add Edit Holidays A list of national holidays is displayed 3 Touch the check box next to each holiday for which you want to maintain specific settings Touch p or q to scroll through the holiday list then touch Next Set the holiday schedule for Occupied or Unoccupied temperatures depending whether the building will be in use 4 Touch p or q to select the Heat and Cool temperatures 5 Review ...

Page 54: ...oliday Mode to display temperatures while you are away on holiday 3 Touch p or q to select the Heat and Cool temperatures then touch Next to select return date 4 Review the settings and touch Done to save them Touch Back then Cancel to ignore the changes Note The cool temperature can only be set higher than the unoccupied program setting and the heat temperature can only be set lower than the unoc...

Page 55: ...hen you arrive touch the button to maintain a comfortable temperature while the room is occupied Touch the p or q buttons to set the temperature or the Hold Until time The temperature is maintained until the time you set Temperature returns to an energy saving level after the timer expires or the Occupied period ends Press to start occupancy ...

Page 56: ...to use a predefined background or select Custom to define you own background color and text If you select a color name the screen shows an example on the left Touch Done to accept that selection If you touch Custom the screen gives you instructions Touch Next to step through the choices touch Done when you are satisfied with your changes Color Themes Done Next MENU ...

Page 57: ... responds to certain situations 1 Touch MENU and select Preferences 2 Select an option and follow prompts Reminders Utility Schedule Options Backlight Smart Response Technology Advanced Preferences Restore Default Schedule 3 Touch Done to save your settings Touch Cancel to ignore changes MENU Preferences ...

Page 58: ...U 2 Select Clean Screen A prompt asks if you want to clean the screen for 30 seconds 3 Touch Yes A countdown timer displays elapsed time until the screen is reactivated Note Do NOT spray any liquid directly on the thermostat Spray liquids onto a cloth then use the damp cloth to clean the screen Use water or household glass cleaner Avoid abrasive cleansers MENU Clean Screen Yes ...

Page 59: ...and select Security Settings 2 Select Change Lock Mode 3 Select an option and follow prompts Unlocked Full access allowed Partially locked Only temperature can be changed Fully locked No access allowed Note If you choose to use a password for additional security write it here for reference MENU Security Se ngs Change Lock Mode ...

Page 60: ...d to make any changes after the update occurs Updates occur in the early morning After your thermostat receives the software it reboots briefly displaying the Honeywell logo The screen then shows Updating software with a green progress bar When the update is complete your home screen will appear as usual Note If you are not connected to Wi Fi or registered at Total Connect Comfort you will not get...

Page 61: ...ebsite account for example you re moving and leaving the thermostat behind follow these steps 1 On mytotalconnectcomfort com log into your account 2 Under My Account select Edit My Profile 3 Click the Delete My Account button Your thermostat will display an orange button that says Register Online ...

Page 62: ...ture settings so the temperature is reached at the time you set For example Set the Wake time to 6 00 am and the temperature to 70 The heat will come on before 6 00 am so the temperature is 70 by 6 00 am Note Select Smart Response Technology in the Preferences menu page 55 The message in recovery is displayed when the system is activated before a scheduled time period ...

Page 63: ...61 Pre occupancy purge This business use feature turns on the fan 1 to 3 hours before each occupied time period to provide a comfortable work environment when you arrive ...

Page 64: ... 05 62 Compressor protection The thermostat keeps the compressor off for a few minutes before restarting to prevent equipment damage During this off time the message waiting for equipment is displayed on screen ...

Page 65: ...automatically selects heating or cooling depending on the indoor temperature Heat and cool settings must be at least 3 degrees apart The thermostat will automatically adjust settings to maintain this 3 degree separation Note Select Auto Changeover on the Heating and Cooling System Changeover screen under Advanced Preferences See Setting advanced preferences on page 64 ...

Page 66: ...e thermostat displays a list of options 2 Select Preferences Advanced Preferences The thermostat displays the first screen of options that you can change 3 On each screen make changes as needed then touch Next to display new options Repeat this step until you have made all changes Tables on pages 65 66 explain the screens and options under Advanced Preferences 4 When you have made all changes pres...

Page 67: ...Scale Select Fahrenheit or Celsius Heating and Cooling System Changeover Select Manual or Automatic Number of Schedule Periods Select 2 Periods Per Day or 4 Periods Per Day see page 37 Pre occupancy Purge Duration Select how long the fan will run before each occupied period Off 1 2 or 3 hours Type of Override Select Standard to maintain the programmed periods or Initiate Occupancy to use energy sa...

Page 68: ...recovery on schedule or Yes to ramp down temperature early Temperature Limits Select the Minimum Cool and Maximum Heat Limit Keypad Lockout Select Unlocked Partially Locked Locked Clock Format Select 12 Hour or 24 Hour Daylight Saving Time Select Off or On If set to On the system will automatically change time date to account for daylight saving Indoor Display Offsets Select the number of degrees ...

Page 69: ...elect System Setup The thermostat displays the first screen of options that you can change 3 On each screen make changes as needed then touch Next to display new options Repeat this step until you have made all changes Tables on pages 68 69 explain the System Setup screens and options 4 When you have made all changes press Done to save and exit Next Touch the Help button to see information about s...

Page 70: ... business installations you can check a box to display the thermostat name on the home screen Your thermostat controls Select Heating or Cooling or both default Your system type Select Forced Air default Heat Pump or Hot Water or Steam Each option offers different choices on the following screens See Step 9e under Installing your Thermostat on page 24 Your forced air heating system type Select how...

Page 71: ...W and W2 refer to your check list in Step 6 on page 12 Your fan control Select whether your thermostat default or heating system controls the fan Type of changeover valve If you selected Heat Pump on Your system type select whether it uses a cooling changeover valve default or heating changeover valve f you are unsure note which wires you have connected refer to your check list in Step 6 on page 1...

Page 72: ...uter even though it is very close to the thermostat A A Verify that the password entered for the Wi Fi router is correct Q Q My thermostat is unable to register to the Total Connect Comfort website A A Verify that the thermostat is correctly enrolled on your homeWi Fi network At Menu Wi Fi Setup check for the Wi Fi signal strength icon Verify that the Wi Fi router has a good internet connection On...

Page 73: ...d a confirmation email A A Check for the email in your Junk or Deleted folder Q Q Is there a way to extend the signal strength A A Most standard routers can be set up to be a repeater You can also purchase and install a Wi Fi repeater Q Q The thermostat is not responding to my voice commands in any condition A A During thermostat device setup or in the Voice Control Menu you must say Yes to the De...

Page 74: ...s Voice Control might not function correctly when initiating commands from distances greater than 15 feet especially when communicating around walls structures or from other enclosed rooms Q Q Why is my thermostat having a hard time hearing my voice A A The sensitivity setting might be too low Set it to a higher number See page 43 Q Q Why is my thermostat responding to voices that aren t directed ...

Page 75: ...if these assistance options do not answer your questions review the FAQs pages 70 71 and troubleshooting tips pages 75 76 On screen help Most displays include an orange Help button 1 Touch Help to display instructions for using the screen 2 Touch OK to redisplay the original screen Help OK ...

Page 76: ...en you need to correct a setting or system problem 1 Touch the button the thermostat displays instructions for completing the task to which you were alerted 2 Touch OK on the instruction display then carry out the task When the task is complete the alert button will no longer be displayed Replace Air Filter Press for info OK ...

Page 77: ...ire is connected see page 11 Cannot change system setting to Cool Check that System Setup screen Your thermostat controls or Your system type is set to match your heating and cooling equipment see page 68 Fan does not turn on when heat is required Check that System Setup screen Your fan control is set to match your heating equipment see page 69 Wait appears on the screen Compressor protection feat...

Page 78: ...system to Cool Make sure the temperature is set lower than the Inside temperature Check circuit breaker and reset if necessary Make sure power switch at heating and cooling system is on Make sure furnace door is closed securely If Wait is displayed the compressor protection timer is on Wait 5 minutes for the system to restart safely without damaging the compressor see page 62 Heating system is run...

Page 79: ...onventional heating cooling system Non heat pump type systems these include air handlers furnaces or boilers that run on natural gas oil or electricity They may or may not include an air conditioner Jumper Loop In this thermostat a plug with a wire loop located below the terminal block is used to connect the R and Rc terminals MAC ID MAC CRC Alphanumeric codes that uniquely identify your thermosta...

Page 80: ... relocate the receiving antenna Increase the separation between the equipment and receiver Connect the equipment into an outlet on a circuit different from that to which the receiver is connected Consult the dealer or an experienced radio TV technician for help Equipment interface module thermostats and outdoor sensor To comply with FCC and Industry Canada RF exposure limits for general population...

Page 81: ...n of a consumer Honeywell s sole responsibility shall be to repair or replace the product within the terms stated above HONEYWELL SHALL NOT BE LIABLE FOR ANY LOSS OR DAMAGE OF ANY KIND INCLUDING ANY INCIDENTAL OR CONSEQUENTIAL DAMAGES RESULTING DIRECTLY OR INDIRECTLY FROM ANY BREACH OF ANY WARRANTY EXPRESS OR IMPLIED OR ANY OTHER FAILURE OF THIS PRODUCT Some states do not allow the exclusion or li...

Page 82: ...lden Valley MN 55422 wifithermostat com U S Registered Trademark Apple iPhone iPad iPod touch and iTunes are trademarks of Apple Inc All other trademarks are the property of their respective owners 2013 Honeywell International Inc 69 2790ES 05 M S Rev 11 13 Printed in U S A 69 2790ES 05 ...

Page 83: ...Guía del usuario Termostato con pantalla táctil a color programable con conexión WiFi RTH9590 con conexión WiFi y control de voz ...

Page 84: ...y controlar el sistema de calefacción refrigeración Ver y modificar las configuraciones del sistema de calefacción refrigeración Ver y configurar la temperatura y los cronogramas Recibir alertas por correo electrónico y obtener actualizaciones automáticas requiere configuración WiFi y estar registrado Ver la temperatura y humedad exterior requiere configuración WiFi y estar registrado Tarjeta de i...

Page 85: ...ell puede supervisar y controlar de manera remota el sistema de calefacción y refrigeración de su hogar o empresa puede permanecer conectado a su sistema de confort dondequiera que vaya Total Connect Comfort de Honeywell es la solución perfecta si usted viaja frecuentemente tiene un hogar de vacaciones una empresa o si administra una propiedad de inversión o simplemente busca tranquilidad ...

Page 86: ...rmostato existente en la basura si este contiene mercurio en un tubo sellado Comuníquese con Thermostat Recycling Corporation en www thermostat recycle org o al 1 800 238 8192 para obtener información sobre cómo y dónde desechar el termostato de manera adecuada y segura AVISO Para evitar posibles daños al compresor no utilice el aire acondicionado si la temperatura externa es inferior a 50 F 10 C ...

Page 87: ...nfigurar programación de días festivos eventos comercial 48 Configuración de eventos personalizados empresarial 49 Configuración de la programación de días festivos empresarial 51 Configuración de la anulación de días festivos uso empresarial 52 Inicio de la modalidad de ocupación empresarial 53 Cómo personalizar el color de la pantalla 54 Configuración de las preferencias 55 Limpieza de la pantal...

Page 88: ...sualizar las opciones Comience aquí para configurar un cronograma del programa Cronograma actual Cambie la configuración de la temperatura y seleccione el mantenimiento temporal o permanente Condiciones interiores Muestra la temperatura y la humedad interior Fecha y hora actuales Estado actual Muestra la modalidad del sistema calefacción refrigeración Condiciones exteriores Después de registrarla ...

Page 89: ...tato Identifique rápidamente qué termostato controla un sector determinado Cronograma actual Toque una flecha para cambiar la configuración de la temperatura y seleccionar una configuración temporal Anulación Toque esta opción para anular temporalmente el cronograma del programa Condiciones interiores Muestra la temperatura y la humedad interior Fecha y hora actuales Estado actual Muestra la modal...

Page 90: ...listo para funcionar tan pronto como se instale y se registre Instale su termostato Conéctelo a su red inalámbrica doméstica Regístrelo a través de Internet para obtener acceso remoto Antes de comenzar le recomendamos que mire un breve video de instalación Utilice el QR Code ubicado al principio de esta guía o visite wifithermostat com support 2 3 1 ...

Page 91: ... 5 6 mm en yeso opcional Martillo opcional Cinta aislante opcional 1 DESCONECTE la energía eléctrica del sistema de calefacción refrigeración Importante Para proteger el equipo DESCONECTE la energía eléctrica de su sistema de calefacción refrigeración en la caja de interruptores de circuito o el interruptor del sistema o M31535 Caja de interruptores del circuito Interruptor de energía del sistema ...

Page 92: ...os 2a Tome una fotografía de las conexiones de los cables a modo de referencia 2b En caso de que no haya cables conectados al terminal C o de que no existiera un terminal C en el termostato existente mire los videos sobre cableado alternativo disponibles en wifithermostat com support Importante Se requiere el cable C que es la fuente de energía de su termostato Si no tiene el cable C su termostato...

Page 93: ...os cables Consejo Si ninguna etiqueta coincide con la designación de los terminales escriba la letra correcta en una etiqueta adhesiva en blanco 4 Retire la placa de pared existente Quite la placa de pared existente de la pared después de que haya etiquetado y desconectado todos los cables Etiquetas en blanco Etiqueta adhesiva Designación de los terminales C C MCR31537 Consejo Enrosque los cables ...

Page 94: ...exión WiFi Monte la nueva placa de pared con los tornillos y anclajes incluidos con el termostato Si fuese necesario Taladre agujeros de 3 16 in 4 8 mm en paneles de yeso Taladre agujeros de 7 32 in 5 6 mm en yeso Nota Puede utilizar los anclajes de pared existentes Levante la placa de pared en los anclajes existentes para comprobar la alineación Placa de pared ...

Page 95: ... en wifithermostat com Nota No todos los sistemas de calefacción refrigeración identifican el terminal común C de 24 V CA Revise su manual del sistema o comuníquese con el fabricante para conocer cuál es el terminal común de 24 V CA Mire los videos sobre cableado alternativo en wifithermostat com support Cableado Para obtener información sobre los sistemas de calefacción refrigeración convencional...

Page 96: ...retirar un cable utilice la punta de un bolígrafo para presionar la liberación del terminal y luego retire el cable Nota Consulte la foto del cableado que tomó en el paso 2 Consejo Para colocar el cable de manera más sencilla use la punta de un bolígrafo para mantener presionada la liberación del terminal Nota Es posible que el cableado de su aplicación sea diferente del cableado que se muestra a ...

Page 97: ...uidado e Repita los pasos de la a a la d para el resto de los cables f Introduzca el excedente de cables en la abertura de la pared después de haber instalado todos los cables g Continúe con la página 20 Las etiquetas no coinciden Consulte las claves para la instalación de cableado alternativo en las páginas 16 y 17 C Rc R W O B Y G W2 Aux E Y2 L Importante Marque la casilla por cada cable que con...

Page 98: ...ar la liberación del terminal y luego retire el cable Nota Consulte la foto del cableado que tomó en el paso 2 Consejo Para colocar el cable de manera más sencilla use la punta de un bolígrafo para mantener presionada la liberación del terminal Las etiquetas no coinciden Consulte las claves para la instalación de cableado alternativo en las páginas 18 y 19 Nota Es posible que el cableado de su apl...

Page 99: ...es separados en Aux y E conecte estos cables Aux y E y un extremo de un nuevo trozo de cable utilizando un empalme para cables no se incluye Seguidamente deslice el otro extremo del cable nuevo en el terminal W2 Aux E f Introduzca el excedente de cables en la abertura de la pared después de haber instalado todos los cables g Continúe con la página 20 Las etiquetas no coinciden Consulte las claves ...

Page 100: ...Utilícelo si las etiquetas de los cables no coinciden con las etiquetas de los terminales Nota Debe tener un cable C o uno equivalente Consulte la página 11 Consulte las claves de 1 a 2 en la página 17 MCR34541 C R W Y G 2 1 2 C K Rc R W O B Y G W2 Aux E Y2 L W1 W2 Y2 RH 4 V Rc R C1 X B ...

Page 101: ...No utilice el terminal K Para uso futuro Si tiene el cable R y el cable Rc desenchufe el circuito del puente para ello jale el circuito del cable Si su termostato existente tenía cables R y RH conecte el cable R al terminal Rc el cable RH al terminal R y desenchufe el circuito del puente ...

Page 102: ... si las etiquetas de los cables no coinciden con las etiquetas de los terminales Nota Debe tener un cable C o uno equivalente Consulte la página 11 Consulte las claves de 1 a 7 en la página 19 MCR34542 C R O Y G 3 1 C K Rc R W O B Y G W2 Aux E Y2 L 4 5 6 AUX X X2 Y2 2 B 7 X B Rc R V VR 2 L F W W1 W2 ...

Page 103: ...lvula de cambio de refrigeración Consulte la página 69 Si su termostato existente tenía un cable O en lugar de un cable B conecte el cable O al terminal O B Si su termostato existente tenía cables Y1 W1 y W2 separados visite wifithermostat com para obtener ayuda Si el termostato existente tiene cables separados en Aux y E utilice un empalme de cables para unir ambos cables a un cable independiente...

Page 104: ... 05 20 Instalación del termostato 7 Conecte el termostato a la placa de pared Alinee el termostato con la placa de pared y luego presiónelo para que calce en su lugar Termostato Placa de pared LEVEL HERE M34498 ...

Page 105: ...ato y al sistema de calefacción refrigeración 8b Verifique que la puerta del sistema de calefacción refrigeración esté fija 8c Vuelva a ENCENDER su sistema de calefacción refrigeración en la caja de interruptores de circuito o el interruptor de energía Caja de interruptores del circuito Interruptor de energía del sistema de calefacción refrigeración o ...

Page 106: ...alefacción refrigeración Idioma Hogar o Comercial En otro momento puede personalizar otras opciones 9 Siga las instrucciones que aparecen en la pantalla para seleccionar las opciones adecuadas 9a Toque el idioma que desea que el termostato muestre y luego toque Siguiente 9b Seleccione Instalación para el hogar o comercio luego toque Siguiente Siguiente Siguiente ...

Page 107: ...iguiente o identifique la ubicación del termostato 9d Seleccione lo que controlará su termostato y toque Siguiente Nota Para obtener más información toque el botón anaranjado de ayuda que se encuentra en cualquier pantalla Siguiente Siguiente ...

Page 108: ...onfiguración Use la lista de comprobación del paso 6c para que le ayude a hacer selecciones adicionales después de haber seleccionado el tipo de sistema 9g Toque Siguiente después de hacer uso de las opciones de cada pantalla 9h Toque Terminado en la última pantalla El termostato muestra una opción para conexión a su red Wi Fi Nota Para obtener más información toque el botón anaranjado de ayuda qu...

Page 109: ...las redes WiFi que se han encontrado Nota Si en este momento no puede completar este paso toque Lo haré después El termostato mostrará el acuerdo del control de voz Responda a esa pantalla consulte la página 27 y el termostato mostrará la pantalla principal Finalice este proceso seleccionando MENÚ Configuración WiFi Continúe con el Paso 2 2 Seleccione la red 2a Toque el nombre de la red que desea ...

Page 110: ...ere y luego aparece la pantalla Conexión satisfactoria 2d Toque Siguiente para visualizar la pantalla de información de registro 2e Ingrese los números de identificación MAC y CRC de su termostato Necesita estos números para completar el registro a través de Internet Terminado Ingrese la contraseña de la red WiFi para su red Su termostato se ha conectado sa sfactoriamente a su red OK ...

Page 111: ...ruirá que lea el acuerdo del control de voz y responda presionando Sí para activar el control de voz No para dejarlo desactivado o Ayuda para más información Consulte la página 43 para obtener más información Nota Si toca Terminado antes de registrarlo a través de Internet la pantalla de inicio muestra un botón anaranjado de alerta que le informa que debe registrar su termostato Al tocar dicho bot...

Page 112: ...rmostato mostrará una pregunta para confirmar su selección 4 Toque Sí para confirmar que desea desconectarse de la red El termostato mostrará la pantalla de configuración WiFi 5 Toque OK para mostrar el menú MENÚ Configuración Wi Fi Desconectar de la red Su red Desconocido Sí Está seguro de que desea desconectarse de su red ...

Page 113: ...ue caracteres para deletrear su contraseña de red doméstica luego toque Terminado 5 El termostato muestra Conectándose a su red Favor esperar luego una pantalla de Conexión satisfactoria 6 Toque Siguiente Si su termostato está registrado verá la potencia de su señal y otra información del estatus Toque Terminado Si la pantalla muestra Regístrelo a través de Internet para obtener acceso remoto siga...

Page 114: ...r el termostato con conexión WiFi de manera remota debe tener una cuenta en Total Connect Comfort Siga los siguientes pasos 1 Abra el sitio web Total Connect Comfort Vaya a mytotalconnectcomfort com Mire el video Registro del termostato con conexión WiFi en wifithermostat com support ...

Page 115: ...las instrucciones en la pantalla 2b Revise su correo electrónico para verificar si tiene un mensaje de activación de My Total Connect Comfort Esto puede demorar varios minutos Nota Si no recibió un mensaje de activación revise su correo no deseado o use otra dirección de correo electrónico 2c Siga las instrucciones de activación que se encuentran en el correo electrónico 2d Inicie sesión ...

Page 116: ...el termostato Las identificaciones no distinguen mayúsculas de minúsculas U S Registered Trademark 2012 Honeywell International Inc 69 2723EFS 01 M S 04 12 Printed in U S A HONEYWELL MODEL RTH8580WF MAC ID MAC CRC 69 2723EFS 01 Thermostat ID Card Use the MAC ID and CRC ID to register this product at mytotalconnectcomfort com Carte d identification de thermostat Utilisez l identification MAC et l i...

Page 117: ...RO EXITOSO Ahora puede controlar su termostato desde cualquier lugar a través de su computadora portátil computadora tipo tableta o teléfono inteligente GET IT ON Download on iTunes La aplicación gratuita de Total Connect Comfort se encuentra disponible para los dispositivos Apple iPhone iPad y iPod touch en iTunes o en Google Play para todos los dispositivos Android ...

Page 118: ...an la hora y la fecha correctas 4 Toque Terminado para guardar o Cancelar para ignorar los cambios Nota Este termostato se actualizará automáticamente para el horario de verano si se observa en su área y almacena toda la información de fecha hora Si el termostato está conectado a Wi Fi y registrado a Total Connect Comfort la hora actual se actualiza desde el Internet Vie Jun 14 2013 6 30 pm Termin...

Page 119: ...do Automático El ventilador funciona solo cuando el sistema de calefacción o refrigeración está encendido Circulación El ventilador funciona de forma aleatoria aproximadamente el 35 del tiempo uso doméstico únicamente Seguir el cronograma El ventilador está controlado mediante configuraciones programadas consulte las páginas 37 42 Note Toque Automático Auto o Encendido para anular temporalmente el...

Page 120: ...os sistemas de calefacción refrigeración Automático El termostato selecciona la calefacción o la refrigeración según fuera necesario conforme a la temperatura interior Calefacción de emergencia bombas de calor con calefacción auxiliar Controla la calefacción auxiliar de emergencia El compresor se bloquea 3 Toque Terminado para guardar y salir SISTEMA Terminado Note Es posible que no aparezcan las ...

Page 121: ...0 00 pm 62 F 16 6 C 82 F 27 7 C 62 F 16 6 C 82 F 27 7 C Refrigeración de lunes a viernes Hora de inicio Calefacción de lunes a viernes Período Calefacción sábados y domingos Refrigeración sábados y domingos Uso doméstico Ocupado 1 8 00 am 70 F 21 1 C 75 F 23 8 C Encendido Desocupado 1 10 00 pm 55 F 12 7 C 85 F 29 4 C Automático Ocupado 2 12 00 am 70 F 21 1 C 75 F 23 8 C Encendido Desocupado 2 12 0...

Page 122: ...leta y realizar ajustes rápidos Toque Guíame para crear una programación respondiendo preguntas simples Toque Lo haré yo mismo para crear de forma manual un cronograma del programa Consulte la página 39 Nota Para disminuir costos use las configuraciones de ahorro de energía preestablecidas que se describen en la página 37 MENÚ Crear Editar horario ...

Page 123: ...é yo mismo en la pantalla Crear editar programación página 38 siga los siguientes pasos 1 Seleccione los días para programar toque Siguiente 2 Toque Despertar para establecer el horario del período Despertar para los días seleccionados Siguiente 6 00 am DESPERTAR ...

Page 124: ...ar Luego toque Terminado 4 Toque otros períodos Salir Regresar Dormir para configurar la hora y las temperaturas para cada uno de ellos 5 Toque Terminado para guardar y salir Nota Toque Borrar período para eliminar los períodos no deseados Nota Toque Ventilador ajustes para personalizar las configuraciones del ventilador para cualquier período Terminado ...

Page 125: ... Sostener hasta lado izquierdo La programación se reanudará cuando finalice el tiempo de Sostener hasta 2 Toque Cambiar a sost permanente para mantener la misma temperatura hasta que la cambie o reinicie el cronograma del programa 3 Toque Reiniciar Horario en cualquier momento para reanudar el cronograma del programa Cambiar a sost permanente ...

Page 126: ...ión de la anulación en Preferencias avanzadas página 64 Toque Anulación para utilizar una temperatura de ocupación preestablecida si una persona usa la habitación durante un período desocupado La nueva temperatura podrá mantenerse durante una hora y regularse hasta el tiempo máximo configurado en la pantalla Duración de la anulación en Preferencias avanzadas página 64 El cronograma programado se r...

Page 127: ...es opciones Voz activada desactivada activa o desactiva el control de voz Cuando está desactivado el termostato funciona como un termostato normal Volumen ajusta el volumen del altavoz del termostato Sensibilidad cambia la sensibilidad del receptor de audio del termostato Mientras más alto sea el número mayor receptividad tendrá el termostato a una orden de voz pero existirá mayor probabilidad de ...

Page 128: ...llo Thermostat Hola termostato Esta frase activa el control de voz 2 Hello Please say a command Hola Por favor dé una orden 3 Make it 5 degrees warmer cooler Sube baja la temperatura 5 grados Consulte la lista completa de las órdenes en la página 45 4 One moment please changing setpoint to Un momento por favor cambiando el punto de ajuste a Si el termostato no responde en el paso 2 o el 4 regrese ...

Page 129: ...ción de la temperatura en 4 grados F Make it 1 10 degrees warmer cooler El usuario selecciona los cambios en la configuración de temperatura entre 1 y 10 grados F I m feeling hot cold Cambia la configuración de la temperatura en 1 grado F What can I say Proporciona una lista de órdenes disponibles Para la lista de órdenes actual wifithermostat com voicecommands ...

Page 130: ... o t para ver el estado de todos los equipos que controla su termostato Según la manera en que se instaló su termostato la pantalla de estado del equipo puede generar información sobre los siguientes sistemas Calefacción y refrigeración Ventilador Información del termostato MENÚ Estatus del equipo Terminado ...

Page 131: ...e Modo vacaciones 3 Toque s o t para seleccionar la fecha en que se marcha luego toque Siguiente para obtener más detalles sobre la programación se incluyen horas del día configuraciones de temperatura fecha de regreso y configuraciones para el regreso 4 Revise lo que ha elegido en la última pantalla y toque Terminado para guardar sus configuraciones Toque Previo luego Cancelar para ignorar los ca...

Page 132: ...ccione el ítem que desea programar Eventos personalizados le permite configurar otros días para programaciones especiales Las opciones de Días festivos de EE UU y Canadá le permiten elegir de una lista de días festivos comúnmente observados en cada país 4 Elija según se le instruya en cada pantalla Para obtener más información consulte las dos páginas siguientes 5 Toque Terminado para guardar sus ...

Page 133: ...a mantenerlas durante un evento específico Puede configurar un evento para una fecha específica o un día del mes El termostato reanuda la programación normal después del evento 1 Seleccione Eventos personalizados del menú Programación de días festivos eventos 2 Seleccione Crear nuevo evento Eventos personalizados Crear nuevo evento ...

Page 134: ...e inicio las configuraciones la fecha de finalización y la frecuencia del evento Para la opción Mes Día de la semana debe seleccionar un mes un día de la semana una semana del mes las configuraciones la duración del evento y la frecuencia del evento 4 Revise las configuraciones y toque Terminado para guardarlas Toque Previo luego Cancelar para ignorar los cambios Terminado Siguiente ...

Page 135: ...regar Editar días festivos Aparecerá una lista de los días festivos nacionales 3 Toque la casilla al lado de cada día festivo en el cual desea mantener una configuración específica toque s o t para desplazarse por la lista de días festivos y luego toque Siguiente Configure la programación de días festivos para temperaturas de ocupado o desocupado dependiendo si el edificio estará en uso 4 Toque s ...

Page 136: ...caciones 3 Toque s o t para seleccionar las temperaturas de calefacción y refrigeración luego toque Siguiente para seleccionar la fecha de regreso 4 Revise las configuraciones y toque Terminado para guardarlas Toque Previo luego Cancelar para ignorar los cambios Nota La temperatura de refrigeración solo se puede establecer en un valor más alto que la configuración del programa del período desocupa...

Page 137: ...oque el botón para mantener una temperatura confortable mientras la habitación esté ocupada Toque los botones s o t para configurar la temperatura o la hora de Sostener hasta La temperatura se mantiene solamente hasta el tiempo que usted configuró La temperatura regresa a un nivel para ahorro de energía después de que finalice el temporizador o el período Ocupado Presione para iniciar el período d...

Page 138: ...fondo predeterminado o seleccione Personalizar para definir su propio color de fondo y texto Si selecciona el nombre de un color la pantalla muestra un ejemplo a la izquierda Toque Terminado para aceptar esa preferencia Si toca Personalizado la pantalla le muestra instrucciones Toque Siguiente para avanzar por las opciones toque Terminado cuando esté satisfecho con sus cambios Temas de color Termi...

Page 139: ...tuaciones 1 Toque MENÚ y seleccione Preferencias 2 Seleccione una opción y siga las instrucciones Recordatorios Opciones del programa del servicio eléctrico Luz posterior Tecnología Smart Response Preferencias avanzadas Restablecer programación predeterminada 3 Toque Terminado para guardar sus configuraciones Toque Cancelar para ignorar los cambios MENÚ Preferencias ...

Page 140: ... le pregunta si desea limpiar la pantalla durante 30 segundos 3 Toque Sí Un contador de cuenta regresiva muestra el tiempo transcurrido hasta que se reactive la pantalla Nota NO rocíe ningún líquido directamente sobre el termostato Rocíe los líquidos sobre un paño después utilice el paño húmedo para limpiar la pantalla Utilice agua o el limpiador para vidrios que utiliza en casa Evite utilizar lim...

Page 141: ...raciones de seguridad 2 Seleccione Cambiar modo de bloqueo 3 Seleccione una opción y siga las instrucciones Desbloqueado Acceso total permitido Parcialmente bloqueado Solo se puede cambiar la temperatura Totalmente bloqueado Acceso no permitido Nota Si elige utilizar una contraseña para mayor seguridad escríbala aquí para su referencia MENÚ Configuraciones de seguridad Cambiar modo de bloqueo ...

Page 142: ...e ocurra la actualización Las actualizaciones se realizan durante las primeras horas del día Una vez que su termostato reciba el software este se reinicia y se muestra brevemente el logotipo de Honeywell Luego la pantalla muestra el mensaje Actualizando el software y se observa una barra de progreso verde Cuando finaliza la actualización su pantalla de inicio aparecerá como es habitual Nota Si no ...

Page 143: ...t por ejemplo si se muda y deja el termostato siga los siguientes pasos 1 Desde mytotalconnectcomfort com inicie sesión en su cuenta 2 En Mi cuenta seleccione Editar mi perfil 3 Haga clic en el botón Borrar mi cuenta Su termostato mostrará un botón anaranjado que sugiere Registrarlo a través de Internet ...

Page 144: ...se alcance esa temperatura a la hora que usted configuró Por ejemplo Configure la hora de despertarse a las 6 00 a m y la temperatura en 70 F 21 1 C La calefacción se encenderá antes de las 6 00 a m para que la temperatura esté en 70 F 21 1 C a las 6 00 a m Nota Seleccione Tecnología Smart Response en el menú Preferencias página 55 Se mostrará el mensaje in recovery en recuperación cuando el siste...

Page 145: ...61 Purga previa a la ocupación Esta función de uso empresarial enciende el ventilador de 1 a 3 horas antes del período ocupado para brindar un ambiente de trabajo confortable cuando usted llegue ...

Page 146: ... compresor El termostato conserva el compresor apagado durante unos minutos antes de volver a arrancar para evitar daños al equipo Durante el tiempo que permanece apagado el mensaje esperando por el equipo se muestra en la pantalla ...

Page 147: ...gún la temperatura interior Las configuraciones de calefacción y refrigeración deben tener al menos una diferencia de tres grados El termostato ajustará automáticamente las configuraciones para mantener esta diferencia de tres grados Nota Seleccione Conversión automática en la pantalla Conversión del sistema de calefacción y refrigeración que se encuentra en Preferencias avanzadas Consulte la secc...

Page 148: ...es 2 Seleccione Preferencias Preferencias avanzadas El termostato muestra la primera pantalla de opciones que puede modificar 3 En cada pantalla realice los cambios necesarios luego toque Siguiente para visualizar las nuevas opciones Vuelva a realizar este paso hasta que haya realizado todos los cambios Las tablas que figuran en las páginas 65 66 explican las pantallas y las opciones disponibles e...

Page 149: ...istema de calefacción y refrigeración Seleccione Manual o Automático Cantidad de períodos programados Seleccione dos períodos por día o cuatro períodos por día Consulte la página 37 Duración de la purga previa a la ocupación Seleccione cuánto tiempo funcionará el ventilador antes de cada período ocupado Apagado 1 2 o 3 horas Tipo de anulación Seleccione la opción Estándar Standard para mantener lo...

Page 150: ...disminuir la temperatura temprano Límites de temperatura Seleccione el límite mínimo de refrigeración y el límite máximo de calefacción Bloqueo del teclado Seleccione Desbloqueado Parcialmente bloqueado Bloqueado Formato del reloj Seleccione 12 horas o 24 horas Horario de verano Seleccione Desactivado Off o Activado On Si selecciona Activado On el sistema cambiará automáticamente el horario o la f...

Page 151: ... muestra la primera pantalla de opciones que puede modificar 3 En cada pantalla realice los cambios necesarios luego toque Siguiente para visualizar las nuevas opciones Vuelva a realizar este paso hasta que haya realizado todos los cambios Las tablas de las páginas 68 69 explican las pantallas y las opciones de la configuración del sistema 4 Cuando haya implementado todas las modificaciones presio...

Page 152: ... tiene solo un termostato puede dejarle el nombre como THERMOSTATO En instalaciones comerciales puede marcar una casilla para mostrar el nombre del termostato en la pantalla de inicio Controles del termostato Seleccione Calefacción o refrigeración o ambos predeterminado Tipo de sistema Seleccione Aire forzado predeterminado bomba de calor o agua caliente o vapor Cada opción ofrece diferentes posib...

Page 153: ...u lista de comprobación en el paso 6 Instalación del termostato de la página 12 Control del ventilador Seleccione qué controla el ventilador el termostato predeterminado o el sistema de calefacción Tipo de válvula de cambio Si seleccionó la bomba de calor en Tipo de sistema elija si utiliza una válvula de cambio de refrigeración predeterminado o una válvula de cambio de calefacción Si no está segu...

Page 154: ... WiFi aunque se encuentren muy cerca R R Verifique que la contraseña ingresada en el enrutador WiFi sea correcta P P No puedo registrar mi termostato en el sitio web Total Connect Comfort R R Verifique que el termostato esté inscrito correctamente en su red doméstica WiFi Desde MENÚ Configuración WiFi verifique el icono de la potencia de la señal WiFi Verifique que el enrutador WiFi tenga una buen...

Page 155: ...l mensaje no esté en la carpeta Correo no deseado o Eliminados P P Hay alguna forma de ampliar la potencia de la señal R R La mayoría de los enrutadores estándar se pueden configurar para que actúen como repetidores También puede comprar e instalar un repetidor WiFi P P El termostato no está respondiendo a mis órdenes de voz en ninguna de las condiciones R R Durante la configuración del dispositiv...

Page 156: ...nte cuando inicia las órdenes a una distancia superior a 15 pies 4 6 m especialmente cuando se comunica alrededor de paredes estructuras o desde otras habitaciones interiores P P Por qué le resulta difícil al termostato escuchar mi voz R R Es posible que la configuración de sensibilidad esté demasiado baja Configure a un número más alto Consulte la página 43 P P Por qué el termostato responde a vo...

Page 157: ... sus dudas consulte las preguntas más frecuentes páginas 70 71 y los consejos sobre la localización y solución de problemas páginas 75 77 Ayuda en la pantalla La mayoría de las pantallas incluyen un botón anaranjado de ayuda 1 Toque Ayuda para visualizar las instrucciones de uso de la pantalla 2 Toque OK para volver a mostrar la pantalla original Ayuda OK ...

Page 158: ...te corregir una configuración o un problema del sistema 1 Toque el botón el termostato muestra instrucciones para finalizar la tarea sobre la cual se le alertó 2 Toque OK en la pantalla de instrucciones y luego lleve a cabo la tarea Cuando la tarea haya finalizado el botón de alerta no seguirá mostrándose Reemplace el filtro de aire Presionar para info OK ...

Page 159: ... puerta del sistema de calefacción esté bien cerrada Asegúrese de que el cable C esté conectado consulte la página 11 No se puede cambiar la configuración del sistema a Refrigeración Revise que la pantalla de configuración del sistema Controles del termostato o Tipo de sistema está configurado de modo que se pueda utilizar con su equipo de calefacción y refrigeración consulte la página 68 El venti...

Page 160: ...reinicie el sistema de forma segura sin dañar el compresor Los problemas con la bomba de calor hacen que se enfríe el aire en la modalidad de calefacción o que se caliente el aire en la modalidad de refrigeración Revise la configuración de la pantalla de programación del sistema Tipo de válvula de cambio para comprobar que está adecuadamente configurada para su sistema consulte la página 69 ...

Page 161: ...n y refrigeración esté encendido Asegúrese de que la puerta del sistema de calefacción esté bien cerrada Si en la pantalla aparece Esperar Wait el temporizador de protección del compresor está encendido Espere cinco minutos para que el sistema se vuelva a iniciar de forma segura sin dañar el compresor consulte la página 62 El sistema de calefacción está funcionando en la modalidad de refrigeración...

Page 162: ...ión refrigeración convencional Estos sistemas no cuentan con una bomba de calor Incluyen controladores de aire equipos de calefacción o calderas que funcionan con gas natural aceite o electricidad Pueden o no incluir un aire acondicionado Circuito del puente En este termostato se utiliza un enchufe con un circuito del cable que se ubica debajo del bloque del terminal para conectar los terminales R...

Page 163: ...didas Vuelva a orientar y ubicar la antena receptora Aumente la distancia entre el equipo y el receptor Conecte el equipo a un tomacorriente en un circuito diferente a aquel en el que está conectado el receptor Consulte con su distribuidor o con un técnico experto en radio televisión para recibir ayuda Módulo de interfaz del equipo termostatos y sensor para interiores Para cumplir con los límites ...

Page 164: ...en posesión de un consumidor La única responsabilidad de Honeywell será la de reparar o reemplazar el producto dentro de los términos mencionados anteriormente HONEYWELL NO SERÁ RESPONSABLE POR LA PÉRDIDA NI EL DAÑO DE NINGÚN TIPO QUE INCLUYE CUALQUIER DAÑO INCIDENTAL O CONSECUENTE QUE RESULTE DIRECTA O INDIRECTAMENTE DE CUALQUIER INCUMPLIMIENTO DE CUALQUIER GARANTÍA EXPRESA O IMPLÍCITA O DE CUALQ...

Page 165: ......

Page 166: ...iales de Apple Inc Todas las demás marcas comerciales son propiedad de sus respectivos dueños 2013 Honeywell International Inc 69 2790ES 05 M S Rev 11 13 Impreso en EE UU Automatización y control desenlace Honeywell International Inc 1985 Douglas Drive North Golden Valley MN 55422 wifithermostat com ...

Reviews: