background image

 21 

 Installation de votre thermostat

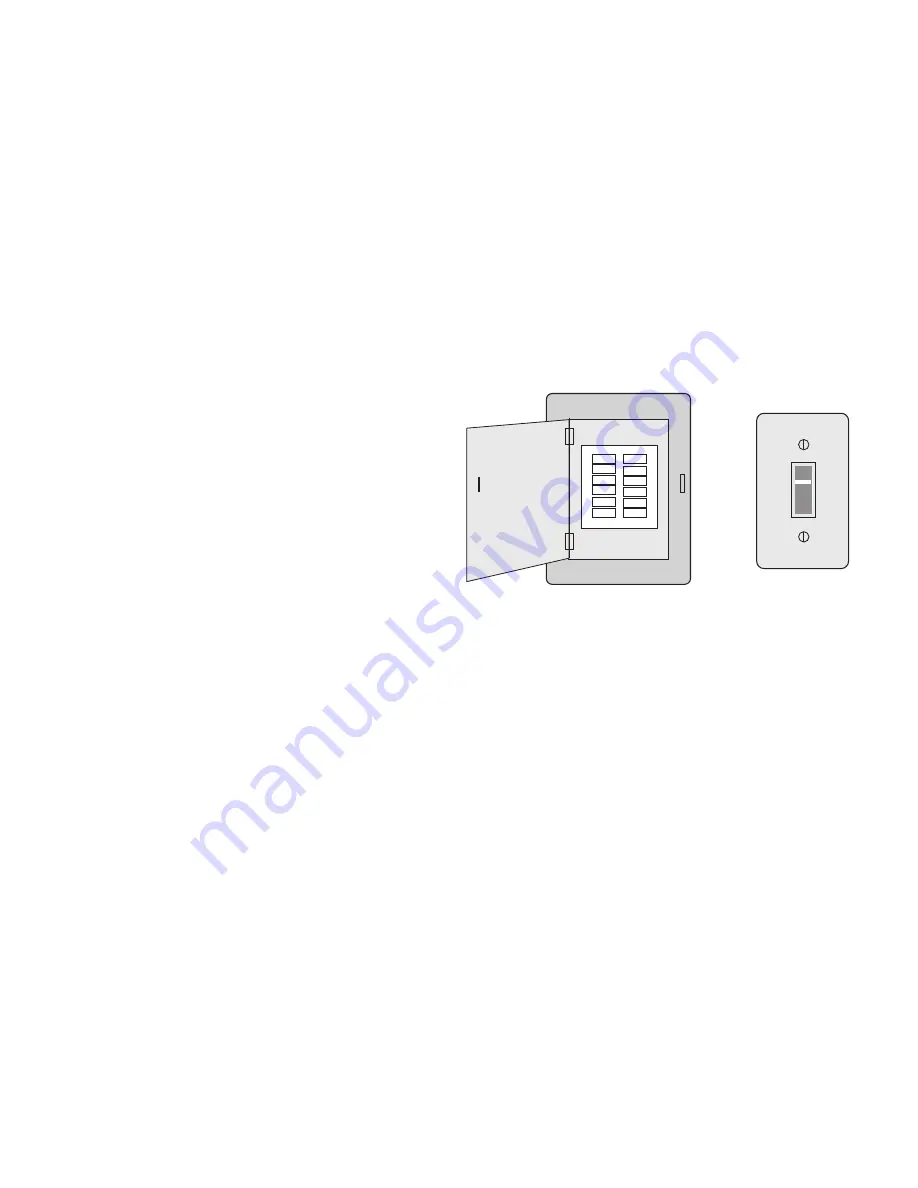
8  Mettez le système de chauffage/

refroidissement en marche.

Important!

8a  Vérifiez que le fil C est 

branché sur le thermostat et 
sur le système de chauffage/
refroidissement.

8b  Assurez-vous que la porte 

du système de chauffage/
refroidissement est bien fermée.

8c  Rétablissez l’alimentation 

du système de chauffage/
refroidissement au niveau de 
la boîte des disjoncteurs ou de 
l’interrupteur d’alimentation.

ou

Boîte des 

disjoncteurs

Interrupteur 

d’alimentation 

du système 

de chauffage/

refroidissement

Summary of Contents for RTH9580 Wi-Fi

Page 1: ...User Guide Wi Fi Color Touchscreen Programmable Thermostat RTH9580 Wi Fi ...

Page 2: ... you can Connect to the Internet to monitor and control your heating cooling system View and change your heating cooling system settings View and set temperature and schedules Receive alerts via email and get automatic upgrades View outdoor temperature and humidity requires Wi Fi set up and registration Thermostat ID Card Wire labels User Guide ...

Page 3: ...Solutions you can remotely monitor and control the heating and cooling system in your home or business you can stay connected to your comfort system wherever you go Honeywell s Total Connect Comfort is the perfect solution if you travel frequently own a vacation home a business or manage an investment property or if you are simply looking for peace of mind ...

Page 4: ...rmostat in the trash if it contains mercury in a sealed tube Contact the Thermostat Recycling Corporation at www thermostat recycle org or 1 800 238 8192 for information on how and where to properly and safely dispose of your old thermostat NOTICE To avoid possible compressor damage do not run air conditioner if the outside temperature drops below 50 F 10 C Need help Visit wifithermostat com or ca...

Page 5: ...old home 44 Setting holiday event schedules business 45 Setting custom events business 46 Setting holiday schedule business 48 Setting holiday override business 49 Initiating occupancy mode business 50 Customizing screen color 51 Setting preferences 52 Cleaning the thermostat screen 53 Adjusting security settings 54 Software updates 55 Unregistering your thermostat 56 Smart Response Technology 57 ...

Page 6: ...isplay options Start here to set a program schedule Current schedule Change temperature setting and select temporary or permanent hold Indoor conditions Shows indoor temperature and humidity Current date and time Current status Shows system mode heat cool Outdoor conditions Outdoor temperature and humidity appear after registration ...

Page 7: ...uickly identify which thermostat is in control of a specific area Current schedule Touch an arrow to change temperature setting and set a temporary hold Override Touch to temporarily override the program schedule Indoor conditions Shows indoor temperature and humidity Current date and time Current status Shows system mode heat cool Outdoor conditions Outdoor temperature and humidity appear after r...

Page 8: ...mmed and ready to go as soon as it is installed and registered Install your thermostat Connect it to your home wireless network Register online for remote access Before you begin you may want to watch a brief installation video Use the QR Code at the front of this guide or go to wifithermostat com support 2 3 1 ...

Page 9: ...onal Drill and bits 3 16 for drywall 7 32 for plaster optional Hammer optional Electrical tape optional 1 Switch OFF power to your heating cooling system Important To protect your equipment switch OFF the power to your heating cooling system at the breaker box or the system switch or Circuit breaker box Heating cooling system power switch ...

Page 10: ... Take a picture of the wire connections for later reference 2b If no wire is connected to a terminal labeled C or no C terminal exists on the old thermostat view the Alternate Wiring videos at wifithermostat com videos Important C wire is required and is the power source for your thermostat Without a C wire your thermostat will not power up Note You will need a picture of your wire connections to ...

Page 11: ...l designations not by wire color Note If no tag matches a terminal designation write the appropriate letter on a blank sticky tag 4 Remove wallplate Remove the old wallplate from the wall after all wires have been labeled and disconnected Blank tags Sticky tag Terminal designation C C Note Wrap the wires around a pencil to prevent them from falling back into the wall ...

Page 12: ... new wallplate using screws and anchors included with the thermostat If necessary Drill 3 16 in holes for drywall Drill 7 32 in holes for plaster Note You may be able to use your existing wall anchors Hold the wallplate up to the existing anchors to check for alignment Installing your thermostat Wallplate ...

Page 13: ...your heating cooling system Check the video section at wifithermostat com Note Not all heating cooling systems label the 24 VAC common C Check your system manual or contact the manufacturer to find out which terminal is the 24 VAC common View the Alternate Wiring videos at wifithermostat com videos Wiring For conventional heating cooling systems natural gas oil or electric furnace air conditioner ...

Page 14: ...until it clicks into place If you need to remove a wire use a pen tip to press the terminal release and then pull wire out Note Refer to the wiring picture you took in Step 2 Tip To make it easier to slide the wire into place use a pen tip to hold down the terminal release Note The wiring for your application might be different than the wiring shown below Labels don t match See alternate wiring ke...

Page 15: ...ify wire is firmly secured by gently pulling on wire e Repeat steps a d for all other wires f Push any excess wire back into the wall opening after all wires are installed g Continue to page 20 Labels don t match See alternate wiring keys on pages 16 17 Important Check the box for each wire you connect You will need this information in Step 9 C K Rc R W O B Y G W2 Aux E Y2 L ...

Page 16: ...en tip to press the terminal release and then pull the wire out Note Refer to the wiring picture you took in Step 2 Tip To make it easier to slide the wire into place use a pen tip to hold down the terminal release Note The wiring for your application might be different than the wiring shown below C K Rc R W O B Y G W2 Aux E Y2 L O Y G R C AUX Labels don t match See alternate wiring keys on pages ...

Page 17: ...ther wires Note If old thermostat has separate wires on AUX and E use a wire nut to attach both wires to a separate wire Slide this third wire into the W2 Aux E terminal f Push any excess wire back into the wall opening after all wires are installed g Continue to page 20 Labels don t match See alternate wiring keys on pages 18 19 Important Check the box for each wire you connect You will need this...

Page 18: ...iring Conventional System Use this if your wire labels don t match the terminal labels Note You must have a C wire or equivalent See page 11 See key to 1 2 on page 17 C R W Y G 2 1 2 C K Rc R W O B Y G W2 Aux E Y2 L W1 W2 Y2 RH 4 V Rc R C1 X B ...

Page 19: ...em 2 1 Do not use K terminal For future use If you have both an R and Rc wire unplug the jumper loop by pulling on the wire loop If your old thermostat had both R and RH wires connect the R wire to the Rc terminal the RH wire to the R terminal and unplug the jumper loop ...

Page 20: ... Pump System Use this if your wire labels don t match the terminal labels Note You must have a C wire or equivalent See page 11 See key to 1 7 on page 19 C R O Y G 3 1 C K Rc R W O B Y G W2 Aux E Y2 L 4 5 6 AUX X X2 Y2 2 B 7 X B Rc R V VR 2 L F W W1 W2 ...

Page 21: ...een select Cooling Changeover Valve See page 66 If your old thermostat had an O wire and not a B wire attach the O wire to the O B terminal If your old thermostat had separate Y1 W1 and W2 wires check wifithermostat com for help If the old thermostat has separate wires on Aux and E use a wire nut to attach both wires to a separate wire Slide this third wire into the W2 Aux E terminal This is the s...

Page 22: ...20 Installing your thermostat 7 Attach thermostat to wallplate Align the thermostat with the wallplate and then snap into place Thermostat Wallplate LEVEL HERE ...

Page 23: ...the C wire is connected at the thermostat and at the heating cooling system 8b Make sure the heating cooling system door is firmly secured 8c Switch power back ON for your heating cooling system at the breaker box or its power switch or Circuit breaker box Heating cooling system power switch ...

Page 24: ...ptions to define your heating cooling system Language Home or business You can customize other options later 9 Follow prompts on the screen to select appropriate options 9a Touch the language you want the thermostat to display then touch Next 9b Select Home or Business installation then touch Next Next Next ...

Page 25: ...ouch Next or name the thermostat location touch THERMOSTAT and follow the rest of the instructions 9d Select what your thermostat will control and touch Next Note Touch the orange Help button on any screen for more information Next Next ...

Page 26: ...ons for completing initial setup Use the checklist from Step 6d when making selections 9f Touch Next after making selections on each screen 9g Touch Done on the last screen The thermostat displays an option to connect to your Wi Fi network Note Touch the orange Help button on any screen for more information Next ...

Page 27: ...ssage Searching for wireless networks Please wait after which it displays a list of all Wi Fi networks it can find Note If you cannot complete this step now touch I ll do it later The thermostat will display the home screen Complete this process by selecting MENU Wi Fi Setup Continue with Step 2 2 Select the network 2a Touch the name of the network you want to use The thermostat displays a passwor...

Page 28: ...etwork password 2c Touch Done The thermostat displays Connecting to your network Please wait then shows a Connection Successful screen 2d Touch Next to display the registration information screen 2e Note your Thermostat MAC and Thermostat CRC You need these numbers to complete online registration Done Next ...

Page 29: ...screen remains active until you complete registration and or touch Done Note If you touch Done before you register online your home screen displays an orange alert button telling you to register Touching that button displays registration information and an option to snooze the task Done Register online for remote access Press for info ...

Page 30: ...sconnect from Network The thermostat will display a question to confirm your selection 4 Touch Yes to confirm that you want to disconnect from the network The thermostat will display the Wi Fi Setup screen 5 Touch OK to display the menu MENU Wi Fi Setup Disconnect from Network Yes ...

Page 31: ...haracters to spell out your home network password then touch Done 5 The thermostat displays Connecting to your network Please wait then a Connection Successful screen 6 Touch Next If your thermostat is registered you will see your signal strength and other status information Touch Done If the screen displays Register Online for Remote Access follow instructions on page 30 MENU Wi Fi Setup ...

Page 32: ...y you must have a Total Connect Comfort account Use the following steps 1 Open the Total Connect Comfort web site Go to mytotalconnectcomfort com View the Wi Fi Thermostat Registration video at wifithermostat com videos Registering your thermostat online ...

Page 33: ...ate An Account 2a Follow the instructions on the screen 2b Check your email for an activation message from My Total Connect Comfort This may take several minutes Note If you do not receive a response check your junk mailbox or use an alternate e mail address 2c Follow activation instructions in the email 2d Log in ...

Page 34: ...mostat package The IDs are not case sensitive U S Reg stered Trademark 2012 Honeywell Interna ional Inc 69 2723EFS 01 M S 04 12 Pr n ed n U S A HONEYWELL MODEL RTH8580WF MAC ID MAC CRC 69 2723EFS 01 Thermostat ID Card Use the MAC ID and CRC ID to register this product at mytotalconnectcomfort com Carte d identification de thermostat Uti isez l identification MAC et l dentification CRC pour enregis...

Page 35: ... registration screen will display a SUCCESS message You can now control your thermostat from anywhere through your laptop tablet or smartphone GET IT ON Download on iTunes Total Connect Comfort free app is available for Apple iPhone iPad and iPod touch devices at iTunes or at Google Play for all Android devices ...

Page 36: ...e is displayed 4 Touch Done to save or Cancel to ignore changes Note This thermostat will automatically update for daylight saving time if observed in your area and all date time information is stored If the thermostat is connected to Wi Fi and registered to Total Connect Comfort the current time is updated from the internet Fri Jun 14 2013 6 30 pm Done 30 ...

Page 37: ...h Done to save and exit On Fan is always on Automatic Fan runs only when the heating or cooling system is on Circulate Fan runs randomly about 35 of the time home use only Follow Schedule Fan controlled by program see pages 37 42 Note Touch Auto or On to temporarily override the programmed fan schedule FAN Done ...

Page 38: ... Off Heating cooling systems are off Automatic Thermostat selects heating or cooling as needed depending on the indoor temperature Emergency Heat heat pumps with aux heat Controls auxiliary emergency heat Compressor is locked out 3 Touch Done to save and exit Note The Automatic and Emergency Heat system settings may not appear depending on how your thermostat was installed SYSTEM Done ...

Page 39: ...8 00 am 62 85 62 85 Return 6 00 pm 70 78 70 78 Sleep 10 00 pm 62 82 62 82 Cool Mon Fri Start time Heat Mon Fri Period Heat Sat Sun Cool Sat Sun Home Use Occupied 1 8 00 am 70 75 On Unoccupied 1 10 00 pm 55 85 Auto Occupied 2 12 00 am 70 75 On Unoccupied 2 12 00 am 55 85 Auto Cool Start time Heat Period Fan Business Use Period 2 is cancelled by default If you activate it the values shown above are ...

Page 40: ...iew the full schedule and make a quick adjustment Touch Guide Me to create a schedule by answering simple questions Touch I ll do it myself to manually create a program schedule See page 39 Note To reduce costs use the pre set Energy Saver settings described on page 37 MENU Create Edit Schedule ...

Page 41: ...If you selected I ll do it myself on the Create Edit Schedule screen page 38 follow these steps 1 Select the days to schedule touch Next 2 Touch Wake to set your Wake time for selected days Next 6 00 am Heat 70 Cool 78 Fan Auto WAKE ...

Page 42: ... the Wake period then touch Done 4 Touch other time periods Leave Return Sleep to set time and temperatures for each 5 Touch Done to save and exit Note Touch Delete Period to eliminate any unwanted time period Note Touch Fan Settings to customize fan settings for any time period Done ...

Page 43: ...n and the Hold Until time left side The schedule will resume when the Hold Until time expires 2 Touch Switch to Permanent Hold to keep the same temperature until you change it or resume the program schedule 3 Touch Cancel Hold at any time to resume the program schedule Switch To Permanent Hold ...

Page 44: ... Duration screen in Advanced Preferences page 61 Touch Override to use a pre set occupied temperature if a person uses the room during an unoccupied period The new temperature will be maintained for 1 hour and can be adjusted up to the maximum time set on the Override Duration screen in Advanced Preferences page 61 The programmed schedule will resume when the override timer expires Touch Cancel Ho...

Page 45: ...ch p or q to view the status of all the equipment your thermostat is controlling Depending on how your thermostat was installed the Equipment Status screen can report data about the following systems Heating and cooling Fan Thermostat information MENU Equipment Status Done ...

Page 46: ...ouch MENU 2 Select Vacation Mode 3 Touch p or q to select the date you leave then touch Next for further scheduling details including times of day temperature settings return date and return settings 4 Review your selections on the last display and touch Done to save your settings Touch Back then Cancel to ignore the changes MENU Next Done Vaca on Mode ...

Page 47: ...vent Scheduler 3 Select the item you want to schedule Custom Events lets you set up other days for special schedules US and Canadian Holiday options let you select from a list of holidays commonly observed in each country 4 Make selections as prompted on each screen For more information see next two pages 5 Touch Done to save your settings MENU Custom events Holiday Event Scheduler ...

Page 48: ...tings to be maintained during a specific event You can set up an event for a specific date or day in a month The thermostat resumes normal scheduling after the event 1 Select Custom events from the Holiday Event Scheduler menu 2 Select Create a new event Custom events Create a new event ...

Page 49: ...o select the start date settings end date and frequency for the event For Month Weekday you are prompted to select the month day of the week week of the month settings length of event and frequency of the event 4 Review the settings and touch Done to save them Touch Back then Cancel to ignore the changes Done Next ...

Page 50: ...2 Select Add Edit Holidays A list of national holidays is displayed 3 Touch the check box next to each holiday for which you want to maintain specific settings Touch p or q to scroll through the holiday list then touch Next Set the holiday schedule for Occupied or Unoccupied temperatures depending whether the building will be in use 4 Touch p or q to select the Heat and Cool temperatures 5 Review ...

Page 51: ...Mode to display temperatures while you are away on holiday 3 Touch p or q to select the Heat and Cool temperatures then touch Next to select return date 4 Review the settings and touch Done to save them Touch Back then Cancel to ignore the changes Note The cool temperature can only be set higher than the unoccupied program setting and the heat temperature can only be set lower than the unoccupied ...

Page 52: ...hen you arrive touch the button to maintain a comfortable temperature while the room is occupied Touch the p or q buttons to set the temperature or the Hold Until time The temperature is maintained until the time you set Temperature returns to an energy saving level after the timer expires or the Occupied period ends Press to start occupancy ...

Page 53: ... a predefined background or select Custom to define you own background color and text If you select a color name the screen shows an example on the left Touch Done to accept that selection If you touch Custom the screen gives you instructions Touch Next to step through the choices touch Done when you are satisfied with your changes Color Themes Done Next MENU ...

Page 54: ... responds to certain situations 1 Touch MENU and select Preferences 2 Select an option and follow prompts Reminders Utility Schedule Options Backlight Smart Response Technology Advanced Preferences Restore Default Schedule 3 Touch Done to save your settings Touch Cancel to ignore changes MENU Preferences ...

Page 55: ...ect Clean Screen A prompt asks if you want to clean the screen for 30 seconds 3 Touch Yes A countdown timer displays elapsed time until the screen is reactivated Note Do NOT spray any liquid directly on the thermostat Spray liquids onto a cloth then use the damp cloth to clean the screen Use water or household glass cleaner Avoid abrasive cleansers MENU Clean Screen Yes ...

Page 56: ...and select Security Settings 2 Select Change Lock Mode 3 Select an option and follow prompts Unlocked Full access allowed Partially locked Only temperature can be changed Fully locked No access allowed Note If you choose to use a password for additional security write it here for reference MENU Security Se ngs Change Lock Mode ...

Page 57: ...ke any changes after the update occurs Updates occur in the early morning After your thermostat receives the software it reboots briefly displaying the Honeywell logo The screen then shows Updating software with a green progress bar When the update is complete your home screen will appear as usual Note If you are not connected to Wi Fi or registered at Total Connect Comfort you will not get automa...

Page 58: ...ebsite account for example you re moving and leaving the thermostat behind follow these steps 1 On mytotalconnectcomfort com log into your account 2 Under My Account select Edit My Profile 3 Click the Delete My Account button Your thermostat will display an orange button that says Register Online ...

Page 59: ...ettings so the temperature is reached at the time you set For example Set the Wake time to 6 00 am and the temperature to 70 The heat will come on before 6 00 am so the temperature is 70 by 6 00 am Note Select Smart Response Technology in the Preferences menu page 52 The message in recovery is displayed when the system is activated before a scheduled time period ...

Page 60: ...58 Pre occupancy purge This business use feature turns on the fan 1 to 3 hours before each occupied time period to provide a comfortable work environment when you arrive ...

Page 61: ... Compressor protection The thermostat keeps the compressor off for a few minutes before restarting to prevent equipment damage During this off time the message waiting for equipment is displayed on screen ...

Page 62: ...automatically selects heating or cooling depending on the indoor temperature Heat and cool settings must be at least 3 degrees apart The thermostat will automatically adjust settings to maintain this 3 degree separation Note Select Auto Changeover on the Heating and Cooling System Changeover screen under Advanced Preferences See Setting advanced preferences on page 61 ...

Page 63: ...ostat displays a list of options 2 Select Preferences Advanced Preferences The thermostat displays the first screen of options that you can change 3 On each screen make changes as needed then touch Next to display new options Repeat this step until you have made all changes Tables on pages 62 63 explain the screens and options under Advanced Preferences 4 When you have made all changes press Done ...

Page 64: ...Scale Select Fahrenheit or Celsius Heating and Cooling System Changeover Select Manual or Automatic Number of Schedule Periods Select 2 Periods Per Day or 4 Periods Per Day see page 37 Pre occupancy Purge Duration Select how long the fan will run before each occupied period Off 1 2 or 3 hours Type of Override Select Standard to maintain the programmed periods or Initiate Occupancy to use energy sa...

Page 65: ...ry on schedule or Yes to ramp down temperature early Temperature Limits Select the Minimum Cool and Maximum Heat Limit Keypad Lockout Select Unlocked Partially Locked Locked Clock Format Select 12 Hour or 24 Hour Daylight Saving Time Select Off or On If set to On the system will automatically change time date to account for daylight saving Indoor Display Offsets Select the number of degrees to off...

Page 66: ...elect System Setup The thermostat displays the first screen of options that you can change 3 On each screen make changes as needed then touch Next to display new options Repeat this step until you have made all changes Tables on pages 65 66 explain the System Setup screens and options 4 When you have made all changes press Done to save and exit Next Touch the Help button to see information about s...

Page 67: ...ss installations you can check a box to display the thermostat name on the home screen Your thermostat controls Select Heating or Cooling or both default Your system type Select Forced Air default Heat Pump or Hot Water or Steam Each option offers different choices on the following screens See Step 9e under Installing your Thermostat on page 24 Your forced air heating system type Select how your f...

Page 68: ...W and W2 refer to your check list in Step 6 on page 12 Your fan control Select whether your thermostat default or heating system controls the fan Type of changeover valve If you selected Heat Pump on Your system type select whether it uses a cooling changeover valve default or heating changeover valve f you are unsure note which wires you have connected refer to your check list in Step 6 on page 1...

Page 69: ...Fi setup page A A You are probably connected only to your router not to your thermostat Try connecting to the thermostat again Q Q Why isn t my thermostat connecting to my Wi Fi router even though it is very close to the thermostat A A Verify that the password entered for the Wi Fi router is correct Q Q My thermostat is unable to register to the Total Connect Comfort website A A Verify that the th...

Page 70: ...ogin using my new account A A Check your email and ensure that you received an activation email Follow the instructions to activate your account and then login to the website Q Q I have signed up on Total Connect Comfort website and have not received a confirmation email A A Check for the email in your Junk or Deleted folder Q Q Is there a way to extend the signal strength A A Most standard router...

Page 71: ...if these assistance options do not answer your questions review the FAQs pages 67 68 and troubleshooting tips pages 71 72 On screen help Most displays include an orange Help button 1 Touch Help to display instructions for using the screen 2 Touch OK to redisplay the original screen Help OK ...

Page 72: ... need to correct a setting or system problem 1 Touch the button the thermostat displays instructions for completing the task to which you were alerted 2 Touch OK on the instruction display then carry out the task When the task is complete the alert button will no longer be displayed Replace Air Filter Press for info OK ...

Page 73: ...ire is connected see page 11 Cannot change system setting to Cool Check that System Setup screen Your thermostat controls or Your system type is set to match your heating and cooling equipment see page 65 Fan does not turn on when heat is required Check that System Setup screen Your fan control is set to match your heating equipment see page 66 Wait appears on the screen Compressor protection feat...

Page 74: ... to Cool Make sure the temperature is set lower than the Inside temperature Check circuit breaker and reset if necessary Make sure power switch at heating and cooling system is on Make sure furnace door is closed securely If Wait is displayed the compressor protection timer is on Wait 5 minutes for the system to restart safely without damaging the compressor see page 59 Heating system is running i...

Page 75: ...onventional heating cooling system Non heat pump type systems these include air handlers furnaces or boilers that run on natural gas oil or electricity They may or may not include an air conditioner Jumper Loop In this thermostat a plug with a wire loop located below the terminal block is used to connect the R and Rc terminals MAC ID MAC CRC Alphanumeric codes that uniquely identify your thermosta...

Page 76: ...te the receiving antenna Increase the separation between the equipment and receiver Connect the equipment into an outlet on a circuit different from that to which the receiver is connected Consult the dealer or an experienced radio TV technician for help Equipment interface module thermostats and outdoor sensor To comply with FCC and Industry Canada RF exposure limits for general population uncont...

Page 77: ...n of a consumer Honeywell s sole responsibility shall be to repair or replace the product within the terms stated above HONEYWELL SHALL NOT BE LIABLE FOR ANY LOSS OR DAMAGE OF ANY KIND INCLUDING ANY INCIDENTAL OR CONSEQUENTIAL DAMAGES RESULTING DIRECTLY OR INDIRECTLY FROM ANY BREACH OF ANY WARRANTY EXPRESS OR IMPLIED OR ANY OTHER FAILURE OF THIS PRODUCT Some states do not allow the exclusion or li...

Page 78: ......

Page 79: ......

Page 80: ...Golden Valley MN 55422 wifithermostat com U S Registered Trademark Apple iPhone iPad iPod touch and iTunes are trademarks of Apple Inc All other trademarks are the property of their respective owners 2013 Honeywell International Inc 69 2809EF 01 CNG 03 13 Printed in U S A 69 2809EF 01 ...

Page 81: ...Guide de l utilisateur Thermostat programmable Wi Fi à écran tactile couleur RTH9580 Wi Fi ...

Page 82: ...me de chauffage refroidissement Consulter et modifier les réglages de votre système de chauffage refroidissement Consulter et régler la température et les programmes Recevoir des alertes par courrier électronique et obtenir des mises à jour automatiques Afficher la température et l humidité extérieures nécessite de configurer le réseau Wi Fi et d enregistrer le produit Carte d identification du th...

Page 83: ...ontrôler à distance le système de chauffage et de refroidissement de votre domicile ou de votre entreprise vous pouvez rester connecté à votre service confort où que vous soyez Le système Total Connect Comfort de Honeywell est la solution parfaite si vous voyagez fréquemment possédez une maison de vacances ou une entreprise ou gérez un immeuble de placement ou tout simplement si vous recherchez la...

Page 84: ... thermostat dans la poubelle s il contient du mercure dans un tube scellé Contactez la Thermostat Recycling Corporation à l adresse www thermostat recycle org ou composez le 1 800 238 8192 pour savoir comment et où mettre au rebut votre thermostat usagé AVIS Pour éviter d endommager le compresseur ne faites pas tourner le climatiseur si la température extérieure est inférieure à 10 C 50 F Besoin d...

Page 85: ...du maintien pendant les vacances résidentielle 44 Réglage des programmes vacances jours fériés commerciale 45 Réglage des événements personnalisés commerciale 46 Réglage du programme des jours fériés commerciale 48 Lancement du mode Occupé commerciale 50 Personnalisation de la couleur de l écran 51 Préférences de réglage 52 Nettoyage de l écran du thermostat 53 Réglages de sécurité 54 Mises à jour...

Page 86: ...er les options Commencez ici pour configurer un programme Programme en cours Modifiez le réglage de la température et sélectionnez le maintien provisoire ou permanent Conditions intérieures Affiche la température et l humidité intérieures Heure et date actuelles Statut en cours Affiche le mode du système chauffage refroidissement Conditions extérieures La température et l humidité extérieures s af...

Page 87: ...ostat Identifie rapidement le thermostat contrôlant une zone spécifique Programme en cours Touchez une flèche pour modifier le réglage de température et régler le maintien provisoire Dérivation Touchez pour déroger provisoirement au programme Conditions intérieures Affiche la température et l humidité intérieures Heure et date actuelles Statut en cours Affiche le mode du système chauffage refroidi...

Page 88: ... il est installé et enregistré Installez votre thermostat Connectez le au réseau sans fil de votre domicile Enregistrez vous en ligne pour bénéficier de l accès à distance Avant de commencer vous désirerez peut être visionner une courte vidéo d installation Utilisez le QR Code figurant sur la couverture de ce guide ou rendez vous à l adresse wifithermostat com support 2 3 1 ...

Page 89: ...èche 7 32 po pour du plâtre optionnels Un marteau optionnel Du ruban électrique optionnel 1 Coupez l alimentation sur votre système de chauffage refroidissement Important Pour protéger votre équipement coupez l alimentation de votre système de chauffage refroidissement au niveau de la boîte des disjoncteurs ou du commutateur du système ou Boîte des disjoncteurs Interrupteur d alimentation du systè...

Page 90: ...to des connexions de câblage pour référence ultérieure 2b Si aucun fil n est connecté à la borne C ou si aucune borne C n est présente sur l ancien thermostat visionnez les vidéos expliquant les autres méthodes de câblage à wifithermostat com videos Important Le fil C est requis et représente la source d alimentation du thermostat Sans fil C votre thermostat ne se mettra pas en marche Remarque Vou...

Page 91: ... en fonction des couleurs des fils Remarque Si aucune étiquette ne correspond à une désignation de borne notez la lettre appropriée sur une étiquette collante vierge 4 Retirez la plaque murale Retirez l ancienne plaque murale du mur après avoir étiqueté et déconnecté tous les fils Étiquettes vierges Étiquette autocollante Désignation des bornes C C Remarque Enroulez les fils autour d un crayon pou...

Page 92: ...is et chevilles fournies avec le thermostat Au besoin Percez des trous de 3 16 po pour les cloisons sèches Percez des trous de 7 32 po pour le plâtre Remarque Vous pourrez peut être utiliser les ancres murales déjà installées Tenez la plaque murale sur les ancres déjà installées pour vérifier l alignement Installation de votre thermostat Plaque murale ...

Page 93: ...à l adresse wifithermostat com Remarque Les systèmes de chauffage refroidissement n indiquent pas tous le fil C commun de 24 V c a Consultez le manuel du système ou le fabricant pour avoir quelle borne est la borne commune de 24 V c a Visionnez les vidéos expliquant les autres méthodes de câblage à l adresse wifithermostat com videos Câblage Pour les systèmes de chauffage refroidissement conventio...

Page 94: ...l doit être retiré utilisez l extrémité d un stylo pour appuyer sur le dispositif de libération et retirez le fil Remarque Consultez la photo de câblage prise à l étape 2 Conseil Pour faciliter l insertion du fil utilisez l extrémité d un stylo pour appuyer sur le dispositif de libération de la borne Remarque Le câblage de votre application spécifique peut être différent du câblage illustré ci apr...

Page 95: ... en tirant délicatement dessus e Répétez les étapes a d pour tous les autres fils f Repoussez tout excédent de fil dans l ouverture murale une fois tous les fils installés g Passez à la page 20 Les étiquettes ne correspondent pas Reportez vous au code de câblage alternatif aux pages 16 17 Important Cochez la case pour chaque fil que vous connecter Vous aurez besoin de cette information à l étape 9...

Page 96: ...r le dispositif de libération et retirez le fil Remarque Consultez la photo de câblage prise à l étape 2 Conseil Pour faciliter l insertion du fil utilisez l extrémité d un stylo pour appuyer sur le dispositif de libération de la borne Les étiquettes ne correspondent pas Reportez vous au code de câblage alternatif aux pages 18 19 Remarque Le câblage de votre application spécifique peut être différ...

Page 97: ...Si l ancien thermostat a des fils séparés sur Aux et E utilisez un serre fil pour attacher les deux fils à un fil séparé Faites glisser ce troisième fil dans la borne W2 Aux E f Poussez tout excédent de fil dans l ouverture mural une fois tous les fils installés g Passez à la page 20 Les étiquettes ne correspondent pas Reportez vous au code de câblage alternatif aux pages 18 19 Important Cochez la...

Page 98: ...tilisez ceci si vos étiquettes de fils ne correspondent pas aux références de bornes Remarque Vous devez avoir un fil C ou un fil équivalent Consultez la page 11 Reportez vous aux codes 1 2 de la page 17 C R W Y G 2 1 2 C K Rc R W O B Y G W2 Aux E Y2 L W1 W2 Y2 RH 4 V Rc R C1 X B ...

Page 99: ...1 N utilisez pas la borne K Pour utilisation ultérieure Si un fil R et Rc sont présents débranchez la boucle de raccordement en tirant sur la boucle Si votre ancien thermostat a des fils R et RH branchez le fil R à la borne Rc le fil RH à la borne R et débranchez la boucle de raccordement ...

Page 100: ...i si vos étiquettes de fils ne correspondent pas aux références de bornes Remarque Vous devez avoir un fil C ou un fil équivalent Consultez la page 11 Reportez vous aux codes 1 7 de la page 19 C R O Y G 3 1 C K Rc R W O B Y G W2 Aux E Y2 L 4 5 6 AUX X X2 Y2 2 B 7 X B Rc R V VR 2 L F W W1 W2 ...

Page 101: ...ez Vanne de commutation de refroidissement Voir la page 66 Si votre ancien thermostat est pourvu d un fil O et pas d un fil B fixez le fil O à la borne O B Si votre ancien thermostat est pourvu de fils Y1 W1 et W2 consultez le site wifithermostat com pour obtenir de l aide Si l ancien thermostat a des fils séparés sur Aux et E utilisez un serre fil pour attacher les deux fils à un fil séparé Faite...

Page 102: ...20 Installation de votre thermostat 7 Fixez le thermostat à la plaque murale Alignez le thermostat sur la plaque murale puis emboîtez le Thermostat Plaque murale LEVEL HERE ...

Page 103: ...ur le système de chauffage refroidissement 8b Assurez vous que la porte du système de chauffage refroidissement est bien fermée 8c Rétablissez l alimentation du système de chauffage refroidissement au niveau de la boîte des disjoncteurs ou de l interrupteur d alimentation ou Boîte des disjoncteurs Interrupteur d alimentation du système de chauffage refroidissement ...

Page 104: ...tème de chauffage refroidissement Langue Résidence ou Commerce Vous pouvez personnaliser d autres options plus tard 9 Suivez les invites sur l écran pour sélectionner les options appropriées 9a Touchez la langue que vous souhaitez voir sur le thermostat puis touchez Suivant 9b Sélectionnez l application Résidence ou Commerce puis touchez Suivant Suivant Suivant ...

Page 105: ...u renommez le thermostat en touchant THERMOSTAT et en suivant le reste des instructions 9d Sélectionnez votre type de système et touchez Suivant Remarque Touchez le bouton Aide orange sur n importe quel écran pour obtenir plus d informations Suivant Suivant ...

Page 106: ...tion initiale Utilisez la liste de vérification de l étape 6d pour faire les sélections 9f Touchez Suivant après avoir effectué les sélections sur chaque écran 9g Touchez Terminé sur le dernier écran Le thermostat affiche l option de connexion à votre réseau Wi Fi Remarque Touchez le bouton Aide orange sur n importe quel écran pour obtenir plus d informations Suivant ...

Page 107: ...enter après lequel une liste de tous les réseaux Wi Fi détectés s affiche Remarque Si vous ne pouvez pas terminer cette étape maintenant touchez Je le ferai plus tard Le thermostat affiche l écran d accueil Terminez ce processus en sélectionnant MENU Configuration Wi Fi Passez à l étape 2 2 Sélectionnez le réseau 2a Touchez le nom du réseau que vous souhaitez utiliser Le thermostat affiche la page...

Page 108: ...ion au réseau en cours Veuillez patienter puis affiche l écran Connexion réussie 2d Touchez Suivant pour afficher l écran des informations d enregistrement 2e Notez les identifiants MAC et CRC du thermostat Ces identifiants sont requis pour terminer l enregistrement en ligne Terminé Inscrivez le mot de passe de votre réseau Wi Fi Suivant Votre thermostat est bien connecté à votre réseau ...

Page 109: ... et ou que vous touchiez Terminé Remarque Si vous touchez Terminé avant de vous enregistrer en ligne votre écran d accueil affiche un bouton d alerte orange vous indiquant de procéder à l enregistrement Touchez ce bouton pour afficher les informations d enregistrement et une option pour retarder l exécution de cette tâche Terminé Enregistrez vous en ligne pour bénéficier de l acceès à distance App...

Page 110: ...une question pour confirmer votre sélection 4 Touchez Oui pour confirmer que vous souhaitez vous déconnecter du réseau Le thermostat affiche l écran de configuration Wi Fi 5 Touchez OK pour afficher le menu MENU Configuration Wi Fi Déconnecter du réseau Votre réseau Inconnu Oui Êtes vous sûr de vouloir vous déconnecter de votre réseau ...

Page 111: ...votre réseau résidentiel puis touchez sur Terminé 5 Le thermostat affiche Connexion au réseau en cours Veuillez patienter puis affiche l écran Connexion réussie 6 Touchez Suivant Si votre thermostat est enregistré vous verrez la force de votre signal et d autres informations de statut Touchez Terminé Si l écran affiche Enregistrez vous en ligne pour bénéficier de l accès à distance suivez les inst...

Page 112: ... posséder un compte Total Connect Comfort Voici comment procéder 1 Ouvrez le site web Total Connect Comfort Allez à mytotalconnectcomfort com Visionnez la vidéo d enregistrement du thermostat Wi Fi à l adresse wifithermostat com videos Enregistrement de votre thermostat en ligne ...

Page 113: ...éer un compte 2a Suivez les instructions à l écran 2b Consultez votre messagerie et recherchez le message d activation provenant de My Total Connect Comfort Ceci peut prendre plusieurs minutes Remarque Si vous ne recevez aucune réponse consultez votre boîte de pourriels ou utilisez une autre adresse électronique 2c Suivez les instructions d activation figurant dans le message 2d Ouvrez une session...

Page 114: ...mostat fournie dans la boîte du thermostat Ces identifiants ne sont pas sensibles à la casse U S Reg stered Trademark 2012 Honeywell Interna ional Inc 69 2723EFS 01 M S 04 12 Pr n ed n U S A HONEYWELL MODEL RTH8580WF MAC ID MAC CRC 69 2723EFS 01 Thermostat ID Card Use the MAC ID and CRC ID to register this product at mytotalconnectcomfort com Carte d identification de thermostat Uti isez l identif...

Page 115: ... Vous pouvez maintenant contrôler votre thermostat de n importe quel endroit au moyen de votre ordinateur portatif de votre tablette ou de votre téléphone intelligent GET IT ON Download on iTunes L application Total Connect Comfort gratuite et est disponible pour les dispositifs iPhone iPad et iPod touch d Apple sur iTunes ou sur Google Play pour tous les dispositifs Android ...

Page 116: ...ichent 4 Touchez Terminé pour enregistrer ou Annuler pour ignorer les changements Remarque Ce thermostat se mettra à jour automatiquement à l heure d été d hiver si respecté dans votre zone et l information de la date heure est enregistrée Si le thermostat est connecté au Wi Fi et est enregistré au Total Connect Comfort l heure courante est mise à jour à partir de l Internet ven 14 juin 2013 6 30 ...

Page 117: ...rs activé Automatique le ventilateur fonctionne uniquement lorsque le système de chauffage ou de refroidissement est en marche Circulation le ventilateur fonctionne de façon aléatoire environ 35 du temps utilisation résidentielle uniquement Suivre le programme ventilateur contrôlé par le programme voir les pages 37 42 Remarque Touchez Automatique ou Marche pour déroger provisoirement au programme ...

Page 118: ... refroidissement sont arrêtés Automatique Le thermostat sélectionne le chauffage ou le refroidissement selon le besoin en fonction de la température ambiante Chauffage d urgence thermopompes avec chauffage auxiliaire commande le chauffage auxiliaire d urgence Le compresseur est verrouillé 3 Touchez Terminé pour enregistrer et quitter SYSTÉME Terminé Remarque Les réglages de système Automatique et ...

Page 119: ...2 85 Retour 18 h 00 70 78 70 78 Sommeil 22 h 00 62 82 62 82 Refroidissement Lun Ven Chauffage Lun Ven Période Chauffage Sam Dim Refroidissement Sam Dim Utilisation résidentielle Occupée 1 8 h 00 70 75 Marche Inoccupée 1 22 h 00 55 85 Auto Occupée 2 12 h 00 70 75 Marche Inoccupée 2 12 h 00 55 85 Auto Refroidissement Heure de début Chauffage Période Ventilateur Utilisation commerciale La période 2 e...

Page 120: ... complet et faire un réglage rapide Touchez Aidez moi pour créer un programme en répondant à de simples questions Touchez Je le ferai moi même pour créer un programme manuellement Consultez la page 39 Remarque Pour réduire les coûts utilisez les réglages préconfigurés de l économiseur d énergie décrits à la page 37 MENU Créer Modifier I horaire ...

Page 121: ...ez Je le ferai moi même sur l écran Créer Modifier programme page 38 suivez ces étapes 1 Sélectionnez les jours à programmer puis Suivant 2 Touchez Réveil pour régler l heure de réveil pour les jours sélectionnés Suivant 6 00 am RÉVEIL Chau 70 Refr 78 Vent Auto ...

Page 122: ... Touchez les autres périodes de temps Départ Retour Sommeil pour régler l heure et les températures de chaque période 5 Touchez Terminé pour enregistrer et quitter Remarque Touchez Supprimer période pour éliminer toute période de temps non souhaitée Remarque Touchez Réglages ventilateur pour personnaliser les réglages du ventilateur pour les périodes souhaitées Terminé ...

Page 123: ...usqu à côté gauche Le programme reprend lorsque la durée Maintien jusqu à a expiré 2 Sélectionnez Passez à maintien permanent pour maintenir la même température jusqu à la prochaine modification ou jusqu à la reprise du programme configuré 3 Touchez Annuler maintien à tout moment pour réactiver le programme configuré Passez à Main en Permanent ...

Page 124: ... la dérogation dans les Préférences avancées page 61 Touchez Dérivation pour utiliser une température pour période occupée préréglée si une personne est présent durant une période non occupée La nouvelle température est maintenue pendant une heure et peut être réglée pour la durée maximale définie sur l écran Durée de la dérogation dans les Préférences avancées page 61 Le programme réglé reprend à...

Page 125: ...fficher le statut de tout l équipement contrôlé par le thermostat En fonction de l installation du thermostat l écran de statut de l équipement peut indiquer les données relatives aux systèmes suivants Chauffage et refroidissement Ventilateur Informations relatives au thermostat MENU État du matériel Terminé ...

Page 126: ...nnez Mode vacances 3 Touchez p ou q pour sélectionner la date de départ puis touchez Suivant pour afficher plus de détails de programmation y compris les heures du jour les réglages de température la date de retour et les réglages de retour 4 Passez en revue vos sélections sur le dernier affichage et touchez Terminé pour enregistrer vos réglages Touchez Retour puis Annuler pour ignorer les changem...

Page 127: ...lectionnez l article à programmer Événements personnalisés vous permet de configurer d autres jours pour les programmes spéciaux Les options Jours fériés pour les américains et canadiens vous permettent de sélectionner une liste des jours fériés généralement observés par chaque pays 4 Répondez aux invites de chaque écran Pour plus d informations consultez les deux pages suivantes 5 Touchez Terminé...

Page 128: ...ant un événement spécifique Vous pouvez configurer un événement pour une date ou un jour spécifique du mois Le thermostat reprend le programme normal après l événement 1 Sélectionnez Événements personnalisés dans le menu Gestionnaire des jours fériés événements 2 Sélectionnez Créer un nouvel événement Événements personnalisés Créer un nouvel événement ...

Page 129: ... début les réglages la date de fin et la fréquence de l événement Pour Mois Jour de la semaine vous êtes invité à sélectionner le mois le jour de la semaine la semaine du mois les réglages la durée de l événement et la fréquence de l événement 4 Passez les réglages en revue et touchez Terminé pour les enregistrer Touchez Retour puis Annuler pour ignorer les changements Terminé Suivant ...

Page 130: ...ier jours fériés Une liste des jours fériés nationaux s affiche 3 Touchez la case à cocher près de chaque jour férié pour lequel vous souhaitez maintenir des réglages spécifiques Touchez p ou q pour défiler dans la liste des jours fériés Puis touchez Suivant Réglez le programme des jours fériés pour les températures en périodes Occupées et Non occupées en fonction de l occupation du bâtiment 4 Tou...

Page 131: ...les jours fériés 3 Touchez p ou q pour sélectionner les températures de chauffage et de refroidissement puis sélectionnez Suivant pour sélectionner la date de retour 4 Passez les réglages en revue et touchez Terminé pour les enregistrer Touchez Retour puis Annuler pour ignorer les changements Remarque Le réglage de la température de refroidissement ne peut être que supérieur au réglage du programm...

Page 132: ...l arrivée touchez le bouton pour maintenir une température confortable pendant que la pièce est occupée Touchez les boutons p ou q pour régler la température ou la durée de maintien La température est maintenue jusqu à l heure réglée La température revient à un niveau d économie d énergie après expiration du temporisateur ou à la fin de la période Occupée Appuyer pour lancer I occupa on ...

Page 133: ... prédéfini ou sélectionnez Personnaliser pour définir votre propre couleur d arrière plan et de police En choisissant un nom de couleur l écran affiche un échantillon sur la gauche Touchez Terminé pour accepter celle sélection En touchant Personnaliser l écran vous fournira des instructions Touchez Suivant pour passez à l étape suivante touchez Terminé lorsque vous êtes satisfait de vos modificati...

Page 134: ...certaines situations 1 Touchez MENU et sélectionnez Préférences 2 Sélectionnez une option et suivez les invites Rappels Options du calendrier utilitaire Rétroéclairage Technologie Smart Response Préférences avancées Restaurer le programme par défaut 3 Touchez Terminé pour enregistrer vos réglages Touchez Annuler pour ignorer les changements MENU Préférences ...

Page 135: ... Une invite vous demande si vous souhaitez nettoyer l écran pendant 30 secondes 3 Touchez Oui Une minuterie montre le temps écoulé jusqu à ce que l écran soit réactivé Remarque Ne pulvérisez AUCUN liquide directement sur le thermostat Pulvérisez les liquides sur un chiffon puis utilisez le chiffon humide pour nettoyer l écran N utilisez pas d eau ni de nettoyant à vitres ménager Évitez les produit...

Page 136: ...rité 2 Sélectionnez Modifier mode de verrouillage 3 Sélectionnez une option et suivez les invites Déverrouillé accès intégral permis Partiellement verrouillé seule la température peut être modifiée Complètement verrouillé Aucun accès permis Remarque Si un mot de passe est choisi pour plus de sécurité notez le ici pour référence MENU Réglage de sécurité Modifier mode de verrouillage ...

Page 137: ...une modification après la mise à jour Les mises à jour ont lieu tôt le matin Une fois votre thermostat mis à jour il est relancé et affiche brièvement le logo Honeywell L écran affiche Mise à jour logicielle avec une barre de progression verte Une fois la mise à jour terminée votre écran d accueil s affiche comme d habitude Remarque Si le thermostat n est pas connecté au Wi Fi et est enregistré à ...

Page 138: ...mfort par exemple vous déménagez sans emporter le thermostat suivez ces étapes 1 Sur mytotalconnectcomfort com ouvrez votre compte 2 Dans Mon Compte sélectionnez Modifier mon profil 3 Cliquez sur le bouton Delete My Account Supprimer mon compte Votre thermostat affiche un bouton orange indiquant Enregistrez vous en ligne ...

Page 139: ...n que la température voulue soit atteinte à l heure programmée Par exemple réglez l heure de réveil à 6 heures et la température à 70 Le chauffage est mis en fonction avant 6 heures de manière à ce que la température soit de 70 à 6 heures Remarque Sélectionnez Technologie Select Smart Response dans le menu Préférence page 52 Le message en reprise s affiche lorsque le système est activé avant une p...

Page 140: ...alayage avant occupation Cette fonction pour utilisation commerciale active le ventilateur de 1 heure à 3 heures avant chaque période occupée pour fournir un environnement de travail confortable à l arrivée ...

Page 141: ...mpresseur Le thermostat maintient le compresseur arrêté pendant quelques minutes avant un redémarrage pour éviter d endommager l équipement Pendant cette durée d arrêt le message En attente du matériel s affiche à l écran ...

Page 142: ...ge ou le refroidissement en fonction de la température intérieure L écart entre les réglages de chauffage et de refroidissement doit être d au moins 3 degrés Le thermostat ajuste automatiquement les réglages afin de maintenir ces 3 degrés d écart Remarque Sélectionnez Commutation automatique sur l écran de Commutation du système de chauffage et de refroidissement dans Préférences avancées Voir Rég...

Page 143: ...2 Sélectionnez Préférences Préférences avancées Le thermostat affiche le premier écran d options que vous pouvez modifier 3 Sur chaque écran effectuez les modifications selon le besoin puis touchez Suivant pour afficher les nouvelles options Répétez cette étape jusqu à ce que tous les changements aient été effectués Les tableaux aux pages 62 63 expliquent les écrans et les options sous Préférences...

Page 144: ...empérature Sélectionnez Fahrenheit ou Celsius Commutation de système de chauffage et refroidissement Sélectionnez Manuel ou Automatique Nombre de périodes programmées Sélectionnez 2 périodes par jour ou 4 périodes par jour Voir la page Calendriers économiseurs d énergie préréglés à la page 37 Durée du balayage avant occupation Sélectionnez la durée de fonctionnement du ventilateur avant chaque pér...

Page 145: ...cer la récupération à l heure programmée ou Oui pour lancer une rampe de température descendante précoce Limites de température Sélectionnez la limite de refroidissement minimum et la limite de chauffage maximum Verrouillage du clavier Sélectionnez Déverrouillé Partiellement verrouillé Verrouillé Format de l horloge Sélectionnez 12 heures ou 24 heures Heure d été hiver Sélectionnez Arrêt ou Marche...

Page 146: ...iche le premier écran d options que vous pouvez modifier 3 Sur chaque écran effectuez les modifications selon le besoin puis touchez Suivant pour afficher les nouvelles options Répétez cette étape jusqu à ce que tous les changements aient été effectués Les tableaux aux pages 65 66 expliquent les écrans et les options de configuration du système 4 Lorsque toutes les modifications ont été effectuées...

Page 147: ...mostat sur l écran d accueil Votre thermostat contrôle Sélectionnez Chauffage ou Refroidissement ou les deux défaut Votre type de système Sélectionnez air pulsé défaut thermopompe eau chaude ou vapeur Chaque option offre différents choix sur les écrans suivants Voir l étape 9e dans la section Installation du thermostat à la page 23 Votre type de système de chauffage à air pulsé Sélectionnez le typ...

Page 148: ...Sélectionnez si votre thermostat défaut ou votre système de chauffage contrôle le ventilateur Type de vanne de commutation Si vous sélectionnez Thermopompe sur Votre type de système sélectionnez si une vanne de commutation de refroidissement défaut ou de chauffage est utilisée Si vous n êtes pas sûr notez les fils que vous avez connectés consultez votre liste de vérification à l étape 6 à la page ...

Page 149: ... uniquement connecté à votre routeur et non pas à votre thermostat Essayez de vous reconnecter au thermostat Q Q Pourquoi mon thermostat ne se connecte t il pas à mon routeur Wi Fi même si celui ci est très proche du thermostat R R Vérifiez que le mot de passe saisi pour le routeur Wi Fi est correct Q Q Il est impossible d enregistrer mon thermostat sur le site Total Connect Comfort R R Vérifiez q...

Page 150: ... message d activation Suivez les instructions d activation de votre compte puis ouvrez une session sur le site web Q Q Je me suis enregistré sur le site Total Connect Comfort et n ai pas reçu de message de confirmation R R Vérifiez que le message ne se trouve pas dans le dossier des pourriels ou des messages effacés Q Q Y a t il un moyen d accroître la force du signal R R La plupart des routeurs s...

Page 151: ...e répondent pas à vos questions consultez la foire aux questions pages 67 68 et les conseils de dépannage pages 71 72 Aide sur écran La plupart des écrans comprennent un bouton Aide orange 1 Touchez Aide pour afficher les instructions d utilisation de l écran 2 Touchez OK pour afficher de nouveau l écran d origine Aide OK ...

Page 152: ... un réglage ou un problème avec le système 1 Touchez le bouton le thermostat affichera les instructions nécessaires pour compléter la tâche pour laquelle vous avez été alerté 2 Touchez OK sur l écran d instructions puis effectuez la tâche Lorsque la tâche est complétée le bouton d alerte disparaîtra Remplacez le filtre á air Appuyez pour info OK ...

Page 153: ...Impossible de changer le réglage du système à Refroidissement Vérifiez que Votre thermostat contrôle ou Votre type de système sur l écran Configuration du système est réglé en fonction de votre équipement de chauffage et de refroidissement voir la page 65 Le ventilateur ne tourne pas lorsque le chauffage est requis Vérifiez que Votre ventilateur contrôle sur l écran Configuration du système est ré...

Page 154: ...r à la température intérieure Vérifiez le disjoncteur et réinitialisez le si nécessaire Assurez vous que l interrupteur de marche arrêt du système de chauffage et de refroidissement est sur marche Assurez vous que la porte de l appareil de chauffage est bien fermée Si Patientez s affiche la minuterie de protection du compresseur est activée Attendez 5 minutes que le système se remette en marche en...

Page 155: ... chauffage refroidissement conventionnel Systèmes sans thermopompe ceux ci incluent des appareils de traitement d air des chaudières ou des chauffe eau qui fonctionnent au gaz naturel au mazout ou à l électricité Ils peuvent ou non inclure un appareil de conditionnement d air Boucle de raccordement Dans ce thermostat une fiche avec fil en boucle située sous le bornier est utilisée pour connecter l...

Page 156: ...ntes Réorientez ou déplacez l antenne réceptrice Augmentez la séparation entre l équipement et le récepteur Branchez l équipement dans la prise d un circuit différent de celui auquel le récepteur est connecté Consultez le distributeur ou un technicien radio TV compétent pour obtenir de l aide Module d interface d équipement thermostats et capteur extérieur Pour être conformes aux limites d exposit...

Page 157: ...ités susmentionnées HONEYWELL N EST EN AUCUN CAS RESPONSABLE DES PERTES OU DOMMAGES Y COMPRIS LES DOMMAGES INDIRECTS OU ACCESSOIRES DÉCOULANT DIRECTEMENT OU INDIRECTEMENT D UNE VIOLATION QUELCONQUE D UNE GARANTIE EXPRESSE OU TACITE APPLICABLE AU PRÉSENT PRODUIT OU TOUTE AUTRE DÉFAILLANCE DU PRÉSENT PRODUIT Certaines provinces ne permettent pas l exclusion ou la restriction des dommages indirects o...

Page 158: ......

Page 159: ......

Page 160: ...e de Apple Inc Toutes les autres marques de commerce sont propriété de leurs propriétaires respectifs 2013 Honeywell International Inc 69 2809EF 01 CNG 03 13 Imprimé aux États Unis Systèmes d automatisation et de régulation Honeywell International Inc 1985 Douglas Drive North Golden Valley MN 55422 wifithermostat com ...

Reviews: