


23
appears in the column at right and click
“Next”.
12. At the Gauge Selection screen, double
click on the appropriate gauge from the
Available column so that the gauge
appears in the column at left and click
“Next”.
Once the model has been configured, the
software will return to the Choose Model
screen and the new model will be shown in the
box at left. When selected, the components of
that model will be shown in the box at right.
13. Click OK when finished adding models.
6.5
Add New Serial Number
Prior to assigning a serial number to an
apparatus, the apparatus model information
must be added to the models database.
1. To add a new serial number to the
software, first select Setup / Apparatus /
Add New Serial Number.
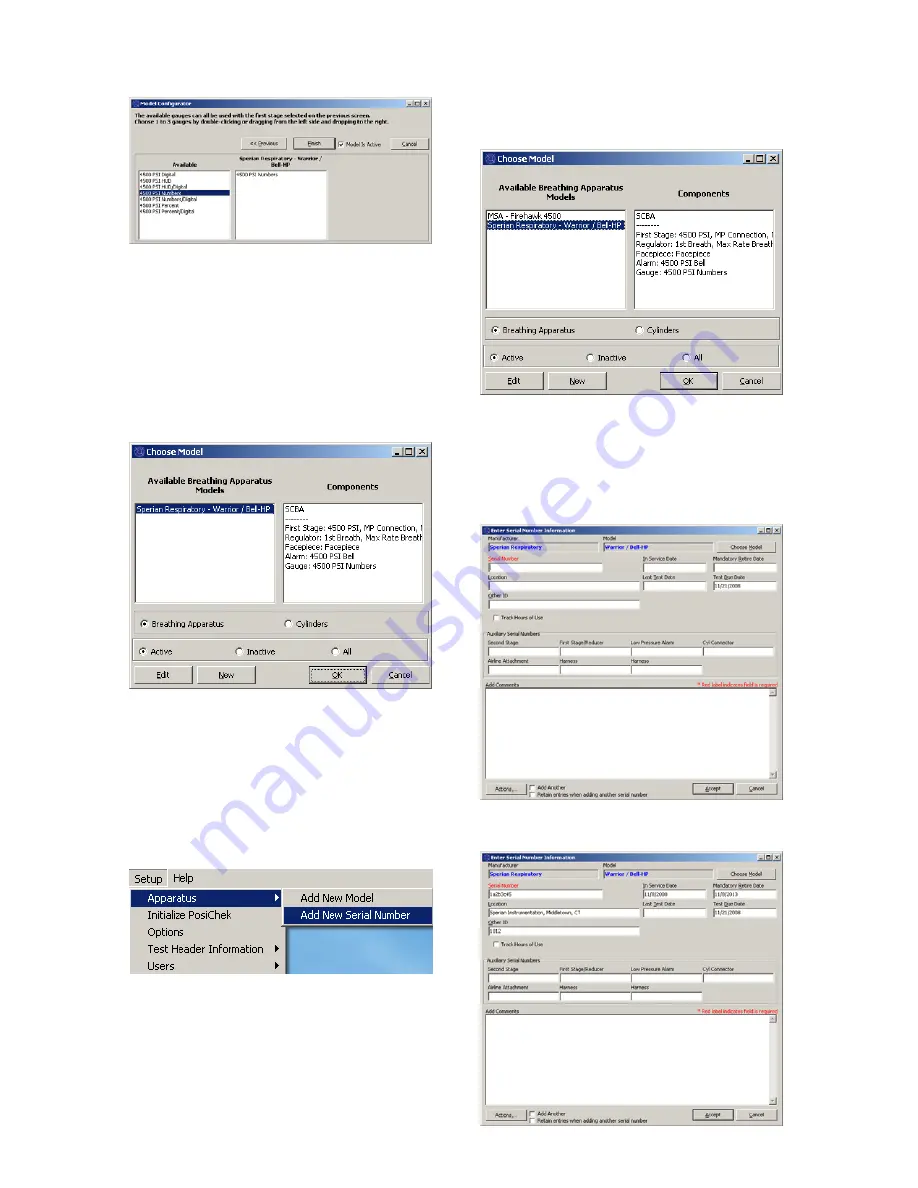
The Choose Model Screen will be shown.
The default settings for the Choose Model
screen are to display Active Breathing
Apparatus. Options at the bottom allow that
user to select from Breathing Apparatus or
Cylinders and from Active, Inactive or All.
Inactive items cannot be selected for testing.
To change the active / inactive setting for an
item, right click on it and select “Set as Active”
or “Set as Inactive” (as appropriate) from the
menu options.
2. If the model for the serial number to be
entered is shown, click on it to select it
and click OK.
To add a new model, click the “New” button
and refer to section 6.4 for instructions on
adding a new model.
3. Enter the serial number and other specific
information about the apparatus.
Summary of Contents for Posi3 USB
Page 2: ...2 ...