background image

TB7100A1000 MULTIPRO™ MULTISPEED AND MULTIPURPOSE THERMOSTAT

63-2675—01

4

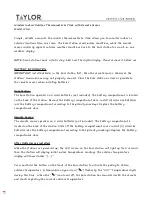
Fig. 4. C7189U Indoor Sensor dimensions in in. (mm).

MERCURY NOTICE

If this control is replacing a control that contains 

mercury in a sealed tube, do not place your old 

control in the trash. Dispose of properly.

Contact your local waste management authority 

for instructions regarding recycling and the proper 

disposal of an old control.

INSTALLATION

When Installing this Product...

1.

Read these instructions carefully. Failure to follow them 

could damage the product or cause a 

hazardous condition.

2.

Check ratings given in instructions and on the product to 

ensure the product is suitable for your application.

3.

Installer must be a trained, experienced service 

technician.

4.

After installation is complete, check out product 

operation as provided in these instructions.

CAUTION

Electrical Shock or Equipment Damage Hazard.

Can shock individuals or short equipment 

circuitry.

Disconnect power supply before installation.

Select Thermostat Location

Select a location for the thermostat about 5 ft (1.5m) above the 

floor in an area with good air circulation at average 

temperature. See Fig. 5.

Fig. 5. Select thermostat location.

Do not install the thermostat where it can be affected by:

— Drafts or dead spots behind doors and in corners.

— Hot or cold air from ducts.

— Radiant heat from sun or appliances.

— Concealed pipes and chimneys.

— Unheated (uncooled) areas such as an outside wall behind 

the thermostat.

Separate Wallplate from Thermostat

1.

Separate the wallplate from the thermostat. See Fig. 6.

Fig. 6. Separate wallplate from thermostat.

Install Wallplate (See Fig. 7)

Mount the thermostat horizontally on the wall:

1.

Pull the wires through the wire hole on the wallplate.

2.

Position the wallplate on the wall with the arrow pointing 

up. Level the wallplate for appearance only.

3.

Use a pencil to mark the mounting holes.

4.

Remove the wallplate from the wall and drill two 3/16 in. 

holes in the wall (if drywall) as marked. For firmer 

material such as plaster, drill two 7/32 in. holes. Tap the 

wall anchors (provided) into the drilled holes until flush 

with the wall.

5.

Pull the wires through the wire hole on the wallplate and 

position the wallplate over the wall anchors.

6.

Insert the mounting screws into the wall anchors and 

tighten.

M4465

4-5/8

(117)

2-3/4  (70)

1-1/8 

(29)

FRONT VIEW

SIDE VIEW

5 FEET

[1.5 METERS]

YES

NO

M22258

NO

NO

THERMOSTAT

WIRE HOLE

M22267

WALLPLATE

Summary of Contents for MultiPRO TB7100A1000/U

Page 1: ... setup effortless Beautiful ergonomic design is smart and sophisticated to match your customers lifestyle Real time clock keeps time during power failures and automatically updates to daylight savings Saving Changes notification lets you know when the schedule changes have been saved Change reminders let you know when to replace the batteries Holiday Override options allow you to override the prog...

Page 2: ... Selectable 1 12 cycles per hour Cooling Selectable 1 6 cycles per hour Interstage Differential Droopless control Once the first stage is running at 90 load the thermostat energizes the second stage Cool Indication Displays Cool On when Cool is activated Heat Indication Displays Heat On when Heat is activated Auxiliary Heat Indication Displays Aux Heat On when Auxiliary Heat is activated Clock Acc...

Page 3: ... TR21 Mounts directly on the wall using mounting screws and anchors provided Fits a vertical 2 x 4 in junc tion box Cover Plate 32003796 001 Cover Plate is used to cover marks left on the wall by the old thermostat Dimensions TB7100 Thermostat See Fig 1 C7189U Remote Indoor Sensor see Fig 4 TR21 Remote Indoor Sensor See Fig 3 32003796 001 Cover Plate See Fig 2 Fig 1 TB7100 Thermostat dimensions in...

Page 4: ...ir circulation at average temperature See Fig 5 Fig 5 Select thermostat location Do not install the thermostat where it can be affected by Drafts or dead spots behind doors and in corners Hot or cold air from ducts Radiant heat from sun or appliances Concealed pipes and chimneys Unheated uncooled areas such as an outside wall behind the thermostat Separate Wallplate from Thermostat 1 Separate the ...

Page 5: ...lock and tighten each screw terminal See Fig 9 Fig 9 Insert wires into terminal block 4 Push excess wire back into the wall opening and restrict wires to the shaded area See Fig 10 5 Plug the wall opening with nonflammable insulation to prevent drafts from affecting the thermostat Fig 10 Restrict wires to shaded area of wire hole Table 4 Wiring Diagrams WALL MOUNTING HOLES M13665 MOUNTING SCREWS 2...

Page 6: ...ransformer Y Compressor output C see Note 2 Common wire from secondary side of cooling system transformer W1 Heat relay Auxiliary heat relay for heat pump PTAC G Fan relay Low fan speed for fan coil and PTAC G2 Medium fan speed Fan coil G3 High fan speed Fan coil and PTAC O B see Note 3 Changeover valve for heat pumps S1 See Note 4 Indoor remote sensor remote setback or changeover input S2 See Not...

Page 7: ... REQUIRED FACTORY INSTALLED JUMPER WHEN USING BATTERIES THE 24V COMMON CONNECTION IS OPTIONAL 1 3 2 3 COMPRESSOR CONTACTOR L1 HOT L2 1 24 VAC 2 C G Y O B RC R W1 G2 G3 S1 S2 INDOOR TEMPERATURE SENSOR REMOTE SETBACK INDOOR TEMPERATURE SENSOR REMOTE SETBACK COMPRESSOR CONTACTOR M27421 CHANGEOVER VALVE 1 2 3 4 5 FAN RELAY POWER SUPPLY PROVIDE DISCONNECT MEANS AND OVERLOAD PROTECTION AS REQUIRED FACTO...

Page 8: ... JUMPER WHEN USING BATTERIES THE 24V COMMON CONNECTION IS OPTIONAL 1 2 3 C G Y O B RC R W1 G2 G3 S1 S2 2 3 L1 HOT L2 1 24 VAC M27424 HIGH FAN RELAY AUXILIARY HEAT RELAY MEDIUM FAN RELAY INDOOR TEMPERATURE SENSOR REMOTE SETBACK CHANGEOVER PIPE SENSOR TWO PIPE HEAT COOL RELAY LOW FAN RELAY POWER SUPPLY PROVIDE DISCONNECT MEANS AND OVERLOAD PROTECTION AS REQUIRED FACTORY INSTALLED JUMPER WHEN USING B...

Page 9: ...21 or C7189U Remote Indoor Temperature Sensor Optional Locate and mount the sensor in the same fashion as the thermostat See the Select Thermostat Location section Consider the following as well 1 Be sure wire distance between sensor and thermostat is less than 200 feet 2 Mark the area on the wall selected for mounting the sensor or junction box 3 Sensor wire must be separate from the thermostat c...

Page 10: ...vide a temperature averaging network Fig 27 Wiring two TR21 20K ohm Sensors and one TR21 A 10K ohm sensor to provide a temperature averaging network Fig 28 Wiring four C7189U 10K ohm Sensors to provide a temperature averaging network SET CALENDAR AND TIME This thermostat is designed to under normal use automatically keep current time and day in memory for up to ten years once the calendar is set T...

Page 11: ...layed to the right NOTE To cycle through the Setup Numbers press the up or down arrow Fig 31 Entering Installer Setup User Settings Simple Set Access to the user settings is obtained as follows 1 From the main screen press SYSTEM 2 Press and hold the center key approximately five sec onds 3 The Setup Number displays to the center of the screen It is a four digit code beginning with zero The curren...

Page 12: ...d Lo speed Fan Relay Y is used for 2 pipe fan coil output relay 0180 Heat Fan Operation 0 0 Fossil 1 Electric Only shows up if conventional system with heat stages and fan capability is selected ISU 0170 If heat pump is selected fan defaults to electric If fan coil or PTAC modes are selected fan defaults to electric does not show up 0185 Pre occupancy Purge Duration 0 0 no duration 1 one hour 2 tw...

Page 13: ...ut default mode is Cool Hotel card NO with 1 second software delay going from UnOcc to Occupied 2 minute delay going from Occupied to UnOcc Hotel Card NC with 1 second software delay going from UnOcc to Occupied 2 minute delay going from Occupied to UnOcc 0342 Override Option only available in non programmable mode 0 0 No Override 1 Override This option is only available for non programmable mode ...

Page 14: ...r 0650 Extended Fan on time Heat 0 0 Off 90 90 seconds Not displayed if fan set to fossil or cool only systems ISU 0170 0660 Extended Fan on time Cool 0 0 Off 40 40 seconds Only shown if system has cool stages ISU 0170 0670 Keypad Lockout 0 0 Unlocked 1 Partial Lockout 1 2 Partial Lockout 2 3 Partial Lockout 3 4 Fully Locked Unlocked All functions accessible Partial 1 Locks out schedule and system...

Page 15: ...st Fan 0 0 Off 1 Fan Stage 1 2 Fan Stage 2 3 Fan Stage 3 Only shown if system has fan Test 3 Installer Test Heat 0 0 Off 1 Heat Stage 1 Only shown if system has fan Test 4 Installer Test EM Heat 0 0 EM Heat Off 1 EM Heat On Only shown if multi stage HP is selected heat pump with more heating than cooling stages Table 6 Installer Setup Menu Continued Installer Setup Number Installer Setup Name Defa...

Page 16: ...selected days These are scheduled with identical times and tempera tures Fig 35 Initial schedule edit screen 6 OCCUPIED 1 flashes denoting the period that is about to be edited 7 Press NEXT and the start time for that period flashes 8 Change the start time by pressing the Up and Down arrow keys 9 Press NEXT to edit the heating and cooling setpoints 10 Continue to cycle through the remaining period...

Page 17: ...t follows the fan sequencing described above with ISU 347 348 349 2 Pipe There are two different 2 pipe modes 2 pipe only and 2 pipe with reheat 2 pipe only 2 pipe modes do not contain the ability to have automatic changeover They are manual changeover only The thermostat will have a priority when choosing a system mode heat or cool When ISU 340 has a 2 pipe changeover sensor enabled the thermosta...

Page 18: ...ED 4 Pipe Cooling Y G2 Cool On Cool or Auto HIGH 4 Pipe Cooling Y G3 Cool On Heat or Auto Auto 4 Pipe Heating W1c Gb G2b G3b Heat On Heat or Auto LO 4 Pipe Heating W1c G Heat On Heat or Auto MED 4 Pipe Heating W1c G2 Heat On Heat or Auto HIGH 4 Pipe Heating W1c G3 Heat On Cool or Heat Auto 2 Pipe Cooling Heatinga Ya Gb G2b G3b Cool On or Heat On Cool or Heat LO 2 Pipe Cooling Heatinga Ya G Cool On...

Page 19: ...pears on the screen The time defaults to the next scheduled period start time 2 Press NEXT to adjust the time for the thermostat to resume schedule NOTE The installer setup can limit the length of time for an override to 1 2 3 or 4 hours beyond the current time 3 Press DONE or wait 5 seconds 4 Press CANCEL or SCHEDULE to cancel Hold Tempera ture Until and resume the schedule OVERRIDE Changes tempe...

Page 20: ...e buttons are either fully or partially locked Fully Locked Screen In this mode the entire interface is locked and not functional To unlock screen see the Advanced Settings section The screen continuously displays SCREEN LOCKED Partially Locked Screen When partially locked Pressing a locked key prompts the screen to indicate LOCKED for five to seven seconds Pressing an unlocked key with LOCKED sho...

Page 21: ...or to absorb the air for a minimum of five minutes before taking a reading See the Sensor instructions for more information NOTE The C7189U TR21 and TR21 A Temperature Sensors are calibrated at the factory and cannot be recalibrated in the field C7189U Remote Indoor Temperature Sensor Operation When installed with Thermostat ISU 0340 set to 3 the remote inside temperature is displayed on the Therm...

Page 22: ...D MULTIPURPOSE THERMOSTAT 63 2675 01 22 Fig 41 20K ohm sensor resistance versus temperature TEMPERATURE DEGREES oF 30 40 50 60 70 80 90 100 110 0 10 20 30 40 RESISTANCE OHMS 20K OHM AT 77oF 25oC 80K 70K 60K 50K 40K 30K 20K 10K oC M5874A ...

Page 23: ...oose or broken wire connection between thermostat and heating equipment Check for 24 Vac between the heat terminal W and transformer common If voltage is not present check wire connection loose or broken between the thermostat and the heating equipment Cooling does not turn on Cool On is solid in the display Cooling equipment failure Check for 24 Vac at the equipment on the secondary side of the t...

Page 24: ...led heating and or cooling equipment Cannot set the system setting to Cool System Type ISU 0170 is set to Heat Only or Heat Only with Fan Set System Type ISU 0170 to match the installed heating and or cooling equipment Heat On is not in the display System setting is not set to Heat and or temperature setting is not set above room temperature Set the system setting to Heat and set the temperature s...

Reviews: