


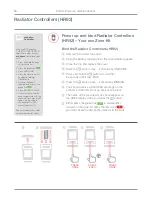

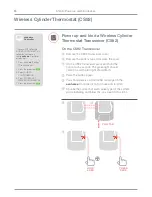


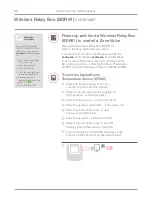

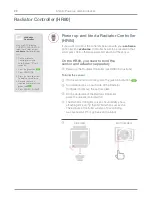
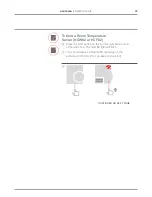


Power up and bind Radiator Controllers
(HR92) – Your evo Zone Kit
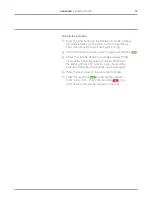
Bind the Radiator Controllers (HR92)
1
Remove the circular top cover
2
Open the battery clip and insert the AA batteries supplied
3
Close the clip and replace the cover
4
Press the
button once − it should say UNBOUND
5
Press and hold the
button for a further
5 seconds until it says BIND
6
Press the
button once – it should say BINDING
7
You should receive a SUCCESS message on the
evohome Controller (if not go back and re-bind)
8
The name of the allocated zone should appear on
the HR92 display when you press the
button
9
Either press the green tick
to add another
radiator to the zone. Or press the red cross
if
you don’t need to add another radiator to the zone
If you are NOT following
GUIDED CONFIGURATION
follow these steps on your
evohome
Controller display
first:
1. Press and hold ‘Settings’
for 3 seconds
2. Press the green tick
3. Press ADD ZONE
4. Press the zone you want
to add the Radiator
Controller to
5. Rename the zone if
required and/or press the
green tick
6. Press RADIATOR VALVE
7. If you want to control the
zone temperature with the
evohome Controller (which
needs to be located in
that zone) press YES,
otherwise press NO.
You must repeat these steps
for each radiator controller.
evohome
Controller
1
2
4
5
6
PRESS
ONCE
PRESS
5 SEC
PRESS
ONCE
Radiator Controllers (HR92)
14
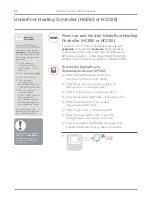
Step 3: Power up and bind devices
Summary of Contents for Evohome
Page 1: ...evohome Installation Guide ...
Page 14: ...12 Step 2 Set up your Central Controller ...
Page 38: ...36 Step 4 System test ...