background image


22 

Multi-Media 


The Multi-Media feature allows you to access voice messages  and display a slide show of personal photos for viewing from your keypad. 

You can customize these features as described in this section. 

Picture Setup 


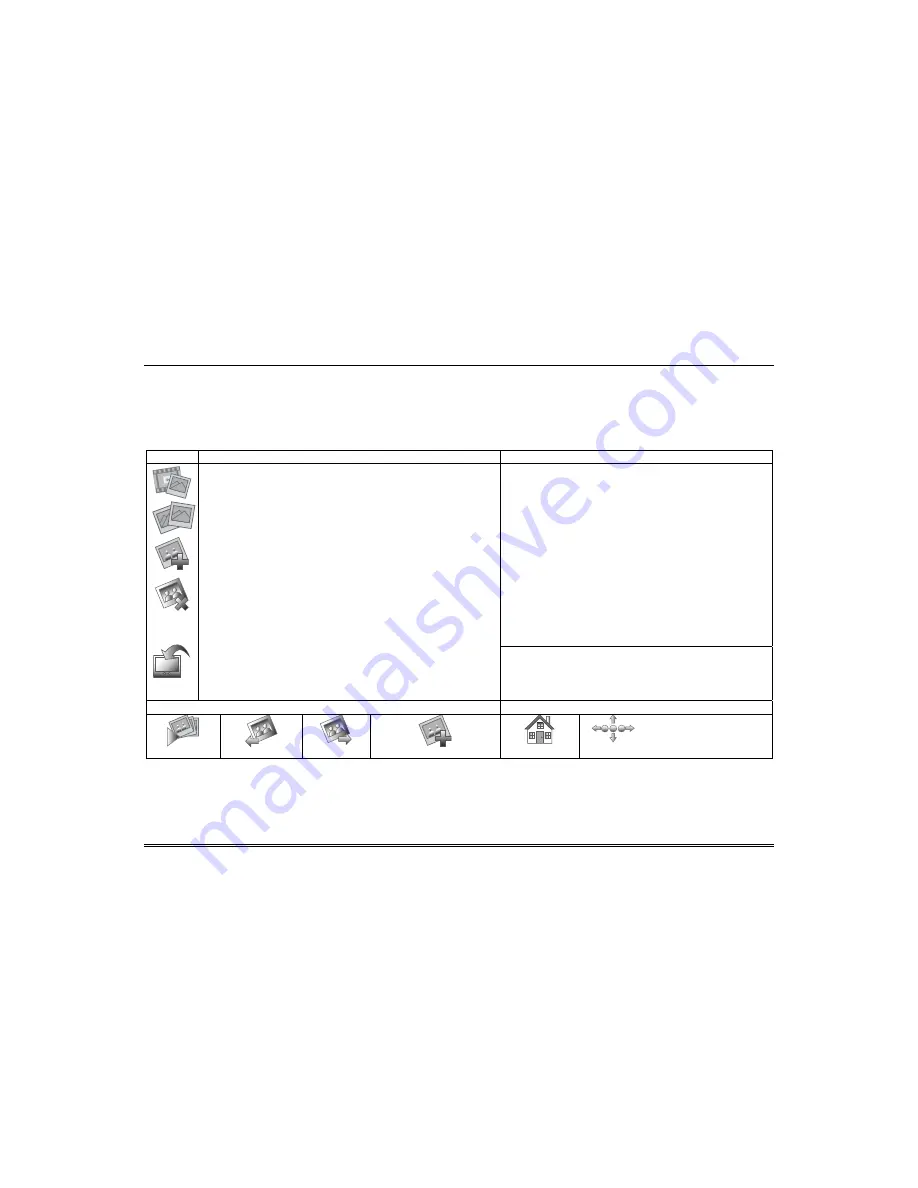
The Picture feature allows the user to display up to 1000 personal photos on the touch-screen and can be accessed by touching the 

Picture icon on the Home screen, or access this feature as follows: 

ICON 

ACTION 

NOTES 


1. Insert your personal media (SD/SDHC) card. 

2. Touch the 

Multi-Media

 icon, and then touch the 

Picture


icon.  

3. Select the type of viewing transition desired by touching the 

Transition

 arrow.  Select from (Standard, Horizontal, Vertical 

or Fade Out). 

4. Touch the 

Slide Delay

 arrow to select the time interval (5, 

10, 15, or 20 seconds) that you want to allow between each 

photo being viewed.  

5. To add an image to the slide show, select the image from the 

list and press the 

Add Image

 icon; the image appears on the 

screen and a check


mark appears next to the selected image 

name on the


list.  

6. To remove an image from the slide show, select the image, 

and press the 

Deselect Image

 icon. 

To set a picture as wallpaper: 

1. Use the slide bar to scroll through the list of pictures and 

highlight the file you want to be displayed on the keypad 

screen.  

2. Touch the 

Set Wallpaper

 icon; view your selection from the 

“Home” screen.


Photo files can be viewed from the (SD/SDHC) Card.  Formats 
supported are .bmp or .jpg files. 
NOTES:  

 To exit slide show at any time and resume keypad operation, 

touch anywhere on the screen. 

 The first image is displayed and a list of stored images 

appears on the screen.  

 When an image is loading, no other Picture Setup function 

can be performed (play, previous, next, add or set wallpaper). 

Touch the TOP button to move up one level in the directory.


Touch the OPEN button to view larger images and/or open 
directories.  

Touch the CLEAR ALL button to clear all pictures from the 
current slide show rotation. 

NOTE: On the “Home” screen press the Minimize Home icon 
to reduce the “Home” screen icons and to have better visibility 
of the Wallpaper. 


Picture  Icons


Play Image


Previous Image


Next Image 


Add Image 


Minimize Home 


 Maximize Home 


Summary of Contents for 6280 Series

Page 1: ...6 62 28 80 0 S Se er ri ie es s T To ou uc ch hC Ce en nt te er r K Ke ey yp pa ad ds s User Guide 800 07602V3 4 13 Rev B ...

Page 2: ...9 SECURITY 10 Introduction to Security System Operation 10 How to Arm the System 11 How to Arm Multiple Partitions 11 How to Display Faults 12 How to Bypass Zones 12 How to Clear Bypassed Zones 13 How to Disarm the System 13 To disarm Multi Partitions do the following 14 How to Check the Status of Other Partitions 14 Fire and Carbon Monoxide Alarm Operation 15 In Case of Fire Alarm 15 Silencing an...

Page 3: ...ghtness and Volume Control 19 Display Audio Setup 19 Operating Modes 19 Language Selection 20 Adjust the Screen Timeouts 20 Clean Screen 21 Routine Care 21 System Information 21 MULTI MEDIA 22 Picture Setup 22 Voice Messages 23 USER SETUP 24 User Setup 24 Authority Levels 24 Access User Setup 24 How to Add a User 25 How to Delete a User 25 How to Edit a User 25 Safe Mode 26 Time Date Setup 27 ...

Page 4: ...Table of Contents 4 Setting Daylight Saving Time 27 Setting Current Time and Date 27 Advanced Setup 28 Keypad Test 28 Keypad Reset 29 GLOSSARY 30 ...

Page 5: ... number of strategically placed smoke carbon monoxide or combustion detectors Lighting output devices The system uses microcomputer technology to monitor all zones and provides appropriate information for display on the TouchCenter and or other keypads used with the system Your system may also have been programmed to automatically transmit alarm or status messages over the phone lines to a central...

Page 6: ... Arm Security Light MultiMedia Friday 02 46PM 01 06 2012 home_screen V0 Multi Media Application The Picture feature allows you to display personal photos in a slide show format via the external SD SDHC card It is recommended that you use the SD SDHC card supplied with the keypad In everyday handling memory cards can become susceptible to malfunction and or failure due to electrostatic discharges a...

Page 7: ...play personal photos in a slide show format Panic Displays Emergency functions as programmed by the installer Note This icon is displayed and active on all screens except while in the Clean Screen mode and during an LCD Display test in Diagnostics Message Record and retrieve Voice Messages Back Reverts to the last screen viewed Voice Status Allows user to hear system status Control Panel Message T...

Page 8: ...ly Expander Failure The system has a failure in an expansion module Low Battery The system battery that powers the system during an AC power loss is low LRR Supervision Failure The Communication Device used to communicate with the central station has a supervision failure Max Attempts Exceeded The system has exceeded the maximum attempts to communicate with the Central Station Pager Failure The sy...

Page 9: ...UTTON Press to reset keypad ON System is armed OFF System is not armed ARMED RED LED READY GREEN LED ON System is disarmed and ready to arm OFF System is armed or disarmed but not ready If disarmed faults or troubles are present MESSAGE YELLOW LED SD SDHC CARD Slot NOTE If the Screen Blackout feature EN50131 Display is enabled see below the keypad returns to the Home screen and the Armed and Ready...

Page 10: ...de Yes Yes set for Away or Stay Mode No set for Instant or Maximum Mode Yes Yes set for Away or Maximum Mode No set for Stay or Instant Mode See note below for Night Mode arming Note Night Mode on Residential Panels Only arms all perimeter zones plus all zones listed in Zone List 5 IMPORTANT On commercial systems Away Auto Stay mode is shown as Away mode with all zones monitored However some inter...

Page 11: ...0 seconds of Exit Delay When exit delay time expires the screen automatically changes to indicate the system is Armed Note For CP 01 installations Maximum Mode cannot be used How to Arm Multiple Partitions Note Some systems may not have multiple partitions and the Arm Multi Partitions icon may not be displayed To arm multiple partitions do the following ICON ACTION NOTES 1 From the Home screen tou...

Page 12: ... All Distressed Zones Alarm Troubles Faults Bypass Zones Low Battery ALL How to Bypass Zones The Bypass function is used when you want to arm your system with one or more zones left open Bypassed zones are unprotected and do not cause an alarm when violated while your system is armed Residential systems do not allow you to bypass fire carbon monoxide or emergency zones On commercial fire systems a...

Page 13: ...is requesting and receiving the zone data from the control panel the screen displays Please Wait Then the zones along with their current status are displayed 3 Enter your 4 digit user code The More Choices screen is displayed showing the system as Ready to Arm Note If the system is armed and you unbypass a zone it disarms the system If zones are still faulted not ready the system will indicate the...

Page 14: ...tion s to disarm and press OK or press ALL to disarm all partitions The keypad displays Multi Partition Arming How to Check the Status of Other Partitions This system supports between one and eight Partitions depending on the system Partitioning enables a single physical alarm system to control up to eight areas of protection partitions depending on the system you have purchased Each TouchCenter k...

Page 15: ...bon monoxide detector if installed is on 24 hours a day providing continuous protection In the event of an emergency the installed smoke heat carbon monoxide detectors automatically send signals to your Control Communicator triggering a loud interrupted sound from the keypad An interrupted sound is also produced by optional exterior sounders EVACUATE ALL OCCUPANTS FROM THE PREMISES IMMEDIATELY Not...

Page 16: ...display by touching the DISPLAY FAULTS icon on the Arming screen selecting the fire or carbon monoxide zone touching the CLEAR icon and then entering your user code Note Contact your Central Station Security Company for servicing if you have further problems with your system More Choices How to Clear Hide a Control Panel Message The Control Panel Message icon alerts the user to a control panel mes...

Page 17: ...N ACTION NOTES 1 Touch the SECURITY icon 2 Touch the MORE CHOICES icon 3 Touch the CONSOLE MODE icon Perform functions as you would from a standard alpha keypad How to View the Event Log Your system has the ability to record various events in a history log wherein each event is recorded with the time and date of its occurrence The control panel must be programmed to record various system events in...

Page 18: ... can be sent to the central monitoring station from the Emergency screen The Emergency screen can be accessed by activating the PANIC Icon Perform the following to send an emergency message ICON ACTION NOTES 1 Touch the PANIC icon 2 Touch and hold for at least 2 seconds the associated alarm icon FIRE PANIC SILENT PANIC or MEDICAL You are immediately returned to the screen from which you pressed th...

Page 19: ... Screen from Display Audio Setup screen Operating Modes Operating modes provides access to Chime Mode Voice Mode and Voice Chime which allows you to turn the TouchCenter chime mode and voice mode on or off Chime Mode TouchCenter chimes whenever a door or window is open Voice Mode TouchCenter voice annunciates whenever a change in system status occurs such as Armed Disarmed or Alarms Voice Chime Th...

Page 20: ...tion is selected returns to the Home screen after the selected To Homepage After time has expired unless Never option is selected and if enabled the Auto Slideshow After time begins the slide show To select the desired screen timeouts do the following ICON ACTION NOTES 1 From the Home screen touch the Setup icon 2 Touch the Disp Audio Setup icon 3 Enter your Authorized Code 4 Touch the desired sel...

Page 21: ... Screen becomes inactive so that you may wipe the screen clean Please use a damp soft cloth DO NOT use any liquids sprays or ammonia based cleaners Press CONTINUE to disable touchscreen Panics cannot be initiated during this process IMPORTANT Do not use an abrasive cleaning agent or abrasive cloth when cleaning the TouchCenter or damage to the touch screen may occur Routine Care Treat the componen...

Page 22: ... to the selected image name on the list 6 To remove an image from the slide show select the image and press the Deselect Image icon To set a picture as wallpaper 1 Use the slide bar to scroll through the list of pictures and highlight the file you want to be displayed on the keypad screen 2 Touch the Set Wallpaper icon view your selection from the Home screen Photo files can be viewed from the SD ...

Page 23: ...on 6 If you wish to delete messages touch the Cancel icon 7 To exit touch the HOME icon As you are recording your message the remaining time counter counts down to indicate the total remaining time available and a Recording New Memo message is displayed above the message list window The message indicator flashes and the message is listed in the message list window To record additional messages rep...

Page 24: ...ned to you there are certain system functions you may be prohibited from performing The following information describes the authority levels that can be assigned through the TouchCenter and provides the equivalent authority level name found in your alarm system manuals The authority levels that can be assigned are as follows TouchCenter Authority Level Functions Equivalent System Name Residential ...

Page 25: ...dependent upon the alarm panel you are interfacing with Check your alarm panel Installation and Setup Guide to determine who can delete add and edit users ICON ACTION NOTES 1 From the User Setup screen touch the ADD USER icon and enter your Authorized Code 2 Touch the box next to Enter User Name 3 Type in the user name 6 characters max no spaces between characters and touch the OK icon 4 Touch the...

Page 26: ...nd to come to the front If this occurs the Yes No message that disappeared times out in 30 seconds even though it is not visible Then the keypad resets into the Normal Mode or Safe Mode if this is the third time that the warning message appeared Note that this is a limited mode of operation While in this mode You can use the Security icon to access the Console Emulation Mode of operation to try to...

Page 27: ... that you want DST to start 4 Touch APPLY to save the settings Make sure DST On is checked to enable this feature Setting Current Time and Date To set the current time do the following ICON ACTION NOTES Press the Get Time icon if available to have the keypad download the time and date from the control panel and exit the Set Time Date screen Or manually set the time as follows 1 Touch the Month arr...

Page 28: ...The Emergency screen cannot be accessed while running the LCD Display Test Audio Test ICON ACTION NOTES 1 Press the Audio Test icon Testing is displayed while beeps sound from the speaker At the conclusion of the test a pop up Confirmation Window is displayed with the question Did you hear Beeping When you press Yes Passed is displayed in the test status column on the Diagnostics screen When you p...

Page 29: ... be set to arm the system in one of five arming modes Away Stay Instant Night Maximum Apply accepts the setting Back cancels your selection Output Setup Function The Output Setup screen displays output selections A maximum of 18 outputs can be enabled or disabled on the Output screen To set the Output Setup function press the System Setup and Advanced Setup icon and then do the following ICON ACTI...

Page 30: ... that have been set for your system during installation and record them on the separate sheet provided in this guide Home Screen The screen that is normally displayed on the TouchCenter when entries are not being made The TouchCenter returns to this screen when the Home icon is pressed or when an entry is not received for a pre set period of time Keypad This is the device through which you operate...

Page 31: ...s encouraged to try to correct the interference by one or more of the following measures If using an indoor antenna have a quality outdoor antenna installed Reorient the receiving antenna until interference is reduced or eliminated Move the radio or television receiver away from the receiver control Move the antenna leads away from any wire runs to the receiver control Plug the receiver control in...

Page 32: ...F OR RELATING IN ANY WAY TO THE PRODUCT AND OR FOR BREACH OF THIS OR ANY OTHER WARRANTY OR CONDITION EXPRESS OR IMPLIED OR UPON ANY OTHER BASIS OF LIABILITY WHATSOEVER EVEN IF THE LOSS OR DAMAGE IS CAUSED BY SELLER S OWN NEGLIGENCE OR FAULT AND EVEN IF SELLER HAS BEEN ADVISED OF THE POSSIBILITY OF SUCH LOSSES OR DAMAGES Any product description whether in writing or made orally by Seller or Seller ...

Reviews: