background image

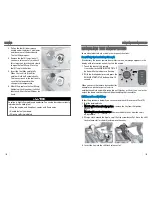
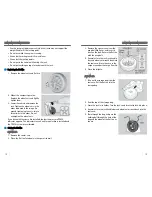
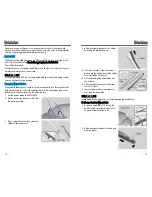
5. While pushing the key down, press the shift lever release button and place

the shift lever into Neutral (N). The lock is now released. Have the shift lever

checked by a dealer as soon as possible.

Jump Starting

Turn off the power to electric devices, such as audio and lights. Turn off the

engine, then open the hood.
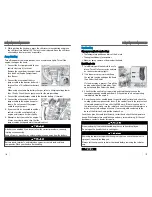
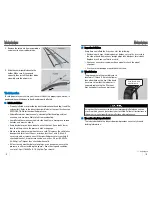
1. Connect the first jumper cable to your

vehicle's battery (+) terminal.
Remove the cover from the under-hood

fuse box. See (Engine Compartment

Fuse Boxes)

2. Connect the other end of the first

jumper cable to the booster battery (+)

terminal. Use a 12-volt booster battery

only.
When using an automotive battery charger, select a charging voltage lower

than 15 volts. Check the charger manual for the proper setting.

3. Connect the second jumper cable to the booster battery (-) terminal.
4. Connect the other end of the second

jumper cable to the engine hanger as

shown. Do not connect this jumper

cable to any other part.

5. If your vehicle is connected to another

vehicle, start the assisting vehicle's

engine and increase its rpm slightly.

6. Attempt to start your vehicle's engine. If

it turns over slowly, make sure that the

jumper cables have good metal-to-metal contact.

A battery can explode if you do not follow the correct procedure, seriously

injuring anyone nearby.
Keep all sparks, open flames, and smoking materials away from the battery.

Battery posts, terminals, and related accessories contain lead and lead

compounds. Wash your hands after handling.

HANDLING THE UNEXPECTED

106 |

Overheating

Signs your engine is overheating:

• The temperature gauge needle is at the H mark
• The engine suddenly loses power
• Steam or spray comes out from under the hood

First thing to do:
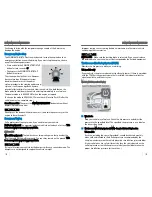
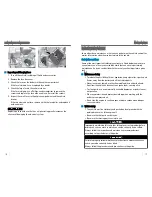
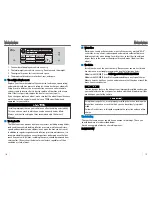
1. Immediately park the vehicle in a safe

place. Turn off all accessories and turn

on the hazard warning lights.

2. If no steam or spray is present: Keep

the vehicle running and open the hood

(See Under the Hood).
If steam or spray is present: Turn off the

engine and wait until it subsides. Then,

open the hood (See Under the Hood).

3. Check that the cooling fan is operating and stop the engine once the

temperature gauge needle goes down. If the cooling fan is not operating,

immediately stop the engine.

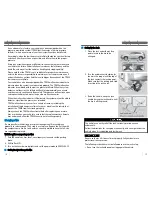
4. Once the engine has cooled down, inspect the coolant level and check the

cooling system components for leaks. If the coolant level in the reserve tank

is low, add coolant until it reaches the MAX mark. If there is no coolant in

the reserve tank, make sure the radiator is cool, then cover the radiator cap

with a heavy cloth and open the cap. If necessary, add coolant up to the

base of the filler neck, and put the cap back on.

Once the engine has cooled sufficiently, restart it and check the temperature

gauge. If the temperature needle has gone down, resume driving. If it has not

gone down, contact a dealer for repairs.

Steam and spray from an overheated engine can seriously scald you.
Do not open the hoodif steam is coming out.

Removing the radiator cap while the engine is hot can cause the coolant to

spray out, seriously scalding you.
Always let the engine and radiator cool down before removing the radiator

cap.

HANDLING THE UNEXPECTED

| 107

Summary of Contents for HR-V 2019

Page 1: ...31T7AG30 OG08882 00X31 T7A G300 owners honda com U S myhonda ca Canada 2019 Honda HR V Owner s Guide 2018 Honda Motor Co Ltd All Rights Reserved Printed in U S A 2019 OWNER S GUIDE ...

Page 2: ...like situations such as an airbag deployment or hitting a road obstacle data that will assist in understanding how a vehicle s systems performed The EDR is designed to record data related to vehicle dynamics and safety systems for a short period of time typically 30 seconds or less The EDR in this vehicle is designed to record such data as How various systems in your vehicle were operating Whether...

Page 3: ...service is available to you in the United States and Canada throughout your 3 year 36 000 mile warranty term Services include jump starting flat tire and lockout assistance towing and more limitations apply Call 866 864 5211 U S or 800 465 7587 Canada TABLE OF CONTENTS VISUAL INDEX 1 Steering Wheel and Nearby Controls 1 Dashboard and Nearby Controls 2 SAFETY INFORMATION 3 Important Safety Informat...

Page 4: ...m TPMS 109 Changing a Tire 110 Fuse Locations 114 MAINTENANCE 117 Safety Precautions 117 Maintenance MinderTM 118 Under the Hood 120 Engine Oil 122 Engine Coolant 124 Checking the Battery 125 Window Washer Fluid 125 Brake Fluid 126 Changing Wiper Blades 126 Tire Information 128 Tire Labeling 131 DOT Tire Quality Grading 132 Air Conditioning 134 Testing of Readiness Codes 134 SPECIFICATIONS 136 CUS...

Page 5: ...ondition Engaging in cell phone conversation or other activities that keep you from paying close attention to the road other vehicles and pedestrians could lead to a crash Remember situations can change quickly and only you can decide when it is safe to divert some attention away from driving n Important Handling Information Your vehicle has higher ground clearance than a passenger vehicle designe...

Page 6: ...y after starting the engine Seat Belts A seat belt is your best protection in all types of collisions Airbags are designed to supplement seat belts not replace them So even though your vehicle is equipped with airbags make sure you and your passengers always wear your seat belts and wear them properly n Lap Shoulder Seat Belts All five seating positions are equipped with lap shoulder seat belts wi...

Page 7: ... 3 Position the lap part of the belt as low as possible across your hips then pull up on the shoulder part of the belt so the lap part fits snugly This lets your strong pelvic bones take the force of a crash and reduces the chance of internal inquiries 4 If necessary pull up on the belt again to remove any slack then make sure that the belt rests across the center of your chest and over your shoul...

Page 8: ...tain Airbags Side curtain airbags help protect the heads of the driver and passengers in outer seating positions during a moderate to severe side impact The side curtain airbags equipped in this vehicle are also designed to help reduce the likelihood of partial and complete ejection of vehicle occupants through side windows in crashes particularly rollover crashes The side curtain airbags are loca...

Page 9: ... time besides vehicle start up or does not come on at all have the system checked by a dealer as soon as possible If you don t your airbags and seat belt tensioners may not work properly when they are needed 1 If equipped SAFETY INFORMATION 10 Ignoring the SRS indicator can result in serious injury or death if the airbag systems or tensioners do not work properly Have your vehicle checked by a dea...

Page 10: ...ensioners The driver s and front passenger s seat belt buckles incorporate sensors that detect whether or not the belts are fastened 6 A driver s seat position sensor This sensor determines the optimal force at which the airbag will deploy in a crash 7 Weight sensors in the front passenger s seat The front passenger s airbag will be turned off if the weight on the seat is about 65 lbs 29 kg or les...

Page 11: ...kely press deep into the child and cause serious or fatal injuries Never let two children use the same seat belt Both children could be very seriously injured in a crash Do not allow children to operate the doors windows or seat adjustments SAFETY INFORMATION 14 Do not leave children pets or people needing assistance in the vehicle unattended especially in hot weather when the inside of the vehicl...

Page 12: ...tions and vehicles not equipped with LATCH a LATCH compatible child seat can be installed using the seat belt and a top tether for added security This is because all child seats are required to be designed so that they can be secured with a lap belt or the lap part of a lap shoulder belt In addition the child seat manufacturer may advise that a seat belt be used to attach a LATCH compatible seat o...

Page 13: ...nsert the latch plate fully until it clicks SAFETY INFORMATION 18 3 Slowly pull the shoulder part of the belt all the way out until it stops This activates the lockable retractor 4 Let the seat belt completely wind up into the retractor then try to pull it out to make sure the retractor is locked If you are able to pull the shoulder belt out the lockable retractor is not activated Pull the seat be...

Page 14: ...ild s neck and arm The lap part of the seat belt is as low as possible touching the child s thighs The child can stay seated for the whole trip If a lap shoulder belt cannot be used properly position the child in a booster seat in a rear seating position For the child s safety check that the child meets the booster seat manufacturer s recommendations Some U S states and Canadian provinces territor...

Page 15: ... or death you should immediately inform Honda Canada Inc and you may also inform Transport Canada If Transport Canada receives similar complaints it may open an investigation and if it finds that a safety defect exists in a group of vehicles it may lead to a recall and remedy campaign However Transport Canada cannot become involved in individual problems between you your dealer or Honda Canada Inc...

Page 16: ...onitoring System TPMS Blinks and remains on Have your vehicle checked by a dealer If the vehicle is fitted with a compact spare get your regular tire repaired or replaced and put back on your vehicle as soon as you can 1 If equipped INSTRUMENT PANEL 24 Vehicle Stability Assist VSA System There is a problem with the VSA or hill start assist system Collision Mitigation Braking System CMBS There is a...

Page 17: ...ndicators remind you when an item is on or off VSA off VSA engaged blinks LKAS on ACC 1 on Turn signals hazards on Fog lights 1 on High beams on Exterior lights on Auto High Beam System on 1 If equipped INSTRUMENT PANEL 26 Information Display 1 Multi Information Display 1 Consists of several displays that provide you with useful information Models with Information Display To switch the display pre...

Page 18: ...mote transmitter in the vehicle can result in theft or accidental movement of the vehicle Always take it with you whenever you leave the vehicle unattended Smart Entry System 1 When you carry the remote transmitter for example in a pocket or purse and it is outside the vehicle and within range about 32 inches or 80 cm you can lock or unlock the doors and the tailgate without handling the transmitt...

Page 19: ...ar it Listen for a beep The system is activated 2 Walk at least 5 feet 1 5 m away 3 Listen for a beep and look for the lights to flash The doors lock The auto lock function is set to OFF as the factory default setting The auto lock function can be set to ON using the multi information display If you set the auto lock function to ON using the multi information display only the remote transmitter th...

Page 20: ...the switch to unlock all doors and the tailgate To lock Press the lock side of the switch to lock all doors and the tailgate VEHICLE CONTROLS 32 n Childproof Door Locks The childproof door locks prevent the rear doors from being opened from the inside regardless of the position of the lock tab Slide the lever in the rear door to the lock position and close the door Open the door using the outer do...

Page 21: ...ch back then release To close Firmly push the switch forward then release 1 If equipped VEHICLE CONTROLS 34 The moonroof opens or closes completely To stop the moonroof at any time push the switch briefly n Manual Operation To open Push the switch back lightly To close Pull the switch forward lightly Release the switch when the window reaches the desired position n Moonroof Tilt To tilt Push the c...

Page 22: ... a certain time The headlights come on when you unlock a door in dark areas with the headlight switch in AUTO Turn on all exterior lights including headlights Turn fog lights 1 on or off n Cargo Area Lights Located on the rear ceiling in front of the tailgate ON position Cargo lights remain on OFF position Cargo area lights remain off One Touch Turn Signal Use this quick and convenient method to s...

Page 23: ...g change the beams manually For the system to work properly Do not place an object that reflects light on the dashboard VEHICLE CONTROLS 38 Keep the windshield around the camera clean When cleaning the windshield be careful not to apply windshield cleanser to the camera lens Do not attach an object sticker or film in the area around the camera Do not touch the camera lens If the camera receives a ...

Page 24: ...tain full control of the vehicle You should be able to sit upright and well back in the seat adequately press the pedals without leaning forward and grip the steering wheel comfortably The passenger s seat should be adjusted so that it is as far back from the front airbag in the dashboard as possible The National Highway Traffic Safety Administration and Transport Canadarecommends that drivers all...

Page 25: ...against whiplash and other rear impact crash injuries The center of the back of the occupant s head should rest against the center of the restraint The tops of the occupant s ears should be level with the center height of the restraint For a head restraint system to work properly Do not hang any items on the head restraints or from the restraint legs Do not place any objects between an occupant an...

Page 26: ...eft and right halves of the rear seat cushions to make room for cargo area 1 Make sure the seat belt buckles are in their loops on the seat VEHICLE CONTROLS 44 2 Pull up the rear seat cushion 3 Fold the seat leg down while pushing the seat cushion firmly against the seat back to lock it n Folding Down the Rear Seats Separately fold down the left and right halves of the rear seat to make room for c...

Page 27: ...with Day Night Positions 1 Manually adjust the position to reduce headlight glare from vehicles behind you Flip the tab to switch between day and night positions VEHICLE CONTROLS 46 n Automatic Dimming Rearview Mirror 1 When driving after dark the automatic dimming function reduces glare in the rearview mirror from headlights behind you Press the AUTO button to turn this function on and off This f...

Page 28: ...out SYNC icon 1 If equipped VEHICLE CONTROLS 48 Models with SYNC icon n Heated Windshield Button 4 Turn the vehicle on Press the heated windshield button to de ice the windshield The heated windshield may automatically activate when the outside temperature is below 4 C and deactivate when the temperature reaches 6 C Front Seat Heaters 1 Quickly warm the front seats when the vehicle is on Press the...

Page 29: ...splay Audio n How to Change a Setting Models with Color Audio Use the selector knob to make and enter selections 1 Press the MENU CLOCK button 2 Select Settings 3 Select a setting option and make your preferred changes 4 Press the Back button to exit the menus Models with Display Audio 1 Press the SETTINGS button 2 Select a category 3 Select a setting option and make your preferred changes 4 Press...

Page 30: ...ICLE CONTROLS 52 AUDIO AND CONNECTIVITY Learn how to operate the vehicle s audio system Basic Audio Operation Connect audio devices and operate buttons and displays for the audio system n USB Port 1 Open the USB cover 2 Install the iPod USB connector or the USB flash drive into the USB port The USB port 1 0A is for playing audio files on a USB flash drive connecting a cellular phone and charging d...

Page 31: ...en listening to a CD 1 iPod USB flash drive or Bluetooth Audio Press To skip to the next song Press To go back to the beginning of the current or previous song When listening to a Bluetooth Audio Press To go to the group up Press To go to the group down When listening to Internet radio 1 Press To skip to the next song Press and hold To select the next station Press and hold To select the previous ...

Page 32: ...esponse HondaLink Models with Display Audio A subscription based service that provides convenient features such as voice communication in case of emergency online security and one on one operator assistance 1 To check phone compatibility and get more information visit handsfreelink com US handsfreelink ca Canada Standard data rates may apply with your phone service provider n HondaLink Connection ...

Page 33: ...ONNECTIVITY 58 1 Maps Navigation Display Google Maps and use the navigation function just as you would with your Android phone When the vehicle is in motion it is not possible to make keyboard entries Stop the vehicle in a safe location to undertake a search or provide other inputs Models with navigation system Only one navigation system pre installed navigation or Android Auto can give directions...

Page 34: ...benow U S or www sirius ca subscribe now Canada 1 If equipped AUDIO AND CONNECTIVITY 60 To learn about additional features such as multi channel preset replay or SportsFlash see your Owner s Manual at owners honda com U S or myhonda ca Canada iPod Play and operate an iPod 14 through the vehicle s audio system Connect your device to the USB port see USB Port Models with Color Audio 14 iPod and iPho...

Page 35: ...Menu then select Music Search 2 Select the items on that menu AUDIO AND CONNECTIVITY 62 Pandora 13 Your audio system allows you to listen to music from the Pandora 13 app on a compatible smartphone This function is available when the phone is paired and connected to the vehicle s Bluetooth HandsFreeLink system or with an iPhone you can connect using your USB cable to the USB port USB Flash Drive Y...

Page 36: ...Display Audio Use the touchscreen to search for tracks AUDIO AND CONNECTIVITY 64 1 From the audio screen press MENU 2 Select Music Search 3 Select a folder 4 Select the track you want to play Bluetooth Audio Play streaming or stored audio from your compatible phone when it is paired to Bluetooth HandsFreeLink see Pairing a Phone Visit handsfreelink com US or handsfreelink ca Canada to check phone ...

Page 37: ...2 Select Music Search 3 Select a search category 4 Select the track you want to play Note Make sure the volume on your phone is properly adjusted You may need to enable additional settings on your phone for playback The resume pause function and remote audio controls are not supported on all phones Compact Disc CD The audio system supports audio CDs CD Rs and CD RWs in MP3 WMA or AAC 1 formats Wit...

Page 38: ... selector knob to select an item on the screen then press the selector knob Models with Display Audio BLUETOOTH HANDSFREELINK 68 Pick up button Press to go directly to the phone screen or to answer an incoming call Hang up back button Press to end a call go back to the previous command or cancel a command Talk button Press to call a number with a stored voice tag Menu button Press and hold to disp...

Page 39: ...ion screen Confirm if the pairing code on the screen and your phone match This may vary by phone 6 A notification appears on the screen if pairing is successful Models with Display Audio Use the touchscreen to make and enter selections BLUETOOTH HANDSFREELINK 70 1 Select Phone 2 Select Yes 3 Make sure your phone is search or discoverable mode then select Continue HFL automatically searches for a B...

Page 40: ...g starts automatically BLUETOOTH HANDSFREELINK 72 Models with Display Audio 1 Go to the phone menu screen 2 Select Phonebook 3 Select a name You can also search by letter Select Search 4 Select a number Dialing starts automatically n Storing Speed Dial Entries Store up to 20 numbers for quick dialing To store a speed dial number Models with Color Audio 1 Press the phone button 2 Rotate the selecto...

Page 41: ...tor knob Dialing starts automatically Models with Display Audio BLUETOOTH HANDSFREELINK 74 1 Go to the phone menu screen 2 Select Speed Dial 3 Select a number Dialing starts automatically SMS Text Messaging and E Mail 1 HFL can display newly received text messages as well as the last 20 messages received on a linked cell phone Each received message can be read aloud and replied to using a fixed co...

Page 42: ...ou to a desired destination You can operate the system using voice commands or the system controls To reduce the potential of driver distraction certain manual functions may be inoperable or grayed out while the vehicle is moving Voice commands are always available n Steering Wheel Controls Use the steering wheel controls to give voice commands If you press the MENU button on the steering wheel an...

Page 43: ...ou can easily route to it 1 Select Set Home Location 2 Select an option Select Use Current Location to set home location If selecting Enter My Address Recently Found or Saved Place proceed to steps 3 and 4 3 Select the home location 4 Select Select 1 If equipped NAVIGATION 78 n Street Address 1 Select Map 2 Select the search icon 3 Select Address 4 Select Search All 5 Enter the house number and se...

Page 44: ... Make sure to secure the floor mats If you have any animals on board do not let them move freely in the vehicle Securely close and lock all doors and the tailgate Adjust your seating position mirrors and steering wheel properly DRIVING 80 Make sure items placed on the floor behind the front seats cannot roll under the seats Everyone in the vehicle must fasten their seat belt Make sure that the ind...

Page 45: ...e how this reduces the available cargo and luggage load capacity of your vehicle Overloading or improper loading can affect handling and stability and cause a crash in which you can be hurt or killed Follow all load limits and other loading guidelines in this guide DRIVING 82 In addition the total weight of the vehicle all occupants accessories cargo and trailer tongue load must not exceed the Gro...

Page 46: ...lectric parking brake indicator comes on for 15 seconds when you pull up to electric parking brake switch 2 Check that the transmission is in P then depress the brake pedal 3 Press the ENGINE START STOP button without depressing the accelerator pedal Note The engine is harder to start in cold weather and in thinner air found at altitudes above 8 000 feet 2 400 m When starting the engine in cold we...

Page 47: ... equipped DRIVING 86 Continuously variable transmission models with paddle shifters Park P Used when parking before turning off or starting the power system Transmission is locked Reverse R Used when reversing Neutral N Transmission is not locked Drive D For normal driving When temporarily driving in the 7 speed manual shift mode Drive S Used for better acceleration increasing engine braking going...

Page 48: ...ur vehicle is equipped with disc brakes at all four wheels A vacuum power assist helps reduce the effort needed on the brake pedal The brake assist system increases the stopping force when you depress the brake pedal hard in an emergency situation The anti lock brake system ABS helps you retain steering control when braking very hard DRIVING 88 n Electric Parking Brake Keep the vehicle from moving...

Page 49: ...ensing Adaptive Cruise Control ACC 1 Helps maintain a constant vehicle speed and a set following interval behind a vehicle detected ahead of yours without you having to keep your foot on the brake or the accelerator 1 If equipped DRIVING 90 Lane Keeping Assist System LKAS Provides steering input to help keep the vehicle in the middle of a detected lane and provides tactile and visual alerts if the...

Page 50: ...on the MAIN button or the brake pedal The CRUISE CONTROL indicator goes off After cruise control has been canceled you can still resume the prior set speed by pressing the RES button while driving at a speed of at least 25 mph 40 km h DRIVING 92 Press CRUISE to turn the system off Improper use of cruise control can lead to a crash Use cruise control only when traveling on open highways in good wea...

Page 51: ...s accelerates or decelerates your vehicle s set speed to keep the vehicle s set following interval from the vehicle ahead If a vehicle detected ahead of you slows down abruptly or if another vehicle cuts in front of you a beep sounds and BRAKE appears on the to alert you ACC has limited braking capability When your vehicle speed drops below 22 mph 35 km h ACC will automatically cancel and no longe...

Page 52: ... button to turn the system off n Important Safety Reminder LKAS is for your convenience only It is not a substitute for your vehicle control The system does not work if you take your hands off the steering wheel or fail to steer the vehicle Do not place an object on the top of the instrument panel It may reflect onto the windshield and prevent the system from detecting lane lines properly Road Dep...

Page 53: ...sist you when there is a possibility of your vehicle colliding with a vehicle or a pedestrian detected in front of yours The CMBS is designed to alert you when a potential collision is determined as well as to reduce your vehicle speed to help minimize collision severity when a collision is deemed unavoidable The system can give you visual audible and tactile alerts when a potential collision is d...

Page 54: ...h Activate the right turn signal The LaneWatch display appears Check the display for blind spots and visually confirm that it is safe to change lanes You can also press the LaneWatch button on the end of the turn signal switch to view a constant real time display Press it again to turn the display off n Changing Settings Customize the display and how and when the display appears 1 From the Home sc...

Page 55: ...ral factors including driving conditions load weight idling time driving habits and vehicle condition Depending on these and other factors you may not achieve the rated fuel economy of this vehicle Refueling Use the proper fuel and refueling procedure to ensure the best performance and safety of your vehicle n Fuel Information Use of unleaded gasoline of 87 octane or higher is recommended Honda re...

Page 56: ...cal or emergency situations Smart Entry System Battery Strength If the battery life in your remote transmitter is weak a message appears in the display with information on how to start the engine 1 Touch the back of the remote transmitter to the ENGINE START STOP button while the indicator is flashing 2 With the brake pedal pressed press the ENGINE START STOP button within 10 seconds When you carr...

Page 57: ...HANDLING THE UNEXPECTED 106 Overheating Signs your engine is overheating The temperature gauge needle is at the H mark The engine suddenly loses power Steam or spray comes out from under the hood First thing to do 1 Immediately park the vehicle in a safe place Turn off all accessories and turn on the hazard warning lights 2 If no steam or spray is present Keep the vehicle running and open the hood...

Page 58: ...g arms that go under the front tires and lift them off the ground The rear tires remain on the ground This is an acceptable way to tow your vehicle Trying to lift or tow your vehicle by the bumpers will cause serious damage The bumpers are not designed to support the vehicle s weight HANDLING THE UNEXPECTED 108 Improper towing such as towing behind a motorhome or other motor vehicle can damage the...

Page 59: ...on of replacement or alternate tires or wheels on the vehicle that prevent the TPMS from functioning properly Always check the TPMS malfunction telltale after replacing one or more tires or wheels on your vehicle to ensure that the replacement or alternate tires and wheels allow the TPMS to continue to function properly Changing a Tire If a tire goes flat while driving grasp the steering wheel fir...

Page 60: ...icator stays on until a regular tire is installed and the TPMS system is recalibrated n Storing the Flat Tire 2WD Models 1 Remove the center cap 2 Place the flat tire face down in the spare tire well HANDLING THE UNEXPECTED 112 3 Remove the spacer cone from the wing bolt flip it over and insert it back on the bolt Secure the flat tire with the wing bolt 4 Securely store the jack jack handle bar an...

Page 61: ...r and box cover number Refer to the Owner s Manual at www owners honda com for a complete fuse chart n Engine Compartment Fuse Boxes Fuse Box A Located near the brake fluid reservoir Push the tabs to open the box Fuse Box B Pull up the cover on the terminal then remove it while pulling out the tab Replacement of engine compartment fuses should be done by a dealer HANDLING THE UNEXPECTED 114 n Inte...

Page 62: ...ce Only you can decide whether or not you should perform a given task n Maintenance Safety To reduce the possibility of fire or explosion keep cigarettes sparks and flames away from the battery and all fuel related parts Never leave rags towels or other flammable objects under the hood Heat from the engine and exhaust can ignite them causing a fire To clean parts use a commercially available degre...

Page 63: ... Maintenance Minder information adjust the valves during services A B 1 2 or 3 if they are noisy U S models Maintenance replacement or repair of emissions control devices and systems may be done by any automotive repair establishment or individuals using parts that are certified to EPA standards According to state and federal regulations failure to perform maintenance on the maintenance main items...

Page 64: ...he hood release handle under the lower left corner of the dashboard 3 Push the hood latch lever in the center of the hood to release the lock mechanism and open the hood 4 Remove the support rod from the clamp using the grip Mount the support rod in the hood When closing remove the support rod and stow it in the clamp then gently lower the hood MAINTENANCE 121 ...

Page 65: ...ontainer This seal indicates the oil is energy conserving and that it meets the American Petroleum Institute s latest requirements Use Genuine Honda Motor Oil or another commercial engine oil of suitable viscosity for the ambient temperature MAINTENANCE 122 Use Genuine Honda Motor Oil or another commercial engine oil of suitable viscosity for the ambient temperature You may also use synthetic moto...

Page 66: ...remove it 4 The coolant level should be up to the base of the filler neck Add coolant if it is low 5 Put the radiator cap back on and tighten it fully Removing the radiator cap while the engine is hot can cause the coolant to spray out seriously scalding you Always let the engine and radiator cool down before removing the radiator cap Pour the fluid slowly and carefully so you do not spill any Cle...

Page 67: ...or soft cloth and wiper fluid If the wiper blade rubber has deteriorated you should change the wiper blades 1 Set the power mode to VEHICLE OFF 2 Lift the driver side wiper arm first then the passenger side 3 Press and hold the tab then slide the holder off the wiper arm MAINTENANCE 126 4 Slide the wiper blade out of the holder by pulling the tabbed end out 5 Insert the flat side of the new wiper ...

Page 68: ...ed when hot tire pressure can be as much as 4 6 psi 30 40 kPa 0 3 0 4 kgf cm2 higher than checked when cold At least once a month or before long trips use a gauge to measure the pressure in all tires including the spare 1 Even tires in good condition can lose 1 2 psi 10 20 kPa 0 1 0 2 kgf cm2 per month MAINTENANCE 128 n Inspection Guidelines Every time you inflate the tires check for the following...

Page 69: ...nnual inspections performed once the tires reach five years old All tires including the spare should be removed from service after 10 years from the date of manufacture regardless of their condition or state of wear MAINTENANCE 130 n Winter Tires If driving on snowy or frozen roads mount all season tires marked M S snow tires or tire chains reduce speed and maintain sufficient distance between veh...

Page 70: ...and maximum section width For example Treadwear 200 Traction AA Temperature A All passenger car tires must conform to Federal Safety Requirements in addition to these grades n Treadwear The treadwear grade is a comparative rating based on the wear rate of the tire when tested under controlled conditions on a specified government test course For example a tire graded 150 would wear one and one half...

Page 71: ...ction indicator lamp will come on for several seconds If it goes off the readiness codes are set If it blinks five times the readiness codes are not set If you are required to have your vehicle tested before the readiness codes are set prepare the vehicle for retesting by doing the following 1 Fill the gas tank to approximately 3 4 full 2 Park the vehicle and leave the engine off for 6 hours or mo...

Page 72: ...SPECIFICATIONS SPECIFICATIONS 136 SPECIFICATIONS 137 ...

Page 73: ...features How do I pair my phone A To check phone compatibility visit handsfreelink com US handsfreelink ca Canada For pairing instructions see Pairing a Phone Q Every time I press the Talk button the system gives me voice prompts 1 Can I turn these off 1 If equipped 13 US models only if equipped CUSTOMER INFORMATION 138 A You can press the Talk button a second time to interrupt the guidance Or you...

Page 74: ...ional limitations Your vehicle s original tires are covered by their manufacturer Tire warranty information can be found at owners honda com U S or www myhonda ca Canada EPA Contact Information An owner may obtain further information concerning emission warranties or report violations of the term of the emission warranties by contacting U S Environmental Protection Agency Office of Transportation ...

Page 75: ...ondaLink 57 Immobilizer 25 Instrument Panel Indicators 23 28 Jump Starting 106 Lane Keeping Assist System LKAS 96 LaneWatch 100 Lights 35 Interior Lights 35 Maintenance 117 135 Battery 125 Brake Fluid 126 Engine Oil 122 INDEX 142 Maintenance Minder 118 Opening the Hood 121 Under the Hood 120 Window Washer Fluid 125 Wiper Blades 126 Mirrors 46 47 Door Mirrors 47 Moonroof 34 Multi View Rear Camera 1...

Page 76: ...may contain perchlorate materials special handling may apply See www dtsc ca gov hazardouswaste perchlorate for more information End User License Agreement Your vehicle comes equipped with software which is governed by the End User License Agreement in this vehicle s Owner s Manual and which contains a binding arbitration clause Please refer to the End User License Agreement for the terms and cond...

Reviews: