background image

6

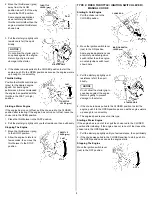
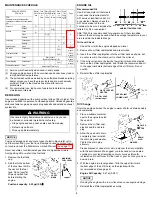
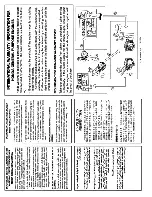
AIR CLEANER 

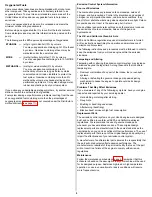
A dirty air cleaner will restrict air flow to the carburetor and cause poor 
engine performance. Inspect the filter each time the engine is 
operated. You will need to clean the filter more frequently if you 
operate the engine in very dusty areas.

NOTICE

Operating the engine without an air filter, or with a damaged filter, will 
allow dirt to enter the engine, causing rapid engine wear. This type of 
damage is not covered under the 

Distributor’s Limited Warranty 

(see 

page 11).

Inspection   

1. Press the latch 

tabs on the top of 
the air cleaner 
cover, and remove 
the cover. Check 
the filter to be sure 
it is clean and in 
good condition.

2. Reinstall the filter 

and air cleaner 
cover.

Cleaning    

1. Tap the filter several times on a hard surface to remove dirt, or blow 

compressed air [not exceeding 30 psi (207 kPa, 2.1 kg/cm²)] 
through the filter from the clean side that faces the engine. Never 
try to brush off dirt. Brushing will force dirt into the fibers.

2. Wipe dirt from the air cleaner body and cover using a moist rag. Be 

careful to prevent dirt from entering the air duct that leads to the 
carburetor.

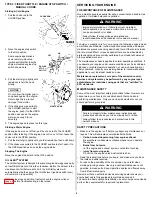
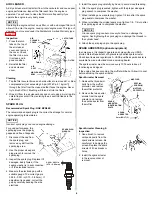
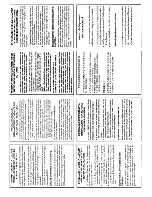
SPARK PLUG    

Recommended Spark Plug: NGK BPR6ES

The recommended spark plug is the correct heat range for normal 
engine operating temperatures.

NOTICE

Incorrect spark plugs can cause engine damage.

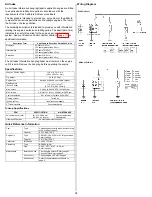
For good performance, the 
spark plug must be properly 
gapped and free of deposits.

1. Disconnect the cap from 

the spark plug, and 
remove any dirt from the 
spark plug area.

2. Use the proper size spark 

plug wrench to remove the 
spark plug.

3. Inspect the spark plug. Replace it if 

damaged, badly fouled, if the 
sealing washer is in poor condition, 
or if the electrode is worn. 

4. Measure the electrode gap with a 

suitable gauge. The correct gap is 
0.028 - 0.031 in (0.70 - 0.80 mm). If 
adjustment is needed, correct the 
gap by carefully bending the side 
electrode.

5. Install the spark plug carefully, by hand, to avoid cross-threading.

6. After the spark plug is seated, tighten with the proper size spark 

plug wrench to compress the washer.

7. When installing a new spark plug, tighten 1/2 turn after the spark 

plug seats to compress the washer.

8. When reinstalling the original spark plug, tighten 1/8 - 1/4 turn after 

the spark plug seats to compress the washer.

NOTICE

A loose spark plug can become very hot and can damage the 
engine. Overtightening the spark plug can damage the threads in 
the cylinder head.

9. Attach the spark plug cap to the spark plug.

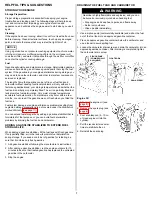
SPARK ARRESTER (optional equipment)

In some areas, it is illegal to operate an engine without a USDA 
(United States Department of Agriculture)-qualified spark arrester. 
Check local laws and regulations. A USDA-qualified spark arrester is 
available from an authorized Honda servicing dealer.

The spark arrester must be serviced every 100 hours to keep it 
functioning as designed.

If the engine has been running, the muffler will be hot. Allow it to cool 
before servicing the spark arrester.

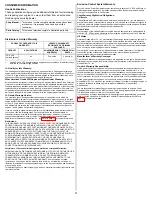
Spark Arrester Removal

1. Remove the three 6 mm 

bolts from the muffler 
protector, and remove 
the muffler protector.

2. Remove the two special 

screws from the spark 
arrester, and remove 
the spark arrester from 
the muffler.

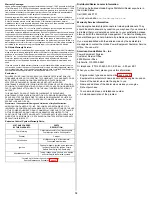
Spark Arrester Cleaning & 
Inspection

1. Use a brush to remove 

carbon deposits from the 
spark arrester screen. Be 
careful not to damage the 
screen. Replace the spark 
arrester if it has breaks or 
holes.

2. Install the spark arrester 

in the reverse order of 
removal.

AIR 
DUCT

AIR CLEANER 
BODY

FILTER

AIR 
CLEANER 
COVER

LATCH TABS

TABS

SPARK PLUG 
WRENCH

0.028 ~ 0.031 in 
(0.70 ~ 0.80 mm)

SPARK 
ARRESTER 
IDENTIFICATION 
PLATE

MUFFLER 
PROTECTOR

6 mm BOLT (3)

SPECIAL 
SCREW (2)

MUFFLER

SPARK 
ARRESTER

Summary of Contents for GC190

Page 1: ...dequate instruction before operating the equipment Your engine s exhaust contains poisonous carbon monoxide Do not run the engine without adequate ventilation and never run the engine indoors The engine and exhaust become very hot during operation Keep the engine at least 3 feet 1 meter away from buildings and other equipment during operation Keep flammable materials away and do not place anything...

Page 2: ...PERATION SAFE OPERATING PRECAUTIONS Before operating the engine for the first time please review the SAFETY INFORMATION section on page 1 and the BEFORE OPERATION CHECKS above Review the instructions provided with the equipment powered by this engine for any safety precautions that should be observed with engine startup shutdown or operation TYPE 1 MANUAL THROTTLE MANUAL CHOKE Starting A Cold Engi...

Page 3: ...o idle for a few seconds then move the throttle lever to the STOP position TYPE 2 FIXED THROTTLE IGNITION SWITCH LEVER MANUAL CHOKE Starting A Cold Engine 1 Pull the choke rod to the CLOSED position 2 Move the ignition switch lever red to the ON position Some engine applications use a remotely mounted ignition switch rather than the engine mounted ignition switch lever shown here 3 Pull the starte...

Page 4: ...mally performed by a Honda technician or other qualified mechanic The maintenance schedule applies to normal operating conditions If you operate your engine under severe conditions such as sustained high load or high temperature operation or use in unusually wet or dusty conditions consult your servicing dealer for recommendations applicable to your individual needs and use Maintenance replacement...

Page 5: ...n the dipstick remove the oil filler cap dipstick and fill with the recommended oil to the upper limit mark bottom edge of the oil fill hole Do not overfill 5 Reinstall the oil filler cap dipstick Oil Change Drain the engine oil when the engine is warm Warm oil drains quickly and completely 1 Place a suitable container next to the engine to catch the used oil 2 Remove the oil filler cap dipstick a...

Page 6: ...itable gauge The correct gap is 0 028 0 031 in 0 70 0 80 mm If adjustment is needed correct the gap by carefully bending the side electrode 5 Install the spark plug carefully by hand to avoid cross threading 6 After the spark plug is seated tighten with the proper size spark plug wrench to compress the washer 7 When installing a new spark plug tighten 1 2 turn after the spark plug seats to compres...

Page 7: ...ge or engine performance problems resulting from neglected storage preparation are not covered under the Distributor s Limited Warranty see page 11 You can extend fuel storage life by adding a gasoline stabilizer that is formulated for that purpose or you can avoid fuel deterioration problems by draining the fuel tank and carburetor ADDING A GASOLINE STABILIZER TO EXTEND FUEL STORAGE LIFE When add...

Page 8: ... 1 500 meters have your servicing dealer perform this carburetor modification This engine when operated at high altitude with the carburetor modifications for high altitude use will meet each emission standard throughout its useful life Even with carburetor modification engine horsepower will decrease about 3 5 for each 1 000 foot 300 meter increase in altitude The effect of altitude on horsepower...

Page 9: ...or exhaust systems Altering or defeating the governor linkage or speed adjusting mechanism to cause the engine to operate outside its design parameters Problems That May Affect Emissions If you are aware of any of the following symptoms have your engine inspected and repaired by your servicing dealer Hard starting or stalling after starting Rough idle Misfiring or backfiring under load Afterburnin...

Page 10: ...n 65 cc Extended 300 hours 0 65 cc 500 hours greater than 65 cc Length x Width x Height 13 6 x 14 5 x 13 0 in 345 x 369 x 331 mm Dry weight 29 lb 13 2 kg Engine type 4 stroke overhead cam single cylinder Displacement Bore x Stroke 11 4 cu in 187 cm3 2 7 x 2 0 in 69 x 50 mm Max output 6 0 bhp 4 4 kW 6 0 PS at 3 600 rpm Max torque 8 9 ft lb 12 1 N m 1 23 kg m at 2 500 rpm Fuel consumption 0 51 lb hp...

Page 11: ...RITTEN LIMITED WARRANTY Some states do not allow limitations on how long an implied warranty lasts and or do not allow the exclusion or limitation of incidental or consequential damages so the above exclusions and limitations may not apply to you This warranty gives you specific legal rights and you may also have other rights which vary from state to state Emission Control System Warranty Your new...

Page 12: ... SYSTEMS OR PARTS WHICH ARE AFFECTED OR DAMAGED BY OWNER ABUSE NEGLECT IMPROPER MAINTENANCE MISUSE MISFUELING IMPROPER STORAGE ACCIDENT AND OR COLLISION THE INCORPORATION OF OR ANY USE OF ANY ADD ON OR MODIFIED PARTS UNSUITABLE ATTACHMENTS OR THE UNAUTHORIZED ALTERATION OF ANY PART THIS WARRANTY DOES NOT COVER REPLACEMENT OF EXPENDABLE MAINTENANCE ITEMS MADE IN CONNECTION WITH REQUIRED MAINTENANCE...

Page 13: ......

Page 14: ......

Page 15: ...NOTES ...

Page 16: ...NOTES ...

Reviews: