OPERATION
HOLZMANN MASCHINEN GmbH www.holzmann-maschinen.at
46
HOB 260ABS
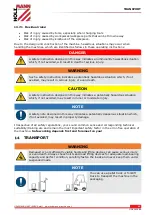
CAUTION
Never start the machine with a workpiece pressed down!
NOTE
In the case of resin residues on the wood, it may be advisable to apply an
appropriate lubricant to the machine table in order to ensure uniform sliding of the
workpiece over the planing table.
16.2
Initial check before starting work:
Check that all guards are installed.
Check whether suitable planing knives have been correctly assembled.
Whether the planer shaft knives are worn out; replace knives if necessary (see
Maintenance section)
Check whether the connection to a dust collection system is available.
Check that the planer shafts rotate in the correct direction.
16.3
Settings
1.
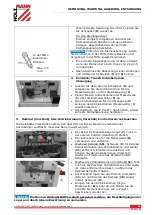
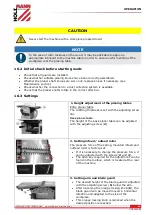
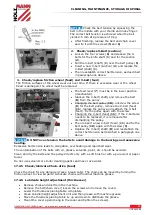
Height adjustment of the planing tables
Entry planer table
The cutitting thickness is set with the adjusting screw
(1).
Back planer table
The height of the back planer table can be adjusted
with the adjusting screw (2).
2.
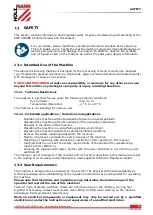
Setting infeed / oufeed roller
The pressure force of the spring-mounted infeed and
outfeed roller is factory-set.
If it is necessary to change the pressure force, it
can be adjusted with the screws (3 and 4).
The Allen key required for the adjustment can be
found in the toolbox, which is located at the rear
of the machine.
3.
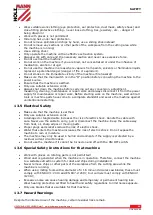
Setting arm and blade guard
The desired height of the blade guard is adjusted
with the adjusting screw (5) below the arm.
After loosening the orange locking knob (6), the
blade guard can be moved moved in horizontal
direction and adapted to the size of the
workpiece.
This orange locking knob is relocked when the
desired position is reached.


