background image

 Chapter 2: Basic Skills


- 23 -


Protecting Data from Low Battery Charge Levels 

If the battery charge level becomes extremely low or the battery becomes 
flat, the memory data stored in Holux GPSmile 60 could be lost. 

When the low battery status icon or alarm message appears, immediately 
connect the AC adapter with Holux GPSmile 60 to charge the battery. 


The removable battery gradually discharges even if Holux GPSmile 60 
is not being used. When Holux GPSmile 60 is left idle for a long time, the 
removable battery may change to will become flat. 


It is recommended to save Holux GPSmile 60’s memory data to your PC 
or storage card. 


The manufacturer is not responsible for the data change or clearance 
due to battery discharge. 

Initial Setup and Touch Screen Correction 

When using Holux GPSmile 60 for the first time, follow the initial setup 
procedures below, after the battery has been charged. When you slide the 
battery switch to the “supply” position

 and install the battery

, Holux GPSmile 

60 powers on automatically and the Welcome screen appears. Tap the 
screen to start the following setup. 

1.  Complete the touch screen correction. 

When the align screen appears, tap the center of the cross target with 
the stylus. The next target position changes upon tapping the target. 
Five taps completes the positioning correction. The screen then 
changes to the stylus screen. 


If an object touches the screen during correction, the 
correction is cancelled. Repeat the correction procedure. 

2.  Follow the on-screen instructions describing how to use the stylus, and 

then tap 

Next


For more information on stylus operation, see “Using the 
Stylus” earlier in this chapter. 

3.  Follow the pop-up menu instructions. 

NOTE 

NOTE 

Summary of Contents for GPSmile 60

Page 1: ...Pocket PC User s manual...

Page 2: ...ctions have been classified according to the seriousness of the risk as follows Signal Word Meaning Indicates an imminently hazardous situation which if not avoided will result in death or serious inj...

Page 3: ...t place for future reference Copyright Information 2005 All rights reserved Under the copyright laws this manual cannot be reproduced in any form without the prior written permission No patent liabili...

Page 4: ...ided for ventilation These openings must not be blocked or covered Mounting Accessories Do not use the product on an unstable table cart stand tripod or bracket Any mounting of the product should foll...

Page 5: ...iaduct In the gross forest Safety Precautions for Battery Warning To reduce the risk of fire or burns do not disassemble crush puncture short external contacts or dispose of in fire or water Danger of...

Page 6: ...ers from possible injury and property damage They also provide information on the safe handling of this product Please check that you fully understand the definition of the following messages signs an...

Page 7: ...s Ce produit est conforme aux exigences de la directive sur les basses tensions 73 23 CEE et de la directive EMC 89 336 CEE Informaci n complementaria El Producto cumple los requistos de baja tensi n...

Page 8: ...d are not the responsibility of the manufacturer The consequences of the use of this product in non approved working environments may be Interference with other devices or machines in the nearby surro...

Page 9: ...implemented In this case the persons who have connected or implemented those options or cables have to make sure that the system Holux GPSmile 60 plus options or cables still fulfills the required st...

Page 10: ...nce will not occur in a particular installation If this equipment does cause harmful interference to radio or television reception which can be determined by turning the equipment off and on the user...

Page 11: ...with your other household waste Instead it is your responsibility to designated collection point for the recycling of waste electrical and electronic equipment For more information about where you can...

Page 12: ...reen 26 Using the Programs 30 Checking System Information 32 Customizing Settings 32 Adding or Removing Programs in ROM and RAM 33 Adding Programs Using ActiveSync 33 Adding Programs Directly from the...

Page 13: ...13 Specifications 48...

Page 14: ...ng Holux GPSmile 60 Due to its size and capabilities you can keep your most important business and personal information up to date and close at hand Microsoft ActiveSync increases the power of Holux G...

Page 15: ...60 The User s Guide and online help To view Help tap and then Help Additional programs that can be installed on Holux GPSmile 60 Holux GPSmile 60 Companion CD Connecting to and synchronizing with a PC...

Page 16: ...ettings of the Program Buttons Program button 1 ezGO Quick menu Program button 2 Navigator application launch buttons Program button 3 Calendar Zoom in Optional Program button 4 Contacts Zoom out Opti...

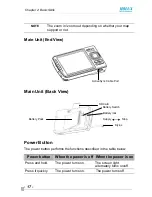
Page 17: ...power button performs the functions described in the table below Power button When the power is off When the power is on Press and hold The power turns on The screen light alternately turns on off Pre...

Page 18: ...he stop position at any time leads to loss of data Setting the Battery Lock 1 Use the stylus to slide the battery lock to the up position the lock side See To install the battery later in this chapter...

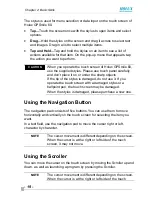
Page 19: ...d do not use it If you operate the touch screen with a damaged stylus or a ballpoint pen the touch screen may be damaged When the stylus is damaged please purchase a new one Using the Navigation Butto...

Page 20: ...nsert the tip of the stylus into the battery lock 4 Slide the lock to the lock position To remove the battery 1 Insert the tip of the stylus into the battery lock 2 Slide the lock to the unlock positi...

Page 21: ...ni USB X into the mini USB Client port Z and connect the other end Y to an electrical outlet to charge Holux GPSmile 60 Maintain an ambient temperature from approximately 32 F to 104 F 0 C to 45 C whi...

Page 22: ...the screen light Set the screen brightness to the power saving mode and shorten the light turn off time Use Holux GPSmile 60 with an ambient temperature between 59 F and 77 F 15 C and 25 C This temper...

Page 23: ...creen Correction When using Holux GPSmile 60 for the first time follow the initial setup procedures below after the battery has been charged When you slide the battery switch to the supply position an...

Page 24: ...ne list appears Tap the desired city and time zone When the setup is completed tap Next 5 Complete the initial setup When the complete screen appears the initial setup is completed After tapping the s...

Page 25: ...g ActiveSync has been installed on your PC For more information see Chapter 3 ActiveSync ports the position of the ActiveSync port on your PC may differ according to the PC type Connect Holux GPSmile...

Page 26: ...ic Skills 26 PDA Mounting Holder and Stand 1 Align the slots with the notches A and attach the stand to the holder B as shown A B 2 Ensure that slots and notches are placed in the proper position and...

Page 27: ...tion of the arrow to fasten it to the surface B Warning Do not unfasten the stand with the PDA still in the holder you may drop the PDA and damage it Notes Make sure that the glass surface is clean To...

Page 28: ...Chapter 2 Basic Skills 28 5 Place the PDA phone inside the holder as shown 6 Push the holder back into place A B...

Page 29: ...f the status icons you may see Status Icon Meaning Turn all sounds on Turn all sounds off Main battery is charging Main battery is low Main battery is very low Main battery is full Connection is activ...

Page 30: ...he program name You can also switch to certain programs by pressing the program button assigned to those programs Holux GPSmile 60 has program buttons located on the front of the device The icons on t...

Page 31: ...nd colleagues Pocket Internet Explorer Browse Web and WAP sites and download new programs and files from the Internet Messaging Send and receive email messages Windows Media Play Play digital audio an...

Page 32: ...ws the text to be exported Export exports all system information parameters to a text txt file Customizing Settings You can customize Holux GPSmile 60 by adjusting the settings and installing addition...

Page 33: ...for Holux GPSmile 60 the most popular place to find Holux GPSmile 60 software is on Holux GPSmile 60 Web site http www microsoft com mobile pocketpc Before you install any programs for the first time...

Page 34: ...ogram file to the Program Files folder on Holux GPSmile 60 For more information on copying files using ActiveSync see ActiveSync Help If the application is not for Windows Mobile 2003 Second Edition a...

Page 35: ...rer and locate the program tap the folder list labeled My Documents by default and then Local Device to see a list of all folders on Holux GPSmile 60 Tap and hold the program and tap Cut on the pop up...

Page 36: ...screen The password is saved and the screen returns to the Personal tab screen If you tap Yes on the confirmation screen to return to the Personal tab screen you must enter the password each time you...

Page 37: ...matically synchronize all types of information Use ActiveSync options to turn synchronization on and off for specific information types With ActiveSync you can also Change synchronization settings and...

Page 38: ...ion take a look at Calendar Contacts and Tasks on Holux GPSmile 60 The information you stored in Microsoft Outlook on your PC has been copied to Holux GPSmile 60 and you did not have to type a word Di...

Page 39: ...ActiveSync on Holux GPSmile 60 switch to ActiveSync tap Help Changing the Synchronization Schedule Using ActiveSync you can schedule the synchronization of Holux GPSmile 60 on two separate schedules...

Page 40: ...hedule tab 1 To synchronize periodically during peak times select the frequency of synchronization in the Peak times list 2 To synchronize periodically during off peak times select the frequency of sy...

Page 41: ...lly after cold boot The second way is to install from CD 2 After installation if Program button 2 refer to p17 is programmed to start Map AP press down Program button 2 will start Map AP On the other...

Page 42: ...ill not close GPS Power either User has to start close GPS independently from Map AP Methods for starting closing GPS Power 1 Click GPS icon located at the lower right corner of Today screen to start...

Page 43: ...n Press Zoom in button will enlarge the map display z Zoom out button Press Zoom out button will diminish the map display The zoom in zoom out depending on whether your map support or not Using GPS Po...

Page 44: ...sing this button returns to the normal status Execution parameters are used to add parameters for the selected map program It is not absolutely required to set parameters Set Environment Profile Envir...

Page 45: ...Chapter 4 GPS Function 45 3 Adjust Screen light Speaker Microphone Headphone and Name by your requirement...

Page 46: ...is exhausted Charge the battery The power was suddenly cut off Automatic suspend is active Tap Settings System Power to change the power shutdown time The touch screen was tapped but the correct actio...

Page 47: ...ot connect to your PC See ActiveSync Help ActiveSync does not function when Holux GPSmile 60 is connected to your PC with a USB cable The USB driver on your PC may not be compatible Re select the USB...

Page 48: ...f Holux GPSmile 60 2 Press and hold the power buttons Program button 3 p17 and Program button 4 p17 meanwhile use the stylus to press the reset switch on the back side of Holux GPSmile 60 3 Release th...

Page 49: ...B Display 3 5 diagonal TFT color LCD screen 240 x 320 pixels up to 64K colors 0 244 mm dot pitch 6 LED Backlight Interfaces DC IN 5V 1A Headphone 3 5 mm stereo mini plug compatible Microphone Built in...

Page 50: ...lume control GPS Receiver Receiver GPS signal L1 C A code Channel 12 channels Tracking sensitivity 152dBm Acquisition time Typical Hot start 8 sec Warm start 38 sec Cold start 42 sec Update 1 sec Accu...

Reviews: