


HOBO
MX
Soil
Moisture
(MX2306)
and
MX
Soil
Moisture
and
Temperature
(MX2307)
Data
Logger
Manual
1
‐
508
‐
759
‐
9500
(U.S.
and
International)
4
www.onsetcomp.com
1
‐
800
‐
LOGGERS
(U.S.
only)
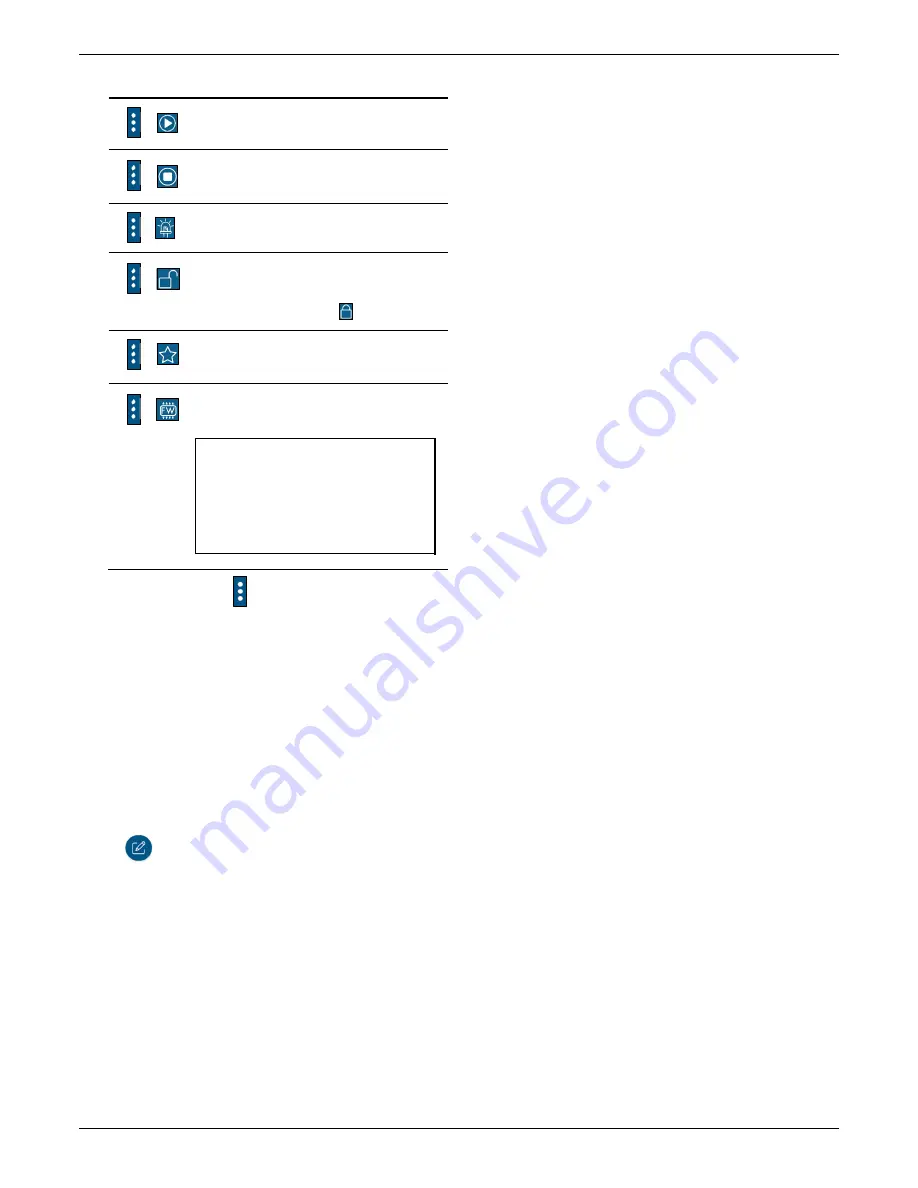
Tap
this:
To
do
this:
Start
logging
if
the
logger
was
configured
to
start
with
a
button
push.
See
Configuring
the
Logger
.
Stop
the
logger
from
recording
data
(this
overrides
any
Stop
Logging
settings
described
in
Configuring
the
Logger
).
Illuminate
the
logger
LEDs
for
4
seconds.
Set
a
logger
password
that
will
be
required
if
another
mobile
device
attempts
to
connect
to
it.
To
reset
a
password,
press
the
button
on
the
logger
for
10
seconds
or
tap
and
tap
Reset.
Mark
the
logger
as
a
favorite.
You
can
then
filter
the
list
of
devices
to
only
show
loggers
marked
as
favorites.
Update
the
firmware
on
the
logger.
A
logger
readout
will
be
completed
automatically
at
the
beginning
of
the
firmware
update
process
Important:
Before
updating
the
firmware
on
the
logger,
check
the
remaining
battery
level
and
make
sure
it
is
no
less
than
30%.
Make
sure
you
have
the
time
to
complete
the
entire
update
process,
which
requires
that
the
logger
remains
connected
to
the
device
during
the
upgrade.
Note:
Tapping
this
icon
is
only
required
when
using
the
app
on
an
iPhone®,
iPad®,
or
Android
device.
Configuring
the
Logger
Use
the
app
to
set
up
the
logger,
including
selecting
the
logging
options,
configuring
alarms,
and
other
settings.
These
steps
provide
an
overview
of
setting
up
the
logger.
For
complete
details,
see
the
app
user’s
guide.
1.
Press
the
button
on
the
logger
to
wake
it
up.
2.
In
the
app,
tap
Devices
and
tap
the
logger
in
the
app
to
connect
to
it.
If
you
are
working
with
multiple
loggers,
you
can
press
the
button
on
the
logger
a
second
time
to
bring
it
to
the
top
of
the
list.
3.
Tap
to
configure
the
logger.
4.
Tap
Name
and
type
a
name
for
the
logger
(optional).
If
no
name
is
selected,
the
logger
serial
number
is
used
as
the
name.
5.
Tap
Group
to
add
the
logger
to
a
group
(optional).
Tap
Save.
6.
Tap
Logging
Interval
and
choose
how
frequently
the
logger
will
record
data
unless
operating
in
burst
logging
mode
(see
Burst
Logging
).
Note:
If
an
alarm
is
configured,
the
logger
will
use
the
logging
interval
that
was
selected
as
the
rate
to
check
for
alarm
conditions
(alarms
are
not
available
if
burst
logging
is
configured).
See
Setting
up
Alarms
for
more
details.
7.
Tap
Start
Logging
and
select
when
logging
will
begin:
Now.
Logging
will
begin
immediately
after
configuration
settings
are
loaded
on
the
logger.
The
data
will
start
with
this
indetermined
time
and
at
the
selected
logging
interval
from
there.
On
Next
Logging
Interval.
This
is
the
most
common
start
option.
Logging
will
begin
at
the
next
even
interval
as
determined
by
the
selected
logging
interval.
For
example,
if
a
10
‐
minute
interval
is
selected,
the
data
will
start
at
the
next
even
10
‐
minute
time.
On
Button
Push.
Logging
will
begin
once
the
button
on
the
logger
is
pressed
for
3
seconds.
On
Date/Time.
Logging
will
begin
on
a
date
and
time
you
specify.
Select
the
date
and
time.
Tap
Save.
8.
Tap
Stop
Logging
and
select
the
options
for
when
logging
will
end.
a.
Choose
one
of
two
memory
options:
When
Memory
Fills.
The
logger
will
continue
recording
data
until
the
memory
is
full.
Never
(Wrap
When
Full).
The
logger
will
continue
recording
data
indefinitely,
with
newest
data
overwriting
the
oldest.
This
option
is
not
available
if
the
Logging
Mode
is
set
to
Burst
(see
Burst
Logging
).
b.
Select
On
Button
Push
to
be
able
to
stop
logging
by
pushing
the
button
on
the
logger
for
3
seconds.
c.
Select
one
of
the
following
time
options
for
when
to
stop
logging:
Never.
Select
this
if
you
do
not
want
to
stop
the
logger
at
any
predetermined
time
frame.
On
Date/Time.
Select
this
if
you
want
the
logger
to
stop
logging
on
a
specific
date
and
time.
Select
the
date
and
time.
After.
Select
this
to
control
how
long
the
logger
should
continue
logging
once
it
starts.
Choose
the
amount
of
time
the
logger
will
log
data.
For
example,
select
30
days
if
you
want
the
logger
to
log
data
for
30
days
after
logging
begins.
d.
Tap
Save.
9.
Tap
Logging
Mode.
Select
either
fixed
or
burst
logging.
With
fixed
logging,
the
logger
records
data
for
all
enabled
sensors
and/or
selected
statistics
at
the
logging
interval
selected
(see
Statistics
Logging
for
details
on
choosing
statistics
options).
In
burst
mode,
logging
occurs
at
a
different
interval
when
a
specified
condition
is
met.
See
Burst
Logging
for
more
information.
Tap
Save.
10.
Enable
or
disable
Show
LED.
If
Show
LED
is
disabled,
the
alarm
and
status
LEDs
on
the
logger
will
not
be
illuminated
while
logging
(the
alarm
LED
will
not
blink
if
an
alarm
trips).
You
can
temporarily
turn
on
LEDs
when
Show
LED
is
disabled
by
pressing
the
button
on
the
logger
for
1
second.
11.
Enable
or
disable
Bluetooth
Always
On.
If
Bluetooth
Always
On
is
enabled,
the
logger
will
“advertise”
or
regularly
send
out
a
Bluetooth
signal
for
the
phone,
tablet,
or
computer
to
find
via
the
app
while
it
is
logging,
which
uses
battery
power.
When
Bluetooth
Always
On
is
disabled,
the
logger
will
only
advertise
during
logging
when
the
button
on
the
>
>
>
>
>
>


