HOBO MX pH and Temperature Logger (MX2501) Manual
6
at different temperatures. HOBOmobile will automatically
compensate for temperature variances from 25°C (77°F)
based on the actual temperature-dependent pH value
(from the chart below) of buffers and samples.
Temperature
°C °F
pH 4.01
Buffer
pH 7.00
Buffer
pH 10.00
Buffer
0 32 4.01
7.12
10.31
5 41 4.00
7.09
10.24
10 50
4.00
7.06
10.17
15 59
4.00
7.04
10.11
20 68
4.00
7.02
10.05
25 77
4.01
7.00
10.00
30 86
4.01
6.99
9.95
35 95
4.02
6.98
9.92
40 104
4.03
6.97
9.88
45 113
4.04
6.97
9.85
Configuring the Logger
Use HOBOmobile to set up the logger, including selecting the
logging options, configuring alarms, and other settings. These
steps provide an overview of setting up the logger. For
complete details, see the
HOBOmobile User’s Guide
.
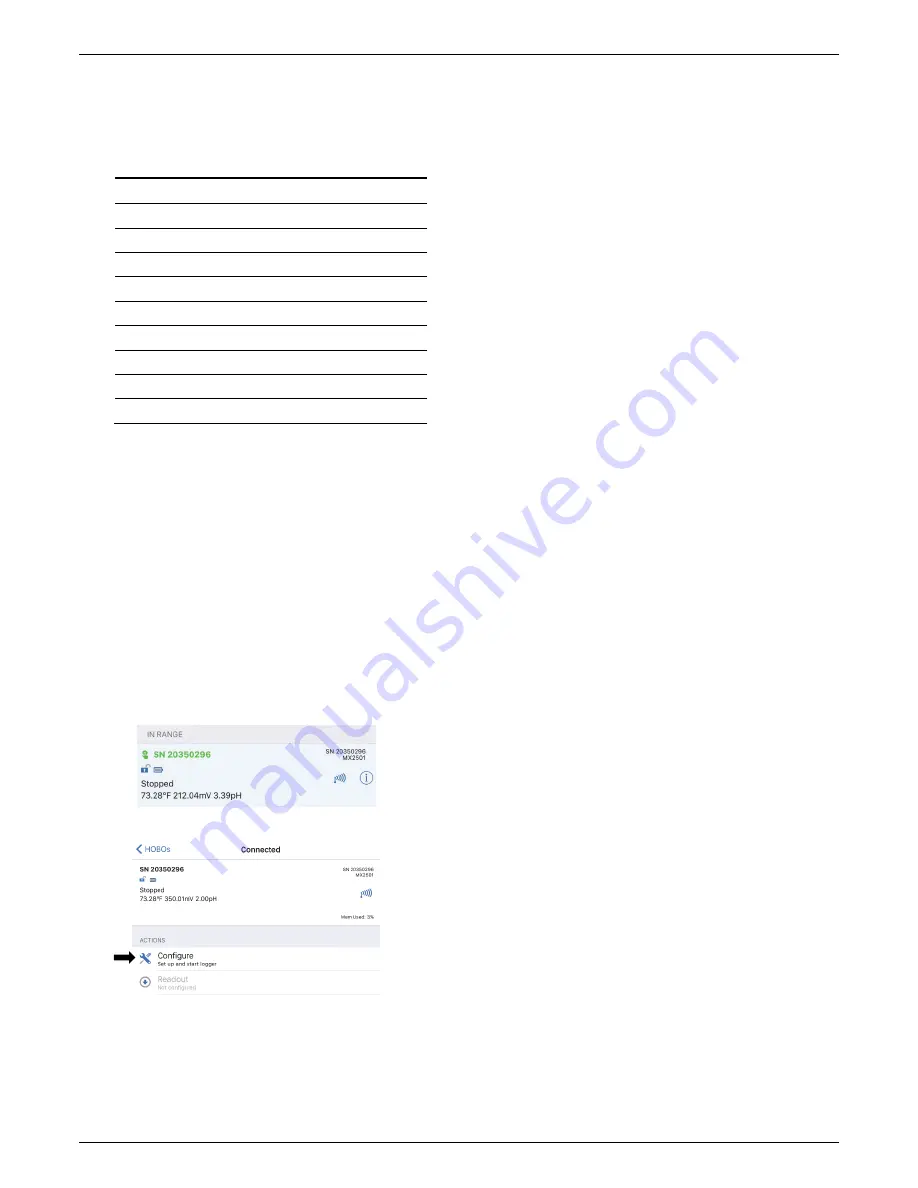
1. Open HOBOmobile and tap the HOBOs icon.
2. Find the logger in the list and tap it to connect to it. If the
logger was previously configured with Bluetooth Always Off,
press the switch on the logger to wake it up. If the logger
was previously configured with Bluetooth Off Water Detect
and it is deployed in water, remove it from water. If you are
working with multiple loggers, pressing the button also
brings the logger to the top of the list (and the logger name
will turn green). Note that the current sensor readings are
displayed even when the logger is not logging.
3. Once connected, tap Configure.
4. Tap Name and type a name for the logger up to 20
characters (optional). Tap Done. If no name is selected, the
logger serial number is used as the name.
5. Tap Group to add the logger to the Favorites group, an
existing custom group, or create a new group name with up
to 20 characters (optional). Tap Done.
6. Tap Logging Interval and choose how frequently the logger
will record data unless operating in burst logging mode (see
Burst Logging
).
Note:
If you configure an alarm, the logger
will use the logging interval you selected as the rate to
check for alarm conditions (alarms are not available if burst
logging is configured). See
Setting up Alarms
for more
details.
7. Tap Start Logging and select when logging will begin:
•
Now.
Logging will begin immediately after tapping Start
in the Configure screen.
•
On Next Logging Interval.
Logging will begin at the next
even interval as determined by the selected logging
interval.
•
On Button Push.
Logging will begin once you press the
switch on the logger for 3 seconds.
•
On Date/Time.
Logging will begin on a date and time you
specify. Select the date and time and tap Done.
Tap Done in the Start Logging screen.
8. Tap Stop Logging and select the options for when logging
will end.
a. Choose one of two memory options:
•
When Memory Fills.
The logger will continue recording
data until the memory is full.
•
Never (Wrap When Full).
The logger will continue
recording data indefinitely, with newest data
overwriting the oldest. This option is not available if
the Logging Mode is set to Burst (see
Burst Logging
).
b. Select On Button Push if you want to be able to stop
logging by pushing the switch on the logger for 3
seconds. Note that if you also choose On Button Push for
the Start Logging option, then you will not be able to stop
logging until 30 seconds after logging begins.
c. Select one of the following time options for when to stop
logging:
•
Never.
Select this if you do not want the logger to stop
at any predetermined time frame.
•
On Date/Time.
Select this if you want the logger to
stop logging on a specific date and time. Select the
date and time and then tap Done.
•
After.
Select this if you want to control how long the
logger should continue logging once it starts. Choose
the amount of time you want the logger to log data
and then tap Done. For example, select 30 days if you
want the logger to log data for 30 days after logging
begins.
d. Tap Done in the Stop Logging screen.
9. Set up an optional alarm to trip when the pH and/or
temperature sensor reading rises above or falls below a
specified value. See
Setting up Alarms
for details on
enabling sensor alarms.
10. Tap Logging Mode. Select either fixed interval logging or
burst logging. With fixed interval logging, the logger records
data for all sensors and/or selected statistics at the logging
interval selected (see
Statistics Logging
for details on


