


21
BATFLY
250 FPV QUAD RACER USER'S GUIDE
oPEnPILoT GCS CC3D FLIGhT ConTRoLLER SoFTwARE
PRIOR TO MAKING PROGRAMMING CHANGES OR PARAMETER ADjUSTMENTS TO YOUR BATFLY 250
FPV QUAD RACER, YOU MUST REMOVE THE PROPELLERS FROM THE QUAD RACER FIRST!
This must be done for safety reasons. Once you have saved your programming changes and tested and verified
the Quad Racer’s flight controls, only then should you reinstall the propellers.
ConnECTInG YoUR QUAD RACER To YoUR PC oR LAPToP (ALL VERSIonS)
After installing the OpenPilot GCS CC3D Flight Controller software from the OpenPilot.org website onto your PC or
laptop, complete the steps below to connect your Quad Racer.
1) Pull the throttle control stick all the way back and turn the transmitter ON.
2) Plug your LiPo battery in (do not install it) and allow the gyros to calibrate and the Flight Controller to initialize. This
takes approximately 10 seconds. The Condition LED will flash Blue slowly.
3) Connect your Quad Racer to your PC or laptop using a Mini USB cable (not included) plugged into the Mini USB
Port on the CC3D Flight Controller.
The first time you connect your Quad Racer to your PC or laptop, Windows may automatically install a USB
Input Device. This is normal. Do not cancel this process.
GEnERAL oVERVIEw (ALL VERSIonS)
After connecting your Batfly 250 FPV Quad Racer to your PC or laptop, open the OpenPilot GCS CC3D Flight Controller
software. In most cases, you will use the Configuration > Hardware and the Configuration > Input menus to make
programming changes and parameter adjustments.
The OpenPilot GCS CC3D Flight Controller software is free Open Source software that’s designed specifically for use
with the CC3D Digital Flight Controller used in the Batfly 250 FPV Quad Racer. This section details connecting your
Quad Racer to your PC or laptop and making some basic programming changes.
For complete information about downloading, installing and using the OpenPilot GCS CC3D Flight Controller
software, please visit
www.openpilot.org.
Although the CC3D Flight Controller will power up when you connect it to your PC or laptop without the LiPo flight
battery plugged in, you must plug the LiPo flight battery in to see and change programming information related
to your transmitter.
Use the Configuration > Hardware menu to program the Flexi Port and/or Main Port for use with S.Bus or DSM2/DSMX
receivers.
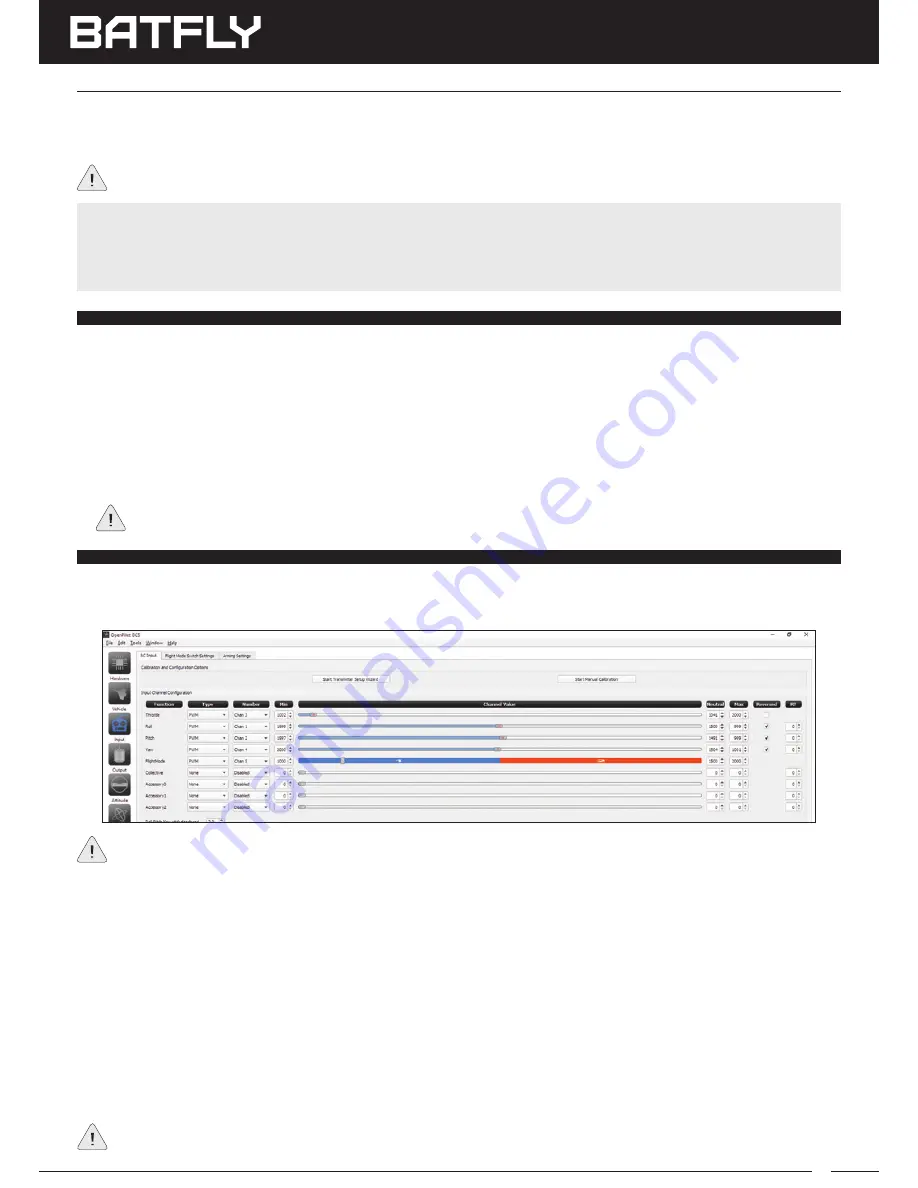
Use the Configuration > Input menu to verify control stick functions, such as correct flight control movement
direction (when you move the control sticks RIGHT or UP, the sliders should move Right and when you move the
control sticks DOWN or LEFT, the sliders should move Left - you can change control direction using the REVERSED
options), check to ensure the trim is centered (the sliders should be lined up with the red dots), check control travel
(we suggest setting the EPAs in your transmitter at 100%, but you can adjust as necessary. For example, if the throttle
control stick is pulled all the way back, but the Throttle Slider is not all the way Left, adjust the throttle channel EPA
until it is. This can resolve motor arming issues).
Use the Configuration > Input > Flight Mode Switch Settings menu to make programming changes related to Flight
Modes. Use the Configuration > Input > Arming Settings menu to make changes to the motor arming procedure.
After making programming changes, make sure to press the SAVE button to write your changes to the Flight
Controller.


