


❏
5. Screw a clevis twenty-five full turns onto a
2-56 x 36" [915mm] pushrod. Connect the clevis to
the second-from-the-outer hole of a control horn.
Make another pushrod assembly the same way.
❏
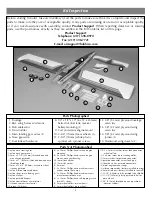
6. Slide the pushrods into the pushrod tubes in the
fuselage. Position the control horn on the rudder as
shown in the photo and sketch. Use the control horn
as a guide to drill two 5/64" [2mm] (or 3/32"
[2.4mm]) holes through the rudder for the mounting
screws. Mount the control horn to the rudder with
two 2 x 16mm Phillips-head screws and the plastic
mounting plate.
❏
7. Mount the elevator control horn to the elevator
with two 2 x 20mm Phillips-head screws.
❏
8.
Carefully
enlarge the holes in the elevator and
rudder servo arms with a hobby knife and a #11 blade
or a 5/64" [2mm] drill.
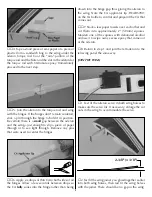
Refer to this photo while connecting the
pushrods to the servos.
❏
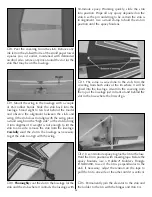
9. Make a 90-degree bend in the elevator pushrod
so the elevator will be centered when the pushrod is
connected to the servo arm. This is most easily done
by disconnecting the pushrod from the elevator,
rotating the pushrod 90-degrees, then making the
bend to the side. The clevis on the back of the
pushrod will now have to be turned 90-degrees the
other way. Take the servo arm off the elevator servos
and fit the pushrod in the third hole out. Install the
pushrod keeper, then cut the wire so 1/16" [2mm]
protrudes. Reinstall the servo arm and clevis.
❏
10. Connect the rudder and nose wheel pushrod
the same way. A few bends will have to be made in
the nose wheel pushrod to align it with the servo arm.
❏
11. Use the remaining 13-1/2" [340mm] plastic
pushrod tube and the 2mm x 27" [685mm] threaded
The Holes in the
Control Horn
Align with the
Pivot Point
Control
Horn
Mounting
Plate
Pivot
Point
17


