background image

Charge the Batteries

❏ 

1. In the fuselage (fuse), connect the plug from the battery

pack, labeled “BATTERY 1”, to the plug from the on/off switch,
labeled “BATTERY 2.”

❏ 

2. As shipped, the rechargeable batteries in the SuperStar

MKII are only partially charged. If you wish to begin assembly
right away, go ahead and do so. If the batteries quit while
performing the Setup procedures (beginning on page 4), they will
have to be charged at that time for 16 hours. If you don't plan to
begin assembly now, go ahead and charge the batteries for 10
hours now. To do so, connect the receiver charge cord coming
from the charger to the connector coming from the on/off switch
in the fuse labeled “CHARGE”. Connect the other charge cord
directly to the transmitter. After the “Setup” procedures have been
performed, recharge the batteries for 10 hours. Fully discharged
batteries will require approximately 16 hours to fully charge. In
any case, the batteries must be charged before you go flying. For
additional battery charging information refer to the Futaba
instruction manual included with this kit.

Assemble the Wing

❏ 

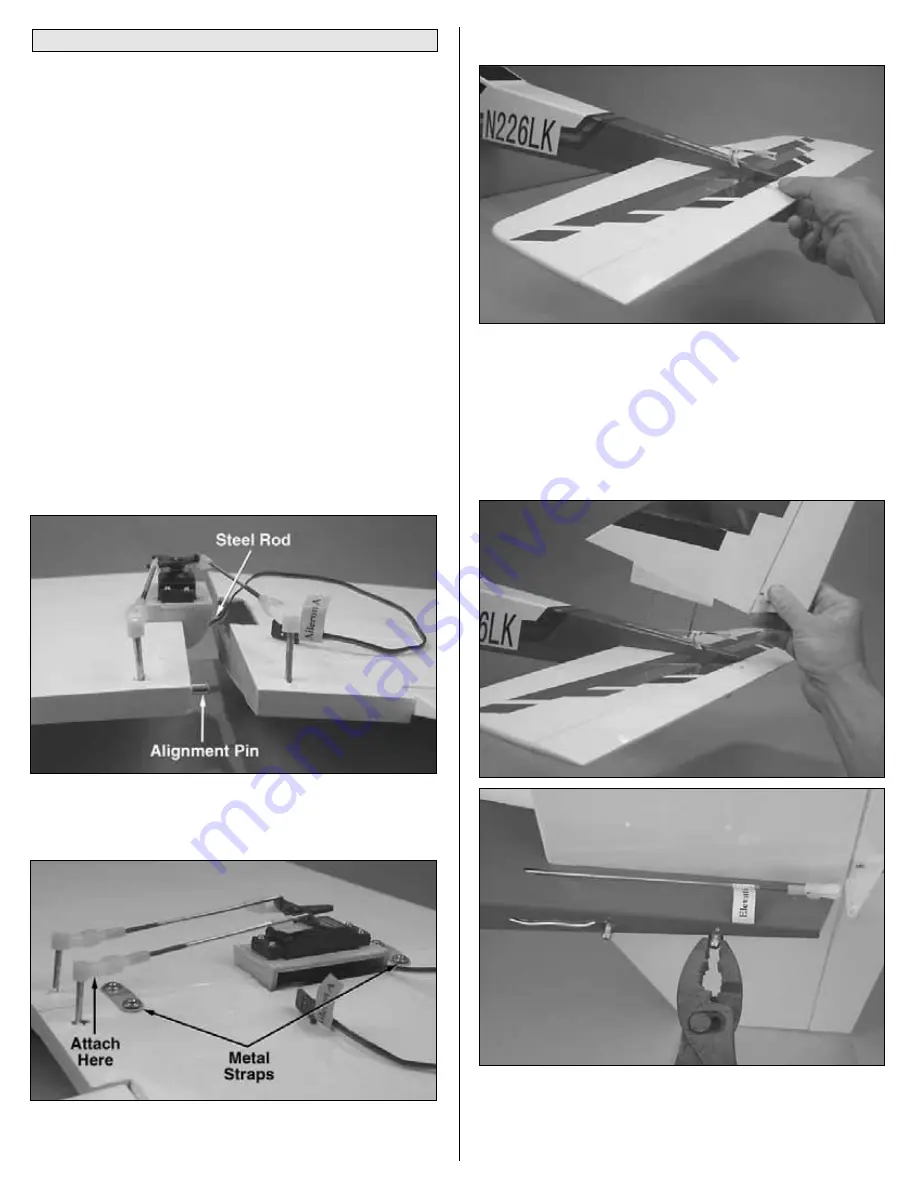
1. Note the metal alignment pin in right wing half. Insert the

steel rod into the wing. Then, slide both halves together,
aligning the pin in the trailing edge.

❏ 

2. Use the two metal straps and four 3 x 6mm screws to hold

the wing halves together. Connect the one unattached pushrod
to the torque rod horn with the clevis and clevis retainer.

Assemble the Fuselage

❏ 

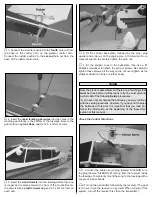
1. Insert the stabilizer (stab) into the fuse.

❏ 

2. Insert the fin into the stab, guiding the metal rods through

the holes in the stab and the bottom of the fuse. Secure the fin
and stab with a flat washer and a 3mm locknut. Be certain to
tighten the nuts securely, but do not over tighten so as to
damage the bottom of the fuse.

Assembly

3

Summary of Contents for HCAA60 series

Page 1: ...inal assembly or material used for final assembly no liability shall be assumed nor accepted for any damage resulting from the use by the user of the final user assembled product By the act of using t...

Page 2: ...nel on the kit box cover for information on the Hobbico ARF RTF Field Pack HCAP5115 This Field Pack contains the items you will need to go flying except for 10 Nitromethane Glow Fuel The items contain...

Page 3: ...ge the batteries for 10 hours Fully discharged batteries will require approximately 16 hours to fully charge In any case the batteries must be charged before you go flying For additional battery charg...

Page 4: ...iver to tighten the spinner screws Be careful to tighten these screws all the way but do not over tighten as the plastic material can strip out rather easily Check the Control Directions 1 Connect the...

Page 5: ...enter the Controls The control surfaces ailerons elevator rudder are to be centered when the control sticks and trims are centered Here s how to do it 1 Do the elevator first With the transmitter and...

Page 6: ...f the carburetor is fully closed proceed to step 3 If the carburetor is nearly but not fully closed loosen the screw on the screw lock connector on the throttle servo arm and move the pushrod forward...

Page 7: ...lying site Fill out the I D tag found in the back of the manual and use spray adhesive or tape to stick it in the model Balance the Model This important step may also be referred to as checking the C...

Page 8: ...ch for wheel collars 10mm wrench or crescent wrench for propeller nut Spare parts 10 x 6 propellers Glow plug 64 rubber bands stored in container with talcum powder or kitty litter Flight preparation...

Page 9: ...model Gain as much speed as the runway and flying site will practically allow before gently applying up elevator lifting the model into the air A good method to remember is to apply pressure to the st...

Page 10: ...covering iron but in an emergency a regular iron could be used A roll of MonoKote includes full instructions for application Ordering Replacement Parts To order replacement parts for the SuperStar MKI...

Page 11: ...than ever More thrust for greater power Swept tip design reduces noise The strict quality control used when manufacturing Power Point props ensures symmetric pitch at any given point on one blade the...

Page 12: ...____________ Where Purchased _________________________ Date Construction Started __________________ Date Construction Finished _________________ Finished Weight __________________________ Date of Firs...

Reviews: