background image

OM-240 438 Page 2

Welding produces fumes and gases. Breathing these

fumes and gases can be hazardous to your health.

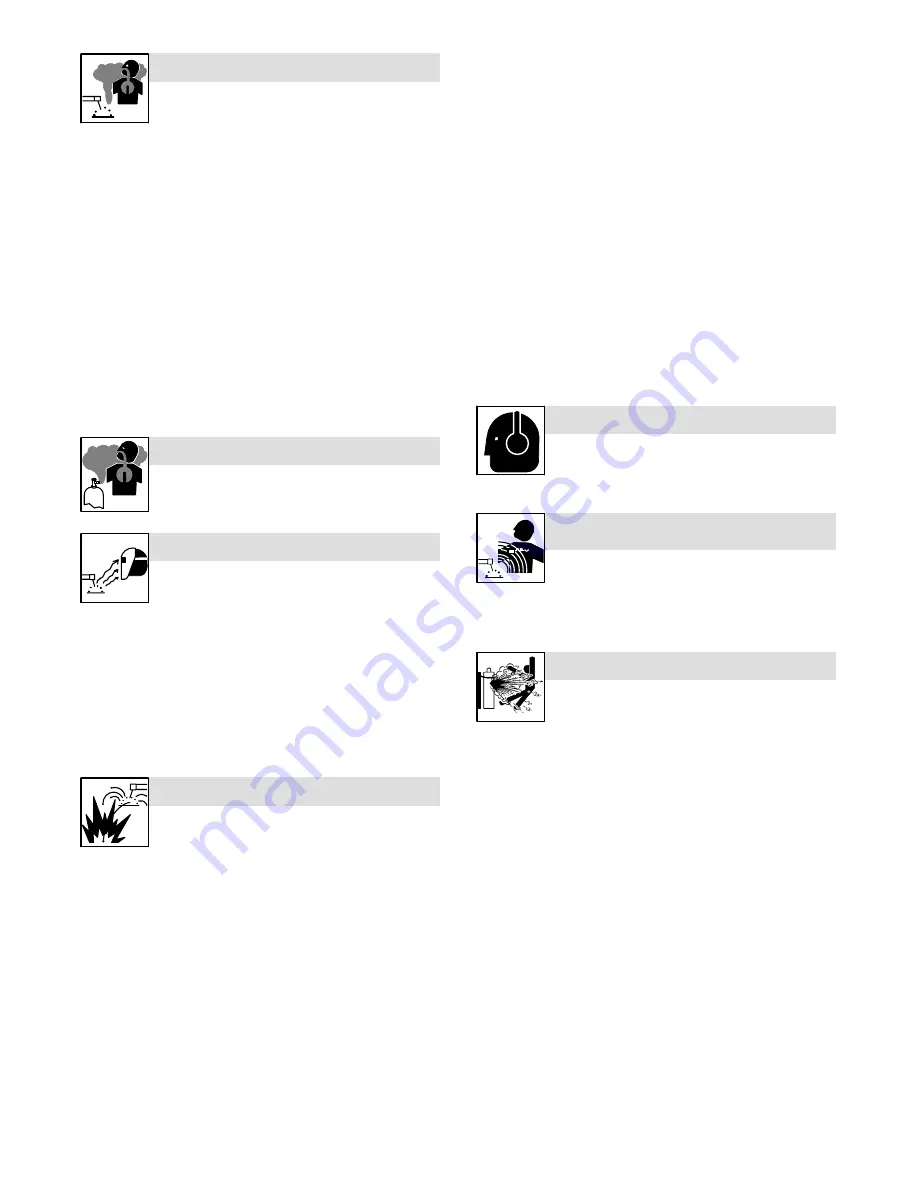
FUMES AND GASES can be hazardous.

Keep your head out of the fumes. Do not breathe the fumes.

If inside, ventilate the area and/or use local forced ventilation at the

arc to remove welding fumes and gases.

If ventilation is poor, wear an approved air-supplied respirator.

Read and understand the Material Safety Data Sheets (MSDSs)

and the manufacturer’s instructions for metals, consumables,

coatings, cleaners, and degreasers.

Work in a confined space only if it is well ventilated, or while

wearing an air-supplied respirator. Always have a trained watch-

person nearby. Welding fumes and gases can displace air and

lower the oxygen level causing injury or death. Be sure the breath-

ing air is safe.

Do not weld in locations near degreasing, cleaning, or spraying op-

erations. The heat and rays of the arc can react with vapors to form

highly toxic and irritating gases.

Do not weld on coated metals, such as galvanized, lead, or

cadmium plated steel, unless the coating is removed from the weld

area, the area is well ventilated, and while wearing an air-supplied

respirator. The coatings and any metals containing these elements

can give off toxic fumes if welded.

BUILDUP OF GAS can injure or kill.

Shut off shielding gas supply when not in use.

Always ventilate confined spaces or use ap-

proved air-supplied respirator.

Arc rays from the welding process produce intense

visible and invisible (ultraviolet and infrared) rays that

can burn eyes and skin. Sparks fly off from the weld.

ARC RAYS can burn eyes and skin.

Wear an approved welding helmet fitted with a proper shade of filter

lenses to protect your face and eyes from arc rays and sparks

when welding or watching (see ANSI Z49.1 and Z87.1 listed in

Safety Standards).

Wear approved safety glasses with side shields under your

helmet.

Use protective screens or barriers to protect others from flash,

glare, and sparks; warn others not to watch the arc.

Wear protective clothing made from durable, flame-resistant mate-

rial (leather, heavy cotton, or wool) and foot protection.

Welding on closed containers, such as tanks, drums,

or pipes, can cause them to blow up. Sparks can fly off

from the welding arc. The flying sparks, hot workpiece,

and hot equipment can cause fires and burns. Accidental contact of

electrode to metal objects can cause sparks, explosion, overheating,

or fire. Check and be sure the area is safe before doing any welding.

WELDING can cause fire or explosion.

Remove all flammables within 35 ft (10.7 m) of the welding arc. If

this is not possible, tightly cover them with approved covers.

Do not weld where flying sparks can strike flammable material.

Protect yourself and others from flying sparks and hot metal.

Be alert that welding sparks and hot materials from welding can

easily go through small cracks and openings to adjacent areas.

Watch for fire, and keep a fire extinguisher nearby.

Be aware that welding on a ceiling, floor, bulkhead, or partition can

cause fire on the hidden side.

Do not weld on closed containers such as tanks, drums, or pipes,

unless they are properly prepared according to AWS F4.1 (see

Safety Standards).

Do not weld where the atmosphere may contain flammable dust,

gas, or liquid vapors (such as gasoline).

Connect work cable to the work as close to the welding area as

practical to prevent welding current from traveling long, possibly

unknown paths and causing electric shock, sparks, and fire haz-

ards.

Do not use welder to thaw frozen pipes.

Remove stick electrode from holder or cut off welding wire at

contact tip when not in use.

Wear oil-free protective garments such as leather gloves, heavy

shirt, cuffless trousers, high shoes, and a cap.

Remove any combustibles, such as a butane lighter or matches,

from your person before doing any welding.

After completion of work, inspect area to ensure it is free of sparks,

glowing embers, and flames.

Use only correct fuses or circuit breakers. Do not oversize or by-

pass them.

Follow requirements in OSHA 1910.252 (a) (2) (iv) and NFPA 51B

for hot work and have a fire watcher and extinguisher nearby.

NOISE can damage hearing.

Noise from some processes or equipment can dam-

age hearing.

Wear approved ear protection if noise level is

high.

ELECTRIC AND MAGNETIC FIELDS (EMF)
can affect Implanted Medical Devices.

Wearers of Pacemakers and other Implanted

Medical Devices should keep away.

Implanted Medical Device wearers should consult their doctor

and the device manufacturer before going near arc welding,  spot

welding, gouging, plasma arc cutting, or induction heating

operations.

Shielding gas cylinders contain gas under high pres-

sure. If damaged, a cylinder can explode. Since gas

cylinders are normally part of the welding process, be

sure to treat them carefully.

CYLINDERS can explode if damaged.

Protect compressed gas cylinders from excessive heat, mechani-

cal shocks, physical damage, slag, open flames, sparks, and arcs.

Install cylinders in an upright position by securing to a stationary

support or cylinder rack to prevent falling or tipping.

Keep cylinders away from any welding or other electrical circuits.

Never drape a welding torch over a gas cylinder.

Never allow a welding electrode to touch any cylinder.

Never weld on a pressurized cylinder — explosion will result.

Use only correct shielding gas cylinders, regulators, hoses, and fit-

tings designed for the specific application; maintain them and

associated parts in good condition.

Turn face away from valve outlet when opening cylinder valve.

Keep protective cap in place over valve except when cylinder is in

use or connected for use.

Use the right equipment, correct procedures, and sufficient num-

ber of persons to lift and move cylinders.

Read and follow instructions on compressed gas cylinders,

associated equipment, and Compressed Gas Association (CGA)

publication P-1 listed in Safety Standards.

Summary of Contents for Champion Elite

Page 1: ...Champion Elite Processes Description Stick SMAW Welding Engine Driven Welding Generator OM 240 438B 2009 09 ...

Page 2: ...ucts Please take time to read the Safety precautions They will help you protect yourself against potential hazards on the worksite We ve made installation and operation quick and easy With Hobart you can count on years of reliable service with proper maintenance And if for some reason the unit needs repair there s a Troubleshooting section that will help you figure out what the problem is The part...

Page 3: ...Operating Angles 16 4 3 Dimensions For Units With Optional Running Gear 17 4 4 Duty Cycle 17 4 5 Fuel Consumption Subaru Powered Units 18 4 6 Fuel Consumption Kohler Powered Units 18 4 7 Volt Ampere Curves 19 4 8 Generator Power Curve 19 SECTION 5 INSTALLATION 20 5 1 Serial Number And Rating Label Location 20 5 2 Installing Welding Generator 20 5 3 Grounding Generator To Truck Or Trailer Frame 21 ...

Page 4: ...red Units 40 9 4 Changing Engine Oil Oil Filter and Fuel Filter Kohler Powered Units 41 9 5 Adjusting Engine Speed Kohler Powered Units 42 9 6 Overload Protection Kohler Powered Units 43 9 7 Servicing Optional Spark Arrestor Kohler Powered Units 43 SECTION 10 TROUBLESHOOTING 44 10 1 Welding Troubleshooting 44 10 2 Generator Power Troubleshooting 44 10 3 Engine Troubleshooting 45 SECTION 11 PARTS L...

Page 5: ...igh risk of unavoid able or accidental contact with the workpiece or ground For these conditions use the following equipment in order presented 1 a semiautomaticDC constant voltage wire welder 2 a DC manual stick welder or 3 an AC welder with reduced open circuit volt age In most situations use of a DC constant voltage wire welder is recommended And do not work alone Disconnect input power or stop...

Page 6: ...n easily go through small cracks and openings to adjacent areas Watch for fire and keep a fire extinguisher nearby Be aware that welding on a ceiling floor bulkhead or partition can cause fire on the hidden side Do not weld on closed containers such as tanks drums or pipes unless they are properly prepared according to AWS F4 1 see Safety Standards Do not weld where the atmosphere may contain flam...

Page 7: ... when engine is cold to avoid scalding Always check coolant level at overflow tank if present on unit instead of radiator unless told otherwise in maintenance section or engine manual If the engine is warm checking is needed and there is no over flow tank follow the next two statements Wear safety glasses and gloves and put a rag over radiator cap Turn cap slightly and let pressure escape slowly b...

Page 8: ... of this unit could result in equipment failure and personal injury Only qualified persons should install op erate and service this unit according to its Owner s Manual industry standards and na tional state and local codes Do not exceed the rated output or capacity of the compressor or any equipment in the compressed air system Design com pressed air system so failure of any component will not pu...

Page 9: ...rks are long enough to extend beyond opposite side of unit Keep equipment cables and cords away from moving vehicles when working from an aerial location Follow the guidelines in the Applications Manual for the Revised NIOSH Lifting Equation Publication No 94 110 when manu ally lifting heavy parts or equipment OVERHEATING can damage motors Turn off or unplug equipment before starting or stopping e...

Page 10: ... 4221 Walney Road 5th Floor Chantilly VA 20151 phone 703 788 2700 website www cganet com Safety in Welding Cutting and Allied Processes CSA Standard W117 2 from Canadian Standards Association Standards Sales 5060 Spectrum Way Suite 100 Ontario Canada L4W 5NS phone 800 463 6727 website www csa international org Safe Practice For Occupational And Educational Eye And Face Protec tion ANSI Standard Z8...

Page 11: ...st équipé Des précautions de sécurité supplémentaires sont requises dans des environnements à risque comme les endroits humides ou lorsque l on porte des vêtements mouillés sur des structures mé talliques au sol grillages et échafaudages dans des positions assises à genoux et allongées ou quand il y a un risque important de contact accidentel avec la pièce ou le sol Dans ces cas utiliser les appar...

Page 12: ...s normes de sécurité Porter des lunettes de sécurité avec écrans latéraux même sous votre casque Avoir recours à des écrans protecteurs ou à des rideaux pour protéger les autres contre les rayonnements les éblouissements et les étincelles prévenir toute personne sur les lieux de ne pas regarder l arc Porter des vêtements confectionnés avec des matières résistan tes et ignifuges cuir coton lourd ou...

Page 13: ...f en premier lieu Le rebrancher en dernier lieu LE CARBURANT MOTEUR peut pro voquer un incendie ou une explosion Arrêter le moteur avant de vérifier le niveau de carburant ou de faire le plein Ne pas faire le plein en fumant ou proche d une source d étincel les ou d une flamme nue Ne pas faire le plein de carburant à ras bord prévoir de l espace pour son expansion Faire attention de ne pas renvers...

Page 14: ...s ou même la mort Avant d intervenir sur le circuit hydraulique couper l alimentation électrique verrouiller et étiqueter l appareil détendre la pression et s assurer que le circuit hydraulique ne peut être remis sous pression par inadvertance Détendre la pression avant de débrancher ou de brancher des canalisations hydrauliques Avant d utiliser l appareil contrôler les composants du circuit hydra...

Page 15: ...n et s assurer que le circuit d air ne peut être mis sous pression par inadvertance Détendre la pression avant de débrancher ou de brancher des canalisations d air Avant d utiliser l appareil contrôler les composants du circuit d air comprimé les branchements et les flexibles en recherchant tout signe de détérioration de fuite et d usure Ne pas diriger un jet d air vers soi même ou vers autrui Pou...

Page 16: ...une fré quence trop faibles Ne pas brancher de moteur de 50 ou de 60 Hz à la prise de 100 Hz s il y a lieu LES ÉTINCELLES PROJETÉES peuvent provoquer des blessures Porter un écran facial pour protéger le visage et les yeux Affûter l électrode au tungstène uniquement à la meuleuse dotée de protecteurs Cette ma nœuvre est à exécuter dans un endroit sûr lors que l on porte l équipement homologué de p...

Page 17: ... des pro duits chimiques dont l État de Californie reconnaît qu ils provoquent des cancers et des malformations congénitales ou autres problèmes de procréation Pour les moteurs diesel Les gaz d échappement des moteurs diesel et certains de leurs composants sont reconnus par l État de Californie com me provoquant des cancers et des malformations congénitalesou autres problèmes de procréation 2 8 Pr...

Page 18: ...bles en les torsadant ou en les attachant avec du ruban adhésif ou avec une housse 2 Ne pas se tenir au milieu des câbles de soudage Disposer les câbles d un côté et à distance de l opérateur 3 Ne pas courber et ne pas entourer les câbles autour de votre corps 4 Maintenir la tête et le torse aussi loin que possible du matériel du circuit de soudage 5 Connecter la pince sur la pièce aussi près que ...

Page 19: ...ding Arc Electrode Stick SMAW SECTION 4 SPECIFICATIONS 4 1 Weld Power and Engine Specifications This unit uses either a Subaru EH 65 or a Kohler CH 23 engine Differences between models are noted throughout this manual Welding Mode Weld Output Range Rated Welding Output Maximum Open Circuit Voltage Generator Power Rating Fuel Capacity Engine CC AC 50 225 A 225 A 25 V 100 Duty Cycle 80 Peak 11 0 kVA...

Page 20: ...mensions Weights And Operating Angles 244 029 A 244 030 A 244 031 A 20 20 20 20 Do not exceed tilt angles or engine could be damaged or unit could tip Do not move or operate unit where it could tip Weight 562 lb 254 kg Lifting Eye Weight Rating 1280 lb 580 kg Support Assembly Dimensions ...

Page 21: ... Width 32 in 813 mm C Protective Cage Length 48 in 1219 mm D Running Gear Length 45 1 2 in 1156 mm 4 4 Duty Cycle 284 311 A 1 100 Duty Cycle Duty cycle is the percentage of 10 minutes that unit can weld at rated load without overheating This unit is rated for welding at 225 amperes CC AC or 210 amperes CC DC continuously NOTICE Exceeding duty cycle can damage unit and void warranty 1 Duty Cycle We...

Page 22: ...ect about 20 hours of op eration Welding at 150 amps at 40 duty cycle uses approximately 3 4 gal lon per hour or about 16 hours of operation 4 6 Fuel Consumption Kohler Powered Units 202 094 A On a typical job using 1 8 in 7018 electrodes 125 amps 20 duty cycle expect about 20 hours of op eration Welding at 150 amps at 40 duty cycle uses approximately 3 4 gal lon per hour or about 16 hours of oper...

Page 23: ...f all other settings fall between the curves shown A For CC AC Mode B For CC DC Mode 0 50 100 150 200 250 300 350 400 0 10 20 30 40 50 60 70 80 AC VOLTS AC AMPERES A B C RANGES A 85 225 B 70 150 C 50 100 0 10 20 30 40 50 60 70 80 DC VOLTS 0 50 100 150 200 250 300 350 400 DC AMPERES A C B RANGES A 85 225 B 70 150 C 50 100 4 8 Generator Power Curve 240 425 A The generator power curve shows the gener...

Page 24: ...s provided in base Always securely fasten weld ing generator onto transport vehicle or trailer and comply with all DOT and other applica ble codes NOTICE Do not install unit where air flow is restricted or engine may over heat See Section 4 2 for lifting eye rat ing Mounting Do not mount unit by support ing the base only at the four mounting holes Do not use flexible mounts Use cross supports to a...

Page 25: ...cle frame Al ways connect a ground wire from the generator equip ment grounding terminal to bare metal on the vehicle frame as shown If unit does not have GFCI re ceptacles use GFCI pro tected extension cord 1 Equipment Grounding Terminal On Front Panel 2 Grounding Cable Not Supplied 3 Metal Vehicle Frame Connect cable from equipment ground terminal to metal vehicle frame Use 10 AWG or larger insu...

Page 26: ...do not use the oil pressure shutdown system to monitor oil level Fuel Add fresh fuel before starting en gine the first time see maintenance label for specifications Always leave filler neck empty to allow room for expansion Check fuel lev el on a cold engine before use each day Oil Do not exceed the Full mark on the oil level dipstick The fuel pump may operate errati cally if crankcase is overfill...

Page 27: ...e the oil pressure shutdown system to monitor oil level Fuel Add fresh fuel before starting en gine the first time see maintenance label for specifications Always leave filler neck empty to allow room for expansion Check fuel lev el on a cold engine before use each day Oil Do not exceed the Full mark on the oil level dipstick The fuel pump may operate errati cally if crankcase is overfilled After ...

Page 28: ...ection but always away from front panel and direction of trav el Be sure to tighten exhaust clamp nuts Exhaust clamp supplied with muffler Tools Needed 1 2 in 5 7 Connecting Or Replacing the Battery 244 033 A 244 034 A Ref S 0756 D 3 8 1 2 in Tools Needed Connect negative battery cable last To connect battery open right side en gine access door 1 Battery Holddown To change battery remove rear pane...

Page 29: ... 6 Copper Bar Remove supplied nut from weld out put terminal Slide weld cable terminal onto weld output terminal and secure with nut so that weld cable terminal is tight against copper bar 7 Work Weld Output Terminal 8 Electrode Weld Output Terminal For Direct Current Electrode Positive DCEP connect work cable to Work terminaland electrode holder cable to Electrode terminal For Direct Current Elec...

Page 30: ...0 1 0 60 150 3 30 3 30 2 35 1 50 1 0 60 2 0 70 3 0 95 3 0 95 200 3 30 2 35 1 50 1 0 60 2 0 70 3 0 95 4 0 120 4 0 120 250 2 35 1 50 1 0 60 2 0 70 3 0 95 4 0 120 2 ea 2 0 2x70 2 ea 2 0 2x70 300 1 50 1 0 60 2 0 70 3 0 95 4 0 120 2 ea 2 0 2x70 2 ea 3 0 2x95 2 ea 3 0 2x95 350 1 0 60 2 0 70 3 0 95 4 0 120 2 ea 2 0 2x70 2 ea 3 0 2x95 2 ea 3 0 2x95 2 ea 4 0 2x120 400 1 0 60 2 0 70 3 0 95 4 0 120 2 ea 2 0 ...

Page 31: ... Hour Meter With engine off place Engine Control switch in Run Idle position to view en gine hours 4 Weld Process Selector Switch NOTICE Do not switch under load Use switch to select type of weld output Use DC Weld position for Direct Current Electrode Positive DCEP Use AC position for alternating current 5 Coarse Range Switch NOTICE Do not switch under load Use switch to select weld amperage rang...

Page 32: ...by if the engine is exten sively idled This may cause vacuum line freezing oil breather tube freezing or ice in the carburetor All of these cause operating problems Due to ice in the lines the engine may not restart until it is warmed to above freezing Load engine and reduce idle times to prevent engine shutdowns Use an electric fuel pump to avoid pulse line freezing Install engine cold weather ki...

Page 33: ...rode holder cable to Elec trode terminal on welding generator Be sure to use the correct size weld cables see Section 5 9 For best performance set the Coarse Range switch to the low est range that covers the desired weld amperage Use the Fine control to select the desired am perage within the range se lected When properly set the Fine control is normally set at 7 or higher Typical Settings For 701...

Page 34: ...or RC3 is 2 4 kVA kW 4 240 V 50 A AC Receptacle RC5 RC5 supplies 60 Hz single phase power at weld power speed Maximum output is 11 kVA kW 5 Supplementary Protector CB1 CB1 protects receptacles RC1 RC2 RC3 and RC5 from overload If CB1 opens the receptacles do not work Place switch in On position to reset 6 Supplementary Protector CB2 7 Supplementary Protector CB3 CB2 protects RC2 and CB3 protects R...

Page 35: ... 120 240V 3 wire load See circuit diagram 1 Plug Wired for 120 240 V 3 Wire Load When wired for 120 V loads each duplex receptacle shares a load with one half of 240 V receptacle 2 Plug Wired for 240 V 2 Wire Load 3 Neutral Silver Terminal 4 Load 1 Brass Terminal 5 Load 2 Brass Terminal 6 Ground Green Terminal 7 Amperes Available using 120 240 V Plug 1 2 3 4 5 6 3 4 5 6 240V 240V 120V 120V 7 Tools...

Page 36: ... A complete Parts List is available at wwwHobartWelders com OM 240 438 Page 32 SECTION 8 MAINTENANCE SUBARU POWERED UNITS 8 1 Maintenance Label Subaru Powered Units ...

Page 37: ...ge Clean Replace To be done by Factory Authorized Service Agent Reference Every 8 Hours Section 5 4 Fuel Level Oil Level Oil Fuel Spills Every 20 Hours Section 8 4 Spark Arrestor Screen Every 25 Hours Section 8 3 Air Cleaner Wrapper Every 50 Hours Weld Terminals Every 100 Hours Engine Manual Section 8 3 8 5 Battery Terminals Cooling System Oil Air Cleaner Element Every 200 Hours Engine Manual Sect...

Page 38: ...ly Spread 1 tablespoon SAE 30 oil evenly into precleaner Squeeze out excess oil 2 Element Replace element if damaged dirty or oily 8 3 Servicing Air Cleaner Subaru Powered Units aircleaner3 11 04 803 070 S 0759 oil 1 2 8 4 Servicing Optional Spark Arrestor Subaru Powered Units 244 029 A Ref 801 682 Stop engine and let cool 1 Spark Arrestor Screen Clean and inspect screen Replace spark arrestor if ...

Page 39: ...e engine oil and filter accord ing to engine owner s manual NOTICE Close valve and valve cap before adding oil and running engine Fill crankcase with new oil to full mark on dipstick see Section 5 4 3 Fuel Filter 4 Fuel Line Replace line if cracked or worn Install new filter Wipe up any spilled fuel Start engine and check for fuel leaks Stop engine tighten connec tions as necessary and wipe up fue...

Page 40: ...Screws 3 Idle Speed Screw Loosen mounting screws Adjust solenoid position so engine runs at idle speed If necessary back out idle speed screw so solenoid can be moved to correct position Tight en mounting screws Be sure sole noid linkage works smoothly Turn idle speed screw for fine adjustments Weld Power Speed Adjustment Move Engine Control switch to Run position 4 Jam Nut 5 Lock Nut 6 Weld Power...

Page 41: ...F2 protects the generator power excitation winding from overload If F2 opens generator power output stops or is low 3 Fuse F6 See Section 11 1 F6 protects the engine wiring sys tem from overload If F6 opens engine will not crank Replace any open fuses Reinstall cover before operating NOTICE If a fuse opens it usually indicates a more serious problem exists Contact a Factory Autho rized Service Age...

Page 42: ... A complete Parts List is available at wwwHobartWelders com OM 240 438 Page 38 SECTION 9 MAINTENANCE KOHLER POWERED UNITS 9 1 Maintenance Label Kohler Powered Units ...

Page 43: ...eck Change Clean Replace To be done by Factory Authorized Service Agent Reference Every 8 Hours Section 5 5 Fuel Level Oil Level Oil Fuel Spills Every 20 Hours Section 9 7 Spark Arrestor Screen Every 25 Hours Section 9 3 Air Cleaner Wrapper Every 50 Hours Weld Terminals Every 100 Hours Engine Manual Section 9 3 9 4 Battery Terminals Cooling System Oil Air Cleaner Element Every 200 Hours Engine Man...

Page 44: ...r with soap and wa ter solution Allow precleaner to air dry completely Spread 1 tablespoon SAE 30 oil evenly into precleaner Squeeze out excess oil 2 Element Replace element if damaged dirty or oily 9 3 Servicing Air Cleaner Kohler Powered Units aircleaner3 11 04 802 772 S 0759 oil 1 2 Notes Work like a Pro Pros weld and cut safely Read the safety rules at the beginning of this manual ...

Page 45: ...il Filter Change engine oil and filter accord ing to engine owner s manual Close valve and valve cap before adding oil and running engine Fill crankcase with new oil to full mark on dipstick see Section 5 5 4 Fuel Filter 5 Fuel Line Replace line if cracked or worn Install new filter Wipe up any spilled fuel Start engine and check for fuel leaks Stop engine tighten connec tions as necessary and wip...

Page 46: ...sition 1 Throttle Solenoid 2 Mounting Screws 3 Idle Speed Screw Loosen mounting screws Adjust solenoid position so engine runs at idle speed If necessary back out idle speed screw so solenoid can be moved to correct position Tight en mounting screws Be sure sole noid linkage works smoothly Turn idle speed screw for fine ad justments Weld Power Speed Adjustment Move Engine Control switch to Run pos...

Page 47: ... Fuse F6 See Section 11 1 F6 protects the engine wiring sys tem from overload If F6 opens engine will not crank Replace any open fuses Reinstall cover before operating If a fuse opens it usually indi cates a more serious problem exists Contact a Factory Au thorized Service Agent 3 8 in Tools Needed 2 1 Fuses F1 F2 located on bracket behind left side panel 3 Fuse F6 located in harness behind left s...

Page 48: ... and adjust if necessary see Section 8 6 or 9 5 Service air cleaner according to engine manual Have Factory Authorized Service Agent check brushes slip rings capacitor C1 and integrated rectifi ers SR2 and SR3 High weld output Check control settings Check engine speed and adjust if necessary see Section 8 6 or 9 5 Erratic weld output Check control settings Tighten and clean connections to electrod...

Page 49: ...Remedy Engine will not crank Check fuse F6 and replace if open see Section 8 7 or 9 6 Check battery voltage Check battery connections and tighten if necessary Check plug PLG4 and plug PLG8 connections Have Factory Authorized Service Agent check Engine Control switch S2 Engine will not start Check fuel level Check battery voltage Check battery connections and tighten if necessary Check oil level se...

Page 50: ...ngine manual Engine does not return to idle speed Remove weld and generator power loads Check throttle linkage for smooth non binding operation Have Factory Authorized Service Agent check hour meter idle module current transformer CT1 Engine Control switch S2 and throttle solenoid TS1 SECTION 11 PARTS LIST 11 1 Recommended Spare Parts Description Part No Dia Mkgs Recommended Spare Parts Quantity F...

Page 51: ... in 250 in 3 8 in 7 16 in 6 mm 2362 in 10 mm 10 mm 5 16 in 3125 in 1 2 in 9 16 in 8 mm 3150 in 14 mm 14 mm 3 8 in 375 in 9 16 in 5 8 in 10 mm 3937 in 17 mm 17 mm 7 16 in 4375 in 5 8 in 3 4 in 12 mm 4724 in 19 mm 19 mm 1 2 in 500 in 3 4 in 13 16 in 14 mm 5512 in 22 mm 22 mm 9 16 in 5625 in 7 8 in 7 8 in 16 mm 6299 in 24 mm 24 mm 5 8 in 625 in 15 16 in 1 in 18 mm 7087 in 27 mm 27 mm 3 4 in 750 in 1 ...

Page 52: ...OM 240 438 Page 48 SECTION 12 ELECTRICAL DIAGRAMS Figure 12 1 Circuit Diagram For Welding Generator ...

Page 53: ...OM 240 438 Page 49 240 424 A ...

Page 54: ...hock and static electricity hazards Also see AWS Safety Health Fact Sheet No 29 Grounding of Portable And Vehicle Mounted Welding Generators 1 EquipmentGrounding Terminal On Front Panel 2 Grounding Cable Not Supplied 3 Metal Vehicle Frame Connect cable from equipment ground terminal to metal vehicle frame Use 10 AWG or larger insulated copper wire Electrically bond generator frame to vehicle frame...

Page 55: ...ive load and requires a constant amount of power 2 Non Resistive Load Equipment with a motor is a non re sistive load and requires approxi mately six times more power while starting the motor than when running see Section 13 8 3 Rating Data Rating shows volts and amperes or watts required to run equipment Amperes x Volts Watts Example 1 If a drill uses 4 5 am peres at 115 volts calculate its run n...

Page 56: ...m Home Equipment Rating Starting Watts Running Watts Stock Tank De Icer 1000 1000 Grain Cleaner 1 4 HP 1650 650 Portable Conveyor 1 2 HP 3400 1000 Grain Elevator 3 4 HP 4400 1400 Milk Cooler 2900 1100 Milker Vacuum Pump 2 HP 10500 2800 FARM DUTY MOTORS 1 3 HP 1720 720 Std e g Conveyors 1 2 HP 2575 975 Feed Augers Air 3 4 HP 4500 1400 Compressors 1 HP 6100 1600 1 1 2 HP 8200 2200 2 HP 10550 2850 3 ...

Page 57: ...1 HP 6000 1500 1 1 2 HP 8200 2200 2 HP 10500 2800 Electric Chain Saw 1 1 2 HP 12 in 1100 1100 2 HP 14 in 1100 1100 Electric Trimmer Standard 9 in 350 350 Heavy Duty 12 in 500 500 Electric Cultivator 1 3 HP 2100 700 Elec Hedge Trimmer 18 in 400 400 Flood Lights HID 125 100 Metal Halide 313 250 Mercury 1000 Sodium 1400 Vapor 1250 1000 Submersible Pump 400 gph 600 200 Centrifugal Pump 900 gph 900 500...

Page 58: ...t must be at least twice the motor s running amperage kVA HP x HP x 1000 Volts Starting Amperage Example Calculate starting amper age required for a 230 V 1 4 HP mo tor with a motor start code of M Volts 230 HP 1 4 kVA HP 11 2 11 2 x 1 4 x 1000 230 12 2A Starting the motor requires 12 2 amperes VOLTS AMPS HP 230 2 5 1 4 Hz PHASE CODE 60 1 M AC MOTOR 1 2 3 4 13 9 How Much Power Can Generator Supply...

Page 59: ...ck to electric utility when service is re stored Install correct switch customer supplied Switch rating must be same as or greater than the branch overcurrent protection 3 Fused Disconnect Switch Install correct switch customer supplied if required by electrical code 4 Welding Generator Output Generator output voltage and wir ing must be consistent with regular utility system voltage and wiring Co...

Page 60: ...50 15 40 4800 112 34 62 19 37 11 45 5400 100 30 62 19 50 6000 87 26 50 15 Conductor size is based on maximum 2 voltage drop Cord Lengths for 240 Volt Loads If unit does not have GFCI receptacles use GFCI protected extension cord Maximum Allowable Cord Length in ft m for Conductor Size AWG Current Amperes Load Watts 4 6 8 10 12 14 5 1200 700 213 450 137 225 84 200 61 7 1680 800 244 500 152 300 91 2...

Page 61: ...ce is clean be fore welding 2 Work Clamp 3 Electrode A small diameter electrode re quires less current than a large one Follow electrode manufactur er s instructions when setting weld amperage see Section 14 2 4 Insulated Electrode Holder 5 Electrode Holder Position 6 Arc Length Arc length is the distance from the electrode to the workpiece A short arc with correct amperage will give a sharp crack...

Page 62: ... ALL ALL ALL ALL FLAT HORIZ FILLET ALL ALL EP EP EP EN EP EN EP EP EN EP EP 6010 6011 6013 7014 7018 7024 NI CL 308L EP ELECTRODE POSITIVE REVERSE POLARITY EN ELECTRODE NEGATIVE STRAIGHT POLARITY ELECTRODE AMPERAGE RANGE DIAMETER 14 3 Striking an Arc S 0049 S 0050 1 Electrode 2 Workpiece 3 Arc Scratch Technique Drag electrode across workpiece like striking a match lift electrode slightly after tou...

Page 63: ...ad Characteristics S 0053 A 1 Large Spatter Deposits 2 Rough Uneven Bead 3 Slight Crater During Welding 4 Bad Overlap 5 Poor Penetration 5 4 2 3 1 14 6 Good Weld Bead Characteristics S 0052 B 1 Fine Spatter 2 Uniform Bead 3 Moderate Crater During Welding Weld a new bead or layer for each 1 8 in 3 2 mm thickness in metals being welded 4 No Overlap 5 Good Penetration into Base Metal 1 5 2 3 4 ...

Page 64: ... of base metal 14 8 Electrode Movement During Welding S 0054 A Normally a single stringer bead is satisfactory for most narrow groove weld joints however for wide groove weld joints or bridging across gaps a weave bead or multiple stringer beads work better 1 Stringer Bead Steady Movement Along Seam 2 Weave Bead Side to Side Movement Along Seam 3 Weave Patterns Use weave patterns to cover a wide a...

Page 65: ...mm 30 2 1 1 16 in 1 6 mm 3 4 14 10 Lap Joint S 0063 S 0064 1 Electrode 2 Single Layer Fillet Weld Move electrode in circular motion 3 Multi Layer Fillet Weld Weld a second layer when a heavi er fillet is needed Remove slag be fore making another weld pass Weld both sides of joint for maxi mum strength 30 Or Less 30 Or Less 1 1 2 3 14 11 Tee Joint S 0060 S 0058 A S 0061 1 Electrode 2 Fillet Weld Ke...

Page 66: ...form near weld bead Possible Causes Corrective Actions Amperage too high for electrode Decrease amperage or select larger electrode Arc length too long or voltage too high Reduce arc length or voltage Incomplete Fusion failure of weld metal to fuse completely with base metal or a preceeding weld bead Possible Causes Corrective Actions Insufficient heat input Increase amperage Select larger electro...

Page 67: ...ase and or maintain steady travel speed Burn Through weld metal melting completely through base metal resulting in holes where no metal remains Possible Causes Corrective Actions Excessive heat input Select lower amperage Use smaller electrode Increase and or maintain steady travel speed Waviness Of Bead weld metal that is not parallel and does not cover joint formed by base metal Possible Causes ...

Page 68: ...OM 240 438 Page 64 Notes ...

Page 69: ...OM 240 438 Page 65 Notes ...

Page 70: ...OM 240 438 Page 66 Notes ...

Page 71: ...onsumable components such as contact tips cutting nozzles slip rings drive rolls gas diffusers plasma torch tips and electrodes weld cables and tongs and tips or parts that fail due to normal wear Exception brushes slip rings and relays are covered on Hobart Engine Driven models 2 Items furnished by Hobart Miller but manufactured by others such as engines or trade accessories These items are cover...

Page 72: ...utor retail or service location Call 1 877 Hobart1 or visit our website at www HobartWelders com Contact your Distributor for Welding Supplies and Consumables Options and Accessories Personal Safety Equipment Service and Repair Replacement Parts Training Schools Videos Books Technical Manuals Servicing Information and Parts Circuit Diagrams Welding Process Handbooks Contact the Delivering Carrier ...

Reviews: