background image

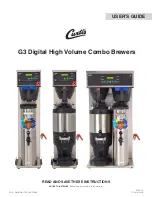
 G3 Digital High Volume Combo Brewers

86(5·6*8,'(

5($'$1'6$9(7+(6(,16758&7,216

127,&(72,167$//(5

: Please leave this booklet with the machine.


022317A

FC16 - CBHS/CBHT, FRONT COVER  

F-10015 revNC

Summary of Contents for CBHS67000-001

Page 1: ...G3 Digital High Volume Combo Brewers 86 5 6 8 5 1 6 9 7 6 16758 7 216 127 72 167 5 Please leave this booklet with the machine 022317A FC16 CBHS CBHT FRONT COVER F 10015 revNC ...

Page 2: ...OH IP25 OOXVWUDWHG 3DUWV 5HFRPPHQGHG 3DUWV 7DQN VVHPEO 7ZLQ IP26 OHFWULFDO 6FKHPDWLF 6 ES21 OHFWULFDO 6FKHPDWLF 7 ES22 7URXEOHVKRRWLQJ XLGH 7 7URXEOHVKRRWLQJ XLGH 7 UURU RGHV EC4 3URGXFW DUUDQW 3 CBHS CBHT CONTENTS LIST 100616A Contact Information Wilbur Curtis Co Inc 6913 Acco Street Montebello CA 90640 US Phone 323 837 2300 Toll Free 800 421 6150 Email csrassistance wilburcurtis com Web www wilb...

Page 3: ...UFOT CSFX UJNF CZ BMMPXJOH DPODFOUSBUF BOE EJMVUJPO DZDMFT UP SVO BU UIF TBNF UJNF 6SHFLÀFDWLRQV 6HOHFWHG 0RGHOV OHFWULFDO 6XSSO 5HTXLUHPHQWV 02 6 5 37 21 3 6 92 76 036 7 1 21 5 776 57 5 6 Single High Volume Combo Brewer 1 PH 110 220 V 15 0 12 7 A 2 X 1600 W 2W 3W G 1800 W 2800 W 50 60 Hz 12 0 7 Twin High Volume Combo Brewer 1 PH 220 V 23 0 34 0 A 3 X 2500 W 3W G 5100 W 7500 W 50 60 Hz 21 0 LPHQVL...

Page 4: ...njury or void the warranty This appliance is designed for commercial use Any service other than cleaning and preventive maintenance should be performed by an authorized Wilbur Curtis service technician 5P SFEVDF UIF SJTL PG mSF PS FMFDUSJD TIPDL 0 05 PQFO UIF TFSWJDF QBOFMT 5IFSF BSF OP VTFS serviceable parts inside Keep hands arms and other items away from hot surfaces of the unit during operatio...

Page 5: ...CZ QFSTPOT ZFBST BOE BCPWF XJUI SFEVDFE QIZTJDBM TFOTPSZ PS NFOUBM DBQBCJMJUJFT or lack of experience and knowledge if they have been given supervision or instruction concerning use of the appliance in a safe way and understand the hazards involved IJMESFO VOEFS UIF BHF PG ZFBST TIPVME CF TVQFSWJTFE UP FOTVSF UIFZ EP OPU QMBZ XJUI UIF BQQMJBODF If the power cord is ever damaged it must be replaced...

Page 6: ...SPECIFICATIONS section for the correct size The water line should also be capable of being DPOUSPMMFE CZ B TIVU PGG WBMWF P OPU DPOOFDU UIF XBUFS MJOF UP B TBEEMF WBMWF 4 OUFSOBUJPOBM SFRVJSFT UIF GPMMPXJOH XBUFS DPOOFDUJPO 1 RVJDL EJTDPOOFDU PS BEEJUJPOBM DPJMFE UVCJOH BU MFBTU UXP UJNFT UIF EFQUI PG UIF appliance JT SFRVJSFE TP UIBU JU DBO CF NPWFE GPS DMFBOJOH VOEFSOFBUI 2 5IJT FRVJQNFOU JT UP ...

Page 7: ...esire faucet mounting location INSTALLATION INSTRUCTIONS II10 HIGH VOLUME COMBO BREWERS INSTALLATION INSTRUCTIONS 082316NC WARNING Use the leveling legs to level the brewer only Do not use them to adjust brewer height Do not extend them higher than necessary High volume combo brewers have a water tank DPOmHVSFE GPS JOTUBMMBUJPO PG BO PQUJPOBM IPU XBUFS faucet The faucet ships loose with the brewer...

Page 8: ...d Disconnect and cap one end of the jumper wire between the C and N terminals on the power block 15 Twin units are equipped with three elements To operate with two elements 5100 Watts disconnect and cap one end of the jumper wire between the C and N terminals on the power block To operate with three elements 7500 Watts the jumper wire must be connected 16 Feed the 220 Volt power cable through the ...

Page 9: ...FFO FGPSF CSFXJOH GPS UIF mSTU UJNF dispense 12 ounces of hot water through the hot water faucet to help purge air from the tubing inside the brewer 26 Perform a brew cycle of a least 12 ounces to purge any remaining air from the system See OPERATING INSTRUCTIONS During the initial brew cycle and XIFOFWFS UIF mMUFS JT SFQMBDFE ZPV NBZ IFBS UIF TPVOET PG BJS CFJOH QVSHFE GSPN UIF mMUFS UVCJOH BOE w...

Page 10: ...ps The brewer will brew coffee or tea based on the settings programmed into the universal control module UCM To change the settings see the PROGRAMMING GUIDE For models equipped for brewing iced coffee 1 The brewer should be ON POmSN UIJT BU UIF SFBS UPHHMF switch Ready to brew should be on the display 6 Press the brew button Brewing will begin immediately WARNING TO AVOID SCALDING AVOID SPLASHING...

Page 11: ...d brush for hard to clean areas Rinse with clean water then dry 3 Wipe the spray head area with a cloth soaked in a mild detergent solution Rinse with a cloth soaked with clean water removing any residual detergent Use a clean soft cloth to dry 4 Dump out the drip tray s if applicable Rinse with clean water then dry with a soft clean cloth Cleaning The Brewer Weekly The brewer should be OFF 5VSO U...

Page 12: ...od grade applications Sanitize according to the directions on the package 5 Disassemble the faucet Unscrew the handle bonnet assembly from the top of the faucet and remove it Inspect the seat cup for wear Replace the seat cup if it is damaged Disassemble the sight gauge some versions If the sight gauge has a cover pull it up and off to remove Remove the cap to disassemble the gauge both versions S...

Page 13: ...e applications Sanitize according to the directions on the package 10 Air Dry Allow all parts to thoroughly air dry 11 Reassemble When dry reassemble the handle bonnet Hand tighten the handle bonnet onto the top of the faucet assembly reinstall the site gauge and cover If replacing a broken gauge glass carefully remove any traces of glass from the silicone parts before inserting the new gauge glas...

Page 14: ...ccording to the directions on the package 5 Air Dry Turn the container upside down and allow to air dry Cleaning the Faucet Parts Lid and Drip Tray Disassemble the faucet Unscrew the faucet assembly from the dispenser Then unscrew the handle bonnet assembly from the top of the faucet and remove Inspect the seat cup for wear Replace the seat cup if it is damaged 2 Wash Wash the lid drip tray and fa...

Page 15: ...ld bottom right BREW button 4 Then press and release ON OFF button 2 Continue to hold down BREW button until Enter Code appears Enter 4 digit code factory default 1 2 3 4 IMPORTANT All programming functions are performed with the three center buttons The symbols below the buttons are Ż Scroll LEFT UP 1 SELECT or ENTER to save new parameter 2 Ź Scroll RIGHT DOWN 3 Once you enter programming mode pr...

Page 16: ...e odometer was last reset Press Ź to go back without resetting or to reset Press Ź to display the subsequent menu features Brew Count Total when accessed displays the total brew cycles on the brewer It cannot be reset The display returns to the previous screen automatically after a few seconds Press Ź to display the subsequent menu features Cold Brew Lock adjusts the temperature at which the brewe...

Page 17: ...Press to save Press Ź to display the subsequent menu features Coffee Drip Out sets the Coffee Drip Out time Drip out allows additional time for coffee to drain from the brew basket before Brewing disappears from the display Once accessed press Ż or Ź to increase or decrease time The range is Off to 5 00 Press to save Press Ź to display the subsequent menu features Tea Drip Out sets the Tea Drip Ou...

Page 18: ...ng High yield coffees typically extract better with the C pulse setting Of course any of the A B or C TFUUJOHT NBZ CF VTFE UP TVJU ZPVS UBTUF QSPmMF Settings D and E are manual pulse counts By Pass On Off turns by pass feature On and Off Press to access Press Ż or Ź to toggle between On and Off Press to save Press Ź to display the subsequent menu features Exit Press exit Non Brew Program menu and ...

Page 19: ...eds to be turned On or Off Press to save If On is selected subsequent screens will appear to adjust the Pulse Count On Time and Off Time Press Ż or Ź to select the setting for each screen then press to move to the next screen Press Ź to display the subsequent menu features Exit Press exit Non Brew Program menu and go back to programming mode main menu Model Select Menu Model Select changes the UCM...

Page 20: ... in 1 2 cm 3 73 in 9 5 cm 36 71 in 93 2 cm 12 50 in 31 8 cm 10 33 in 26 2 cm 23 68 in 60 1 cm 20 84 in 52 9 cm 23 13 in 58 8 cm 25 63 in 65 1 cm 16 61 in 42 2 cm 1 29 in 3 3 cm CBHS67000 001 ROUGH IN DRAWING 101916NC 22 82 in 58 0 cm 5 43 in 13 8 cm Water Supply Connection ...

Page 21: ...m 18 13 in 46 0 cm 16 75 in 42 5 cm 23 63 in 60 0 cm 23 13 in 58 7 cm 1 25 in 3 2 cm 20 88 in 53 0 cm 23 63 in 60 0 cm 36 75 in 93 3 cm 12 50 in 31 8 cm 10 25 in 26 0 cm CBHT17000 001 ROUGH IN DRAWING 101816NC 22 88 in 58 1 cm 33 74 in 85 7 cm Water Supply Connection ...

Page 22: ...Supplies and Accessories All Models CAB 1 Cleaning Brush WC 29050 Spray Head Purple 14 8 27 22 31 32 4 29 6 1 1 3 28 19 20 21 23 5 13 26 25 2 9 10 12 30 24 18 1 15 7 17 CBHS67000 001 Main Chassis Exploded View A A Sold by the case See section IP25 16A 16B 33A 33B 34A 34B ...

Page 23: ...UMP VALVE RIGHT CBHS67000 001 Series Recommended Parts to Stock ITEM PART DESCRIPTION 19 WC 37255 KIT DUAL VALVE WATER INLET 20 WC 1200 CORD 14 3 SJTO 6 BLK W PLUG 21 WC 1412 CORD GRIP 3 4 FOR METAL CORD TO 81 OD 22 WC 39846 LABEL UCM OVERLAY COMBO SINGLE CURTIS 23 WC 37252 KIT HOT WATER FAUCET REPLACEMENT ALPGT D60GT D500GT 24 WC 4308 WASHER 1 2 ID INTRNL LCK STL 25 WC 37132 KIT VALVE REPAIR USE ...

Page 24: ...ECOMMENDED PARTS IP16 4 5 6453 5 1 354 3 0 1 354 ø 3 8 7 27 22 6 29 14 20 31 28 15 9 19 23 21 10 5 13 26 25 2 1 1 32 17 18 4 30 24 12 1 CBHT17000 001 Main Chassis Exploded View A A See section IP26 16A 16B 33A 33B 34A 34B ...

Page 25: ...SPRAYHEAD FITTING METAL CBHT17000 001 Series Recommended Parts to Stock ITEM PART DESCRIPTION 19 WC 37255 KIT DUAL VALVE WATER INLET 20 WC 847 VALVE INLET 2 GPM 120V 10W GEN USE BROWN BODY 21 WC 1412 CORD GRIP 3 4 FOR METAL CORD TO 81 OD 22 WC 39845 LABEL UCM OVERLAY COMBO TWIN CURTIS 23 WC 37252 KIT HOT WATER FAUCET REPLACEMENT ALPGT D60GT D500GT 24 WC 4308 WASHER 1 2 ID INTRNL LCK STL 25 WC 3713...

Page 26: ...ING 1 6KW120V W JAM NUT SILICONE O RING 6 WC 1438 101 SENSOR TEMPERATURE TANK 8 WC 522 THERMOSTAT HI LIMIT HEATER CONTROL DPST 277V 40A WC 62080 Recommended Parts to Stock ITEM PART DESCRIPTION 9 WC 37365 KIT FITTING TANK INLET 10 WC 37266 KIT FITTING TANK OVERFLOW 11 WC 37317 KIT STRAIGHT FITTING BUSHNG MM GEN USE 12 WC 43055 GUARD SHOCK RESET THERMOSTAT WC 522 13 WC 37357 KIT STRAIGHT PLASTIC FI...

Page 27: ...T PROBE WATER LEVEL O RING NUT 5 WC 934 04 KIT ELEMENT HEATING 2 5KW 220V W JAM NUT SILICONE WASHERS 6 WC 1438 101 SENSOR TEMPERATURE TANK WC 62033 Recommended Parts to Stock ITEM PART DESCRIPTION 8 WC 522 THERMOSTAT HI LIMIT HEATER CONTROL DPST 277V 40A 9 WC 37365 KIT FITTING TANK INLET 10 WC 37266 KIT FITTING TANK OVERFLOW 11 WC 37317 KIT STRAIGHT FITTING BUSHNG 8MM GEN USE 12 WC 43055 GUARD SHO...

Page 28: ... 14 TANK TEMPERATURE SENSOR 15 UCM GROUND 16 WATER LEVEL PROBE 17 120V NEUTRAL 18 120V HOT 19 DUMP VALVE 20 NOT USED UCM Pin Assignments 20 Pin Connector Model Voltage V Amps A WaƩs W Hertz Hz of Conductor Wires Phase of Tank Elements Tank Element RaƟng W V 120 10 0 1200 2 110 220 10 7 2350 3 120 10 0 1200 2 120 240 10 2 2450 3 120 15 0 1800 2 110 220 12 7 2800 3 120 15 0 1800 2 120 240 13 8 3300 ...

Page 29: ...ELECTRICAL SCHEMATICS ES22 CBHT ELECTRICAL SCHEMATIC 091516NC CBHT 220 Volts ...

Page 30: ...BMWF 3 3VO B CSFX DZDMF XIJMF NPOJUPSJOH UIF WPMUBHF BU UIF WBMWF DPJM UFSNJOBMT G WPMUBHF JT QSFTFOU PO UIF UFSNJOBMT ZPV TIPVME IFBS UIF WBMWF DMJDL PQFO DMPTFE BU UIF NPNFOU QPXFS JT BQQMJFE PS SFNPWFE GSPN UIF UFSNJOBMT 5IF JOMFU WBMWF TIPVME PQFO BOZ UJNF UIF XBUFS UBOL JT OPU GVMM G UIF WBMWF EPFT OPU PQFO SFQMBDF UIF WBMWF G WPMUBHF JT OPU EFUFDUFE mSTU DIFDL UIF XJSJOH G UIF XJSJOH JT 0 SF...

Page 31: ... to the tank and that heat sink compound was used A properly mounted sensor should have a resistance of around 7 k when the water is hot If not replace the sensor 3 Check to see if the universal control module UCM constantly has 5 Vdc output nominal to the solid state relay SSR regardless of the resistance of the temperature sensor If so the UCM is probably bad 4 If the UCM is working properly che...

Page 32: ... WKH KHDWLQJ WDQN KDV ULVHQ DERYH System Fault Messages An error message will appear on the screen in the event of a malfunction under the following conditions 1 8BUFS MFWFM PWFSnPX 5IJT FSSPS JOEJDBUFT UIBU FJUIFS UIFSF JT OPU FOPVHI JODPNJOH XBUFS nPX QSFTTVSF PS B XBUFS PWFSnPX DPOEJUJPO VOJU XJMM TUPQ GVODUJPOJOH 2 SFBL JO UFNQFSBUVSF DPOUSPM DJSDVJU 3 YDFTT UFNQFSBUVSF JO IFBUJOH UBOL G BOZ P...

Page 33: ...er installation of equipment This equipment must be installed by a professional technician and must comply with all local elec trical mechanical and plumbing codes Improper voltage Equipment must be installed at the voltage stated on the serial plate supplied with this equipment Improper water supply 7KLV LQFOXGHV EXW LV QRW OLPLWHG WR H FHVVLYH RU ORZ ZDWHU SUHVVXUH DQG LQDGHTXDWH RU ÀXFWXDWLQJ Z...

Reviews: