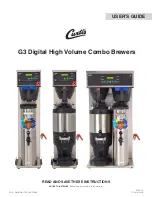


Brewers With A Cord Set Attached
21 Connect the power cord to the appropriate electrical
outlet.
Power Up the Brewer
22 Turn on the water supply valve.
23 Make sure that the circuit breaker supplying power to
the unit is on.
24 Turn the toggle switch on the back of the brewer to the
0/QPTJUJPO5IFXBUFSUBOLXJMMTUBSUUPmMM8IJMFUIF
UBOLJTmMMJOHJOTQFDUUIFXBUFSTVQQMZMJOFGPSMFBLT
25 When the water level in the tank rises to the
correct volume, the heating elements will turn on
automatically. Depending on the incoming water
UFNQFSBUVSFBOEUIFFMFDUSJDBMTQFDJmDBUJPOTUIF
water tank typically requires 20 to 30 minutes to reach
the factory set operating temperature. When the
water has heated,
Ready to brew
will be displayed
POUIF-$%TDSFFO#FGPSFCSFXJOHGPSUIFmSTUUJNF
dispense 12 ounces of hot water through the hot
water faucet to help purge air from the tubing inside
the brewer.
26 Perform a brew cycle of a least 12 ounces to purge
any remaining air from the system. See
OPERATING
INSTRUCTIONS
. During the initial brew cycle and
XIFOFWFSUIFmMUFSJTSFQMBDFEZPVNBZIFBSUIF
TPVOETPGBJSCFJOHQVSHFEGSPNUIFmMUFSUVCJOHBOE
water tank.
INSTALLATION INSTRUCTIONS
II10
IMPORTANT:
When operating the brewer at
higher elevations, reduce the operating
temperature by 2°F for each 1000 feet of
elevation. See the
PROGRAMMING GUIDE
.
WARNING:
Connect the power cord to the
appropriate type and size electrical outlet. If the
electrical outlet is not compatible with the power
cord, have it upgraded by a licensed electrician.
Do not modify the power plug. Do not use an
extension cord. Do not use a power cord/plug
that is damaged.
HIGH VOLUME COMBO BREWERS, INSTALLATION INSTRUCTIONS
082316NC


