13 (30)
►
Switch on the power supply.
→
The default configuration with 250 Kbit/s is started automatically.
→
With CANnector Range the Master configuration is started.
►
If using CANnector Range with Master and Slave device, the slave application must be
activated on the Slave device (see
Selecting a Pre-Configured Configuration, p. 13
).
If using the CANnector Log, the logging only starts if the USB memory storage device is
plugged in correctly.
6.2.3
Selecting a Pre-Configured Configuration
When the device is correctly connected the default configuration of the respective product
variant is running (see
). With the dashboard, that is accessible via
the IP address and a web browser, different pre-configured configurations can be selected and
activated on the device.
►
Make sure, that the required software is installed (see
Installing the Software, p. 12
) and
that the CANnector is connected (see
►
Use the USB cable (included in the scope of delivery) to connect the Mini USB connector of
the CANnector to the PC.
►
Open a web browser on the PC.
►
Enter the IP address 169.254.254.254 as URL.
→
CANnector dashboard is opened.
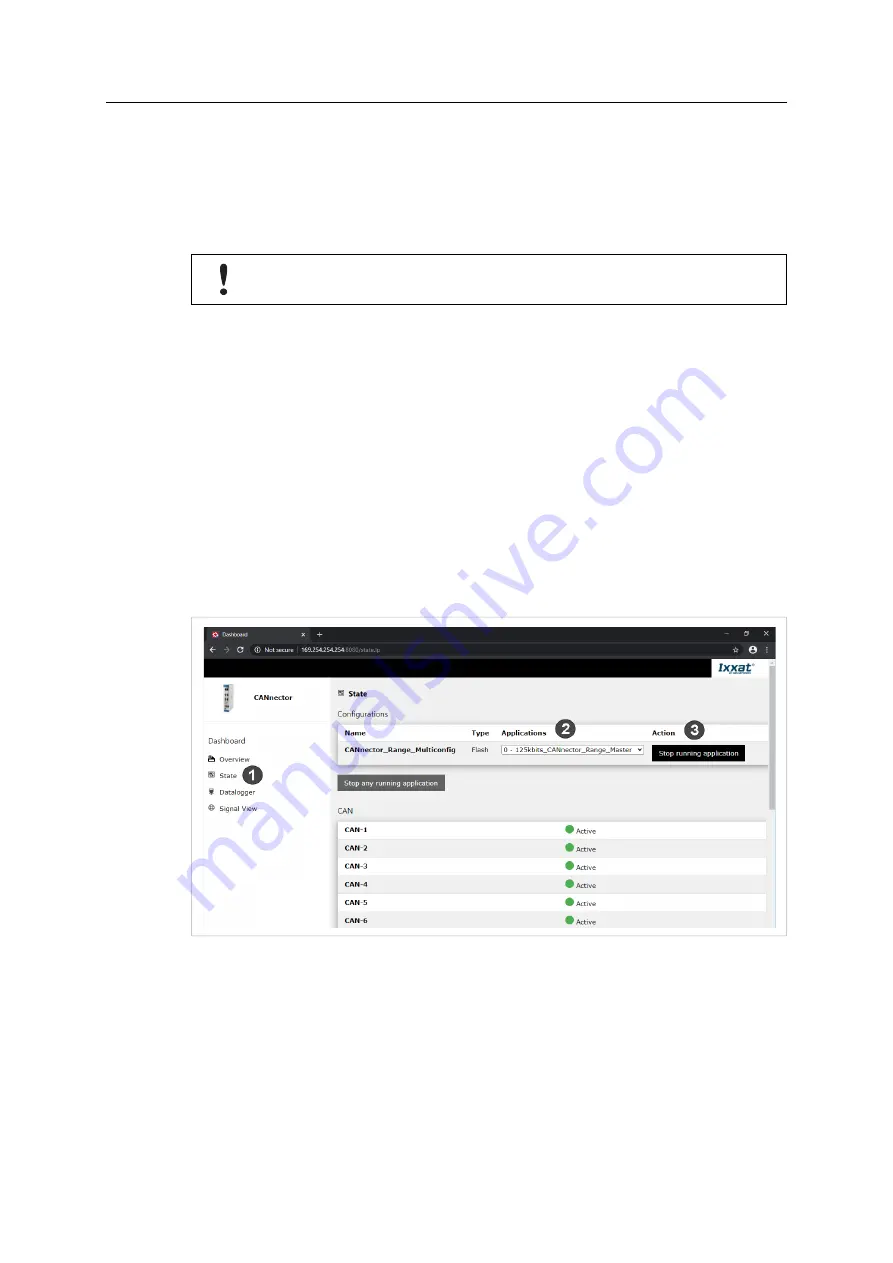
Fig. 2
CANnector dashboard
►
Select
State
(
1
) in the configuration tree.
→
State of configuration and CAN ports is shown.
►
Click button
Stop running application
in column
Action
(
3
).
►
In drop-down menu in column
Application
(
2
) select the application with the desired baud
rate.
►
For the slave device of a CANnector Range select the Slave application with the same baud
rate as used on the Master device.
CANnector Installation Guide
4.01.0091.20000 1.3 en-US


