


31
32
1. Make sure the cable and the Constant Power
Supply Unit are in proper condition for installa-
tion.
3. Disconnect the negative cable form the battery.
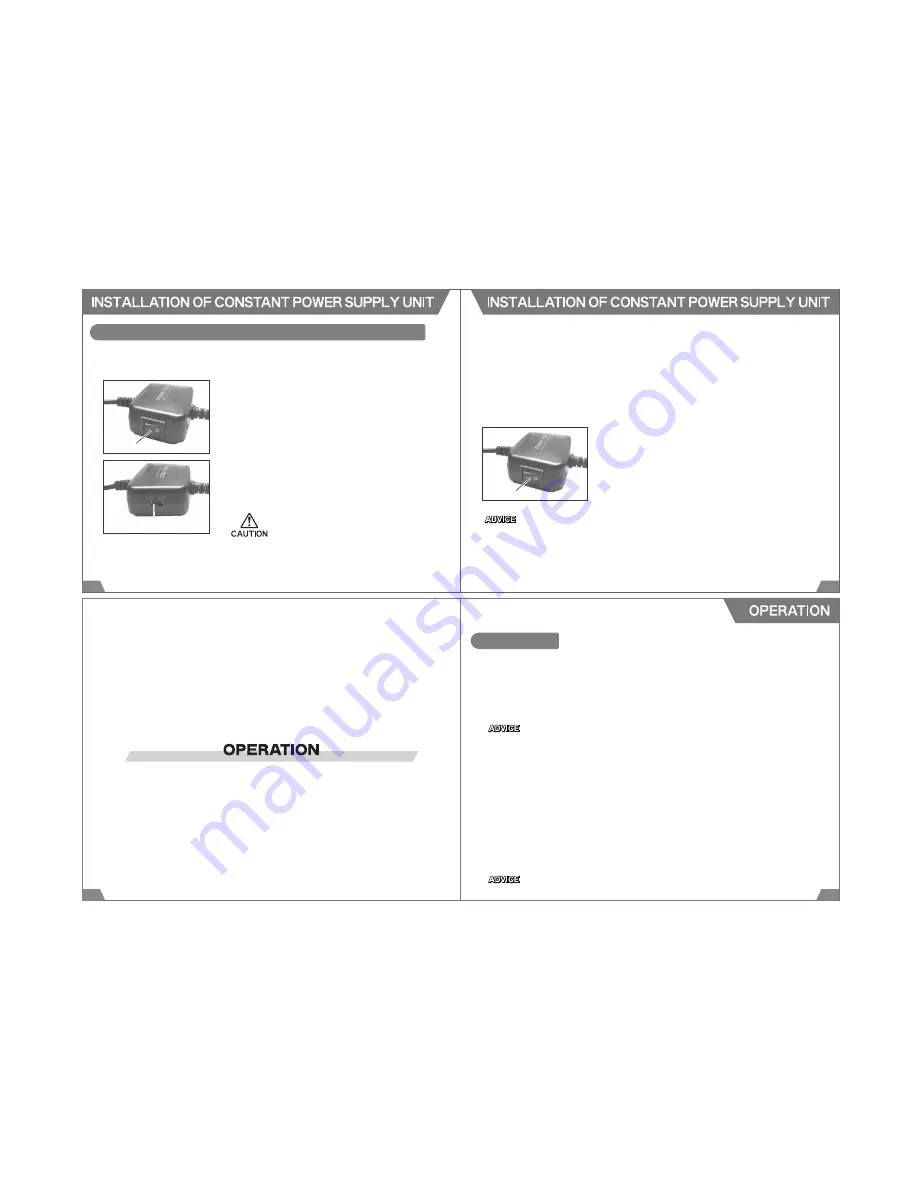
4. Select the Input Voltage
Turn off the power of the Constant Power Supply Unit (
○
side),
and switch the input voltage selection to the side proper for the
vehicle.
Select the proper side of the input voltage.
Connect the black wire from the Constant Power Supply Unit
to a good chassis ground or the ground line.
Find a line of constant 12V (or 24V) power supply using a
tester.
Make sure connectors are properly connected.
INSTALLATION OF CONSTANT POWER SUPPLY UNIT
2. Constant Power Line
5. Connect to Ground Line
7.Mount the Unit
Mount the Constant Power Supply Unit using the provided
Fixture Tape. Make sure to mount to the position where it does
not distract driving using the provided Fixture Tape.
8.Connect to the DMR Main Unit
Connect the Constant Power Supply Unit to the power
connector of the DMR main unit. Turn on the power of the
Constant Power Supply Unit (- side).
9.After Installation
10.Route the cable not to distract driving.
Reconnect the negative cable to the battery. Make sure the
DMR main unit and the Constant Power Supply Unit can be
operated properly.
Connect the red wire from the Constant Power Supply Unit to
the line of constant 12V (or 24V) power supply. Secure the
connected point using a splice or electro tap splice.
6.Connect to Power Supply Line
Make sure to maintain adequate
distance between the Constant
Power Supply Unit and antenna
and/or antenna wires of other
electrical devices to prevent poor
reception.
Input Voltage
Switch
Power Switch
Power Switch
34
OPERATION
33
1.Turn On the Power
2.Start Recording
(1) Make sure the Power Cable is plugged in the DMR main unit properly, and the SD Memory Card
is inserted properly.
(2) Start the engine. The power of the DMR is turned on automatically.
(3) After the power is on, a blue LED and purple LED start blinking, and the unit is started up.
1) Constant Recording Mode
After initialization, recording begins. Recoded data are filed and split into 3 minute blocks. When
a shock/impact is detected during recording, the position is recorded to the G-sensor graph in
the view.
When the unit start-up is completed, the unit beeps 5 times (when warning beeping sound is on.).
When "1Channel" is selected for the Video setting, a red LED comes on. "2Channel" is selected,
a purple LED comes on. During recording, the LED on the left side of the main unit blinks at 1.5
seconds interval. If this LED does not blink, there must be a system error. Turn of the power, and
reboot the unit.
IF the SD memory card is not inserted or write-protected, the unit beeps, and a blue LED and
purple LED blink. Insert a SD memory card, or release the write protection to stop beeping and
blinking.
Under this constant recording mode, a shock or impact can be detected, but the image cannot
be recorded in addition to the image originally recorded.


