background image

HITBOT Z-Arm 

2140

E-Mail:  [email protected]

Huiling-tech Robotic Co., Ltd 

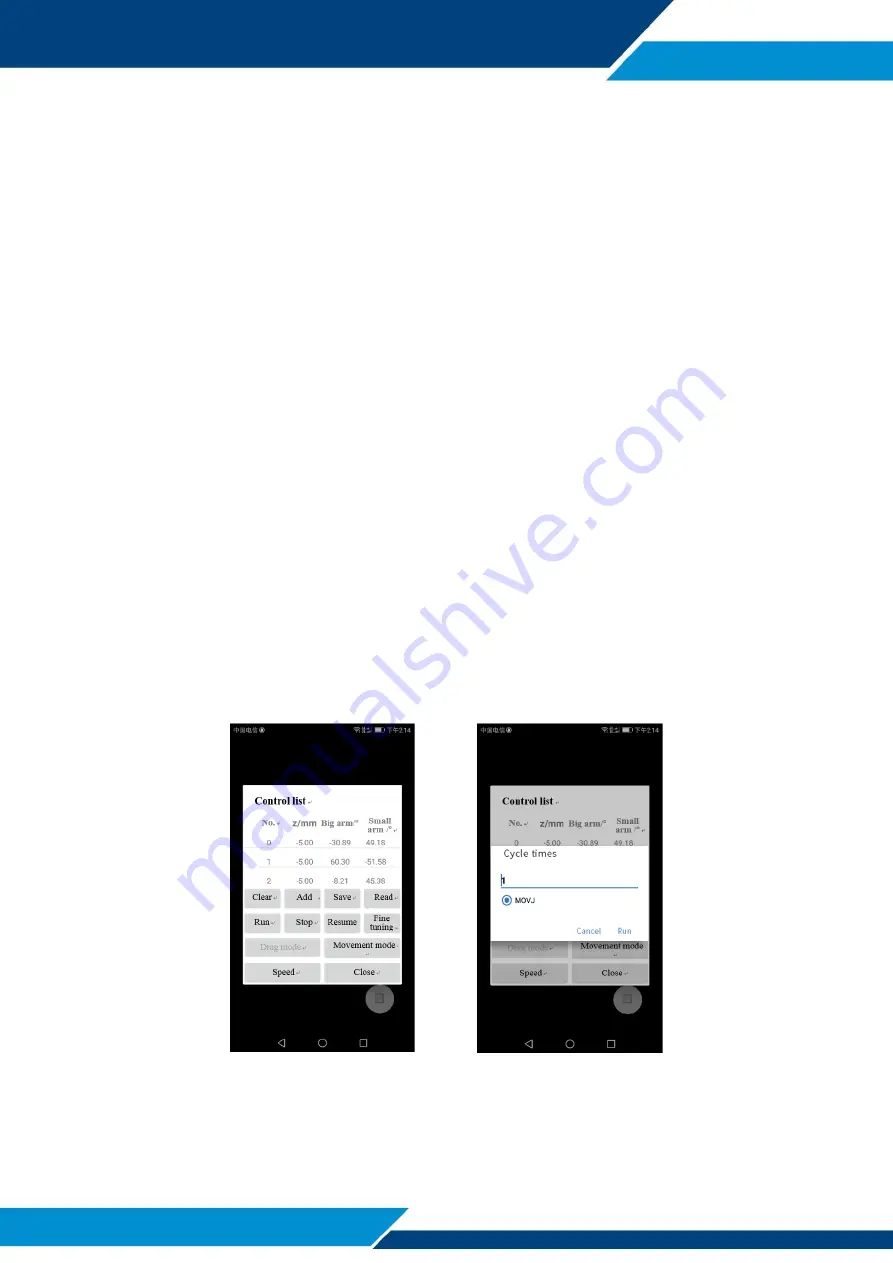
By doing so, after adding two or more position coordinates, you can click on CTRL to pop 

up  control  menu;  click  RUN  button,  it  will  pop  up  the  cycle  number  setting  interface  after 

jumping (as shown in Figure 11); after setting, click RUN button, the robotic arm will move 

according to the movement track and settings we added before. 

2.2 Drag teaching (not supported currently) 

After  clicking  drag  teaching,  the  system  will  initialize  automatically.  After  initialization, 

click the robotic arm icon below the software, and enter the interface shown in Figure 12. 

Click the "drag mode", you need to wait for the setting successfully, then you can use an 

external  force  to  drag  big  arm  and  small  arm  positions;  if  you  need  to  change  the  Z  axis 

position, you need to double click Z axis joint on the mobile phone to select, and slide up and 

down on the screen, to make the robot arm Z axis joint to move. When we drag the robot 

arm to a certain position, we can click the Add button to add the coordinates of this position. 

By doing so, after adding two or more position coordinates, click the motion mode button, 

and the big arm and small arm will return to zero position; you can, click the run button only 

after setting successfully, to pop up the cycle number interface (as shown in Figure 13); after 

setting, the robotic arm will move according to the movement track and settings we added 

before. 

Figure 12 

Figure 13 

Summary of Contents for Z-Arm 2140

Page 1: ...Huiling tech Robotic Co Ltd Z Arm 2140 APPSoftware Instructions...

Page 2: ...rees the front of the robot arm is 0 and clockwise is negative counterclockwise is positive Small arm axis 2 180 degrees 180 degrees the big arm along the direction away from the machine is 0 and cloc...

Page 3: ...is energized click on the button Figure 1 to add the robotic arm equipment As shown in Figure 2 click OK and it will automatically jump to the interface shown in Figure 1 Figure 1 Figure 2 2 Applicati...

Page 4: ...automatically initialize the robotic arm speed and torque related settings when it prompts to set successfully you need to click on the 3D graphical teaching again and the system will initialize the f...

Page 5: ...ar to other joints to control the robotic arm At this time the robotic arm will move according to the trajectory you are moving on your mobile phone Double click black background to exit control Figur...

Page 6: ...drag mode you need to wait for the setting successfully then you can use an external force to drag big arm and small arm positions if you need to change the Z axis position you need to double click Z...

Page 7: ...hree dragging bars on the left side of the screen resolution fine tuning 1 fine tuning 2 as shown in Figure 15 After adjustment click the Print button the robotic arm will draw according to the image...

Page 8: ...in Figure 16 and then click the send button then the robotic arm will work according to the patterns we draw We can also check the Auto button at the lower left corner and then if we draw a line on th...

Page 9: ...botic Co Ltd Tel Email Website Address 0755 36382405 hitbot hitbot cc www z arm com 1st floor 3 Building Robot Intelligence and Manufacturing Industrial Park Dayang Road90 Baoan District Shenzhen Guan...

Reviews: