background image

Advanced Techniques 

- 27 - 

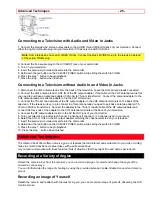
1. Press the camera release lever in the direction of the   mark and pull out the camera in the direction of the 
arrow. 


2. Fit the camera in the direction of the   mark indicated in the camera mounting pedestal and slide it along the 
grooves in the pedestal. Make sure that there is a click. 


3. Lift the camera to adjust the angle of the camera lens. 


Note:

 Be sure to set the CAM/OFF/VIDEO switch to OFF and hold the camera with both hands when 

detaching and reattaching the camera. If you drop the camera or give it a strong impact, it could result in a 
malfunction. 

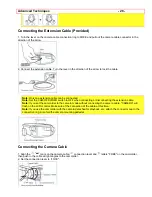
When you place the camcorder on a table, etc. to record an image of yourself, lift the stand so you can view the 
LCD screen easily. 


iv

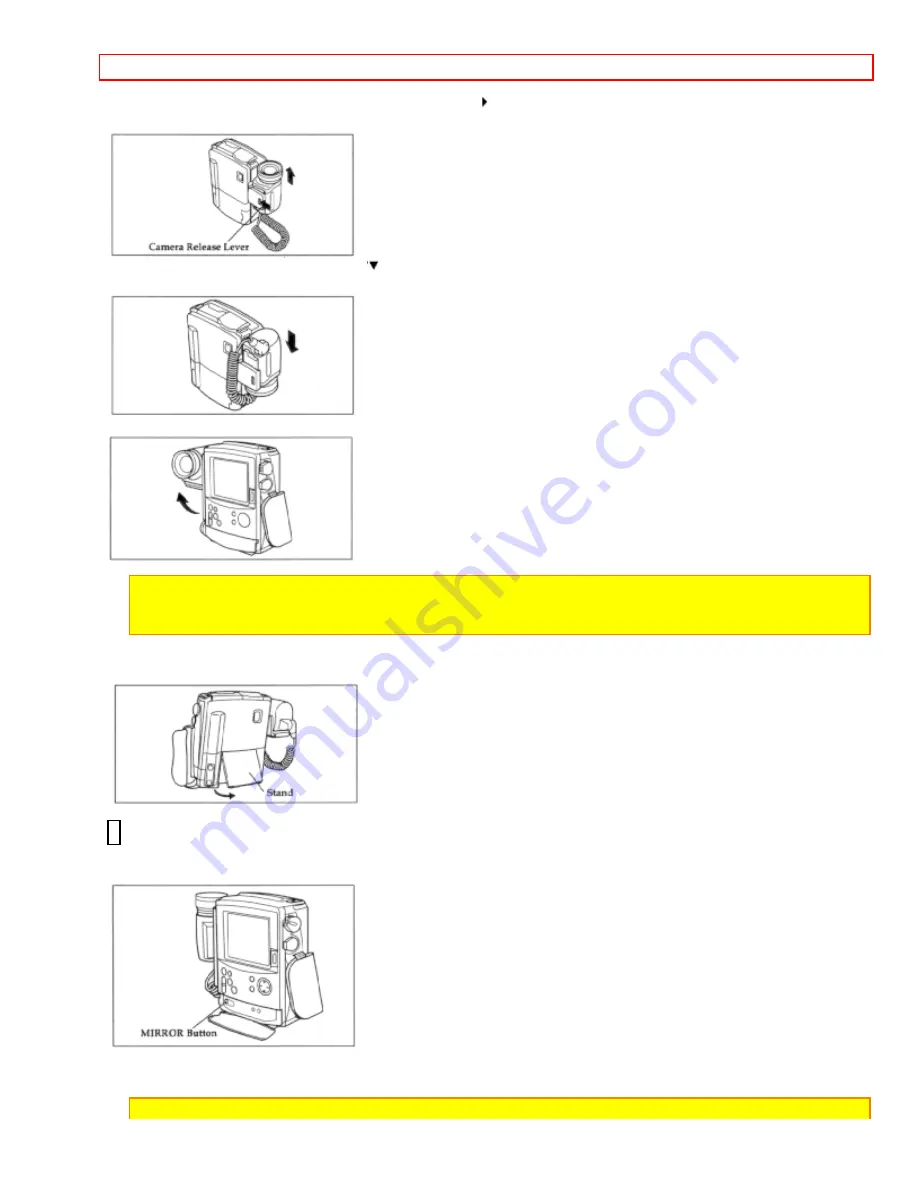
Viewing Mirror Image 

When you record an image of yourself, the image displayed on the LCD monitor is reverse to the mirror image. 
Press the MIRROR button when you want to view a mirror image of yourself on the LCD monitor. 


Press the MIRROR button and hold it for more than three seconds; the mirror image appears. To restore the 
original image, press the MIRROR button again. 

Note:

 Even when you view a mirror image on the LCD monitor, a non-inverted picture is recorded. 

Summary of Contents for VMH-100LA - Camcorder

Page 1: ...s Canada Highway Pointe Claire Tel 770 279 5600 Quebec H9R 1B1 CANADA Tel 514 697 9150 HITACHI SALES CORPORATION OF HAWAII INC 3219 Koapaka Street Honolulu Hawaii 96819 Tel 808 836 3621 Thank you for buying a Hitachi product Please take time to become familiar with the manual and how it is set up Keep it handy for future reference QR13072 Hitachi Ltd 1995 Printed in Japan KG K N ...

Page 2: ...ting Started Identifying Controls 19 Controlling the Picture on the LCD Monitor 22 Using the Sunshade of the LCD Screen 23 Basic Techniques 23 Making a Basic Recording 23 Playback 24 Playing Back Your Recording on Your TV 25 Advanced Techniques 26 Recording at a Variety of Angles 26 Date Recording 29 Using the Power Zoom 30 Using the Digital Zoom 30 Using the I ZOOM Instant Zoom Button 31 Using Ma...

Page 3: ...hock Therefore it is dangerous to make any kind of contact with any inside part of this unit This symbol alerts the user that important literature concerning the operation and maintenance of this unit has been included Therefore it should be read carefully to avoid any problems CAUTION TO REDUCE THE RISK OF ELECTRIC SHOCK DO NOT OPEN NO USER SERVICEABLE PARTS INSIDE REFER SERVICING TO QUALIFIED SE...

Page 4: ...to Article 820 40 of the NEC that provides guidelines for proper grounding and in particular specifies that the cable ground shall be connected to the grounding system of the building as close to the point of cable entry as practical Notes This unit uses 8mm video format cassettes It records and plays back in the SP mode 14 3 mm sec It cannot record and play back in the LP mode 7 2 mm sec This cam...

Page 5: ...r deteriorated insulation 7 Power Cord Protection Power supply cords should be routed so that they are not likely to be walked on or pinched by items placed upon or against them paying particular attention to cords at plugs convenience receptacles and the point where they exit from the appliance 8 Ventilation Slots and openings in the cabinet are provided for ventilation to ensure reliable operati...

Page 6: ... be hazardous and should be left to a professional antenna installer USE 14 Cleaning Unplug this video product from the wall outlet before cleaning Do not use liquid cleaners or aerosol cleaners Use a damp cloth for cleaning 15 Object and Liquid Entry Never push objects of any kind into this video product through openings as they may touch dangerous voltage points or short out parts that could res...

Page 7: ...se subjected to damage or stress 9 Do not operate charger with damaged cord or plug replace them immediately 10 An extension cord should not be used unless absolutely necessary Use of improper extension cord could result in a risk of fire and electric shock If extension cord must be used make sure A The pins on plug of extension cord are the same number size and shape as those of plug on charger B...

Page 8: ... Your camcorder is functioning properly but the solid state pickup device C C D usually causes this as an inherent characteristic Try to avoid shooting an excessive bright object directly Be sure not to leave the camcorder in a place where the temperature exceeds 140 F 60 C or the pickup device may be damaged Dangerous includes Inside a car with the windows closed and in direct sunshine Near heati...

Page 9: ...isting found on page 65 Waterproof The camera block of this camcorder is waterproof and recording under water is possible Use the waterproof extension cable provided to extend the range in which you can use this camera Usable limit Up to 30 minutes under water at 3 3 feet 1m CAUTION Take care not to expose the recorder block to rain or water Only the camera block is waterproof Exposing the recorde...

Page 10: ... so now Charging the Battery The first step is to set the battery to charge Once fully charged the battery will give an operating time of approximately 50 minutes but this is reduced to a half to one third depending on how often you use the zoom and start stop functions Charge the battery at a temperature range of 50ºF 10ºC 86ºF 30ºC to prevent damage to the battery Using the AC Adapter Charger To...

Page 11: ...ously charge the battery attached to the AC adapter charger and the battery loaded in the camcorder 1 Set the CAM OFF VIDEO switch of the camcorder to OFF 2 Load a battery inside the camcorder 3 Connect the external power cord plug to the DC OUTPUT jack on the AC adapter charger 4 Attach the other end of the external power cord to the installation section at the bottom of the camcorder 5 Attach an...

Page 12: ...guarantee the Batteries charge status With repeated normal charging and use the battery will gradually lose operating time When operation time becomes too short to be useful replace the battery If the CHARGE indicator flashes during charging remove the battery and then reattach it to the AC adapter charger If the CHARGE light continues to flash after several attempts to attach it the battery is un...

Page 13: ...ap Attach the lens cap to protect the lens when carrying or storing the camcorder During shooting attach the lens cap as shown in the figure to prevent it from being lost Using the Soft Carrying Case House the camcorder and accessories in the soft carrying case as shown in the figure after attaching the lens cap and LCD sunshade to the camcorder ...

Page 14: ...ls such as Maxell CR2025 or its equivalent Note Dispose of battery safely in accordance with local laws Do not dispose of in fire Note Do not short circuit the battery Note Do not take apart the battery Note Do not hold the battery with the metallic tweezers Note Do not re charge the battery Note Keep the battery in a dark cool dry place Camcorder Battery Before you install the battery for the fir...

Page 15: ...is symbol indicates a fully charged battery This symbol indicates a partially charged battery This flashing symbol indicates a battery nearly out of power Use an alternative power source or charge the battery before continuing to use the camcorder Using Alternative Power Sources Using the AC Adapter Charger Please ensure that the CAM OFF VIDEO switch is in the OFF position whenever attaching or de...

Page 16: ... into the car s cigarette lighter socket Please ensure that the CAM OFF VIDEO switch is in the OFF position whenever attaching or detaching any power supply ie battery AC adapter charger etc 1 Connect the car adapter charger to the car s cigarette lighter socket 2 Attach the external power cord to the camcorder 3 Connect the external power cord plug to the DC OUTPUT jack of the car adapter charger...

Page 17: ...eshooting on page 59 Removing a Cassette Slide the EJECT switch in the direction of the arrow The cassette door opens automatically Remove the cassette Protecting Recorded Material Protect 8mm cassettes from accidental erasure by sliding the tab on the side of the cassette towards the opposite side until the tab is completely visible Slide the tab in the opposite direction until the tab disappears...

Page 18: ...t three minutes TAPE END flashes on the LCD monitor Setting the Date and Time Take the time to set the date and time now The time backup battery is rechargeable Charge the backup battery every two months Set the CAM OFF VIDEO switch on the camera recorder to OFF and connect a charged battery or the AC adapter charger to the camcorder for 24 hours If you record the date and time at the beginning of...

Page 19: ... from OFF to AUTO and the auto date recording mode is entered See Automatic Date Recording on page 36 7 Press the CAM MENU button The menu display disappears from the LCD monitor Getting Started Identifying Controls Rear view Illustration 1 Camera Block The waterproof camera block can be detached from the recorder block so you can enjoy recording at various angles Recording at a Variety of Angles ...

Page 20: ...ayback fast forward or reverse Also use these buttons when specifying camera menu options and adjusting the picture on the LCD monitor screen 14 PAUSE Button During playback use this button to stop the tape temporarily During recording this can be used as a record start stop button 15 REC record Button Press to record TV programs or dub copy video from another video source 16 LCD MENU Button Press...

Page 21: ... the sound is recorded only on the left channel Note Disconnect the external microphone from the camcorder when you are not using it 33 PHONES headphones Jack Sound being recorded by the microphone or played back can be monitored by headphones connected to this jack 34 AV IN OUT Jack Behind the jack cover Use this jack to connect the camcorder to a VCR or television Playing Back Your Recordings on...

Page 22: ...tment screen will appear R red G green 3 Press the play or stop button to specify the item to be adjusted The symbol hand moves up or down each time or is pressed 4 Press the fast forward or rewind button to adjust each setting 5 Press the LCD MENU button The LCD picture adjustment screen will disappear Note If the adjustment screen is left as it is for about 1 minute it will disappear automatical...

Page 23: ...ic or a short tour of your backyard Once familiar with how the machine works you can move to the more sophisticated features with less stress Let s get started Making a Basic Recording The Hitachi VM H100LA uses PROGRAM AE auto exposure that automatically selects the optimum shutter speed The iris adjusts automatically in response to the shutter speed 1 Connect the camcorder to a power source Load...

Page 24: ... where you want to start playback 3 Press the play button and play back the tape To adjust the sound volume press the FOCUS VOLUME up and down buttons 4 Press the stop button when you have finished Note The letters and symbols are displayed on the LCD monitor in color but they are in black and white on the TV screen Note Decrease the sound volume of the camcorder when you play back a recording by ...

Page 25: ...bols are displayed on the LCD monitor in color but they are in black and white on the TV screen Note Decrease the sound volume of the camcorder when you play back a recording by connecting the camcorder to your TV If the volume of the camcorder is set to maximum the played back picture may be distorted Connecting to a Television with a VCR Attached 1 Connect the provided AV stereo output cable to ...

Page 26: ... to connect to a flat antenna lead you need to purchase antenna adapter 75 ohm to 300 ohm transformer Connect the adapter to the 75 ohm coaxial cable of the RF output adapter and connect the free ends of the adapter to the VHF antenna terminals at the back of your television 4 Connect the RF output adapter cable to the AV IN OUT jack of your camcorder 5 Turn your television on and select channel 3...

Page 27: ...he camera If you drop the camera or give it a strong impact it could result in a malfunction When you place the camcorder on a table etc to record an image of yourself lift the stand so you can view the LCD screen easily ivViewing Mirror Image When you record an image of yourself the image displayed on the LCD monitor is reverse to the mirror image Press the MIRROR button when you want to view a m...

Page 28: ...ecting or disconnecting the extension cable Note If you set the camcorder to the camera mode without connecting the camera cable CAMERA will flash on the LCD monitor Make sure of the connection of the cable at this time Note If you use the camcorder with the camera detached for playback etc attach the connector cap to the connection ring Also fold the camera mounting pedestal Connecting the Camera...

Page 29: ...s the same date when the cassette is replaced you select AUTO again the recording is less than 10 seconds long Note If the date changes while recording continues over 10 seconds the new date is recorded for about 10 seconds the next time you make a recording TITLE Automatic Title and Date Recording This option records the date and created title see Creating and Recording a Title on page 47 automat...

Page 30: ...he left of the LCD monitor the digital zoom function shown below has been engaged When the power zoom lever is operated the zoom position is displayed on the LCD monitor for about 5 seconds and then disappears The zoom position is displayed in 10 steps Pressing the power zoom lever strongly results in rapid zooming and pressing it lightly results in slow zooming Note You can use the zoom switch on...

Page 31: ...eft of the LCD monitor and the picture is magnified 1 5 times Note To return to the original zoom position press the I ZOOM button so that I ZOOM disappears from the LCD monitor Note This instant zoom has certain limitations and may degradate at extreme magnification and amplify camcorder s movement Using Macro This function allows you to shoot subjects as close as 1 3 16 inches Press and hold the...

Page 32: ...he auto focus with subjects that are 3 6 feet away from the lens and further away to infinity With the W zoom control you can use the auto focus with subjects 1 3 16 inches away from the lens and further away to infinity Using Manual Focus 1 Press the FOCUS control buttons simultaneously FOCUS displays on the LCD monitor You can adjust the focus manually 2 Use the power zoom T control to zoom up c...

Page 33: ...green and the currently set option is in yellow 3 Press the fast forward or rewind button to specify the option you want 4 Press the CAM MENU button The menu disappears and the specified option is set EIS ON or OFF ON The electronic image stabilizer EIS corrects slight shaking of the image being recorded and is effective in the following situations While you zoom to a distant subject While you app...

Page 34: ...ton again UNLOCK The background is corrected only when you press the B LIGHT button and hold it 16X9 ON or OFF ON The picture format aspect ratio is changed from 4 3 the picture format of an ordinary TV set to 16X9 When the 16X9 feature is switched on the top and bottom of the picture are faded to black and 16X9 is displayed on the LCD monitor OFF 16X9 feature is switched off LCD ON or OFF ON The ...

Page 35: ... Press the CAM MENU button SEARCH appears in place of the time counter 4 Press the rewind button to search for the start position from which you last made a recording or the fast forward button to recording end position 5 When the required position is located the camcorder enters the stop mode and SEARCH disappears from the LCD monitor Note If you have ejected the cassette this function will not o...

Page 36: ...recording with the camcorder use the FADE button to select a fade option 2 Press the Start Stop button to stop recording the fade begins automatically and REC flashes until the fade ends Note When fading out be sure to wait until the PAUSE indicator is visible on the LCD monitor before attempting to put the camcorder into the record mode again Using Instant Review Use this feature to view the last...

Page 37: ...reless remote control operate the functions of the corresponding buttons on the camcorder Aim the wireless remote control at the infrared ray receiver of the camcorder Note Use the wireless remote control within the range of the infrared ray receiver of the camcorder shown above Note The wireless remote control may not function in strong light such as direct sunlight or very bright artificial ligh...

Page 38: ...ich you wish to return The linear time counter clears to 0 00 00M 4 Press the stop button to stop playback or press the start stop button to stop recording and set the CAM OFF VIDEO switch to VIDEO 5 Press the rewind button and the tape stops at approximately where you reset the linear time counter This feature works in fast forward as well Creating and Recording A Title Create titles easily and p...

Page 39: ... switch while sliding the switch to CAM 2 Locate the point of the tape where you wish to record the title Using Quick Edit p 45 3 Press the TITLE ON OFF button to start recording the title 4 Press the Start Stop button to start recording the title 5 Press the TITLE ON OFF button on the remote control to stop recording the title The title graphics disappear from the LCD monitor and the camcorder ca...

Page 40: ... cable to the AV IN OUT jack of your camcorder 2 Connect the synchro edit cable to the AUDIO IN VIDEO IN and EDIT IN jacks of your VCR Connect either the right or left audio plug into your VCR if it has only one AUDIO IN jack Note Some VCR s have an S VIDEO IN jack Connect the black S VIDEO plug to the VCR instead of the yellow VIDEO plug 3 Insert the recorded tape in the camcorder and a blank tap...

Page 41: ...rder in A V DUB pause mode 10 Press the PAUSE START STOP button The audio video dubbing starts When the linear time counter reaches 0 00 00M the camcorder stops automatically recording only the portion of the tape that you selected Note If the camcorder is in AV DUB pause or STILL mode for more than 5 minutes the camcorder stops automatically to protect the tape Note Automatic date recording is di...

Page 42: ...quipment If using with other accessories please use only after reading the manuals of the other accessories Caution Adjust after confirming the safety of the surroundings Adjust the angle of the tiltable monopod after confirming the safety of the surroundings If it strikes a person or object it could injure the person or damage the equipment Caution Do not let a child use the monopod on his or her...

Page 43: ... Turn the screws to tighten 2 After adjusting the angle tighten 2 Turn the screw to fix the the monopod securely the screw to fix the monopod securely tripod head securely Note Be sure to hold the grip section firmly during adjustment Using the camera Mount Maximum weight supportable 2 2 lbs 1 kg Attaching the camera block Using in combination with the tiltable monopod 1 Fit the fixing screw into ...

Page 44: ...aning the Lens and LCD Screen vWhen the LCD screen and lens are dirty use the provided LCD cleaner to wipe off the dirt Do not hold the LCD screen with force or apply a strong impact Otherwise the LCD screen could be damaged the display could become uneven or it could lead to a fault Periodic Maintenance A precision electromechanical device the Hitachi VM H100LA requires maintenance after a period...

Page 45: ...assette window must be toward outside CAMERA RECORDING Symptom Check Point Correction Picture does not appear in the LCD Monitor Remove the lens cap Slide the CAM OFF VIDEO switch to CAM Disconnect the AV input cable from the camcorder The camcorder cannot go into the recording mode even when the start stop button is pressed Check the record protect tab on the cassette See page 19 for details Push...

Page 46: ... using output adapter When you see the playback picture on your TV RF adjust fine tuning knob on television set to obtain best picture Sound is heard only from one channel or no sound was recorded When recording with an external monaural microphone the sound is recorded only on the left channel If recording is done with the power of the external microphone turned off no sound is recorded Disconnec...

Page 47: ... the polarities of the batteries are correct Insert six batteries The LCD screen is black and white Remove the power source and after about one minute push the reset switch gently using a toothpick etc until you feel a click The display will be reset Then set the information again TAPE DISPLAY Symptom Check Point Correction TAPE appears in the LCD Monitor Have you moved the camcorder or cassette f...

Page 48: ... locate an authorized HITACHI service facility in the continental U S A DIAL TOLL FREE 7 days a week 24 hours a day 800 HITACHI 1 800 448 2244 Hitachi Home Electronics America Inc Hitachi has made every effort to assure you hours of trouble free operation from your unit However should you require service a network of Hitachi Authorized Service Facilities has been established in all 50 states and P...

Page 49: ...in U S currency and payable to Hitachi Home Electronics America Inc Hitachi Home Electronics America Inc Parts Division 905 East South Street Anaheim Ca 29805 blank page Order form iCleaning Camcorder LCD viewfinder Do not use cotton swabs they will damage LCD First use a dry lens cloth If dry lens cloth does not do the job spray a little Windex on the cloth and then clean the LCD According to Hit...

Page 50: ...not use cotton swabs they will damage LCD First use a dry lens cloth If dry lens cloth does not do the job spray a little Windex on the cloth and then clean the LCD According to Hitachi these LCDs can be easily damaged so this must be done with the utmost care 10 30 96 ...

Reviews: