5
1
2
3
4
ON
1
2
3
ON
1
2
3
4
ON
ELECTRICAL WIRING
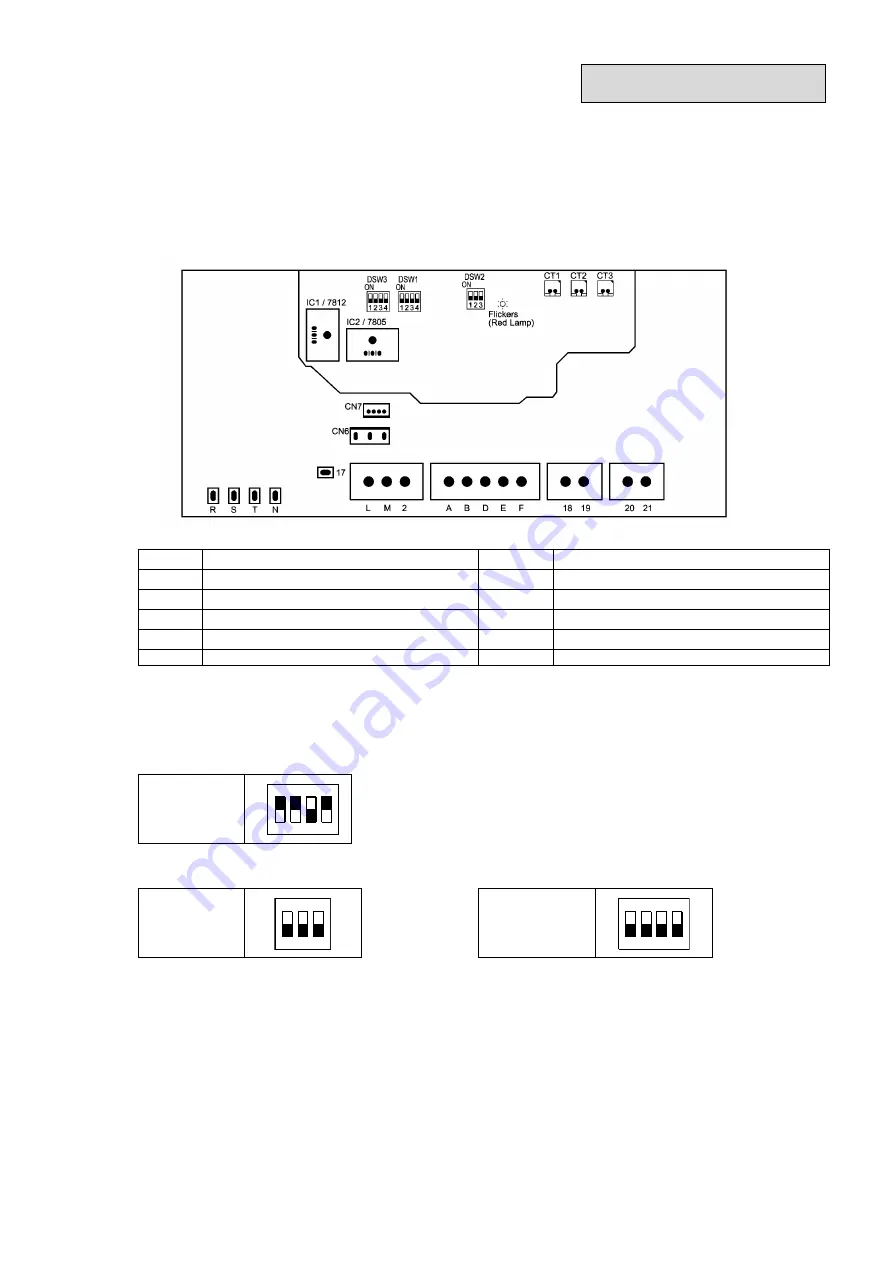
3.3 Printed Circuit Board (PCB) Layout (RUA-30AT3S only)
All DSW were set correctly at factory, do not change settings of DSW. The following figures are only for
reference in installation. After installation, make sure all DSW were set as factory setting.
3.3.1 PCB Drawing
The PCB in the Unit is operating with 3 types of DIP switches. The location is as follows:
Mark
Name of Parts
Mark
Name of Parts
CT1
Current Transformer for NO.1 Compressor
DSW1
Dip Switch for Capacity Setting
CT2
Current Transformer for NO.2 Compressor
DSW2
Dip Switch for Optional Function Setting (1)
CT3
Current Transformer for NO.3 Compressor
DSW3
Dip Switch for Optional Function Setting (2)
CN6
Connector for Transformer Input
L,M
Terminal for Different Main Power Supply
CN7
Connector for Transformer Output
A,B,D,E,F Terminal for Room Thermostat
3.3.2 Factory Setting of Dip Switch (DSW)
DSW1: Capacity Settings
Setting
Position
DSW2: Optional Function Settings (1)
DSW3: Optional Function Settings (2)
Setting
Position
Setting
Position


