background image

English

7

lacquer, paint, benzine, thinner, gasoline, gas,
adhesives and similar inflammable substances as they
may ignite or explode. Under no circumstances should
this tool therefore be used in the vicinity of such
inflammable material.

  3.

Explosion and fire hazard.

The fuel cell is an aerosol dispensers
with flammable contents.
Pressured container and the
propellant will remain in the fuel cell.
Failure to follow instructions may
result in explosion or fire.
Keep the power tool, fuel cells and
battery away from sunshine and from
temperature exceeding 50°C (120°F).
Fuel cell and/or battery may burst,
releasing flammable gas.
Do not pierce or burn the container,
even after use.
Do not incinerate, refill, reclaim or
recycle the fuel cell.
Do not spray to a naked flame or

any incandescent material.
Keep away from ignition sources – No smoking.
Keep out of the reach of children.

  4.

Always wear eye protection (protective goggles).

When operating the power tool,
always wear eye protection, and
ensure that surrounding people wear
eye protection too.
The possibility of fragments of the nails
that were not properly hit entering the

eye is a threat to sight. Eye protection can be bought
at any hardware store. Always wear eye protection
while operating this tool. Use either eye protection
or a wide vision mask over prescription glasses.
Employers should always enforce the use of eye
protection equipment.

  5.

Protect your ears and head.

When engaged in nailing work please wear ear
mufflers and head protection. Also, depending on
condition, ensure that surrounding people also wear
ear mufflers and head protection.

  6.

Use outside or well-ventilated areas.

This tool exhausts carbon monoxide
which are a danger to health when
inhaled.
This tool shall not be used in
enclosed or poorly ventilated areas.
Do not inhale.

  7.

Pay attention to those working close to you.

It would be very dangerous if nails that were not
properly driven in should hit other people.
Therefore, always pay attention to the safety of the
people around you when using this tool. Always
make sure that nobody’s body, hands or feet are
close to the nail outlet.

  8.

Never point the nail outlet towards people.

Always assume the tool contains
fasteners.
If the nail outlet is pointed towards
people, serious accidents may be
caused if you mistakenly discharge

the tool. When connecting and disconnecting the
battery or fuel cell, during nail loading or similar

operations, be sure the nail outlet is not pointed towards
anyone (including yourself). Even when no nails are
loaded at all, it is dangerous to discharge the tool while
pointing it at someone, so never attempt to do so. No
horseplay. Respect the tool as a working implement.

9.

Before using the power tool, check the push lever.

The Push Lever and Chamber operate in conjunction
for this device.
Before using the power tool make sure to check that
the push lever operate properly. Without nails,
fuel cell and battery loaded into the power tool,
check the following.
If abnormal operation occurs, do not use the power
tool until it has been inspected and repaired.

Pull the Feeder knob with the device facing
upward and press down the Push lever then
confirm that the Push lever securely returns to
its original position.
The Push lever operation becomes especially
heavy in low temperatures and drive operations
may not function.

With pulling back the feeder knob, the push lever
must move smoothly.

With pulling back the feeder knob, the trigger
must move smoothly.
Furthermore, with regard to the push lever, please
note that it must never be modified or removed.

10.

Use specified nails only.

Never use nails other than those specified and
described in these instructions.

11.

Be careful when connecting the battery.

When connecting the battery and loading nails in
order not to fire the tool by mistake, make sure of
the followings.

Do not touch the trigger.

Do not allow the firing head to contact with any
surface.

Keep the firing head down.
Strictly observe the above instructions, and always
make sure that no part of the body, hands or
legs is ever in front of the nail outlet.

12.

Do not carelessly place your finger on the trigger.

Do not place your finger on the trigger except when
actually nailing. If you carry this tool or hand it to
someone while having your finger on the trigger,
you may inadvertently discharge a nail and thus
cause an accident.

13.

Press the nail outlet firmly against the material to
be nailed.

When driving in nails, press the nail outlet firmly
against the material to be nailed. If the outlet is not
applied properly, the nails may rebound.

14.

Keep hands and feet away from the firing head
when using.

It is very dangerous for a nail to hit
the hands or feet by mistake.

15.

Do not touch around the exhaust outlet.

This tool produces hot exhaust
gases that may flammable materials.
The push lever and nose will become
hot and get heated up after
prolonged or rapid use.
Do not touch with bare hands.

MAX 50°C

 (120°F)

 01Eng_NC40G_WE_6L

6/15/07, 12:01

7

Summary of Contents for NC 40G

Page 1: ... DECLARATION DE CONFORMITE CE Nous déclarons sous notre seule et entière respon sabilité que ce produit est conforme aux normes ou documents normalisés EN792 13 EN50260 1 et EN55014 en accord avec les Directives 89 336 CEE et 98 37 CE du Conseil Cette déclaration s applique aux produits désignés CE Italiano DICHIARAZIONE DI CONFORMITÀ CE Si dichiara sotto nostra responsabilità che questo prodotto ...

Page 2: ... DECLARATION DE CONFORMITE CE Nous déclarons sous notre seule et entière respon sabilité que ce produit est conforme aux normes ou documents normalisés EN792 13 EN50260 1 et EN55014 en accord avec les Directives 89 336 CEE et 98 37 CE du Conseil Cette déclaration s applique aux produits désignés CE Italiano DICHIARAZIONE DI CONFORMITÀ CE Si dichiara sotto nostra responsabilità che questo prodotto ...

Page 3: ... un recyclage respectueux de l environnement Italiano Solo per Paesi UE Non gettare le apparecchiature elettriche tra i rifiuti domestici Secondo la Direttiva Europea 2002 96 CE sui rifiuti di apparecchiature elettriche ed elettroniche e la sua attuazione in conformità alle norme nazionali le apparecchiature elettriche esauste devono essere raccolte separatamente al fine di essere reimpiegate in m...

Page 4: ... un recyclage respectueux de l environnement Italiano Solo per Paesi UE Non gettare le apparecchiature elettriche tra i rifiuti domestici Secondo la Direttiva Europea 2002 96 CE sui rifiuti di apparecchiature elettriche ed elettroniche e la sua attuazione in conformità alle norme nazionali le apparecchiature elettriche esauste devono essere raccolte separatamente al fine di essere reimpiegate in m...

Page 5: ...eeder Knob Zuführungsknopf Bouton de l alimenteur Nail feeder B Nagelschieber B Alimenteur de clous B Cell Cover Zellenabdeckung Couvercle de la pile Latch Riegel Languette Adapter Adapter Adaptateur Battery Akku Batterie Latch Battery Riegel Akku Verrou Batterie Indicator light Anzeigeleuchte Témoin Charger Ladegerät Chargeur Pilot lamp Kontrollleuchte Lampe témoin Fuel cell Brennstoffzelle Pile ...

Page 6: ...tón del alimentador Alimentatore chiodi B Spijkertoevoer B Alimentador de clavos B Coperchio cella Gaspatroonafdekking Protector de la célula Nottolino Klink Cierre Adattatore Adapter Adaptador Batteria Batterij Batería Bloccaggio batteria Klink Batterij Cierre Batería Luce di indicazione Indicatielampje Luz indicadora Caricatore Oplader Cargador Luce pilota Controlelampje Luz del piloto Cella car...

Page 7: ...n Do not use the power tools and charger in damp or wet locations And keep work area well lit Never use power tools and charger near flammable or explosive materials Do not use the tool and charger in presence of flammable liquids or gases 14 Store idle the tool and charger When not in use the tool and charger should be stored in dry high or locked up place out of reach of the children and infirm ...

Page 8: ...ding or similar operations besurethenailoutletisnotpointedtowards anyone including yourself Even when no nails are loaded at all it is dangerous to discharge the tool while pointing it at someone so never attempt to do so No horseplay Respect the tool as a working implement 9 Before using the power tool check the push lever The Push Lever and Chamber operate in conjunction for this device Before u...

Page 9: ...e charger for about 15 minutes before the next charging of battery 25 Do not allow foreign matter to enter the hole for connecting the rechargeable battery 26 Never disassemble the rechargeable battery or charger 27 Never short circuit the rechargeable battery Short circuiting the battery will cause a great electric current and overheat It results in burn or damage to the battery 28 Do not dispose...

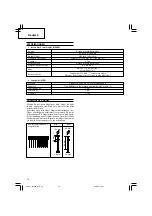
Page 10: ... mm L 352 mm H 108 mm W 16 1 2 13 7 8 4 1 4 Weight 3 7 kg Nail feeding method Piston reciprocation Ambient temperature 0 C to 40 C 32 F to 104 F Battery EB714S 1 4 Ah 6 cells Ni Cd battery 7 2 V Fuel cell Type No 753 600 sold separately Liquid hydrocarbon propane butane 40g 80ml SPECIFICATIONS 1 Gas Concrete Nailer NC40G NAIL SELECTION 2 Charger UC7SD Input power source Single phase AC 230 V 50 Hz...

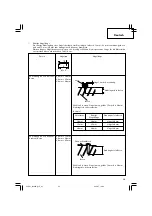
Page 11: ...102 1 3 8 2 6 mm 40 mm 102 1 9 16 Choose nail to secure approx 15 mm 20 mm 590 787 intrusion depth Example To nail thin steel to concrete 2 6 mm 15 mm 102 19 32 2 6 mm 20 mm 102 25 32 2 6 mm 25 mm 102 1 Choose nail to secure approx 12 mm 20 mm 472 866 intrusion depth Wood thickness Appropriate nail length Intrusion depth into concrete 10 mm 393 30 mm 1 3 16 Approx 20 mm 787 15 mm 590 35 mm 1 3 8 A...

Page 12: ...ave not been used for an extended period isnotactivated theelectricdischargemightbelowwhen using them the first and second time This is a temporary phenomenon and normal time required for recharging will be restored by recharging the batteries 2 3 times How to make the batteries perform longer 1 Recharge the batteries before they become completely exhausted When you feel that the power of the tool...

Page 13: ...See Fig 11 NOTE 䡬 Use nail strip of more than 10 nails The Nailer is now ready to operate Removing the nails 1 Pull the feeder knob backward See Fig 12 2 Return the feeder knob forward quietly while pushing the nail feeder B 3 Push the nail stopper See Fig 13 4 Pull out nails from the back of the magazine See Fig 14 CAUTION 䡬 To prevent unintentional operation never touch the trigger or place the ...

Page 14: ...rvice parts list CAUTION Repair modification and inspection of Hitachi Power Tools must be carried out by a Hitachi Authorized Service Center This Parts List will be helpful if presented with the tool to the Hitachi Authorized Service Center when requesting repair or other maintenance In the operation and maintenance of power tools the safety regulations and standards prescribed in each country mu...

Page 15: ... Clean and lubricate Ribbon spring weakened or damaged Replace ribbon spring Nail feeder B worn or damaged Replace nail feeder B Check for returning of piston Pull the trigger all the way Too low temperature warm up fuel cell under 50 C 120 F Check for moving of piston smoothly Contact Hitachi for replacement Replace piston ring Replace piston Replace cylinder o ring Check for proper nails Use onl...

Page 16: ...senen Ort Wenn es nicht verwendet wird sollte das Elektrowerkzeug an einem trockenen Ort außerhalb der Reichweite von Kindern verwendet werden 13 Gefährliche Umgebungen vermeiden Die Maschine und das Ladegerät keiner Feuchtigkeit aussetzen oder an nassen Stellen benutzen Achten Sie auf einen hellen wenn erforderlich gut beleuchteten Arbeitsplatz Maschine und Ladegerät niemals in der Nähe von brenn...

Page 17: ...benen Gläsern Arbeitgeber sollten das Tragen von Augenschutz immer vorschreiben 5 Schützen Sie Ihre Ohren und Ihren Kopf Tragen Sie während des Nagelns Lärmschutz und Sicherheitshelme Abhängig von den Bedingungen sollten auch Personen in der Umgebung Lärmschutz und Sicherheitshelme tragen 6 Im Freien oder an gut belüfteten Orten verwenden Dieses Werkzeug setzt Kohlenmonoxid frei das gesundheitssch...

Page 18: ...ageln der Ecken des Werkstücks passieren Vergewissern Sie sich in sol chen Fällen dass sich niemand mit den Händen Füßen usw in nächster Nähe des Werkstücks befindet das sie anna geln wollen 18 GleichzeitigesNagelnaufbeidenSeiteneinerWand ist gefährlich Unter keinen Umständen darf auf beiden Seiten derselben Wand gleichzeitig genagelt werden Dies wäre gefährlich da die Nägel durch die Wand schlage...

Page 19: ... im direkten Sonnenlicht oder in einem Fahrzeug Nicht offener Flamme oder Funken aussetzen Brennstoffzellen nicht durchstechen oder öffnen Brennstoffzellen nicht nachfüllen nicht manipulieren nicht recyceln Gemäß den örtlichen Entsorgungsbestimmungen für Aerosole Produkten entsorgen Brennstoffzellen nicht zusammen mit anderen für das Recycling bestimmten Produkten entsorgen Außerhalb der Reichweit...

Page 20: ...x Nagelstreifen SPEZIFIKATIONEN 1 Beton Gas Power Nagler NC40G Antrieb Kolben druckluftgetrieben Nägel ø 2 6 mm Siehe Abb Anzahl Nägel 40 Stück 4 Streifen Geträteabmessungen 420 mm L 352 mm H 108 mm W Gewicht 3 7 kg Nagelführung Kolben druckluftgetrieben Umgebungstemperatur 0 C bis 40 C Akku EB714S 1 4 Ah 6 Zellen Ni Cd Akku 7 2 V Brennstoffzelle Typnummer 753 600 separat erhältlich Flüssiger Kohl...

Page 21: ...e Die richtige Eindringlänge des Nagels beträgt beim Einschlagen in Beton 12 mm 22 mm zum Anna geln von Holz und 15 mm 20 mm zum Annageln von dünnem Stahlblech Werden längere Nägel benutzt verbie gen sich die Nägel Wählen Sie die passende Länge für die Materialien ent sprechend der nachstehenden Tabelle aus Holzstärke Richtige Nagellänge Eindringtiefe in Beton 10 mm 30 mm Ungef 20 mm 15 mm 35 mm U...

Page 22: ... Ladegerät nehmen und dann die Batterien angemessen aufbewahren Zur Leistung von neuen Batterien Da die Batteriechemikalien von neuen Batterien und Batterien die längere Zeit über nicht verwen det wurden noch nicht bzw nicht mehr aktiv sind kann die Leistung von beim ersten und zweiten Einsatz niedrig sein Dies ist eine vorübergehende Erscheinung und die normale Batterieleistung wird nach zwei ode...

Page 23: ...st extrem entladen Laden Sie den Akku Energiesparmodus Wenn das Werkzeug bei eingelegtem Akku etwa eine Stunde lang nicht benutzt wird schaltet sich der Energiesparmodus ein um unnötigen Akkuverbrauch zu verhindern Das Werkzeug kann auch in den Energiesparmodus wechseln wenn der Akkustand sehr niedrig ist oder das Werkzeug nicht bestimmungsgemäß arbeitet Achten Sie also auf die Akkuanzeige nachdem...

Page 24: ... Ansatzkappe ab wenn Sie Nägel in Holz einschlagen 1 Abnehmen Anbringen der Ansatzkappe Die Ansatzkappe wird einfach durch Aufdrücken auf den Drückknopf aufge setzt Siehe Abb 19 Um sie abzunehmen schieben Sie einen Schraubenzieher oder etwas Ähnliches in den Spalt zwischen der Ansatzkappe und dem Drückknopf und heben sie ab Siehe Abb 20 INSPEKTION UND WARTUNG ACHTUNG Denken Sie immer daran Akku un...

Page 25: ...intreibungen usw ab Abhängig von den Bedingungen am Arbeitsplatz und der Form des Werkstücks müssen möglicherweise individuelle Lärmverhütungsmaßnahmen durchgeführt werden z B Aufstellung des Werkstücks auf einer schalldämpfenden Unterstützung Verhüten von Werkstückvibration durch Festklemmen oder Abdecken usw In besonderen Fällen ist das Tragen von Gehörschutz erforderlich Vibrationsinformation D...

Page 26: ...zieher ist oder nicht und bringen Sie den Kolben wieder in die höchste Position Prüfen Sie auf korrekte Nägel Verwenden Sie ausschließlich empfohlene Nägel Überprüfen Sie das Funktionieren Reinigen und schmieren Sie des Nagelschiebers Bandfeder abgenutzt oder beschädigt Ersetzen Sie die Bandfeder Nagelschieber B abgenutzt Ersetzen Sie den Nagelschieber B oder beschädigt Prüfen Sie dass der Kolben ...

Page 27: ...rüfen Sie die Brennstoffzelle Ersetzen Sie sie durch eine neue ungenügend Brennstoffzelle Kontrollieren Sie das Wenden Sie sich wegen eines Zündkerzenkabel auf Abnutzung Ersatzteils an Hitachi Prüfen Sie die Zündkerze auf Wenden Sie sich wegen eines Schmierfett oder Ablagerungen Ersatzteils an Hitachi Prüfen Sie den Filter auf Wenden Sie sich wegen eines Verstopfung Ersatzteils an Hitachi Magazin ...

Page 28: ...éés par le producteur sous respect des instructions indiquées dans le manuel de manutention Pour des réparations n utilisez que des pièces d origine Hitachi 12 Gardez le cloueur dans un lieu adéquat S il est hors usage l appareil doit être tenu dans un lieu sec hors portée des enfants 13 Eviter des alentours dangereux Ne pas exposer l outil et le chargeur à la pluie Ne pas utiliser l outil ou le c...

Page 29: ... fragments de clous qui sont mal enfoncés n endommagent les yeux est un danger pour la vue Vous trouvez des lunettes de sécurité dans chaque quincaillerie Portez toujours des lunettes de sécurité ou un masque de sécurité si vous utilisez le cloueur Les employeurs doivent veiller à ce que l équipement de protection soit toujours porté 5 Protégez vos oreillies Veuillez porter des oreillettes lors de...

Page 30: ... exemple lorsque le changement d une position de clouage fait intervenir l utilisation d échafaudages d escaliers d échelles ou de toute autre construction de type échelle par ex des lattes de pied la fermeture de boîtes ou de caisses la fixation de systèmes de sécurité par ex sur des véhicules ou des wagons 20 Débrancher la batterie et la pile à combustible et sortez tous les clous du chargeur ap...

Page 31: ...r hors de portée des enfants 35 Transport Stockage Transport Le transport maritime postal est interdit Le transport de petites quantités pour un usage particulier dans une voiture privée est autorisé sans papiers de douane et de carte d urgence Observer la limite de température de 50 C Stockage Ne pas stocker dans des passages des halls d entrée à proximité de portes sorties ou dans un grenier Les...

Page 32: ...lage plastique SPECIFICATIONS 1 Cloueur gaz maçonnerie NC40G 2 Chargeur UC7SD Source d alimentation d entrée Monophasé AC 230 V 50 Hz Durée de chargement Environ 60 minutes à 20 C Tension de chargement 7 2 V Courant de chargement 1 6 A Poids 1 1 kg Type Piston réciproque Clous appliquables ø 2 6 mm voir fig Nombre de clous 40 clous 4 recharge Dimension cloueur 420 mm L 352 mm H 108 mm larg Poids 3...

Page 33: ...iron 20 mm 20 mm 40 mm Environ 20 mm Bois Fine plaque d acier 䡬 Longueur de clou adaptée La profondeur d intrusion dans le béton est 12 mm 22 mm pour le cloutage de matériaux en bois et de 15 mm 20 mm pour le cloutage de plaques d acier fines L usage de clous plus longs peut entraîner une torsion de ces derniers Sélectionnez la longueur adaptée aux matériaux en vous aidant du tableau suivant Chois...

Page 34: ...ise secteur 4 Tenir le chargeur fermement et sortir la batterie REMARQUE Après l utilisation commencer par sortir les batteries du chargeur puis conserver les batteries correctement En ce qui concerne le courant de décharge d une batterie neuve Etant donnée que les substances chimiques internes sont restées inactives dans le cas des batteries neuves ou des batteries qui sont restées longtemps inut...

Page 35: ...e en cours de marche Éteint La batterie est très faible Charger la batterie Mode d économie d énergie Si l outil n a pas été utilisé pendant environ une heure avec la batterie installée le mode d économie d énergie se met en route pour minimiser toute consommation non nécessaire de la puissance de la pile Le mode d économie d énergie est également activé lorsque la puissance de la batterie est ext...

Page 36: ...is ou outil similaire dans l interstice entre l embout et le levier poussoir et faites levier Voir Fig 20 INSPECTION ET MANUTENTION ATTENTION Veiller à toujours retirer la batterie et la pile à combustion pendant le nettoyage des l inspection et la maintenance 1 Inspection du magasin 1 DEBRANCHER LA BATTERIE et LA PILE A COMBUSTIBLE 2 Nettoyer le magasin Ôtez tous les éclats de plastique et la pou...

Page 37: ...e la pièce il faudra peut être adopter des mesures individuelles d atténuation du bruit par exemple en plaçant les pièces sur des supports d insonorisation en supprimant la vibration des pièces au moyen de serrage ou de couvertures etc Dans certains cas spéciaux il faudra porter des protections anti bruit Information sur les vibrations La valeur type des caractéristiques de vibrations conformément...

Page 38: ... la lame d entraînement avec d entraînement est baissé ou non un tournevis à lame plate et remettre le piston dans sa position la plus élevée Vérifier si l on utilise les bons clous Utiliser uniquement les clous recommandés Vérifier le fonctionnement de Nettoyer et graisser l alimenteur de clous Le ressort à ruban est il distendu Remplacer le ressort à ruban ou endommagé L alimenteur de clous B es...

Page 39: ...trop basse réchauffer la pile à combustible à moins de 50 C Pile à combustible trop faible Remplacer par une nouvelle Fil à bougie usé Contacter Hitachi pour le remplacement Graisse ou débris autour de la bougie Contacter Hitachi pour le remplacement Filtre colmaté Contacter Hitachi pour le remplacement Magasin vide Charger des clous dans le magasin Noter la couleur du témoin Si rouge charger la p...

Page 40: ...Quando non lo usate l utensile dovrebbe essere tenuto in un luogo sciutto e lontano dalla portata dei bambini 13 Evitare ambienti pericolosi Non esporre gli utensili elettrici e il caricabatterie alla pioggia Non usare gli utensili elettrici e il caricabatterie all umidità e al bagnato Tenere l area di lavoro ben illuminata Non usare mai gli utensili elettrici e il caricabatterie vicino a sostanze...

Page 41: ...parsi di utilizzarel equipaggiamento di protezione 5 Proteggete le vostre orecchie e la testa Quando siete impegnati nell uso della chiodatrice indossate sempre le protezioni per orecchie e testa Inoltre in base alla condizione assicuratevi che anche le persone intorno indossino il para orecchie e la protezione per la testa 6 Utilizzatelo all esterno o in aree adeguatamente ventilate Questo utensi...

Page 42: ...stessa parete è pericolosa In nessun caso la chiodatura dovrebbe essere fatta allo stesso tempo sui due lati di una parete Questo potrebbe essere molto pericoloso perchè i chiodi possono possono attraversare la parete e causare seri incidenti 19 Non usare l utensile elettrico su scaffalature scale L utensile elettrico non va usato per applicazioni specifiche come ad esempio Quando il passaggio da ...

Page 43: ...mpite recuperate o riciclate la cella a combustibile Smaltire in conformità delle normative locali relative ai prodotti spray Non smaltite la cella a combustibile insieme agli altri rifiuti da riciclare Tenete lontano dalla portata dei bambini 35 Trasporto Conservazione Trasporto E vietato spedire l utensile per posta Il trasporto di piccole quantità per uso personale nella propria auto è concesso...

Page 44: ... calcestruzzo NC40G Tipo di potenza Pistone alternativo Chiodi applicabili ø 2 6 mm Vedere Fig Quantità chiodi caricabili 40 chiodi 4 caricatore Misure 420 mm Lu 352 mm A 108 mm La Peso 3 7 kg Metodo di alimentazione Pistone alternativo Temperatura ambiente Da 0 C a 40 C Batteria EB714S 1 4 Ah 6 celle Batteria Ni Cd 7 2 V Cella a combustibile Modello No 753 600 venduta separatamente Idrocarburo li...

Page 45: ... mm 40 mm Circa 20 mm 䡬 Lunghezza appropriata dei chiodi La lunghezza di penetrazione del chiodo appropriata per l inserimento nel calcestruzzo è di 12 mm 22 mm per inchiodare materiali in legno e di 15 mm 20 mm per inchiodare lanerie d acciaio sottili Usando chiodi più lunghi questi si piegano Scegliete la lunghezza adatta ai vari materiali secondo la tabella seguente Legno Scegliete chiodi che a...

Page 46: ...terie dal caricatore e quindi conservare correttament le batterie Scarica nel caso di batterie nuove ecc Poiché la sostanza chimica interna delle batterie nuove e delle batterie che non sono state usate per un lungo periodo di tempo non è attivata la scarica esterna può essere abbassata quando le si usa per la prima e seconda volta Questo è un fenomeno temporaneo e il tempo normale necessario per ...

Page 47: ...e premuto nuovamente 2 Spingete avanti lato del supporto e indietro verso il lato anteriore della valvola di misurazione Vedi Fig 3 2 3 Spingete indietro verso la parte posteriore della valvola di misurazione finché si blocchi Vedi Fig 3 3 Controllo della valvola di misurazione Spingete il supporto della valvola di misurazione sulla cella a combustibile per due o tre volte verso un oggetto fermo e...

Page 48: ...utensile 2 Leva tastatore Quando premete fuori il chiodo assicuratevi di sollevare la leva tastatore completamente Vedi Fig 15 per rilasciare il blocco In questo modo i chiodi non possono essere guidati senza il rilascio della leva di blocco In caso di funzionamento senza caricamento la macchina impiega un meccanismo preventivo La macchina entra in uno stato per cui la leva di espulsione non può e...

Page 49: ...e che potrebbe essere necessario eseguire come disporre i pezzi da lavorare su dei supporti scarica vibrazioni in modo da prevenire le vibrazioni del pezzo tramite un fissaggio o una copertura ecc In casi speciali è necessario indossare l equipaggiamento di protezione per l udito Informazioni sulle vibrazioni I tipi di vibrazioni caratteristiche sono valutate in accordo con il EN 792 13 GIUGNO 200...

Page 50: ...con un cacciavite abbassata a lama piatta e riposizionare il pistone nella posizione più elevata Verificare che vi siano i chiodi corretti Usare solo chiodi consigliati Verificare il funzionamento Pulire e lubrificare dell alimentatore a chiodi La molla di torsione è indebolita Sostituire la molla di torsione o danneggiata L alimentatore a chiodi B è Sostituire l alimentatore chiodi B usurato o da...

Page 51: ...Verificare la cella carburante Cambiarla con una nuova cell a insufficiente carburante Verificare il cavo della candela di Contattare Hitachi per la sostituzione accensione usurato Verificare la candela di accensione Contattare Hitachi per la sostituzione sono presenti grasso o detriti Verificare il filtro intasato Contattare Hitachi per la sostituzione Contenitore vuoto Caricare altri chiodi nel ...

Page 52: ...oud uw pneumatisch gereedschap mooi schoon en zorg er goed voor 10 Regelmatige inspectie is essentieel voor de veiligheid Kijk het apparaat regelmatig na zodat het pneumatisch gereedschap altijd veilig en doelmatig functioneert 11 Raadpleeg een officiële service vertegenwoordiger wanneer reparatie of vervanging van onderdelen noodzakelijk zijn Let er op dat het pneumatisch gereedschap alleen door ...

Page 53: ...ogbescherming veiligheidsbril Draag altijd uw oogbescherming wanneer u met dit pneumatisch gereedschap werkt en zorg ervoor dat de mensen in uw omgeving hetzelfde doen De mogelijkheid dat rondvliegende spijkers die niet goed geraakt werden in uw oog terechtkomen is een bedreiging voor uw gezichtsvermogen Oogbescherming is verkrijgbaar in elke gereedschapswinkel Draag altijd een vorm van oogbescher...

Page 54: ...achtige terugslag kan geven als bijvoorbeeld de spijker die wordt ingedreven een oude spijker of een knoest in het werkstuk raakt 17 Wees voorzichtig wanneer u de hoeken van een werkstuk gaat spijkeren Wanneer u dun plaatmateriaal spijkert kunnen de spijkers er dwars doorheen vliegen wat ook kan gebeuren als u de hoeken van een werkstuk spijkert en de spijker afketst In dergelijke gevallen dient u...

Page 55: ...atronen Bewaar in een goed geventileerde ruimte Bewaar niet in een ruimte met temperaturen boven 50 C oftewel in direct zonlicht of in een voertuig Stel niet bloot aan vlammen en vonken Maak het gaspatroon niet open of lek U dient het gaspatroon niet bij te vullen te regenereren of te recyclen Verwijder het gaspatroon met naleving van lokale regelgeving omtrent verwijdering van spuitbussen Verwijd...

Page 56: ...van 40 spijkers geleverd Het gebruik van andere spijkers kan leiden tot het slecht functioneren van het gereedschap met ernstig letsel als gevolg Met plastic an elkaar Min Max verbonden stripspijkers Krachtbron Reciprocerende zuiger Bruikbare spijkers ø 2 6 mm Zie Afb Aantal te laden spijkers 40 spijkers 4 strips Afmetingen 420 mm L 352 mm H 108 mm W Gewicht 3 7 kg Spijker toevoer methode Reciproc...

Page 57: ... Ongeveer 20 mm 䡬 Juiste spijkerlengte De juiste indrijflengte voor het slaan van spijkers in beton is 12 mm 22 mm voor het spijkeren van houten materialen en 15 mm 20 mm voor het spijkeren van dunne metalen platen Gebruik van langere spijkers veroorzaakt kromslaan van de spijkers Kies de juiste lengte afhankelijk van de materialen aan de hand van onderstaande tabel Kies de spijker voor het vastze...

Page 58: ...chemische aktiviteit is teruggelopen zal de stroomopbrengst bij het eerste en tweede gebruik slechts gering zijn Dit is een tijdelijk verschijnsel de normale oplaadtijd kan hersteld worden door de accu 2 à 3 maal bij kamer temperatuur op te laden Om langdurig gebruik van de batterij te bevorderen 1 Laad batterij op vóórdat ze volledig uitgeput zijn Merkt u dat de gevoede apparatuur minder krachtig...

Page 59: ...icatielampje nadat u de spaarstand heeft uitgezet door de batterlij los en weer vast te koppelen 2 Het aansluiten van het gaspatroon op het gereedschap 1 Trek aan de klink en open de gaspatroonafdekking Zie Afb 6 2 Steek het gaspatroon in het gereedschap Zie Afb 7 3 Steek de steel van het gaspatroon in het gat van de adapter Zie Afb 8 4 Sluit de gaspatroonafdekking 3 Laden van spijkers 1 Steek de ...

Page 60: ...terij loskoppelt 1 Het inspecteren van het magazijn 1 KOPPEL DE BATTERIJ EN HET GASPATROON LOS 2 Reinig het magazijn Verwijder stukjes plastic en betonstof dat zich mogelijk in het magazijn heeft verzameld Smeer het magazijn met de speciaal voor dit Gas stripspijkerapparaat ontwikkelde Hitachi smering 2 Controleer de schroeven waar alle onderdelen mee vast zitten Controleer regelmatig of er ergens...

Page 61: ...persoonlijke beschermingsmiddelen toe te passen zoals het plaatsen van het werkstuk op een geluiddempende ondergrond voorkomen van vibratie van het werkstuk door het vast te klemmen of te bedekken enz In speciale gevallen zal het nodig zijn om oorbeschermers te dragen Trillingsinformatie De typische vibratie karakteristieke waarde in overeenstemming met EN 792 13 JUNI 2000 3 5 m s2 Deze waarde is ...

Page 62: ...s geplaatst opschroevendraaier en zet de zuiger terug in de hoogste positie Controleer of de juiste spijkers Gebruik alleen aanbevolen spijkers worden gebruikt Controleer het functioneren van de Maak schoon en smeer spijkertoevoer Is de veer lam geworden of Vervang de veer beschadigd Is de spijkertoevoer B versleten Vervang de spijkertoevoer B of beschadigd Controleer of de zuiger terug Haal de tr...

Page 63: ...laat deze niet warmer worden dan 50 C Bekijk het brandstofpeil is er Vervang door een nieuw voldoende gas gaspatroon Controleer het snoer van de bougie Neem contact op met Hitachi voor versleten vervanging Controleer de bougie is deze vettig Neem contact op met Hitachi voor of vuil vervanging Controleer het filter is deze verstopt Neem contact op met Hitachi voor geraakt vervanging Leeg magazijn L...

Page 64: ...os regulares puesto que es esencial para la seguridad Inspeccione la herramienta eléctrica a intervalos regulares para poder operarla con seguridad y eficientemente en todo momento 11 Lleve la herramienta a un agente de servicio autorizado si es necesario efectuar alguna reparación o reemplazo de alguna parte Asegúrese de que la herramienta eléctrica es revisada solamente por un agente de servicio...

Page 65: ...pre los ojos con unas gafas protectoras Cuando opere la herramienta eléctrica siempre protéjase los ojos y asegúrese de que las personas que puedan encontrarse en los alrededores también se los hayan protegido Existe una gran posibilidad de que salgan disparados fragmentos de los clavos lo que es una amenaza para los ojos Protéjase siempre los ojos mientras opera la herramienta Puede protegerse lo...

Page 66: ... retroceder violentamente si el clavo que está siendo clavado contactara con otro clavo o grapa que ya estuviera clavado en la pieza de trabajo 17 Tenga cuidado cuando efectúe el clavado en las esquinas de la pieza de trabajo Cuando efectúe el clavado en tableros delgados los clavos pueden traspasarlos así como también cuando clave las esquinas de la pieza de trabajo debido a la desviación de los ...

Page 67: ... médico 34 Célula de combustible Guárdela en un lugar bien ventilado No la almacene a temperaturas superiores a 50 C p ej a luz directa del sol o en un vehículo No la exponga a las llamas ni chispas No perfore ni abra la célula de combustible No rellene recupere ni recicle la célula de combustible Deshágase de ella conforme a la normativa local sobre productos aerosoles No ponga la célula de combu...

Page 68: ...roducir un fallo de funcionamiento de la herramienta y o la rotura del clavo lo que provocaría a su vez lesiones de gravedad Puntas colocadas en ristra Min Max de plástico ESPECIFICACIONES 1 Clavadora a gas para hormigon NC40G Tipo motorizado Pistón alternativo Clavos aplicables ø 2 6 mm Consultar la Fig Cantidad de clavos a cargar 40 clavos 4 ristras Tamaño 420 mm L 352 mm Al 108 mm An Peso 3 7 k...

Page 69: ...cuada Profundidad de inserción en el cemento 10 mm 30 mm Unos 20 mm 15 mm 35 mm Unos 20 mm 20 mm 40 mm Unos 20 mm 䡬 Longitud de clavo adecuada La longitud de inserción adecuada para clavos que se van a clavar en cemento es de 12 mm 22 mm para materiales de madera y de 15 mm 20 mm para finas hojas de acero Si se usan clavos más largos pueden doblarse Seleccione la longitud adecuada para cada materi...

Page 70: ...ma de CA 4 Sujetar firmemente el cargador y extraer la batería NOTA Después de la operación extraiga en primer lugar las baterías del corgador y después guárdelas adecuadamente Descarga eléctrica en caso de baterías nuevas etc Como la substancia química interna de las baterías nuevas o las que no se hayan utilizado durante mucho tiempo no está activada la descarga eléctrica puede ser inferior cuan...

Page 71: ... durante el funcionamiento OFF La batería está totalmente vacía Cargue la batería Modo de ahorro de energía Si la herramienta no se ha utilizado durante una hora aproximadamente y la batería sigue instalada el modo de ahorro de energía se activa para minimizar el consumo innecesario de la potencia de la batería El modo de ahorro de energía se activa también cuando la potencia de la batería es extr...

Page 72: ...la tapa de la punta cuando clave clavos en madera 1 Cómo quitar Poner la tapa de la punta La tapa de la punta se fija fácilmente colocándola a presión sobre la palanca Véase Fig 19 Para retirarla inserte un destornillador o similar en el hueco que hay entre la tapa y la palanca y abra haciendo palanca Véase Fig 20 INSPECCIÓN Y MANTENIMIENTO PRECAUCIONES Asegúrese de extraer la batería y la celda d...

Page 73: ...eza número de operaciones de clavado etc Dependiendo de las condiciones del lugar de trabajo y de la forma de la pieza de trabajo deberán llevarse a cabo medidas de atenuación de ruido individuales tales como la colocación de las piezas de trabajo en soportes amortiguadores de ruido prevención de vibraciones de la pieza de trabajo mediante sujeción o cobertura etc En casos especiales será necesari...

Page 74: ...stón en la posición superior Compruebe si está utilizando los Utilice solamente los clavos clavos apropiados recomendados Compruebe el funcionamiento del Limpie y lubrique alimentador de clavos Está flojo o dañado el resorte de cinta Reemplácelo Está el alimentador de clavos B Reemplace el alimentador de gastado o dañado clavos B Compruebe el retorno del pistón Tire del disparador completamente Si...

Page 75: ... combustible Cambie la célula de combustible por no está totalmente llena otra nueva Compruebe si el cable del chispero Póngase en contacto con Hitachi está desgastado para reemplazarla Verifique que no haya grasa ni restos Póngase en contacto con Hitachi de suciedad en el chispero para reemplazarla Compruebe que el filtro no esté Póngase en contacto con Hitachi atascado para reemplazarla El almac...

Page 76: ...75 07Back_NC40G_WE_6L 5 7 07 10 33 75 ...

Page 77: ...3 20 1 119 NAIL FEEDER B 1 120 NAIL FEEDER A 1 121 SPRING B 1 122 O RING 1 501 CHARGER MODEL UC7SD 1 502 PROTECTIVE GLASSES 1 503 HEX BAR WRENCH 4MM 1 504 CASE 1 ITEM NO PART NAME Q TY 1 FLANGED BOLT M5 1 2 SHAFT RING 1 3 BOLT WASHER D5 2 4 SHAFT 1 5 TOP COVER 1 6 FILTER ASS Y 1 7 M4 SCREW 1 8 MOTOR ASS Y 1 9 RUBBER WASHER 1 10 ROLL PIN D2 5 25 1 11 MOTOR MOUNT 1 12 MOUNT SLEEVE 1 13 SHAFT WASHER ...

Page 78: ...77 07Back_NC40G_WE_6L 6 15 07 12 04 77 ...

Page 79: ...78 07Back_NC40G_WE_6L 6 15 07 12 04 78 ...

Page 80: ...79 07Back_NC40G_WE_6L 6 15 07 12 04 79 ...

Page 81: ... un recyclage respectueux de l environnement Italiano Solo per Paesi UE Non gettare le apparecchiature elettriche tra i rifiuti domestici Secondo la Direttiva Europea 2002 96 CE sui rifiuti di apparecchiature elettriche ed elettroniche e la sua attuazione in conformità alle norme nazionali le apparecchiature elettriche esauste devono essere raccolte separatamente al fine di essere reimpiegate in m...

Page 82: ... DECLARATION DE CONFORMITE CE Nous déclarons sous notre seule et entière respon sabilité que ce produit est conforme aux normes ou documents normalisés EN792 13 EN50260 1 et EN55014 en accord avec les Directives 89 336 CEE et 98 37 CE du Conseil Cette déclaration s applique aux produits désignés CE Italiano DICHIARAZIONE DI CONFORMITÀ CE Si dichiara sotto nostra responsabilità che questo prodotto ...

Reviews: