background image

- 12 -

Everyday Operation

Pressing the 

 button at any time while watch-

ing television programmes will switch the TV set be-

tween displaying the digital terrestrial television broad-

casting and its normal analogue broadcasting.

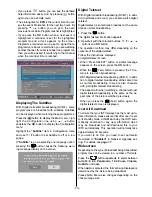
Information Banner

Whenever  you  change  channel,  using  the 

P-

 / 

P+

button or the digit buttons, TV displays the channel

picture along with an information banner at the bottom

of the screen. This will remain on the screen for ap-

proximately  three  seconds.  The  information  banner

can also be displayed at any time while watching TV
by pressing the


 button on the remote control.

The information banner gives a number of facts on

the channel selected and the programmes on it. The

name of the channel is displayed, along with its chan-

nel list number and an indication of the strength of the

signal received on this tuning channel.

Hint
Not  all  channels  broadcast  the  programme

data. If the name and times of the programmeis

not  available  then  “No  Information  Available”

are  displayed  in  the  information  banner.

Icons  are  also  displayed  in  the  information  banner

and if this channel is a favourite channel:

Favourite channel icon 

.

If the selected channel is locked, you must enter the

correct four digit code to view the channel.

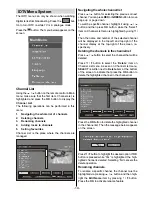
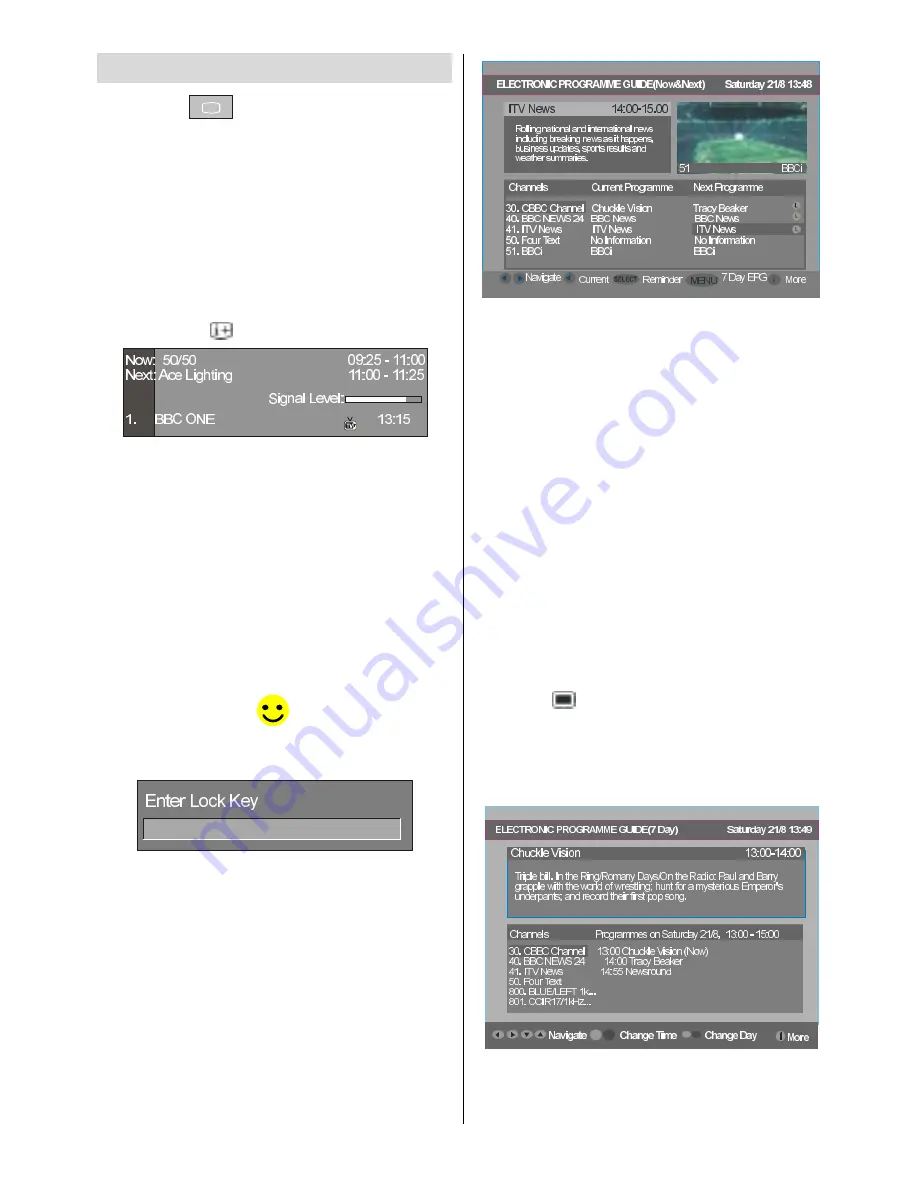
Electronic Programme Guide (EPG)

Some, but not all, channels send information about

the current and next events. Please note that event

information is updated automatically. If there is no event

information data available in channels, only channel

names with 

“No Information Available” 

banner  is

displayed.
• Press 

GUIDE

 button to view the 

EPG

 menu.

• In EPG Menu, you can easily see the extended help

information by pressing 

INFO

 button and by pressing

this button again you can close this window.

• In the EPG Menu all channels are displayed. Current

channel is highlighted. Use 

a

 / 

b

 buttons to change

channels. Also press 

RED

 or 

GREEN

 buttons to make

page up/down scroll for the channels.

•  If  you  highlight  an  event,  short  event  description,

extended event description, start and finish times of

event are displayed on the screen.

• When the current programme is highlighted, the box

is switched to the highlighted channel by pressing

the 

OK 

button.

•  If  you  press  the 

OK 

button  when  a  next  event  is

highlighted,  a  reminder  is  set  for  the  highlighted

programme and a clock appears across the high-

lighted channel line.

Programme  reminders  can  be  set  to  signal  that  a

programme is about to start when you are watching

another channel. If you set reminder to a programme,

then you will be asked for switching to that channel

when the reminder time is reached.
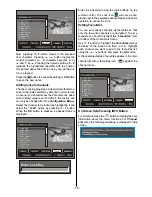
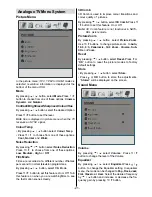
• Press the


  button to view the 7 day EPG.

•  Press 

a

 / 

b

  button  to  navigate  in  Channels  or

Programmes.

• Press 

_

 / 

`

 button to navigate through the channel

and programme list.

• With 

RED/GREEN

 buttons you can change schedule

time.  By  pressing 

  YELLOW/BLUE 

  you  can  ad-

vance the schedule backward / forward of a day.

Summary of Contents for L26H01U

Page 1: ...L26H01U GB Instructions for use Digital LCD olo r Television C u L26HR1U ...

Page 2: ...ower Connection 9 Connections To The Aerial Input Socket 9 Inserting Batteries In The Remote Control Handset 9 Handling the Remote Control 9 Operating Range for the Remote Control 9 Switching The TV ON OFF 10 Navigating the Menu System 10 Initial Settings 10 Basic Operations 11 Operation with the buttons on the TV 11 Volume Setting 11 Programme Selection 11 Entering Main Menu 11 AV Mode 11 Operati...

Page 3: ...icture 29 Teletext 29 Connect Peripheral Equipment 30 High Definition 30 Via The Scart 30 Via Aerial Input 30 Decoder 30 Connect a decoder with an aerial socket to the TV 30 Connect a decoder without an aerial socket to the TV 30 TV And Video Recorder 30 Playback NTSC 30 Camera And Camcorder 30 To Connect To AV Input 30 To Connect To S VHS Input 30 Connect The Decoder To The Video Recorder 30 Conn...

Page 4: ...nd consult your dealer DON T place water filled vessels on top of T V cabinets DON T remove any fixed cover as this may ex pose dangerous voltages DON T leave equipment switched on when it is unattended unless it is specifically stated that it is designed for unattended operation or has a stand by mode Switch off using the switch on the equipment and make sure your family know how to do this Speci...

Page 5: ...at no naked flame sources such as lighted candles are placed on top of the TV Batteries shall not be exposed to excessive heat such as sun shine fire or the like 7 Lightning In case of storm and lightning or when going on holi day disconnect the power cord from the wall outlet 8 Replacement Parts When replacement parts are required be sure the service technician has used replacement parts which ar...

Page 6: ...ation through the mains connection or through other apparatus with a connection to pro tective earthing and to a television distribution sys tem using coaxial cable may in some circumstances create a fire hazard To ground the antenna system properly be sure that the cable grounding is connected with the building s grounding system Note that the connection should follow IEC 60364 7 707 and IEC 6036...

Page 7: ...atic Programming System All programmes can be named Forward or backward automatic tuning Sleep timer Child Lock Automatic sound mute when no transmission NTSC Playback AV in and S VIDEO in are available It has two HDMI connectors for Digital Video and Audio This connection is also designed to accept High Definition signals AVL Automatic Volume Limiting When no valid signal is detected after 5 minu...

Page 8: ...RF Component Video Inputs YPBPR Component Audio Inputs SCART 2 SCART 1 For Service Use Only CI Slot Note Because FAV CVBS and SVHS Y are connected parallelly the picture may blend if the two peripherals are used at the same time Likewise because SVHS C and SCART II R are connected parallelly the picture may blend if the two peripherals are used at the same time Thus these two are not to be used at...

Page 9: ...ff RED GREEN Teletext On Off Update Menu On Off b a _ Cursor buttons FUNCTION No function Equalizer Sound Mode Aspect ratio No Function Control buttons for DVD players recorders Go back to previous menu OK Enter GUIDE Index Page Guide for DTT Subtitle On Off in DTV Subpage in teletext mode Reveal BLUE YELLOW P Programme Up Down Mono Stereo Dual A B PIP PAP On Off PAT 0 9 Digit buttons INPUT INPUT ...

Page 10: ... equivalent type batteries inside Place the batteries in the right directions and replace the battery cover Note Remove the battery from remote control hand set when it is not to be used for a long period Other wise it can be damaged due to any leakage of bat tery Handling the Remote Control It could cause corrosion or battery leakage and may result in physical injury and or property damage in clu...

Page 11: ...tings Press OK to set as default 5 To exit the menu or return from sub menu screen press These explanations are available for the navigation of the whole menu system To select options that are explained in the following parts refer to Navigating The Menu System Initial Settings When the TV is turned on for the first time it is in the digital mode Because this is the first time the TV is used there...

Page 12: ...ain menu In the Main menu select sub menu using P CH or P CH buttons and enter the sub menu using or buttons To learn the usage of the menus refer to the Menu System sections AV Mode Press the TV AV button at the control panel on the the TV to switch your TV to AV modes Operation with Remote Control The remote control of your TV is designed to control all the functions of the model you selected Th...

Page 13: ... and next events Please note that event information is updated automatically If there is no event information data available in channels only channel names with No Information Available banner is displayed Press GUIDE button to view the EPG menu In EPG Menu you can easily see the extended help information by pressing INFO button and by pressing this button again you can close this window In the EP...

Page 14: ...e button The digital teletext information appears 2 Operate it with the coloured buttons _ a b buttons and OK button The operation method may differ depending on the contents of the digital teletext Follow the instructions displayed on digital teletext screen When Press SELECT button or similar message appears on the screen press the OK button When the Text button is pressed the TV re turns to tel...

Page 15: ...ton while the Select item on Channel List menu is highlighted by using _ Then the name and number of the selected channel will be displayed in the top left and top right of the channel display at the top right of the screen re spectively Deleting the channels in the channel list Press a b button to select the channel that will be deleted Press _ button to select the Delete item on Channel List men...

Page 16: ...When the OK button is pressed a password box is displayed QWHU RFN H Enter the password using the digit buttons on the remote control The Lock icon will now be dis played next to the selected channel Repeat the same operation to cancel the Lock Setting Favourites You can set various channels as favourites so that only the favourite channels are navigated To set a favourite you should highlight the...

Page 17: ...s For every valid channel number signal level signal quality and network name are shown at the bottom of the screen In both manual and auto search any existing channel in the database is not re stored to avoid redundant duplicates of that channel FIRST TIME INSTALLATION The user can use this item to load default settings which had been loaded to the receiver at the factory To install factory setti...

Page 18: ...ndtracks Highlight the Audio Language line in the Configura tion menu and use the _ button to cycle through the language options Subtitle Digital terrestrial television channels can broadcast subtitles displayed on screen for the hard of hear ing This function selects the desired subtitle language and enables the automatic display of subtitles when ever subtitle information is broadcast Highlight ...

Page 19: ... for younger viewers can be protected This function enables or disables the menu protection system and allows the PIN code to be changed Use a b button to go to Parental Settings option Press the OK button to enter Parental Settings Menu A box asking for the lock key is displayed There is only one key which is set to 0000 initially Enter lock key If wrong Lock key is entered the fol lowing message...

Page 20: ... ex pires the TV switches to the channel which it is switched from Selected digital channel will be output via Scart 2 You should connect your VCR to Scart 2 for record ing digital broadcast Recording From IDTV Connect your VCR to AV 2 via a scart lead Set the AV 2 OUT in the feature menu to DDT as illustrated and described on page 24 Set the time as described above Set your TV to standby using th...

Page 21: ...ing to a pay channel com pany then insert those to the Television using the following procedure 1 Switch off the TV and unplug from the mains 2 Insert the CAM then Viewing Card to the slot that is located in the terminal cover at the left hand side of the TV from front view The CAM should be correctly inserted it is impos sible to insert fully if reversed The CAM or the TV terminal may be damaged ...

Page 22: ...ure On or Off Turn this feature on when you are watchingfilms to see the fast motion scenes clearly 3D Comb 3D Comb is used to improve colour transitions and colour quality of pictures By pressing a b button select 3D Comb Press _ button to set this feature On or Off Note 3D Comb feature is not functional in NATU RAL picture mode Picture Zoom By pressing a b button select Picture Zoom Use _ button...

Page 23: ...u can select Mono Stereo Dual I or Dual II mode only if the selected channel supports that mode AVL By pressing a b select AVL Press _ button to set the AVL as on or off Effect By pressing a b select Effect Press _ button to set Effect as on or off Dynamic Bass Dynamic Bass is used to increase bass effect of the TV set By pressing a b button select Dynamic Bass By pressing _ button set Dynamic bas...

Page 24: ...ons Positions available are Bottom Right Bottom Centre Bottom Left Top Left Top Center and Top Right PIP Source Select PIP Source item by using a b button Use _ button to set PIP source Note When main picture source is DTT TV AV 1 AV 2 or AV 3 PIP Window can only be set to HDMI 1 HDMI 2 AV 5 PC source or vice versa PIP SWAP Select PIP SWAP item by using a bbutton Use _ button to set This function ...

Page 25: ...an Polish Czech Hungarian Russian Bulgarian Greek Slo vak AV 2 Out By pressing a b select AV 2 Out Use _ button to set AV 2 Out to TV DTT AV 1 AV 3 FAV YPbPr Audio or PC Audio Note When TV Source is set to HDMI HDMI Audio setting will be available among AV 2 Out options PCAudioIn By pressing a b select Pc Audio In By pressing _ button you can change the PC Audio In to TV DTT AV 1 AV 2 AV 3 FAV YPb...

Page 26: ...space and press the GREEN but ton again Delete To delete a programme press the YELLOW button Pressing the YELLOW button again erases the se lected programme from the programme list and the programmes below shift one up APS Auto Programming System When you press the BLUE button for APS Auto Pro gramming System Menu will appear on the screen XWR 3URJUDP A P S Auto Programming System Country Press _ ...

Page 27: ...arch item is highlighted Store By pressing a b button select Store Press or OK button to store the adjustments Stored will be displayed on the screen Install menu in AV modes The following screen appears in the install menu Colour System By pressing a b select Colour System By press ing _ button you can change the colour system to PAL SECAM PAL 60 NTSC 4 43 NTSC 3 58 or AUTO VCR By pressing a b se...

Page 28: ...Select Autoposition item by using a b buttons Press or OK button Warning Auto position adjustment recommended to be done with the full screen image for the proper adjustment H Horizontal Position This item shifts the image horizontally to right hand side or left hand side of the screen Select H Position item by using a b button Use _ button to adjust the value V Vertical Position This item shifts ...

Page 29: ...TV to AV modes by using re lated buttons on the remote control First press button till INPUT OSD is displayed on the screen You can then use AV1 AV2 AV3 AV4 AV5 HDMI1 or HDMI2 buttons on your remote control to select the desired source except being in teletext Note that in PIP PAP modes pressing button will directly change sources ZoomModes Zoom mode can be changed by pressing the button You can c...

Page 30: ... buton will split the screen into two win dows one displaying the teletext and the other dis playing the current channel Pressing again will switch to teletext mode in a single screen Index Selects the teletext index page Reveal Shows hidden information solutions of games for example Hold Holds a text page when convenient Press again to resume Subcode Pages Time Selects subcode pages if available ...

Page 31: ...of the decoder you may attain a better dis play resolution TV And Video Recorder Connect the aerial cables Better picture quality can be obtained if you also con nect a Scart cable to SCART sockets Playback NTSC Connect NTSC VCR player to a SCART socket of the TV Then selecttherelatedsourcefromtheSOURCEmenu Source selection for VCR recording Select Feature menu Select AV 2 Out by pressing b a butt...

Page 32: ...ipher als are connected to the TV at the same time In such a case disconnect one of the peripherals No Picture Is the aerial connected properly Are the plugs con nected tightly to the aerial socket Is the aerial cable damaged Are suitable plugs used to connect the aerial If you are in doubt consult your dealer No Picture means that your TV is not receiving a transmission Have you selected the corr...

Page 33: ... 32 Peripheral Equipment Connections 2XWGRRU HULDO RQQHFWLRQ Aerial Connection ...

Page 34: ... 33 Specifications ...

Page 35: ... 34 Specifications ...

Page 36: ...r will automatically select the signals in the following priority order Even in the case of the recommended signals shown on the following page there may be instances when correct display is not pos sible In this case use H V separate sync H V composite sync S input connector pin specifications HDMI connector pin specifications SCART connector pin specifications Specifications ...

Page 37: ...cal Display Modes The display has a maximum resolution of 1360 x 768 frequency range of 56 75 Hz The following table is an illustration of some of the typical video display modes 0RGH RUL RQWDO 9HUWLFDO RU N 9HU 5HVROXWLRQ UHTXHQF ...

Page 38: ... 37 Appendix B Main and PIP PAP Picture Combinations 0DLQ DQG 3 3 3 3 SLFWXUH FRPELQDWLRQV ...

Page 39: ... or modified by any person other than an Hitachi authorised engineer iii The product serial number has not been removed or altered This guarantee does not apply to product acquired second hand or for commercial or communal use This guarantee does not cover the replacement of exhausted batteries the adjustment of user controls or aerial alignment Any parts replaced under this guarantee shall become...

Page 40: ...e italy hitachi eu com france consommateur hitachi eu com Digital Media Group 94 Quai Charles de Gaulles 69006 Lyon HITACHI EUROPE LTD CZECH REPUBLIC Na Sychrove 975 8 101 27 Pr aha 10 Bohdalec TEL 267 212 383 FAX 267 212 385 Email info hitachi be dmg eeu hitachi eu com HITACHI EUROPE S A GREECE HITACHI EUROPE S A HITACHI EUROPE AB SWEDEN NORWAY 364 Kifissias Ave 1 Delfon Str 152 33 Chalandri Athe...

Reviews: