background image

iH-210  User  Guide 


Hitachi  Terminal  Solutions  Korea  Co.,  Ltd. 

  43 


AUTO

: It will automatically change to Count Value or Denom depending on the screen of   

the machine. (Only for LCD Type) 


Count Value

: Displays the total count and amount of bills counted. 


DENOM

: Displays count and amount of all denominations of counted currency. (Only for LCD Type) 


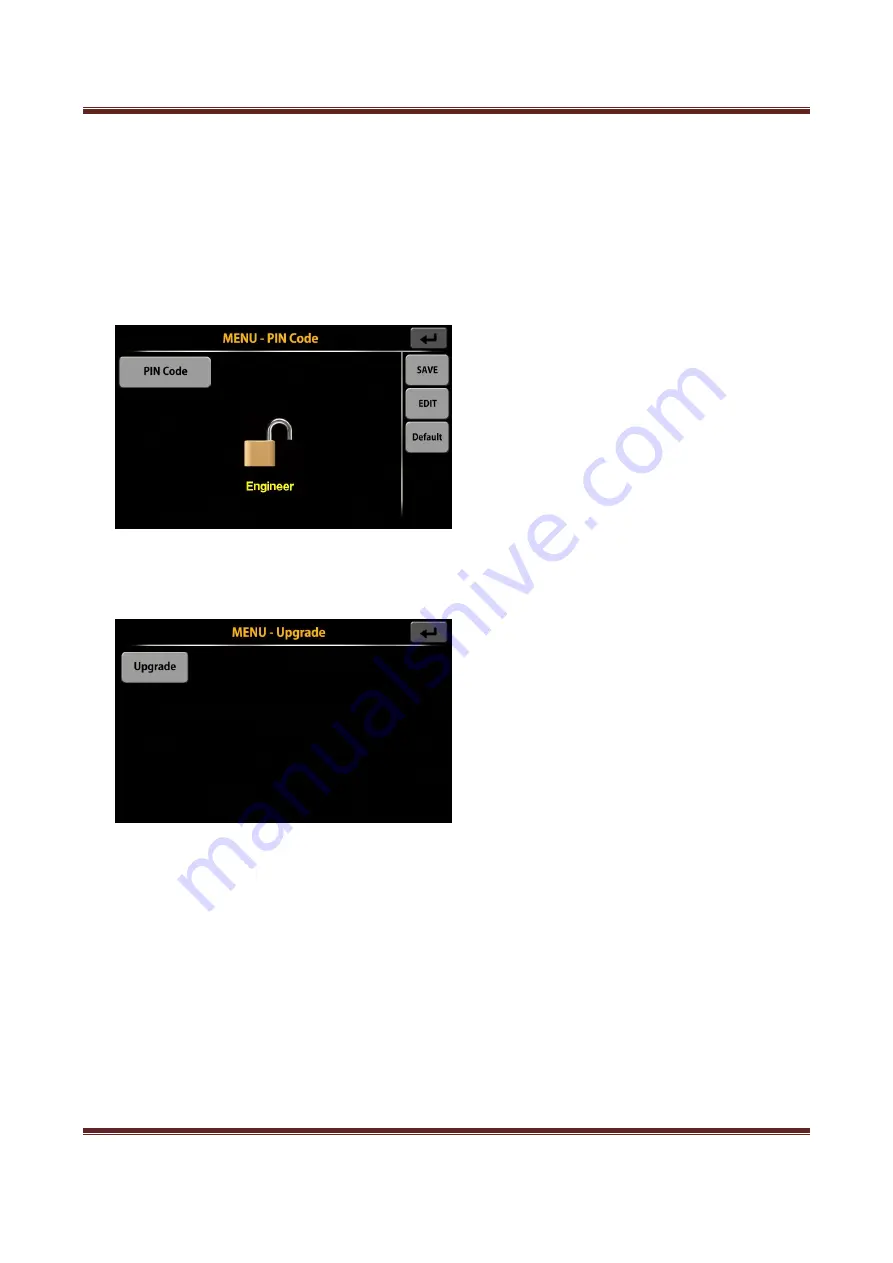
4-5. PIN Code 

You can enter and modify the machine's pincode and load the default pincode. 


4-6. Upgrade 

Upgrade S/W of the machine via USB. 


4-7. Machine Status 

You can check the motor, solenoid, counter sensor and FND LED status of the machine. 

Summary of Contents for iH-210

Page 1: ...iH 210 is advanced banknote processing machine with maximized efficiency technology with 3 pockets banknote sorter Rev 1 0 0 Date 2019 12 23 3 Pockets Banknote Sorter ...

Page 2: ...on 22 3 Basic Operation 3 1 Currency Mode 24 3 2 Count Mode 25 3 3 Stacker Pocket Information 26 3 4 Count Result on Main Screen 27 3 5 Reject Pocket Information 27 3 6 SPEED 28 3 7 BATCH 28 3 8 LEVEL 29 3 9 MENU 31 3 10 Operation Mode 31 3 11 PRINT 32 3 12 ADD 32 3 13 ETC 32 3 14 Date Time 33 3 15 USER 33 4 MENU Screen 4 1 Machine info 34 4 2 System Setting 34 4 3 Operation 38 4 4 Comm Info 39 4 ...

Page 3: ...4 5 2 Direction 45 5 3 Version 45 5 4 Manual START 46 5 5 Grand Total 46 5 6 2 Teller 47 5 7 Data Acquisition 47 5 8 Manual ADD 48 5 9 Deposit 49 5 10 Dispenser 50 5 11 Batch option 51 5 12 SN Full Image 52 5 13 Fitness 53 5 14 Fitness Viewer 53 5 15 Image Viewer 53 5 16 Key Function Setting 54 6 Specification 56 7 Error Code 57 8 Maintenance 58 ...

Page 4: ...ted Application Smart Integration Manager SIM iH 210 offers a highly convenient and easy operation For Safety Use English Safety Guidelines In this section the compliance matters are described in order to use the product safely and to prevent you and other people from the damages brought by the product to the human bodies or properties Please read this instruction manual thoroughly in advance to u...

Page 5: ... the indications well and utilize the product safely This symbol indicates prohibited matters do not attempt Please read the indications well Never try any prohibited matters This symbol denotes that there are indication matters which should be done without fail Please read the indicated matters thoroughly and always perform them as shown ...

Page 6: ... for evacuation Illegal installation may cause an accident 4 Keep an installation space as described in the instruction manual and do not block or close the ventilation inlet If the ventilation inlet is blocked heat is accumulated inside and it may cause fire 5 Depending on the installation place mounting of an earth leakage breaker is required by Electricity Enterprises Law Illegal installation m...

Page 7: ...d The ground terminals on which grounding work is made The place where is a ground wire must not be fitted Gas pipes Telephone wires for exclusive use Lightning rods Water pipes or faucets with plastic materials at their intermediate part Any place with high temperature high humidity or low temperature Any place with direct sunlight Any place with large amounts of dust When installing the product ...

Page 8: ...do not convert a 3 prong power supply plug into a two pole type Grounding becomes insufficient and there may cause electric shock Please follow the items below to prevent electric shock and or fire due to damage of the power supply cord Do not pull the cord part when pulling out the power supply plug Do not put anything on the cord part Do not pass the cord near a source of heat Do not bend or pin...

Page 9: ...uct and normal operation cannot be performed 4 Do not use chemicals such as thinner or benzene when removing dirt of the product Otherwise it may cause damages 5 Do not use a interface cable other than the attached one When cables are other than the attachment it may cause the interface error or machine trouble Do not use a combustible spray etc around product If spraying gas etc contacts the elec...

Page 10: ... Otherwise it may cause heating and or firing due to dust accumulation Do not modify the product or mount modified parts on the product Further do not dismount the portion which is not indicated to be opened closed in the manual or the cover and parts etc fixed with screws etc Otherwise it may cause fire electric shock and or injury 1 Keep your hand or clothes away from the machine during operatio...

Page 11: ...d clean the power supply plug and the cord regularly It the power supply plug is broken or the cord is damaged stop using and please replace it by contacting our distributor near you or our designated dealers It may cause fire and or electric shock When smoke abnormal smell or abnormal sound is generated from the product stop using it immediately cut off power supply and pull out the plug from the...

Page 12: ...ien lire les indications et utiliser le produit en toute sécurité Ce symbole indique des matières interdites ne tentez pas S il vous plaît lire les indications bien Ne jamais essayer des choses interdites Ce symbole indique qu il y a des problèmes d indication qui doivent être réalisés sans faute Veuillez lire attentivement les informations indiquées et effectuez les toujours comme indiqué Warning...

Page 13: ...rvice etc Passages et installations d évacuation Une installation illégale peut causer un accident 4 Conservez un espace d installation tel que décrit dans le manuel d utilisation et ne bloquez pas ou ne fermez pas l entrée de ventilation Si l entrée de ventilation est bouchée de la chaleur s y accumule et peut provoquer un incendie 5 En fonction du lieu d installation la loi sur les entreprises d...

Page 14: ... se trouve un fil de terre ne doit pas être installé Tuyaux de gaz Fils téléphoniques à usage exclusif Paratonnerres Conduites d eau ou robinets avec des matières plastiques à leur partie intermédiaire Il y a des problèmes de sécurité et la détérioration du produit peut être accélérée ce qui entraîne toute cause de panne N importe quel endroit à haute température forte humidité ou basse températur...

Page 15: ...e d alimentation à 3 broches en un type à deux pôles La mise à la terre devient insuffisante et peut provoquer un choc électrique Veuillez suivre les instructions ci dessous pour éviter un choc électrique et ou un incendie dû à un endommagement du cordon d alimentation Ne tirez pas sur le cordon lorsque vous retirez la prise d alimentation Ne posez rien sur le cordon Ne passez pas le cordon près d...

Page 16: ... le produit Il y a un risque d endommager le produit et le fonctionnement normal ne peut pas être effectué 4 N utilisez pas de produits chimiques tels que diluants ou benzène lorsque vous enlevez la saleté du produit Sinon cela pourrait causer des dommages 5 N utilisez pas de câble d interface autre que celui fourni Lorsque les câbles ne sont pas connectés cela peut provoquer une erreur d interfac...

Page 17: ... veillez à débrancher le cordon d alimentation de la prise pour des raisons de sécurité Sinon cela pourrait provoquer un échauffement et ou une inflammation en raison de l accumulation de poussière Ne modifiez pas le produit et ne montez pas de pièces modifiées sur le produit En outre ne démontez pas la partie non indiquée dans le manuel le couvercle les pièces etc fixés avec des vis etc Cela pour...

Page 18: ...rement la fiche d alimentation et le cordon Si la fiche d alimentation est cassée ou si le cordon est endommagé arrêtez de l utiliser Veuillez le remplacer en contactant notre distributeur local ou vos revendeurs désignés Cela pourrait provoquer un incendie et ou un choc électrique Si de la fumée une odeur ou un son anormal sont générés par le produit arrêtez de l utiliser immédiatement coupez l a...

Page 19: ...iH 210 User Guide Hitachi Terminal Solutions Korea Co Ltd 19 Packing List Options sold separately External Display Serial Printer iH 210 Series Power Cable Manual ...

Page 20: ...iH 210 User Guide Hitachi Terminal Solutions Korea Co Ltd 20 Appearance Front View Rear View Hopper Stacker L LCD Display Hopper Guide Operation Keys Reject Pocket Stacker R ...

Page 21: ...efore Using Avoid counting wet excessively dirty or spoiled notes Check for foreign matter paper chips rubber bands clips dust etc mixed with notes Printer USB S Devices Power Switch External Display Power Supply Socket External Display USB S Devices LAN USB H PC ...

Page 22: ...utions Korea Co Ltd 22 Remove folds or end from notes beforehand Spread and separate brand new notes well for some of them are slightly adhesive Align all the four corners and edges of notes Any unevenness may cause an error 1 Key Operation ...

Page 23: ...e operation manually Go to the previous screen Long Key Not available RIGHT 1 Short Key Go to MENU screen Long Key Not available RIGHT 2 Short Key Go to ETC screen Long Key Not available RIGHT 3 Short Key Stop the machine operation manually Go to the previous screen Long Key Not available 2 Display Operation LEFT 1 Key LEFT 2 Key RIGHT 1 Key RIGHT 2 Key RIGHT 3 Key LEFT 3 Key REJECT LED FND 1 FND ...

Page 24: ...Stacker L and Stacker R Display Quantity Pieces and Amount and view count result Display Reject Amount and see the details Display and change Speed Set Batch number for Stacker L and Stacker R Set User Level High Middle Low Enter Menu screen Set Operation Mode VALUE PREFIT ATM FIT ATM FIT Icon for printing the receipt of counting result 11 9 8 7 6 5 4 3 2 1 2 1 5 4 6 7 8 Date Time User 3 10 11 12 ...

Page 25: ...User Guide Hitachi Terminal Solutions Korea Co Ltd 25 Turn on off ADD function Enter ETC screen Display and set date and time Display the current user and select the user 3 Basic Operation User Date Time 13 12 ...

Page 26: ...tions Korea Co Ltd 26 3 1 Currency Mode including Multi Currency By short touch the currency icon change the currency mode If long touch the currency icon go to Select Local screen 3 2 Count Mode 2 1 5 4 6 7 8 Date Time User 3 10 11 12 13 9 ...

Page 27: ...n is sent to Stacker Pocket 3 SG The selected denomination is counted After select SG mode long touch SG SELECT DENOM screen is shown When select Version OLD NEW V NEW only the version is sent to Left Pocket or Right Pocket When select a denomination the denomination is counted 4 USER the user set the pocket option for counting notes After select USER mode long touch USER POCKET OPTION screen is s...

Page 28: ... SG The selected denomination is sent to Stacker Pocket PC Pocket Currency Count by specifying local for each pocket 3 3 Stacker Pocket Information You can check the count mode batch number and the counted notes by Stacker Pocket icon And the color of icon is changhed by the selected count mode By short touch Left Right Pocket icon Pocket Information screen is shown When click SN icon the details ...

Page 29: ...eject about the counted notes are shown 3 4 Count Result on Main Screen When touch the count result displayed on the screen Count Result screen is shown 3 5 Reject Pocket Information You can check the batch number and the rejected notes by Reject Pocket icon By short touch Reject Pocket icon Pocket Information screen is shown too ...

Page 30: ...o 1300 After enter the speed you have to click SAVE button to save the change 3 7 BATCH When short click BATCH icon the batch of Stacker Pocket is increased by 100 units If you long click the icon BATCH Setting screen is shown After select Pocket first enter the new batch number When click ALL button you can set LP1 and RP1 together The range of batch number is as below LP1 and RP1 10 300 notes RE...

Page 31: ...n the level setting target is automatically changed to the version and denom of the counted note If Fit Level Activation is turned off Middle level is default By clicking or button you can increase the each parameters by 5 units After selecting a parameter click on the yellow colored area and you can enter the parameter value directly After change the parameter value you have to click SAVE button ...

Page 32: ...H 210 User Guide Hitachi Terminal Solutions Korea Co Ltd 32 2 PreFIT Parameters Dogear Tear Hole Tape X Tape Y 3 FIT 1 Parameters Soil Deinked Stain Graffiti 4 FIT2 Parameters Composed Mulilation Crumple ...

Page 33: ...U screen can be found in Chapter 4 3 10 Operation Mode You can check the currently selected operation mode and click the icon to change the operation mode VALUE Fitness is off PREFIT Detect Reject Dogear Tear Hole and Tape notes ATM Sort the notes by ATM and UNFIT FIT Sort the notes by FIT and UNFIT ATM FIT Sort the notes by ATM FIT and UNFIT ...

Page 34: ...uide Hitachi Terminal Solutions Korea Co Ltd 34 3 11 PRINT When click PRINT icon the currenct counting result is printed to receipt 3 12 ADD Turn on or off ADD function 3 13 ETC When click ETC icon enter ETC screen ...

Page 35: ...n Chapter 5 3 14 Date Time The set date and time are displayed 3 15 USER When short click USER icon the registered users are selected in turn If you long click the icon USER INFORMATION screen is shown Select the user enter the relevant information and press the SAVE button to save the entered user information 1 2 3 ...

Page 36: ...iH 210 User Guide Hitachi Terminal Solutions Korea Co Ltd 36 4 MENU Screen 4 1 Machine info You can check S W information machine serial number and local currency information on the machine ...

Page 37: ... and output option of the serial printer connected to the machine Printer Setup Baudrate Set the baudrate with the connected printer 9600 115200 Paper Paper size of the receipt 2 or 3 inch Count Neumber of the receipt 1 2 ea Start Choose whether to print the receipt manually or automatically Print Option NAME Print the user name to the receipt BANK Print the bank name to the receipt BRANCH Print t...

Page 38: ... Count refers to the number of notes sent to the stacker in value mode and prefit mode ERROR The number of bills sent to the reject pocket can be checked for each classified error UNFIT You can check the number of banknotes recognized as UNFIT 4 Screen Saver If the machine is idle for a selected amount of time the LCD screen will dim ...

Page 39: ...rea Co Ltd 39 5 TOUCH You can proceed Touch calibration of LCD screen Touch shape in the order of the numbers on the screen until the numbers turn yellow If it doesn t turn yellow touch another first When all five are yellow the setting is complete ...

Page 40: ...iH 210 User Guide Hitachi Terminal Solutions Korea Co Ltd 40 4 3 Operation 1 Denom Display If it is set to ON all denominations of the local currency is displayed on the count screen ...

Page 41: ...selected time while the batch is full an alarm will sound OFF 240s 7 Cleaning Cycle If you count banknotes above the selected quantity you will be prompted to clean the machine 8 Fit Level Activation When it is set to ON the user level can be divided into high middle and low levels 9 Standard Pocket Set the reference pocket Pocket Left or Pocket Right When counting bills the counted notes are stac...

Page 42: ... OFF both are updated at the same time 4 4 Comm Info Set up ENET and External Display connection 1 ENET After selecting each item press and hold the item to edit it After enter all items try to press Connect button to connect the machine to Server You can save the current setting by pressing SAVE Button When press Default button Default ENET Setting is loaded 2 External Display Display Type FND ty...

Page 43: ...alue Displays the total count and amount of bills counted DENOM Displays count and amount of all denominations of counted currency Only for LCD Type 4 5 PIN Code You can enter and modify the machine s pincode and load the default pincode 4 6 Upgrade Upgrade S W of the machine via USB 4 7 Machine Status You can check the motor solenoid counter sensor and FND LED status of the machine ...

Page 44: ...otor When Motor OFF button is pressed all motors start running and the speed is shown on the screen 2 Solenoid You can check the operation each solenoid by turning it ON OFF SOL 3 and SOL 4 are for IH 410 series 3 CNT Displays the current status of each count sensor ...

Page 45: ...tions Korea Co Ltd 45 4 FND LED You can check the operating status of all FNDs and LEDs 4 8 Machine Setting You can set the installed CNT Sensor CIS Sensor MG Sensor UV Sensor and TDS Please refer to the service manual for the setting method ...

Page 46: ...iH 210 User Guide Hitachi Terminal Solutions Korea Co Ltd 46 4 9 User Setting You can register user information ...

Page 47: ...each sensor 2 CF Option When detecting CF note the operation of the machine can be selected CF LED When a counterfeit is detected the red LED flashes CF BUZZER If a counterfeit is detected a pop up message is output after the buzzer warning tone CF STOP When detecting a counterfeit a pop up message is output after the machine stops operating ...

Page 48: ...n of the notes FF FR BF BR 2 Select Direction Select a specific direction and only the banknotes inserted in that direction is ejected into the Stacker Pocket 5 3 Version You can sort the counted notes by version of the banknote 1 Separate Version ON OFF Version classification can be turned on or off 2 Select Version Select a specific version and only that version is ejected into the Stacker Pocke...

Page 49: ...aged from the specified time point Value ATM FIT and UNFIT results can be summed separately and the count result in Mix Currency mode is not supported by Grand Total function 1 VALUE Sum of count results in VALUE and Prefit Mode 2 ATM Sum of ATM count results in ATM and ATM FIT Mode 3 FIT Sum of FIT count results in FIT and ATM FIT Mode 4 UNFIT Sum of UNFIT count results in ATM and FIT Mode ...

Page 50: ...rection operates Left or right You need to register 2 or more users first 5 7 Data Acquisition Collect data from banknotes There are two ways to collect data The data can be saved by USB or LAN 1 Note Info Collect data except the note image data Save data from multiple notes at the same time 2 Data Acq Collect data including the note image data Save data from one note only ...

Page 51: ...t manually 1 ADD DENOM Enter the quantity of the desired denominations and add it to the count result After enter the quantity of the desired denominations click SAVE 2 ADD COIN Enter the desired coin value directly and add it to the count result Can be up to 2 decimal places After enter coin value click Enter button ...

Page 52: ...tick PC Transfer information to ENET START Press START to turn the deposit function ON After enter the information of Teller ID Seal No Client Code and Bag No when press START button the screen is changed as below This information can also be entered with a barcode scanner Amount The amount entered in the current bundle is subtracted and settled Add Note The quantity for the entered denomination i...

Page 53: ...urrently max 50 5 10 Dispenser Function where only the specified amount or quantity can be counted Dispenser When press the butoon Amount Denom Off are changed in order Amount When press button you can enter the amount Denom Denom button allows you to enter the quantity for each denomination ...

Page 54: ...tion is not accumulated ADD OFF Validate ON The counting result is retained until all notes are removed from the Hopper and Stacker After completion of counting the counting information for banknotes by the uncompleted batch is not accumulated When counting again after removing all notes the starting count becomes 0 and the final counting information is not accumulated ADD ON Validate OFF The coun...

Page 55: ...cognition function If SN Compare and SN Black List function is selected SN Reading is automatically turned on 2 SN Compare Turn ON OFF SN Compare function You can set the number of characters to compare by Compare SN User level 3 SN Black List Turn ON OFF Black List function If the set Black List and the recognized serial number are the same reject processing is performed If you type the character...

Page 56: ...l Image Turn ON OFF the Full Image transfer function TOP BOT and RGB images are sent and the file format is JPEG 5 13 Fitness Each item of fitness Parameters can be set to Unfit recognition Reject processing or OFF not detected 5 14 Fitness Viewer You can see the fitness status of the inserted banknotes as a value 0 100 Multiple notes can be counted simultaneously 5 15 Image Viewer ...

Page 57: ...area to select the desired function and then press the SEL button to save the changes Press the INIT button to return to the default setting Changeable Key Function Description LOCAL 0 Change Local Currency LOCAL 1 Go to Select Local screen MODE 0 Change Counting Mode MODE 1 In SG Mode go to SELECT DENOM screen In USER Mode go to POCKET OPTION screen MANUAL STOP Key to stop the machine manually IN...

Page 58: ...TCH 0 If you press the button it change the stacker s batch value to 100 200 300 in order BATCH 1 Go to BATCH setting screen SPEED 0 If you press the button the speed is changed in units of 100 notes min SPEED 1 Go to SPEED setting screen PRINT Print the receipt of the current counting result MENU Go to MENU screen ETC Go to ETC screen ADD Turn on off ADD function FITNESS Select Operation Mode VAL...

Page 59: ...erial Number Recognition Printing Max 1 000 Notes min Pocket Capacity Hopper Max 1 000 Notes Stacker x 2 Max 300 Notes Mint condition Reject Pocket x 1 Max 200 Notes Mint condition Display 480 x 272 TFT LCD 5 inch Touch Screen Dimension 382 W x 417 D x 340 H mm Weight Approx 21 Kg User Interface LAN USB Serial x 2 USB host RS232C x 3 Power Supply 100 240V 50 60Hz Sensor Information Full Color Dual...

Page 60: ...r Did not find the outline of the note Case 2 7 E3004 Outline Error Did not find the outline of the note Case 3 8 E3005 Outline Error Did not find the outline of the note Case 4 9 E3006 X Size Error X Size Error 10 E3007 Y Size Error Y Size Error 11 E3008 XY Size Error XY Size Error 12 E3009 Not Rec Error Recognition Error 13 E300A Different Denom Different Denomination is counted 14 E300B Differe...

Page 61: ...rror 28 E6001 So Soil 29 E6002 St Stain 30 E6003 De Deinked No Error Code Error Message Explanation 31 E6004 Gr Graffiti 32 E6005 Co Composed 33 E6006 Mu Mutilation 34 E6007 Do Dogear 35 E6008 Te Tear 36 E6009 Ho Hole 37 E600A Tape Tape X 38 E600B Tape Tape Y 39 E600C Cr Crumple 40 E7001 Compare SN Compare SN 41 E7002 Black List Black List Error ...

Page 62: ...any sensitive sensors to perform high technology functions for example counterfeit detection denominations etc Users are recommended to clean the machine sensors at least once a day Refer to following section and clean the machine regularly Please turn the power off before cleaning the machine ...

Page 63: ...iH 210 User Guide Hitachi Terminal Solutions Korea Co Ltd 63 FD MODULE RD MODULE UP BODY 2 and 3 ASM LOWER BODY 2 and 3 ASM ...

Page 64: ...iH 210 User Guide Hitachi Terminal Solutions Korea Co Ltd 64 HOPPER SENSOR STACKER SENSOR STACKER SENSOR FRONT DUST BOX REAR DUST BOX ...

Page 65: ...iH 210 User Guide Hitachi Terminal Solutions Korea Co Ltd 65 Hitachi Terminal Solutions Korea Co Ltd 7 6 Samsung 1 ro 4 gil Hwaseong si Gyeonggi Do Korea TEL 82 31 211 8761 FAX 82 31 211 8763 ...

Reviews: