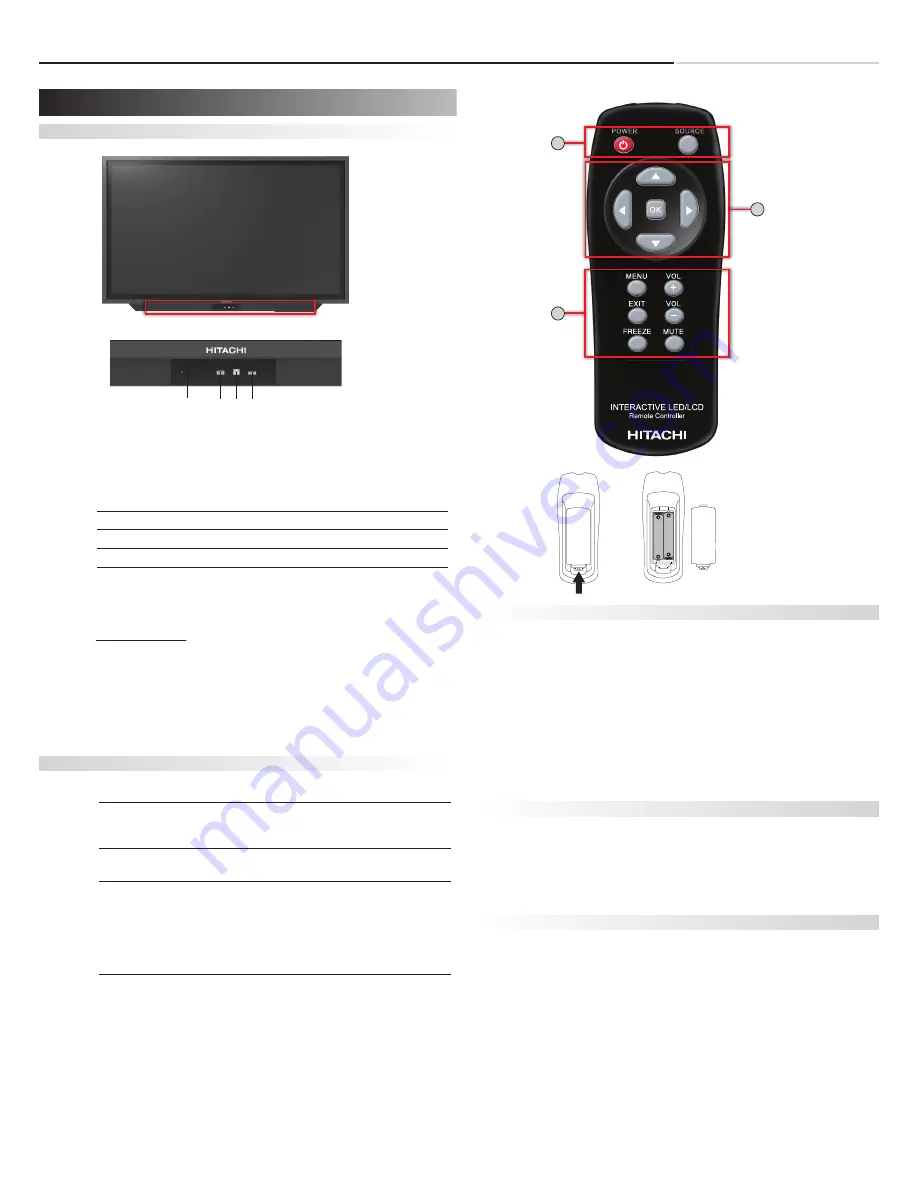
The control panel of the monitor
1: LED Indicator
2 : USB
3 : Touch USB(for Laptop PC)
4 : HDMI IN (Connected to External)
Power Status
2
1
3 4
Condition
Blue
Power on
Red
Power off(stand-by)
Off
AC off
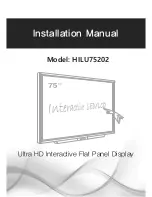
The Remote Control (RCU) Instructions
No. Function
Description
1 Power
Turns the monitor On and Off
Source
Select source (PC, HDMI 1,
HDMI 2, HDMI 3 Displayport)
2
3
▲, ◀, ▶, ▼
Navigates through submenus and
settings
Increases the sound volume
Volume -
Decreases the sound volume
Exit
Closes the menu system
Menu
Open the menu
Freeze
Freezes the current source image
Mute
Turns off the sound
Display Mode
Turning the monitor on
Important Notice
1. Correctly insert the power cord into the monitor and
into the power socket
2. Press the power button on the remote or front control panel.
Turning the monitor off
With the power on, press the power button on the remote or
front control panel to place the monitor in a standby mode. To
turn off power completely, disconnect the AC power cord from
the power outlet.
Adjusting the Volume
1. Using the remote, press the or VOLUME- to increase
or decrease the volume.
2. Press the MUTE button to temporarily turn off all sound.
To restore the sound, press the MUTE button again.
Selecting the input source
1. Using the remote, press the desired source button (PC, HDMI 1,
HDMI 2, HDMI 3, DP)
2. Or press SOURCE on the monitor keypad, and toggle the source
button until you have reached the desired source, and press
ENTER
PC
HDMI 1
HDMI 2
HDMI 3
DP
3. If the monitor cannot find a source, a “No signal” message
will appear.
Battery insertion
Remote Control
Receiver
4
Operating the monitor
5
1
3
2
The USB cable (5 m) that Hitachi provides in this accessory box is
for use of connection to Touch USB at the back. Therefore, in case
of connecting USB cable to Touch USB in front, separate USB cable
is required and the length of cable is strongly recommended to be
less than 3 m to make sure signal intensity of touch sensor work
properly.


