
GR4000 Quick Start Guide, Revision 1 - Preliminary
QSGGR4K00-10 5794047-1X
9
●
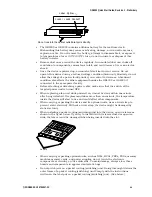
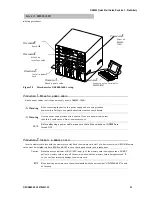
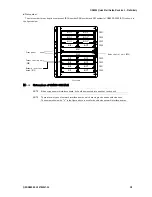
Setup procedures
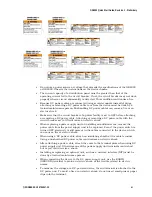
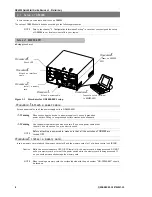
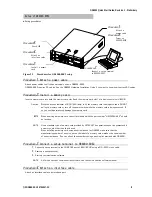
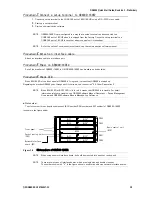
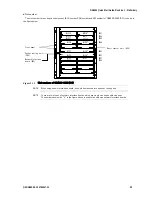
Figure 2-3
Procedures for GR4000-80E2 setup
Procedure
1.
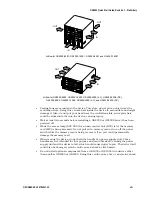
Attach a power cable.
Attach power cables to all the power supply units in GR4000-80E2.
GR4000-80E2 requires DC cables. See the GR4000 Hardware Installation Guide if you want to know how to attach DC cables.
Procedure
2.
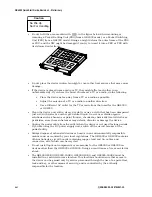
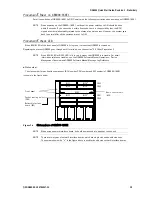
Install a memory card.
Insert a memory card into both the memory card slot 0 and the memory card slot 1 of a basic control unit (BCU0).
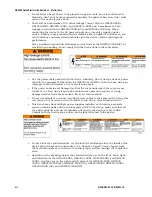
Caution
While the access indicator of BCU (ACC lamp) is lit, the memory card is being accessed. DO NOT
pull out a memory card or turn off the power switch while the memory card is being accessed. If
so, you could permanently damage the memory card.
NOTE
When inserting a memory card, the surface labeled with the part number “HN-F9244-66X” should
be faced up.
NOTE
Use a standard type of memory card provided by HITACHI. The operation cannot be guaranteed if
a memory card other than that is used.
When installing a memory card using an option license for GR4000, make sure that the
manufacturing number of a device put on the label of a memory card matches the serial number
of an option license. (You can check these numbers using a packing list provided with GR4000.)
Procedure
3.
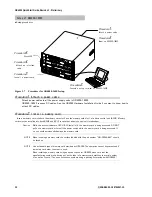
Connect a setup terminal to GR4000-80E2.
1.
Connect a setup terminal to the CONSOLE port of BCU (BCU0) using a RS-232C cross cable.
2.
Start up a setup terminal.
3.
Start up communication software.
NOTE
As for the setup of communication software, see the communication software manual.
Procedure
4.
Attach an interface cable.
Attach an interface cable to an interface port.
Procedure
5.
Power on
GR4000-80E2.
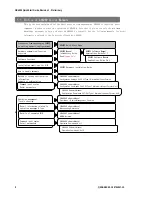
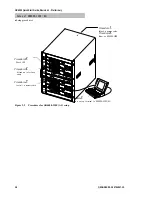
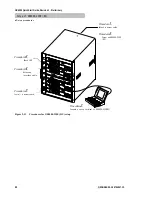
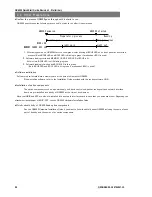
Setup of GR4000-80E2
Procedure
2.
Install a memory
card.
Procedure
3.
Connect a setup terminal
to GR4000-80E2.
Procedure
1.
Attach a
power cable.
Procedure
6.
Check LED
Procedure
4.
Attach an
interface cable.