13
English
OPERATING THE GRINDER
WARNING
○
Keep your face away from the tip tool during use.
○
Wear goggles and a dust mask when using the grinder.
Breakage of the tip tool may lead to injury.
○
Do not operate the grinder at extremely slow speed. A
smooth
fi
nished surface will not be achieved and doing
so may lead to damage of the tip tool, breakdown of
the grinder or injury.
CAUTION
Do not touch the tip tool, collet nut or collet
immediately after machining as they will be very hot
and touching them may result in burns.
1. Remove the battery and attach the tip tool
2. Fix the workpiece so that it does not move
The smaller the workpiece, the more unstable it is to
machine. Fix small workpieces in a vise.
Holding the workpiece by hand may result in injury.
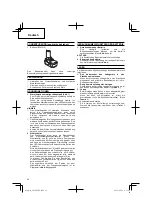
3. Insert the battery in the grinder
4. Check the balance of the tip tool
Check the tip tool visually at low speed (around [1] on
the switch dial).
Also check for abnormal noise during operation.
5. Select the machining speed
○
Select the optimal speed for the material while
performing trial grinding with reference to
Table 4
.
○
If plastic is machined at high speed, it may melt due to
heating. Test it gradually starting from a low speed.
Table 4 Switch dial settings
Workpiece
material
Tip tool
Softwood Hardwood Laminate/
Plastic
Steel
Aluminium,
brass, etc.
Shell/
Stone
Ceramic
Glass
Aluminium oxide
point
3-4
3-4
—
2.5
1
1.5
3-4
—
Silicon carbide point
—
—
1.5
3-4
1
1.5
3-4
3-4
High-speed cutter
3-4
3-4
1
1.5
3-4
—
—
—
Drill
3-4
3-4
1
—
1.5
—
—
—
Cutting wheel
—
—
1
3-4
3-4
3-4
3-4
—
Aluminium oxide
grinding wheel
3-4
3-4
—
2.5
1
1.5
3-4
—
Sanding disc
2.5
2.5
1
—
1
—
—
—
Polishing wheel
—
—
—
1
1
1
1
1
Felt polishing wheel
—
—
—
1
1
—
—
—
Sanding band
1-4
1-4
1-4
3-4
3-4
1-4
1-4
—
6. Machining
○
Place the rotating tip tool lightly against the workpiece
and machine the workpiece with minimal pressure.
○
Rather than doing the whole task in a single action,
a better
fi
nish is achieved gradually by multiple
machinings.
NOTE
○
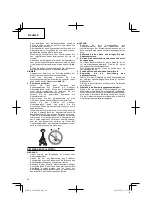
The grinder narrows toward the tip tool holder. Place
your
fi
nger on the narrow section and hold the grinder
for easy operation. (
Fig. 9
)
○
When machining a material for the
fi
rst time or using
the tip tool for the
fi
rst time, perform trial grinding
fi
rst
to check the optimal speed, how to hold the grinder
and how to place the tool against the workpiece.
○
If you do not achieve the expected results, applying
more pressure to the power tool will not give better
results. Nor will the machining performance be
improved by tilting the power tool. Adjust the rotating
speed or change to another tip tool.
MAINTENANCE AND INSPECTION
1. Inspecting the accessories
Using a tip tool or mandrel with a worn or damaged
end will not only result in a poor
fi
nish, but will place
unreasonable strain on the motor, causing reduced
e
ffi
ciency, damage or injury.
If the tip tool or mandrel is worn or damaged, replace it.
2. Inspecting the mounting screws
Regularly inspect all mounting screws and ensure that
they are properly tightened. Should any of the screws
be loose, retighten them immediately. Failure to do so
could result in serious hazard.
3. Maintenance of the motor
The motor unit winding is the very “heart” of the power
tool.
Exercise due care to ensure the winding does not
become damaged and/or wet with oil or water.
4. Cleaning of the outside
When the grinder is stained, wipe with a soft dry cloth
or a cloth moistened with soapy water. Do not use
chloric solvents, gasoline or paint thinner, for they melt
plastics.
5. Storage
Store the grinder in a place in which the temperature is
less than 40°C and out of reach of children.
NOTE
Make sure that the battery is fully charged when stored
for a long period (3 months or more). The battery with
smaller capacity may not be able to be charged when
used, if stored for a long period.
NOTE
Storing Lithium-ion Batteries
Make sure the lithium-ion batteries have been fully
charged before storing them.
000Book̲GP10DL̲EE.indb 13
000Book̲GP10DL̲EE.indb 13
2014/07/31 9:57:45
2014/07/31 9:57:45


