17
English
SPARK PLUG SERVICE
To service the spark plug, use plug wrench (standard accessory). Use
recommended spark plugs.
RECOMMENDED PLUG AND ELECTRODE CLEARANCE
To ensure proper engine operation, the spark plug must be properly gapped and
free of deposits.
CAUTION: If the engine has been running, the muffler will be very hot.
Be careful not to touch the muffler. Be sure to allow the
engine to cool before you touch the spark plug.
1. Remove the spark plug cap.
2. Clean any dirt from around the spark plug base.
3. Use a spark plug wrench to remove the spark plug.
4. Visually inspect the spark plug. Replace it if the insulator is cracked or
chipped.
Clean the spark plug with a wire brush if you plan to reuse it.
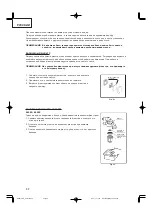
5. Measure the plug gap with the feeler gauge. Correct as necessary by
carefully bending the side electrode (Fig.33).
6. Check that the spark plug washer is in good condition. If it is not, thread the spark plug in by hand to prevent
cross threading.
7. After the spark plug is seated, tighten with a spark plug wrench to compress the washer. If you are installing a
new spark plug, tighten the spark plug 1/2 turn after it seats to compress the washer. If you are reinstalling a
used spark plug, tighten 1/8–1/4 turn after the spark plug seats to compress the washer.
NOTE: The spark plug must be securely tightened. An improperly tightened spark plug can become very
hot and could damage the engine. Never use spark plugs which have an improper heat range. Use
only the recommended spark plugs or equivalent.
Plug
BPR6HS (NGK)
BPR5ES (NGK)
Electrode Clearance
0.6 to 0.7mm (0.024" to 0.028")
0.7 to 0.8mm (0.028" to 0.031")
HITACHI Model
E24SC
E42SC, E62SC
PREPARATION FOR STORAGE
The following procedures should be followed prior to storage of your generator for periods of 3 months or longer.
1. Drain fuel from fuel tank carefully. Gasoline left in the fuel tank will eventually
deteriorate making engine-starting difficult.
2. Loosen the drain screw on the bottom of the carburetor float chamber, and
drain the fuel completely.
3. Change engine oil.
4. Check for loose bolts and screws, tighten them if necessary.
5. Clean generator thoroughly with oiled cloth. Spray with preservative if
available.
NEVER USE WATER TO CLEAN GENERATOR!
6. Pull starter handle until resistance is felt, leaving handle in that position.
7. Store generator in a well ventilated, low humidity area.
SERVICE AND REPAIRS
All quality generators will eventually require servicing or replacement of parts because of wear from normal use.
To assure that only authorized replacement parts will be used, all service and repairs must be performed by a
HITACHI AUTHORIZED SERVICE CENTER, ONLY.
DRAIN
SCREW
Fig. 34
ELECTRODE
CLEARANCE
Fig. 33


