background image

English

5

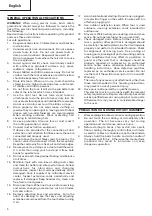
GENERAL OPERATIONAL PRECAUTIONS

WARNING! 

When using electric tools, basic safety

precautions should always be followed to reduce the
risk of fire, electric shock and personal injury, including
the following.
Read all these instructions before operating this product
and save these instructions.
For safe operations:
1.

Keep work area clean. Cluttered areas and benches
invite injuries.

2.

Consider work area environment. Do not expose
power tools to rain. Do not use power tools in
damp or wet locations. Keep work area well lit.
Do not use power tools where there is risk to cause
fire or explosion.

3.

Guard against electric shock. Avoid body contact
with earthed or grounded surfaces. (e.g. pipes,
radiators, ranges, refrigerators).

4.

Keep children and infirm persons away. Do not let
visitors touch the tool or extension cord. All visitors
should be kept away from work area.

5.

Store idle tools. When not in use, tools should be
stored in a dry, high or locked up place, out of reach
of children and infirm persons.

6.

Do not force the tool. It will do the job better and
safer at the rate for which it was intended.

7.

Use the right tool. Do not force small tools or
attachments to do the job of a heavy duty tool. Do
not use tools for purposes not intended; for example,
do not use circular saw to cut tree limbs or logs.

8.

Dress properly. Do not wear loose clothing or
jewelry, they can be caught in moving parts. Rubber
gloves and non-skid footwear are recommended
when working outdoors. Wear protecting hair
covering to contain long hair.

9.

Use eye protection. Also use face or dust mask if
the cutting operation is dusty.

10.

Connect dust extraction equipment.
If devices are provided for the connection of dust
extraction and collection facilities ensure these are
connected and properly used.

11.

Do not abuse the cord. Never carry the tool by the
cord or yank it to disconnect it from the receptacle.
Keep the cord away from heat, oil and sharp edges.

12.

Secure work. Use clamps or a vise to hold the work.
It is safer than using your hand and it frees both
hands to operate tool.

13.

Do not overreach. Keep proper footing and balance
at all times.

14.

Maintain tools with care. Keep cutting tools sharp
and clean for better and safer performance. Follow
instructions for lubrication and changing
accessories. Inspect tool cords periodically and if
damaged, have it repaired by authorized service
center. Inspect extension cords periodically and
replace, if damaged. Keep handles dry, clean, and
free from oil and grease.

15.

Disconnect tools. When not in use, before servicing,
and when changing accessories such as blades,
bits and cutters.

16.

Remove adjusting keys and wrenches. Form the
habit of checking to see that keys and adjusting
wrenches are removed from the tool before turning
it on.

17.

Avoid unintentional starting. Do not carry a plugged-
in tool with a finger on the switch. Ensure switch is
off when plugging in.

18.

Use outdoor extension leads. When tool is used
outdoors, use only extension cords intended for
outdoor use.

19.

Stay alert. Watch what you are doing. Use common
sense. Do not operate tool when you are tired.

20.

Check damaged parts. Before further use of the
tool, a guard or other part that is damaged should
be carefully checked to determine that it will operate
properly and perform its intended function. Check
for alignment of moving parts, free running of
moving parts, breakage of parts, mounting and any
other conditions that may affect its operation. A
guard or other part that is damaged should be
properly repaired or replaced by an authorized
service center unless otherwise indicated in this
handling instructions. Have defective switches
replaced by an authorized service center. Do not
use the tool if the switch does not turn it on and off.

21.

Warning
The use of any accessory or attachment, other than
those recommended in this handling instructions,
may present a risk of personal injury.

22.

Have your tool repaired by a qualified person.
This electric tool is in accordance with the relevant
safety requirements. Repairs should only be carried
out by qualified persons using original spare parts.
Otherwise this may result in considerable danger
to the user.

 PRECAUTIONS ON USING ROTARY HAMMER

1.

Wear earplugs to protect your ears during operation.

2.

Do not touch the bit during or immediately after
operation. The bit becomes very hot during
operation and could cause serious burns.

3.

Before starting to break, chip or drill into a wall,
floor or ceiling, thoroughly confirm that such items
as electric cables or conduits are not buried inside.

4.

Always hold the body handle and side handle of
the power tool firmly.  Otherwise the counterforce
produced may result in inaccurate and even
dangerous operation.

Summary of Contents for DH 24PA

Page 1: ...336 CEE y 98 37 CE Esta declaración se aplica a los productos con marcas de la CE Portugûes DECLARAÇÃO DE CONFORMIDADE CE Declaramos sob nossa única e inteira responsabilidade que este produto está de acordo com as normas ou documentos normativos EN50144 EN55014 e EN61000 3 em conformidade com as Diretrizes 73 23 CEE 89 336 CEE e 98 37 CE do Conselho Esta declaração se aplica aos produtos designad...

Page 2: ...336 CEE y 98 37 CE Esta declaración se aplica a los productos con marcas de la CE Portugûes DECLARAÇÃO DE CONFORMIDADE CE Declaramos sob nossa única e inteira responsabilidade que este produto está de acordo com as normas ou documentos normativos EN50144 EN55014 e EN61000 3 em conformidade com as Diretrizes 73 23 CEE 89 336 CEE e 98 37 CE do Conselho Esta declaração se aplica aos produtos designad...

Page 3: ...ore bit shank Bohrkronenzapfen Queue de couronne Thread Gewinde Filetage Center pin Mittelstift Goujon central Guide plate Führungsplatte Plaque de guidage Core bit tip Bohrkronenspitze Bout de couronne Wear limit Verschleißgrenze Limite d usure No of carbon brush Nr der Kohlebürste No de balai en carbone Usual carbon brush Gewöhnliche Kohlebürste Balai en carbone ordinaire Auto stop carbon brush ...

Page 4: ...ore bit shank Bohrkronenzapfen Queue de couronne Thread Gewinde Filetage Center pin Mittelstift Goujon central Guide plate Führungsplatte Plaque de guidage Core bit tip Bohrkronenspitze Bout de couronne Wear limit Verschleißgrenze Limite d usure No of carbon brush Nr der Kohlebürste No de balai en carbone Usual carbon brush Gewöhnliche Kohlebürste Balai en carbone ordinaire Auto stop carbon brush ...

Page 5: ...a Borstelhouder Portaescobilla Koolborstel Escobilla de carbón nterne bedrading Cableado interno Schakelaar Conmutador Broca Cabo de peça SDS plus Tampa da frente Mordente Receptáculo para poeira Coletor de poeira B Alavanca Seletor Mandril Adaptador do mandril Adaptador do mandril D Palhetão Encaixe Empunhadura lateral Sonda Orifício de montagem Adaptador de cabo cônico Cavilha Suporte Coroa Cabo...

Page 6: ...brication and changing accessories Inspect tool cords periodically and if damaged have it repaired by authorized service center Inspect extension cords periodically and replace if damaged Keep handles dry clean and free from oil and grease 15 Disconnect tools When not in use before servicing and when changing accessories such as blades bits and cutters 16 Remove adjusting keys and wrenches Form th...

Page 7: ...rd and side handle 2 3 kg Be sure to check the nameplate on product as it is subject to change by areas STANDARD ACCESSORIES 1 Case Molded plastic 1 2 Side handle 1 3 Depth gauge 1 Standard accessories are subject to change without notice Adapter for slender shaft SDS plus shank Drill bit Slender shaft Drill bit Taper shank Taper shank adapter SDS plus shank Cotter Outer diameter 11 0 mm 12 3 mm 1...

Page 8: ...chor size W1 4 W5 16 W3 8 Anchor size W1 4 W5 16 W3 8 W1 2 W5 8 3 Large hole boring rotation striking 䡬 Center pin core bit core bit shank and guide plate Guide plate Center pin Core bit Core bit shank SDS plus shank Center pin Core bit outer diameter Core bit shank 25 mm 29 mm A 32 mm Core bit shank A Center pin A 35 mm 38 mm 45 mm Center pin B B 50 mm Core bit shank B Do not use core bits with w...

Page 9: ...mical Anchor rotation striking SDS plus shank 12 7 mm Chemical Anchor Adapter 19 mm Chemical Anchor Adapter Standard socket on the market 6 Drilling holes and driving screws rotation only 䡬 Drill chuck chuck adapter G special screw and chuck wrench Chuck adapter G SDS plus shank Chuck wrench Drill chuck 13 VLR Special screw ...

Page 10: ...g in steel or wood 8 Driving Screws rotation only Chuck adapter D SDS plus shank Bit No Screw Size Length No 2 3 5 mm 25 mm No 3 6 8 mm 25 mm 9 Dust cup Dust collector B Optional accessories are subject to change without notice Dust cup Dust collector B 10 Hammer grease A 500 g in a can 70 g in a green tube 30 g in a green tube Bit No Drill chuck 13 VLA ...

Page 11: ... than 190 mm of overall length dust collector B cannot touch the concrete surface and will rotate Therefore please use dust collector B by attaching to drill bits which have 166 mm 160 mm and 110 mm overall length 䡬 Dump particles after every two or three holes when drilling 䡬 Please replace the drill bit after removing dust collector B 6 Selecting the driver bit Screw heads or bits will be damage...

Page 12: ...e on the side handle 2 Adjust the depth gauge position according to the depth of the hole and thighten the knob securely 7 How to use the drill bit taper shank and the taper shank adapter 1 Mount the taper shank adapter to the rotary hammer Fig 11 2 Mount the drill bit taper shank to the taper shank adapter Fig 11 3 Turn the switch ON and drill a hole in prescribed depth 4 To remove the drill bit ...

Page 13: ...cover or come in contact with the armature or rotating parts of the motor a serious danger of electric shock to the operator will be created Excercise extreme caution in disassembling and reassembling the motor following the above procedures exactly Do not attempt to disassemble any parts other than those necessary to effect replacement of the carbon brush 6 Service parts list A Item No B Code No ...

Page 14: ...se das Kabel harausreißen Das Kabel sollte gegen Hitze Öl und scharfe Kanten geschützt werden 12 Den Arbeitsplatz gut absichern Zwingen oder einen Schraubstock zur Befestigung des Werkstücks verwenden Das ist sicherer als die Benutzung der Hände und macht beide Hände zur Bedienung des Werkzeugs frei 13 Sich niemals weit überbeugen Immer einen festen Stand und ein sicheres Gleichgewicht bewahren 14...

Page 15: ...des Betriebs sehr heiß sobaß es zu ernsthaften Verbrennungen führen könnte 3 Bevor man on der Wand im Boden oder an der Decke etwas ausbricht meißelt oder bohrt muß man sich sorgfältig davon überzeugen ob keine elektrischen Kabel oder Kabelrohre darunter liegen 4 Immer den körper Handgriff und Seiten Handgriff des Elektrowerkzeugs festhalten weil die entstehende Gegenkraft sonst zu einem ungenauen...

Page 16: ...tadapter 䡬 13 mm Bohrhammerfutter Zum Bohrbetrieb mit gerader Schlagspitze für schlagbohrer mit bohrhammer 13 mm Bohrhammerfutter SDS Plus Schaft Gerade Meißelspitze für Schlagbohrer Außendurchmesser 11 0 mm 12 3 mm 12 7 mm 14 3 mm 14 5 mm 17 5 mm 21 5 mm Bohrfutterschlüssel 2 Ankereinsatz 䡬 Adapter für Ankerbefestigung mit Bohrhammer Adapter für Ankerbefestigung SDS Plus Schaft mit Bohrhammer Ges...

Page 17: ...29 mm Außendurchmesser von 25 mm oder 29 mm verwenden besitzen 4 Aufbrecharbeiten Schlag und Drehbohrer Spitzmeißel Nur runder Typ SDS Plus Schaft 3 Lochbohren mit weitem Durchmesser Schlag und Drehbohrer 䡬 Mittelstift Bohrkrone Bohrkronenschenkel und Führungsplatte Führungsplatte Mittelstift Bohrkronenschenkel SDS Plus Schaft Bohrkrone 5 Bolzenplazierung für Chemical Anchor Schlag und Drehbohren ...

Page 18: ...ge nummer Nr 2 3 5 mm 25 mm Nr 3 6 8 mm 25 mm 9 Staubschale Staubfang B Das Sonderzubehöre kann ohne vorherige Bekanntmachung jederzeit geändert werden 10 Hammer Schmierfett A 500 g Dose 70 g in grüner Tube 30 g in grüner Tube Bohrfutter 13 VLA Bohrespitzennummer Staubfang B Staubschale 6 Löcherbohren und schneidschraube nur Drehung 䡬 Bohrfutter Bohrfutteradapter G Spezialschraube und Bohrfuttersc...

Page 19: ...mit mehr als 190 mm Gesamtlänge kann die Staubfang B nicht die Betonoberfläche berühren und dreht sich Darum immer Bohrspitzen mit 166 160 und 110 mm Gesamtlänge verwenden 䡬 Nach dem Bohren von zwei oder drei Löchern den Inhalt der Staubfang B ausleeren 䡬 Die Bohrspitze nach dem Abnehmen der Staubfang B austauschen 6 Wahl der Schrauberspitze Falls die Schrauberspitze dem Schraubendurchschnitt nich...

Page 20: ... gemäß der Härte des Holzes durchgeführt wird Falls das Loch zu klein oder nicht tief genung sein sollte und dadurch große Kraftanwendung zum Einschrauben erforderlich wird kann das Schraubengewinde manchmal beschädigt werden 6 Verwendung des Anschlags Abb 10 1 Die Kopfschraube am Seitenhandgriff lösen und das Anschlagstück in die U förmige Kerbe am Seitenhandgriff einstecken 2 Den Anschlag entspr...

Page 21: ... zu achten ist nicht mit Gewalt an den Kabeln im Bürstenhalter zu ziehen 3 Die Klemme der Bürste wird abgezogen und die Kohlenbürste aus dem Bürstenhalter herausgenommen 䡬 Einbau 1 Die neue Kohlenbürste wird in den Bürstenhalter eingessetzt und die Klemme an der Kohlenbürste angeschlossen 2 Der Bürstenhalter und die übrigen Teile werden wie in Abb 19 dargestellt 3 Das Kabel wird in die vorgeschrie...

Page 22: ... 12 Fixer fermement la piêce à travailler Utiliser des agrafes ou un étau pour la maintenir C est plus sûr que d utiliser ses mains et cela les libêre pour faire fonctionner l outil 13 Ne pas présumer de ses forces Essayer de garder son équilibre en toute circonstance 14 Entretenir les outils avec soin Les conserver bien aiguisés et les nettoyer afin d en obtenir les meilleures performances et de ...

Page 23: ...toujours fermenent la poignée principale et la poignée latérale de la machine Dans le cas contraire la force de recul peut amoindrir la précision de travail et présenter aussi quelque danger SPECIFICACIONS Assurez vous de vérifier la plaque signalétique se trouvant sur le produit car elle peut changer suivant les régions ACCESSOIRES EN OPTION vendus séparément 1 Perçage de trous d ancrage rotation...

Page 24: ... Raccord de mise en place de la fixation Tige SDS plus pour perceuse électrique Longueur totale 160 260 mm Dimension de l ancrage W1 4 W5 16 W3 8 䡬 Raccord de mise en place de la fixation pour marteau Dimension de l ancrage W1 4 W5 16 W3 8 W1 2 W5 8 Raccord de mise en place de la fixation pour marteau Tupe de cône Foret de perçage utilisé Cône Morse No 1 Foret de perçage utilisé 11 0 17 5 mm queue...

Page 25: ...pour des couronnes extérieur de 25 mm de 29 mm d un diamètre extérieur de 25 mm et 29 mm 4 Travail de démolissage rotation frappe Pointe de broyage type rond uniquement Tige SDS plus 3 Perçage de trou à large diamètre rotation frappe 䡬 Goujon couronne queue de couronne et plaque de guidage Goujon Couronne Queue de couronne Tige SDS plus 5 Mise en place du booulon pour d ancre chimique rotation fra...

Page 26: ...ris la clé de mandrin et mandrin pour percer l acier ou le bois 8 Vis d entraînement rotation uniquement No de mèche dimension de vis Longueur No 2 3 5 mm 25 mm No 3 6 8 mm 25 mm 9 Capuchon anti poussière Collecteur à poussière B Les accessoires standards sont sujets à changement sans préavis Capuchon anti poussière Collecteur à poussière B 10 Graisse A pour marteau 500 g en boîte 70 g en tube ver...

Page 27: ...pluse facile 䡬 Lors de la mise sous tension du marteau perforateur alors le collecteur à poussière B est détaché de la surface en béton le collecteur à poussière B va tourner en même temps que le foret Ne bien activer l interrupteur de mise sous tension qu après avoir appuyé le collecteur à poussière B sur la surface en béton Si le collecteur à poussière B est utilisé avec un foret de plus de 190 ...

Page 28: ...is à bois Fig 9 1 Sélection d une mèche appropriée Utilisez des vis à tête cruciforme autant que possible étant donné que la mèche glisse souvent de la tête des vis ordinaires 2 Enfoncement de vis à bois 䡬 Avant d enfoncer des vis à bois préparez d abord des trous appropriés aux vis utilisées dans le bois Appliquez la mèche aux fentes de la tête de la vis et enfoncez la vis dans le bois en douceur...

Page 29: ...r après avoir retiré le goujon central et la plaque de guidage de la couronne 4 Si l on applique une force excessive cela donnera un travail bâclé et abîmera la pointe du foret de perçage réduisant ainsi la durée de service de la perceuse à percussion ATTENTION Quand on retire le goujon central et la plaque de guidage mettre l interrupteur sur la position d arrêt OFF et débrancher la perceuse 3 Dé...

Page 30: ...ifications sans avis préalable Au sujet du bruit et des vibrations Les valeurs mesurées ont été déterminées en fonction de la norme EN50144 Le niveau de pression acoustique pondéré A est de 90 dB A Le niveau de puissance sonore type est de 103 dB A Porter un casque de protection Valeur d accélération moyenne quadratique pondérée type 8 0 m s2 ...

Page 31: ...tti fermi Fissare saldamente l oggetto in una morsa Èpiù sicuro che non tenendolo fermo con le mani che restano libere per maneggiare l elettroutensile 13 Non squilibrare il corpo durante l esecuzione di un lavoro Stare sempre su due piedi in equilibrio stabile 14 Trattare gli utensili elettrici con cura Tenerli sempre puliti ed affilati per un funzionamento migliore e più sicuro Seguire le istruz...

Page 32: ...oro impreciso e persino pericoloso Model DH24PA DH24PB Voltaggio per zona 110V 115V 120V 127V 220V 230V 240V Potenza assorbita 620W Velocità senza carico 1050 min 0 1050 min Frequenza d impatto a pieno carico 4400 min 0 4400 min Capacità cemento 3 4 24 mm acciaio 13 mm legno 32 mm Peso 2 3 kg escluso il cavo e l impugnatura laterale ACCESSORI STANDARD 1 Valigetta in plastica 1 2 Impugnatura latera...

Page 33: ...m Asta SDS Plus Diametro esterno 11 0 mm 12 3 mm 12 7 mm 14 3 mm 14 5 mm 17 5 mm 21 5 mm Chiave per mandrino Punta a diamanti dritta per trapanare a percossa 2 Ancoraggio 䡬 Adattatore per ancoraggio per trapano a percussione elettrico Adattatore per ancoraggio Asta SDS Plus per trapano a percussione elettrico Lunghezza totale 160 260 mm 䡬 Adattatore per ancoraggio per inserimento con martello manu...

Page 34: ...di corona di 25 mm o 29 mm diametro 4 Lavoro di rottura rotazione percussione Punta gigante Solo tipo rotondo Asta SDS Plus 3 Forature ad ancoraggio rotazione percussione 䡬 Punta della corona corona gambo della corona e piastra guida Punta della corona Corona Gambo della corona Asta SDS Plus 5 Operazioni di perforazione dell ancoraggio chimico rotazione percussione Asta SDS Plus Adattatore dell an...

Page 35: ...3 mm con chiave e mandrino per foratura nell acciaio e nel legno 8 Viti d guida solo relazione Adattatore D per mandrino Asta SDS Plus Punta in Dimensioni vite Lunghezza No 2 3 5 mm 25 mm No 3 6 8 mm 25 mm Mandrino 13 VLA Chiave per mandrino Punta in 9 Contenitore a polvere Camera a polvere B Gli accessori disponibili a richiesta sono soggetti a modifiche senza preavviso 10 Grasso A per martello 5...

Page 36: ...amente necessario eserciatare una grande forza sul trapano Spingere invece il trapano solo leggermente in modo che si veda la polvere uscire dal foro APPLICAZIONI Con azione combinate di rotazione e percussione 䡬 Apertura di fori da ancoraggio 䡬 Apertura di fori nel cemento armato 䡬 Apertura di fori in tegole Con sola rotazione 䡬 Foratura di acciaio o legno con accessori disponibili a richiesta 䡬 ...

Page 37: ...g 9 1 Scelta dalla punta Se possibile usare una vite con testa a croce Usando una vite con testa a meno la punta potrebbe scivolare fuori facilmente 2 Avvitamento di viti del legno 䡬 Prima di avvitare viti del legno eseguire un foro quida nel materiale da avvitare Disporre la punta sulla acanalatura della testa della vite e avvitare con cura 䡬 Far girare prima il giravite a bassa velocità per un m...

Page 38: ...se sono consumate In tal caso sostituirle con delle spazzole nuove dello stesso numero come indicato nella Fig 18 Si raccomanda inoltre di mantenere le spazzole di carbone sempre pulite e di controllare che scorrano agevolmente nel portaspazzole 5 Sostituzione di una pazzola di carbone Fig 19 䡬 Rimozione 1 Allentare le tre viti nel coperchio del calcio e togliere il coperchio del calcio 2 Sollevar...

Page 39: ...ventiva comunicazione Informazioni riguardanti i rumori trasmessi dall aria e le vibrazioni I valori misurati sono stati determinati in conformità a EN50144 Il livello di pressione sonora pesato A tipico è di 90 dB A Il livello di potenza sonora tipico è di 103 dB A Indossare protezioni per le orecchie Il valore efficace pesato tipico dell accelerazione è di 8 0 m s2 ...

Page 40: ...pe hoeken 12 Neem de uiterste veiligheid in acht Gebruik klemmen of een bankschroef om het werkstuk vast te zetten Hierdoor heeft u uw handen vrij om het gereedschap te bedienen 13 Buig u nooit te ver naar voren Kies een goede plaats en behoud altijd uw evenwicht 14 Behandel het gereedschap voorzichtig Zorg ervoor dat het gereedschap scherp en schoon is zodat een goed en veilig prestatievermogen w...

Page 41: ...er iets uitbreekt dient gecontroleerd te worden of er electrische kabels of leidinegn onder liggen 4 Hund de handgrepen van het elektrisch gereedschap altijd stevig vast Zoniet dan zal de tegendruk onzuiver werk of gevaarlijke sit dan uaties in de hand werken TECHNISCHE GEGEVENS EXTRA TOEBEHOREN los te verkrijen 1 Boren van ankergaten draaien stoten 䡬 Boorstuk smalle as schacht STANDAARD TOEBEHORE...

Page 42: ... 260 mm Anker formaat W1 4 W5 16 W3 8 䡬 Ankerstellingsadaptor voor normale hamer Anker formaat W1 4 W5 16 W3 8 W1 2 W5 8 Ankerstellingsadaptor voor normale hamer Sleutel Soort taper Toepasbaar boorstuk Morse taper Nr 1 Boorstuk 11 17 5 mm vernauwde schacht Morse taper Nr 2 Boorstuk 21 5 mm vernauwde schacht A taper DevernauwdeschachtadaptorgevormdeA taper of B taper is aanwezig maar het boorstuk e...

Page 43: ...Kernstuk buitendiameter Kernstukschacht 25 mm 29 mm A 32 mm Kernstukschacht A Middenpin A 35 mm 38 mm 45 mm Middenpin B B 50 mm Kernstukschacht B Gebruik geen kernstukken Met pasplaatje met een buitendiameter Het plaatje is niet van toepassing voor 25 mm van 25 mm of 29 mm en 29 mm kernstuk 5 Bout aanbrengwerk voor chemische anker draaien stoten SDS Plus schacht 12 7 mm chemische ankeradapter 19 m...

Page 44: ...het boren in staal of hout 8 Drijven van schroeven alleen draaibeweging Boorstuk Nr Schroefmaat Lengte Nr 2 3 5 mm 25 mm Nr 3 6 8 mm 25 mm 9 Stofvangkap Stofverzamelaar B De extra toebehoren kunnen zonder aankondiging op ieder moemnt worden veranderd 10 Hammer Grease A 500 gr in een blik 70 gr in een groene tube 30 gr in een groene tube Boorstuk Nr Boorkop 13 VLA Boorkop 13 VLR Boorkopadaptor D SD...

Page 45: ...kelen van de boorhamer terwijl de stofverzamelaar B niet tegen het beton oppervlak aan sluit zal de stofverzamelaar B met de boorkop mee draaien Let dus op dat u de schakelaar pas indrukt nadat u de stofverzamelaar B stevig tegen het betonnen oppervlak gedrukt heeft Bij gebruik van de stofverzamelaar B met een boorkop die in totaal meer dan 190 mm lang is kan de stofverzamelaar B het betonnen oppe...

Page 46: ...p de kop van de schroef en draai deze langzaam naar binnen 䡬 Draai de boorhamer eerst langzaam totdat deschroef gedeeltelijk is ingedreven en trek dan verder aan de schakelaar om optimale drijfkracht te verkrijgen LET OP Neem voorzichtigheid in acht bij het maken van een gat voor de schroef met de hardheid van het hout dient rekening gehouden te worden Als het gat te klein is of te ondiep hetgeen ...

Page 47: ...ls in de borstelhouder te trekken 3 Trek de klem van de borstel af en neem de koolborstel uit de borstelhouder 䡬 Montage 1 Zet de nieuwe koolborstel in de borstelhouder en sluit de klem aan de koolborstel aan 2 De borstelhouder en de overige delen worden zoals aangetoond in Afb 19 3 De kabel wordt op de voorgeschreven plaats gebracht Er moet zorgvuldig op gelet worden dat de kabel niet in aanrakin...

Page 48: ...que usar las manos ademas ambas manos quedan libres para operar la herramienta 13 No extenderse excesivamente para efectuar un trabajo Mantener en todo momento un buen balance y base de apoyo 14 Mantener cuidadosamente las herramientas Tener las siempre limpias y afiladas para obtener un mejor rendimiento y un funcionamiento más seguro Seguir siempre las instrucciones para la lubricación y el camb...

Page 49: ...do con el país de destino 3 Antes de empezar a romper picar o perforar en una pared suelo o techo comprobar cuidadosamente que no hayan objetos empotrados tales como cables o conductos eléctricos 4 Sujetar siempre firmemente el asidero del cuerpo y el asidero lateral de la herramienta De lo contrario la contrafuerza producida podría causar un funcionamiento impreciso e incluso peligroso ACCESORIOS...

Page 50: ... 13 mm Para la operación de taladrado cuando emplee una broca de vástago recto para taladrar con un martillo perforador Diámetro externo 11 0 mm 12 3 mm 12 7 mm 14 3 mm 14 5 mm 17 5 mm 21 5 mm Llave de portabrocas Portabrocas del martillo perforador de 13 mm SDS más vástago Adaptador cónico SDS más vástago Chaveta 䡬 Broca de taladro vástago cónico y adaptador cónico Broca de taladro Vástago cónico...

Page 51: ...ion golpeteo Puntero Tipo redondo solamente SDS más vástago 䡬 Adaptador de montaje de ancla para martillo manual Medida de ancla W1 4 W5 16 W3 8 W1 2 W5 8 Adaptador de montaje de ancla para martillo manual 3 Pertoración de orificio de diámetro grande rotation golpeteo 䡬 Pasador central barrena tubular espiga de la barrena tubular y placa guía Pasador central Barrena tubular Espiga de la barrena tu...

Page 52: ...a perforación de orificios en hormigón o madera 8 Colocación de tornillos rotación solamente No de broca Tamaño del tornillo Longitud No 2 3 5 mm 25 mm No 3 6 8 mm 25 mm No de broca Portabrocas 13 VLA Adaptador D del portabrocas SDS más vástago Liave de portabrocas Adaptador D del portabrocas SDS más vástago 9 Copa de polvo Colector de polvo B Los accesorios de norma están sujetos a cambio sin pre...

Page 53: ...o ponga en funcionamiento del martillo perforador meintras el colector de polvo B esté separado de la superficie de hormigón dicho colector girará junto con la broca Cerciórese de apretar el gatillo interruptor después de haber presionado la copa de polvo sobre la superficie de hormigón Cuando emplee la copa de polvo con una broca de no más de 190 mm de longitud total el colector de polvo B no pod...

Page 54: ... Antes de atornillar los tornillos para madera hay que hacer orificios apropiados en la madera aplicando luego la broca destornillador en la cabeza del tornillo y colocar asi éste en los orificios 䡬 Luego de hacer rotar la herramienta lentamente hasta que el tornillo quede parcialmente metido en la madera apretar más el gatillo para obtener la fuerza óptima de atornillado PRECAUCIÓN Tener cuidado ...

Page 55: ...s al motor Al equiparse la escobilla de carbón de autoparada el motor se detiene automáticamente En ese momento hay que proceder a cambiar las escobillas de carbón por las nuevas que tienen los mismos números de escobillas de carbón que se muestran en la Fig 18 Además siempre hay que mantener las escobi llas de carbón limpias y asegurar que se mueven libremente en sus portaescobillas 5 Reemplazo d...

Page 56: ...io aviso Información sobre el ruido propagado por el aire y vibración Los valores medidos fueron determinados de acuerdo con EN50144 El nivel de presión acústica de ponderación A típica es de 90 db A Nivel de potencia acústica típico 103 dB A Utilice protectores para los oídos Valor medio cuadrático ponderado típico de aceleración 8 0 m s2 ...

Page 57: ...u contato com óleo e objetos cortantes 12 Mantenha fixa a peça a trabalhar Utilize dispositivos de fixação ou uma morsa para prender a peça a trabalhar É mais seguro do que a fixação manual e permite manejar a ferramenta com ambas as mãos 13 Controle sua posição Escolha uma posição segura e mantenha sempre o equilíbrio 14 Efetue uma manutenção cuidadosa das ferramentas Tenha as ferramentas sempre ...

Page 58: ...ou furar paredes chão ou teto verifique minuciosamente se não existem cabos elétricos ou condutos embutidos nesses locais 4 Segure sempre com firmeza as empunhadeiras do corpo e lateral da ferramenta elétrica Se isto não for feito a força contrária produzida pode resultar numa operação imprecisa e até mesmo perigosa Os acessórios padrão estão sujeitos a mudanças sem aviso prévio ACESSÓRIOS OPCIONA...

Page 59: ...e impacto com um martelo perfurador 2 Montagem de âncora 䡬 Adaptador de montagem de âncora para martelo perfurador elétrico 䡬 Adaptador de montagem de âncora para martelo manual 3 Perfuração de furos grandes rotação martelada 䡬 Pino central coroa cabo de coroa placa guia Cabodehasteretopara perfuração de impacto Mandril de 13 mm de martelo perfurador cabo SDS plus Chave de mandril Adaptador de mon...

Page 60: ... A 32 mm Cabo de coroa A Pino central A 35 mm 38 mm 45 mm Pino central B B 50 mm Cabo de coroa B Não use coroas com diâmetro externo de 25 mm e de 29 mm com placa guia A placa guia não está equipada com coroas de diâmetro externo de 25 mm e de 29 mm Ponta macho somente o tipo redondo cabo SDS plus Encaixe padrão do mercado Adaptador de mandril G cabo SDS plus Chave de mandril Parafuso especial cab...

Page 61: ... acessórios opcionais ANTES DA OPERAÇÃO 1 Fonte de energia Certifique se de que a fonte de energia a ser utilizada está conforme às exigências especificadas na placa identificadora do produto 2 Interruptor Certifique se de que o interruptor está na posição desligada Se o plugue estiver conectado a um receptáculo quando o interruptor estiver ligado a ferramenta elétrica vai começar a operar imediat...

Page 62: ... o gatilho e pressionar a alavanca de parada o interruptor se mantém na posição ON ligado para operação contínua Para desligar o perfurador aperte novamente o gatilho do interruptor e solte o 2 DH24PB A velocidade de rotação da broca pode ser controlada sem etapas intermediárias variando se a intensidade de aperto do gatilho do interruptor A velocidade é baixa quando se aperta ligeiramente o gatil...

Page 63: ...etra em grandes orifícios utilize a coroa para cargas leves Nesse momento utilize com o pino central e o cabo de coroa fornecidos como acessórios adicionais 1 Montagem CUIDADO Certifique se de desligar a máquina e desconectar o plugue da tomada 1 Monte a coroa no cabo da coroa Fig 13 Lubrifique a rosca do cabo da coroa para facilitar a desmontagem 2 Monte a coroa no martelo perfurador Fig 14 3 Ins...

Page 64: ...coloque a proteção do cabo cuidadosamente de modo a prendê la firmemente com os três parafusos CUIDADO Caso o fio de ligação seja comprimido pela proteção do cabo ou entre em contato com o induzido ou as peças giratórias do motor o operador da ferramenta corre um grave perigo de choque elétrico Seja extremamente cauteloso ao desmontar e remontar o motor seguindo exatamente os procedimentos acima d...

Page 65: ...ιγκτήρες ή µια µέγγενη για το κράτηµα του αντικειµένου πάνω στο οποίο εργάζεστε Είναι πιο ασφαλές απ το να χρησιµοποιείτε το χέρι σας και επιπρ σθετα ελευθερώνει και τα δυο χέρια για να λειτουργήσετε το εργαλείο 13 Μην προεκτείνεστε ιατηρήστε πάντοτε το κατάλληλο πάτηµα και ισορροπία 14 Συντηρείτε τα εργαλεία µε προσοχή ιατηρείτε τα εργαλεία που κ βουν αιχµηρά και καθαρά για καλύτερη και ασφαλέστε...

Page 66: ...τική και ακ µα επικίνδυνη λειτουργία ΤΕΧΝΙΚΑ ΧΑΡΑΚΤΗΡΙΣΤΙΚΑ Μοντέλο DH24PA DH24PB Τάση ανά περιοχές 110V 115V 120V 127V 220V 230V 240V Ισχύς εισ δου 620W Ταχύτητα χωρίς φορτίο 1050 min 0 1050 min Ταχύτητα κρούσης πλήρους φορτίου 4400 min 0 4400 min Iκαν τητα τσιµέντο 3 4 24 mm ατσάλι 13 mm ξύλο 32 mm Βάρος χωρίς καλώδιο και πλευρική λαβή 2 3 kg K φτης Λεπίδα τρυπανιού Λεπτοµήκη στέλεχος Προσαρµογέ...

Page 67: ...υ άγκιστρου για χειροκίνητη σφύρα Προσαρµογέας για την τοποθέτηση του άγκιστρου SDS plus στέλεχος για ηλεκτρικ περιστροφικ σφυροδράπανο Συνολικ µήκος 160 260 χιλ Μέγεθος άγκιστρου W1 4 W5 16 W3 8 Μέγεθος άγκιστρου W1 4 W5 16 W3 8 W1 2 W5 8 Οδηγητική πλάκα Κυλινδρικ κοπτικ τµήµα Στέλεχος κυλινδρικού κοπτικού τµήµατος SDS plus στέλεχος 䡬 13 χιλ σφικτήρας Περιστροφικού σφυροδράπανου Για εργασίες τρυπ...

Page 68: ...lus στέλεχος 12 7 χιλ Προσαρµογέας Χηµικού Άγκιστρου 19 χιλ Προσαρµογέας Χηµικού Άγκιστρου Σφικτήρας τρυπανιού 13 VLR µε οδηγητική πλάκα Η οδηγητική πλάκα δεν είναι εφοδιασµένη µε κυλινδρικά κοπτικά τµήµατα µε εξωτερική διάµετρο 25 χιλ και 29 χιλ Μην χρησιµοποιήσετε κυλινδρικά κοπτικά τµήµατα µε εξωτερική διάµετρο 25 χιλ και 29 χιλ 4 Λειτουργία θρυµµατίσµατος περιστροφή κτύπηµα 5 Τοποθέτηση µπουλο...

Page 69: ... ΠΡΙΝ ΤΗ ΛΕΙΤΟΥΡΓΙΑ 1 Πηγή ρεύµατος Βεβαιωθείτε τι η πηγή ρεύµατος που πρ κειται να χρησιµοποιηθεί είναι εναρµονισµένη µε τις απαιτήσεις σε ρεύµα που αναφέτεται στην πινακίδα του εργαλείου 2 ιακ πτης ρεύµατος Βεβαιωθείτε τι ο διακ πτης ρεύµατος βρίσκεται στη θέση OFF Αν το βίσµα είναι στη µπρίζα καθώς ο διακ πτης ρεύµατος βρίσκεται στο ΟΝ το εργαλείο θα αρχίσει να λειτουργεί αµέσως µε πιθαν τητα π...

Page 70: ... πίσω πλευρά πατώντας την R πλευρά του αναστρεφ µενου µοχλού Η L πλευρά του µοχλού πατιέται για να περιστρέψει την λεπίδα προς τα αριστερά ΠΩΣ ΝΑ ΤΟ ΧΡΗΣΙΜΟΠΟΙΗΣΕΤΕ ΠΡΟΣΟΧΗ Για την αποφυγή ατυχηµάτων σιγουρευτείτε να κλείσετε το διακ πτη και να αποσυνδέσετε το βίσµα απ την πρίζα κατά την εγκατάσταση και αφαίρεση των διάφορων λεπίδων του τρυπανιού και των διάφορων άλλων µερών Ο διακ πτης θα πρέπει ...

Page 71: ...πει στο ξύλο πατήστε το διακ πτη πιο δυνατά για να αποκτήσετε τη βέλτιστη δύναµη για το βίδωµα ΠΡΟΣΟΧΗ ώστε προσοχή στην προετοιµασία της δοκιµαστικής τρύπας που είναι κατάλληλη στην ξυλ βιδα λαµβάνοντας υπ ψην τη σκληρ τητα του ξύλου Αν η τρύπα είναι υπερβολικά µικρή ή ρηχή που απαιτεί µεγάλη δύναµη για να βιδωθεί η βίδα µέσα της το σπείρωµα της ξυλ βιδας µπορεί µερικές φορές να καταστραφεί 6 Χρή...

Page 72: ...ναλώσιµα µέρη Οταν φθαρούν ή ταν φθάσουν κοντά στο ριο φθοράς µπορεί να προκαλέσουν πρ βληµα στο µοτέρ ταν είναι εφοδιαµένο µε ένα καρβουνάκι αυτ µατης διακοπής το µοτέρ θα σταµατήσει αυτ µατα Σε αυτή τη στιγµή αντικαταστήστε και τα δύο καρβουνάκια µε καινούργια τα οποία έχουν τους ίδιους αριθµούς άνθρακα που φαίνονται στην Εικ 18 Επιπρ σθετα πάντοτε κρατάτε τα καρβουνάκια καθαρά και εξασφαλίσετε ...

Page 73: ...ιδοποίηση ΣΗΜΕΙΩΣΗ Εξαιτίας του συνεχιζ µενου προγράµµατος έρευνας και ανάπτυξης της Hitachi τα τεχνικά χαρακτηριστικά που εδώ αναφέρονται µπορούν να αλλάξουν χωρίς προηγούµενη ειδοποίηση Πληροφορίες που αφορούν τον εκπεµπ µενο θ ρυβο και τη δ νηση Οι τιµές µετρήθηκαν σéµφωνα µε το ΕΝ50144 Ένα τυπικ επίπεδο πίεσης ήχου Α 90 dB Α Tο τυπικ επίπεδο ηχητικής ισχύς 103 dB A Φοράτε προστατευτικà αυτιών ...

Page 74: ...73 32A 27A 35A 60 59 58 71 DH24PA ...

Page 75: ...S2L 44 876 796 1 P 22 45 608 DDM 1 608DDC2PS2L 46 982 631 2 47 1 360 446U 1 110V 115V 45 56 53 47 2 360 446E 1 220V 230V 47 3 360 446F 1 240V 48 314 879 1 49 49 994 343 2 50 1 340 398C 1 110V 115V 50 2 340 398E 1 220V 230V 50 3 340 398F 1 240V 51 314 886 1 52 314 884 1 53 608 VVM 1 608VVC2PS2L 54 314 889 1 55 1 A B C D 56 314 883 1 57 1 314 892 1 57 2 314 893 1 GBR 110V 58 301 653 3 D4 20 59 314 8...

Page 76: ...75 32A 27A 35A 72 502 503 501 504 44 45 46 DH24PB ...

Page 77: ...45 608 DDM 1 608DDC2PS2L 46 982 631 2 47 1 360 446U 1 110V 115V 45 56 53 47 2 360 446E 1 220V 230V 47 3 360 446F 1 240V 48 314 879 1 49 49 994 343 2 50 1 340 398C 1 110V 115V 50 2 340 398E 1 220V 230V 50 3 340 398F 1 240V 51 314 914 1 52 1 314 919 1 GBR 100V 52 2 314 920 1 53 608 VVM 1 608VVC2PS2L A B C D 54 314 889 1 55 1 56 314 912 1 57 314 915 1 58 301 653 3 D4 20 59 314 891 1 60 1 314 916 1 11...

Page 78: ...77 ...

Page 79: ...dquisición 4 Nombre y dirección del cliente 5 Nombre y dirección del distribudor Se ruega poner el sellú del distribudor con su nombre y dirección CERTIFICAT DE GARANTIE 1 No de modèle 2 No de série 3 Date d achat 4 Nom et adresse du client 5 Nom et adresse du revendeur Cachet portant le nom et l adresse du revendeur CETTIFICADO DE GARANTIA 1 Nùmero do modelo 2 Nùmero do série 3 Data de compra 4 N...

Page 80: ...79 1 2 3 4 5 ...

Page 81: ...ore bit shank Bohrkronenzapfen Queue de couronne Thread Gewinde Filetage Center pin Mittelstift Goujon central Guide plate Führungsplatte Plaque de guidage Core bit tip Bohrkronenspitze Bout de couronne Wear limit Verschleißgrenze Limite d usure No of carbon brush Nr der Kohlebürste No de balai en carbone Usual carbon brush Gewöhnliche Kohlebürste Balai en carbone ordinaire Auto stop carbon brush ...

Page 82: ...336 CEE y 98 37 CE Esta declaración se aplica a los productos con marcas de la CE Portugûes DECLARAÇÃO DE CONFORMIDADE CE Declaramos sob nossa única e inteira responsabilidade que este produto está de acordo com as normas ou documentos normativos EN50144 EN55014 e EN61000 3 em conformidade com as Diretrizes 73 23 CEE 89 336 CEE e 98 37 CE do Conselho Esta declaração se aplica aos produtos designad...

Reviews: