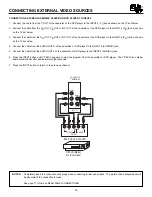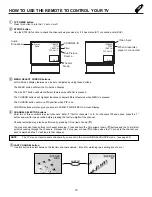
background image

6

HOOK-UP CABLES AND CONNECTORS

Most video/audio connections between components can be made with shielded video and audio cables that have phono connectors.
For best performance, video cables should use 75-Ohm coaxial shielded wire.  Cables can be purchased from most stores that sell
audio/video products.  Below are illustrations and names of common connectors.  Before purchasing any cables, be sure of the output
and input connector types required by the various components and the length of each cable.

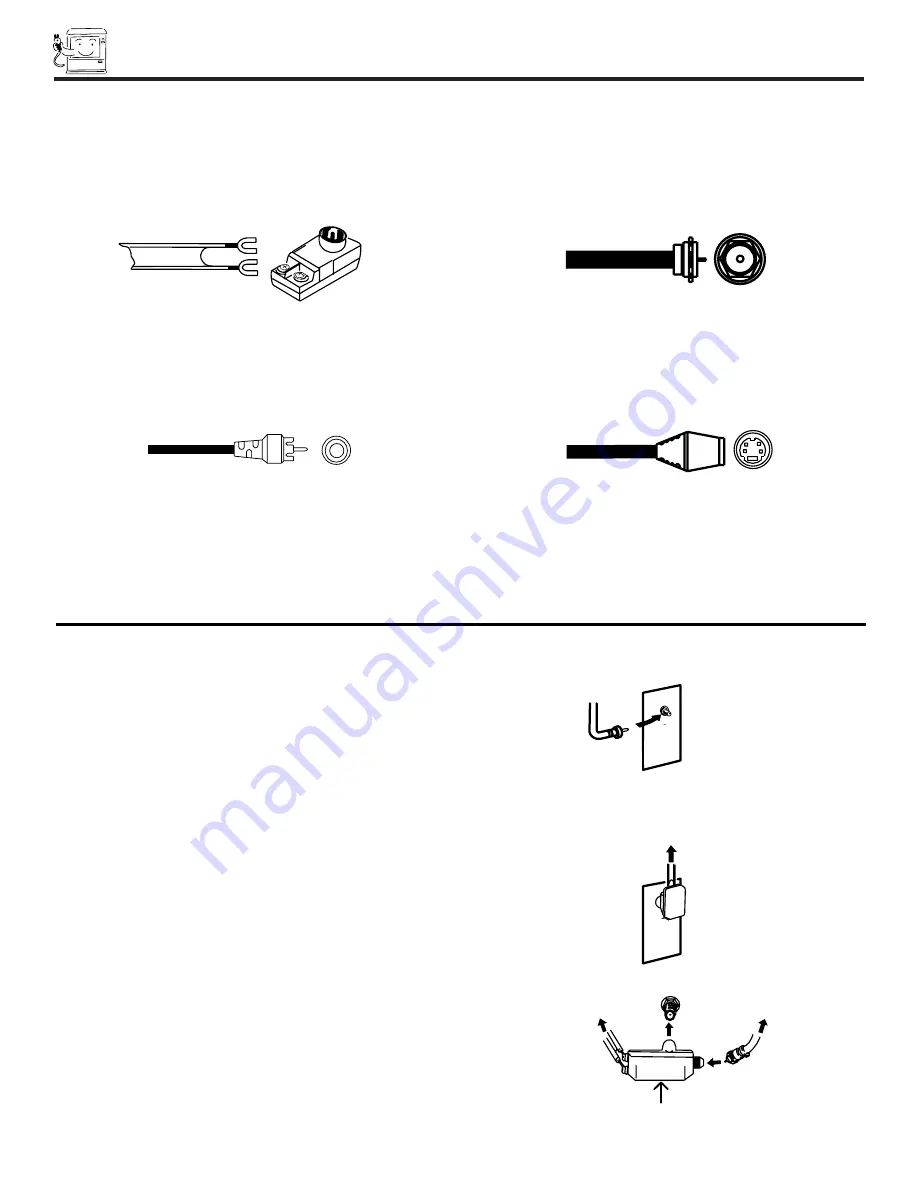
300-Ohm Twin Lead Connector
This outdoor antenna cable must be connected to an antenna
adapter (300-Ohm to 75-Ohm).

Phono Connector
Used on all standard video and audio cables which connect to
inputs and outputs located on the television’s rear jack panel and
front control panel.

''F'' Type 75-Ohm Coaxial Antenna Connector
For connecting RF signals (antenna or cable TV) to the antenna
terminal on the television.

S-VIDEO (Super Video) Connector
This connector is used on camcorders, VCRs, and laserdisc
players with an S-VIDEO feature in place of the standard video
cable to produce a high quality picture.

ANTENNA CONNECTIONS TO REAR JACK PANEL

VHF (75-Ohm) antenna/CATV (Cable TV)
When using a 75-Ohm coaxial cable system, connect the outdoor
antenna or CATV coaxial cable to UHF/VHF (75-Ohm) terminal.

VHF (300-Ohm) antenna/UHF antenna
When using a 300-Ohm twin lead from an outdoor antenna,
connect the VHF or UHF antenna leads to screws of the VHF or
UHF adapter.  Plug the adapter into the antenna terminal on the
TV.

When both VHF and UHF antennas are connected
Attach an optional antenna cable mixer to the TV antenna
terminal, and connect the cables to the antenna mixer. Consult
your dealer or service store for the antenna mixer.

To outdoor antenna

or CATV cable

To second antenna

or cable system

Antenna mixer

ANT A/ANT B

To UHF

Antenna

To outdoor

antenna or

CATV system

To outdoor VHF

or UHF antenna

UHF/VHF

Summary of Contents for 50DX20B

Page 1: ...NS 2 3 FIRST TIME USE 4 16 THE REMOTE CONTROL ULTRATEC BIT MAP ON SCREEN DISPLAY USEFUL INFORMATION INDEX 55 60 29 54 17 28 CUSTOMIZE SETUP VIDEO AUDIO THEATER SEL As an ENERGY STAR Partner Hitachi Ltd has determined that this product meets the ENERGY STAR guidelines for energy efficiency ...

Page 2: ...n the literature accompanying the appliance WARNING TO PREVENT FIRE OR SHOCK HAZARD DO NOT EXPOSE THIS TELEVISION TO RAIN OR MOISTURE NOTE There are no user serviceable parts inside the color television Model and serial numbers are indicated on back side of the television This television is not intended for use in a computer room POWER SOURCE THIS TELEVISION IS DESIGNED TO OPERATE ON 120 VOLTS 60H...

Page 3: ...ufacturer 17 An outdoor antenna should not be located in the vicin ity of overhead power lines or other electrical circuits 18 If an outside antenna is connected to the receiver be sure the antenna system is grounded so as to provide some protection against voltage surges and built up static charges Section 810 of the National Electric Code ANSI NFPA No 70 1984 provides information with respect to...

Page 4: ...size batteries for the remote control When replacing old batteries push them towards the springs and lift them out 3 Match the batteries to the and marks in the battery compartment 4 Replace the cover BOTTOM VIEW Lift up on tab to remove back cover 1 2 3 4 5 6 7 8 9 0 INPUT STATUS VOL CH POWER TV CBL SAT DVD VCR PIP SWAP MOVE FREEZE HELP PIP CH MENU MUTE EXIT LAST CH REC TV VCR PIX SELECT PART NAM...

Page 5: ...ample in direct sunlight or near a heating appliance etc VIEWING The major benefit of the HITACHI Projection Television is its large viewing screen To see this large screen at its best test various locations in the room to find the optimum spot for viewing The best picture is seen by sitting directly in front of the TV and about 10 to 18 feet from the screen Picture brightness decreases as the vie...

Page 6: ...tenna or cable TV to the antenna terminal on the television S VIDEO Super Video Connector This connector is used on camcorders VCRs and laserdisc players with an S VIDEO feature in place of the standard video cable to produce a high quality picture ANTENNA CONNECTIONS TO REAR JACK PANEL VHF 75 Ohm antenna CATV Cable TV When using a 75 Ohm coaxial cable system connect the outdoor antenna or CATV co...

Page 7: ...lows you to enter the MENU making it possible to set TV features to your preference without using the remote This button also serves as the SELECT button when in MENU mode INPUT EXIT button Press this button to select antenna sources VIDEO 1 2 3 or 4 Your selection is shown in the top right corner of the screen This button also serves as the EXIT button when in MENU mode CHANNEL selector Press the...

Page 8: ...area when selecting channels adjusting volume etc DIGITAL ARRAY Use this button to enter DIGITAL ARRAY mode This will allow you to adjust your picture quality to optimum performance see page 37 FRONT INPUT JACKS for VIDEO 3 Use these audio video jacks for a quick hook up from a camcorder or VCR to instantly view your favorite show or new recording Press the INPUT button until VIDEO 3 appears in th...

Page 9: ...e TV s PB input and the com ponents CR output to the TV s PR input It may be necessary to adjust TINT or turn AUTO COLOR ON to obtain optimum picture quality when using the Y PBPR inputs To ensure no copyright infringement the MONITOR OUT output will be abnormal when using the Y PBPR jacks Y PBPR can only receive 480i signals Input 4 Y VIDEO can be used for standard video input NOTE You may use VI...

Page 10: ...EXT R L REAR SPEAKER AUDIO TO HI FI AUDIO MONO L R AUDIO MONO L R AUDIO MONO L R R L OUTPUT Y P P L R DVD Player Laserdisc player etc See tips on page 11 R B L R INPUT Stereo System Amplifier 2 Way signal splitter INPUT V L R VCR 2 VCR 2 Outside antenna or cable TV coaxial cable Optional see tips on page 11 Cable TV Box OUTPUT INPUT VCR 1 OUTPUT V L R S VHS ANT IN MONITOR OUT INPUT 2 INPUT 1 S VID...

Page 11: ... left audio jack on the television Refer to the operating guide of your other electronic equipment for additional information on connecting your hook up cables A single VCR can be used for VCR 1 and VCR 2 but note that a VCR cannot record its own video or line output INPUT 1 in example on page 10 Refer to your VCR operating guide for more information on line input output connection You may use VID...

Page 12: ...em as shown below NOTE To prevent damage to the speaker and distorted sound set the volume control of the audio amplifier lower and adjust the sound using the remote control of the TV set TO AUDI O I NPUT TERM I NAL O F EXTERNAL AM PLI FI ER AUDI O AM PLI FI ER EXTERN AL SPEAKERS EXTERN AL SPEAKERS REAR O F TV SET AUDI O TO HI FITERM I NAL AUDIO TO HI FI R L ...

Page 13: ...then press the INPUT button as necessary to view the input source see page 20 NOTE When the TV is set to VIDEO and a video signal is not received from the VIDEO INPUT jack on the jack panel of the TV i e VCR laserdisc player etc is not connected or the video device is OFF the set will appear to be OFF CONNECTING A MONAURAL AUDIO VCR OR LASERDISC PLAYER 1 Connect the cable from the VIDEO OUT of the...

Page 14: ...STEREO VCR OR STEREO LASERDISC PLAYER 1 Connect the cable from the VIDEO OUT of the VCR or the laserdisc player to the INPUT VIDEO jack on the TV set below 2 Connect the cable from the AUDIO OUT R of the VCR or the laserdisc player to the INPUT AUDIO R jack 3 Connect the cable from the AUDIO OUT L of the VCR or the laserdisc player to the INPUT AUDIO L jack 4 Press the INPUT button to view the pro...

Page 15: ...of the Laserdisc or DVD player to the INPUT 4 AUDIO R jack 5 Connect the cable from the AUDIO OUT L of the Laserdisc or DVD player to the INPUT 4 AUDIO L jack 6 Press the INPUT button until Y PbPr 4 appears to view the program from the Laserdisc or DVD player The Y PbPr 4 icon disap pears automatically after approximately eight seconds 7 Press the INPUT button to return to the previous channel NOT...

Page 16: ...amplifier Use the AUDIO TO HI FI output on the TV These speakers are connected to the REAR SPEAKER 8 Ohm output on the TV SURROUND SURROUND REQUIRED OPTIONAL EFFECT FEATURE SWITCH CONNECTION CONNECTION OFF SP MATRIX Receive Mono and Stereo sound SURROUND MATRIX SP MATRIX Receive Movie Theater like sound SURROUND EXTERNAL EXT This feature turns off the TV s SPEAKERS internal speakers See page 9 for...

Page 17: ...r instructions on how to program the remote to control your DVD or VCR To operate your cable satellite box point the remote at the remote sensor of the cable satellite box and press the CBL SAT but ton The remote will now control your cable satellite box See page 27 for instructions on how to program the remote to control your cable satelllite box These buttons allow the remote to control your TV ...

Page 18: ... buttons to select the CHANNEL you wish to watch INPUT button Use this button to select the main or sub picture video source from the antenna or video inputs PIP CH button Use this button to select between main picture and sub picture tuning TV POWER button Press this button to turn the TV set On or Off EXIT button Use this button to exit all On Screen Display menus LAST CHANNEL LAST CH button Use...

Page 19: ...0 first for channels 1 to 9 For channels 100 and above press the 1 button and wait for two seconds before pressing the last two digits of the channel Channel selection may also be performed by pressing CH up or down You may also use these buttons for channel scanning Press and hold the CH up or down buttons and the TV will start quickly scanning through the channels Release the CH up or down butto...

Page 20: ...the video inputs and antenna source by every press of the INPUT button If the Sub Picture is chosen with the PIP CH button the Sub Picture will alternate between the video inputs and Antenna source by every press of the input button Ant 28 TAKA Video 1 VID1 INPUT INPUT Stereo St Sa Video 2 VID2 Video 4 VID4 Video 3 VID3 INPUT INPUT INPUT NOTE Signals priority Super Video Signal Has a higher priori...

Page 21: ...for a description PIP CH buton Use the PIP CH button to select between main picture and sub picture tuning The gray background on the channel number will indicate which channel is being controlled EXIT button When in MENU mode this button will exit On Screen Displays HELP button Press this button if help is needed to change menu setting and our context sensitive help system will provide explanatio...

Page 22: ...to watch more than one program at the same time You can watch a TV program while viewing other programs from the ANTENNA source or any of the video inputs PIP button Press the PIP button and a sub picture appears in one corner of the screen Press the button again to reduce the size of the sub picture Press the PIP button the fourth time to remove the sub picture from the screen Use the PIP CH butt...

Page 23: ...ground Green color MOVE button To move the sub picture to another corner press the MOVE button The sub picture moves one step counterclockwise every time the MOVE button is pressed Example below illustrates the MOVE operation CURSOR buttons The cursor button will move the PIP position to any of the four corners depending on which CURSOR button is pressed The PIP will move according to the directio...

Page 24: ...ton again Quick FREEZE button Press this button without a Sub Picture to freeze the picture you are currently viewing Press this button again to return to normal viewing CAUTION A pattern burn may develop if the Sub Picture is left in the same corner permanently If the PIP fea ture is used frequently occasionally shift the Sub Picture to a different corner You may also vary its position using the ...

Page 25: ...You must first program the remote to match the remote system of your VCR refer to page 28 1 Turn ON your VCR 2 Aim the remote control at the front of your VCR 3 Press the DVD VCR button to switch to the VCR pre coded mode 4 Hold down the DVD VCR button on the remote enter the two digit preset code that matches your VCR as shown on page 28 The remote will turn off your VCR when the correct two digi...

Page 26: ... Player refer to page 28 1 Turn ON your DVD Player 2 Aim the remote control at the front of your DVD Player 3 Press the DVD VCR button to switch to the DVD Player pre coded mode 4 Hold down the DVD VCR button on the remote enter the two digit preset code that matches your DVD Player as shown on page 28 The remote will turn off your DVD Player when the correct two digit preset code is entered When ...

Page 27: ...n ON your cable satellite box 2 Aim the remote control at the front of your cable satellite box 3 Press the CBL SAT button to switch to the cable satellite box pre coded mode 4 Hold down the CBL SAT button on the remote enter the two digit preset code that matches your cable satellite box as shown on page 28 The remote will turn off your cable satellite box when the correct two digit preset code i...

Page 28: ...ughes 33 Panasonic 34 RCA 30 35 Samsung 36 Sony 31 VCR BRAND CODE Aiwa 48 Daewoo 45 Emerson 20 21 22 23 24 Fisher 34 37 38 39 Funai 52 General Electric 33 Goldstar 36 Hitachi 00 01 02 03 04 05 06 JVC 18 49 50 51 Magnavox 12 13 14 Mitsubishi 27 28 29 30 NEC 40 41 Panasonic 10 11 Philips 14 Samsung 17 25 26 Scott 16 Sharp 31 32 Shintom 19 Sony 07 08 09 Symphonic 42 Teknica 46 Toshiba 15 DVD BRAND CO...

Page 29: ...ntrol to quickly exit from a menu 4 Press HELP on the remote control when a menu is displayed and text will appear giving a description of that menu This part of the screen shows what selections are available This part of the screen shows which remote control buttons to use To Quit Exit CUSTOMIZE SETUP VIDEO AUDIO THEATER SEL Menu Language Signal Source Auto Channel Set Channel Memory Channel List...

Page 30: ...w favorite channels Parental Control Block channel picture and sound 4 Event Program Turn TV on and off once daily or weekly Auto Link Automatically turn TV on with VIDEO 4 input Closed Caption Feature to display dialogue text Menu Background Select from two types of backgrounds Contrast Adjust contrast Brightness Adjust brightness Color Adjust color Tint Adjust tint Sharpness Adjust sharpness Res...

Page 31: ...e Press SELECT button to select the language of your choice Press EXIT to quit menu or CURSOR to return to previous menu MENU LANGUAGE SETUP CUSTOMIZE SETUP VIDEO AUDIO THEATER SEL Exit Exit CUSTOMIZE SETUP VIDEO AUDIO THEATER SEL Menu Language English Signal Source Francais Auto Channel Set Español Channel Memory Channel List Clock Set Digital Array Menu To Menu Bar To Quit Cursor Menu Language E...

Page 32: ...EL Exit CUSTOMIZE SETUP VIDEO AUDIO THEATER SEL Exit CUSTOMIZE SETUP VIDEO AUDIO THEATER SEL Cursor Menu Language Signal Source Antenna Auto Channel Set Catv 1 Channel Memory Catv 2 Channel List Clock Set Digital Array Menu To Menu Bar To Quit Menu Language Signal Source Antenna Auto Channel Set Catv 1 Channel Memory Catv 2 Channel List Clock Set Digital Array Menu To Menu Bar To Quit Menu Languag...

Page 33: ...e CHANNEL MEMORY to add or erase additional channels AUTO CHANNEL SET Exit CUSTOMIZE SETUP VIDEO AUDIO THEATER Exit CUSTOMIZE SETUP VIDEO AUDIO THEATER SEL Exit CUSTOMIZE SETUP VIDEO AUDIO THEATER SEL SELECT Cursor Auto Channel Set Installing Channel 110 88 Complete Menu To Menu Bar To Quit Menu Language Signal Source Auto Channel Set Begin Channel Memory Channel List Clock Set Digital Array Menu ...

Page 34: ... SETUP VIDEO AUDIO THEATER SELECT Cursor Menu To Menu Bar To Quit Menu Language Signal Source Auto Channel Set Channel 3 Channel Memory Add Channel List Erase Clock Set Digital Array Menu To Menu Bar To Quit Menu Language Signal Source Auto Channel Set Channel 3 Channel Memory Add Channel List Erase Clock Set Next Ch Digital Array Ch Ch or keys Menu To Menu Bar To Quit Menu Language Signal Source ...

Page 35: ... CURSOR CURSOR Channel List Ch Id Scan Lock 1 ON ON 2 3 4 5 6 7 8 Channel List Ch Id Scan Lock 9 ON ON 10 11 12 13 14 15 16 Menu To Menu Bar To Quit Exit Exit CUSTOMIZE SETUP VIDEO AUDIO THEATER SEL CUSTOMIZE SETUP VIDEO AUDIO THEATER SEL Menu To Menu Bar To Quit Exit CUSTOMIZE SETUP VIDEO AUDIO THEATER SEL Ant Ant Menu Language Signal Source Auto Channel Set Channel Memory Channel List Clock Set ...

Page 36: ... menu when the CURSOR is in the first position CLOCK SET CURSOR CURSOR Clock Set AM Jan 01 2001 Clock Set AM Mar 01 2001 Menu To Menu Bar To Quit Exit Exit CUSTOMIZE SETUP VIDEO AUDIO THEATER SEL CUSTOMIZE SETUP VIDEO AUDIO THEATER SEL Menu To Menu Bar To Quit Exit CUSTOMIZE SETUP VIDEO AUDIO THEATER SEL Menu Language Signal Source Auto Channel Set Channel Memory Channel List Clock Set Digital Arr...

Page 37: ...ou may want to converge align the colors Properly converged the lines appear white which is actually a combination of the outputs of the three color tubes The output of the green tube is stationary The outputs of the red and blue tubes can be adjusted When properly aligned the outputs of all three tubes should be directly over each other to produce the white lines To simplify convergence HITACHI i...

Page 38: ... label additional channels Select ERASE to erase a CHANNEL ID Press EXIT to quit menu or CURSOR to return to previous menu when the CURSOR is in the first position CHANNEL ID Exit CUSTOMIZE SETUP VIDEO AUDIO THEATER Exit CUSTOMIZE SETUP VIDEO AUDIO THEATER SEL Exit CUSTOMIZE SETUP VIDEO AUDIO THEATER Exit CUSTOMIZE SETUP VIDEO AUDIO THEATER A E ABC AMC AP BET BRVO A E ABC AMC AP BET BRVO SEL SEL S...

Page 39: ...dition NOTE VIDEO ID will be displayed only when VIDEO input is displayed as main picture VIDEO ID Exit CUSTOMIZE SETUP VIDEO AUDIO THEATER Exit CUSTOMIZE SETUP VIDEO AUDIO THEATER SEL Exit CUSTOMIZE SETUP VIDEO AUDIO THEATER Exit CUSTOMIZE SETUP VIDEO AUDIO THEATER SEL SEL SEL CAM CBL DVD LD SAT STB CAM CBL DVD LD SAT STB Cursor Menu To Menu Bar To Quit Channel Id Video Id Family Favorites Parent...

Page 40: ... with your favorite channels The channel to be added is displayed in the top right corner of the screen Enter channel 00 to erase a favorite channel To reset categories and channels back to original factory preset press STATUS while you are renaming a category FAMILY FAVORITES MENU Exit CUSTOMIZE SETUP VIDEO AUDIO THEATER SEL Exit CUSTOMIZE SETUP VIDEO AUDIO THEATER Exit SEL TO CHANGE LETTER STATU...

Page 41: ...a category using CURSOR or buttons Use CURSOR or buttons to highlight a favorite channel and the TV will automatically tune to that channel Press EXIT to remove FAMILY FAVORITES OSD from the screen FAMILY FAVORITES OPERATION CURSOR To Quit Exit To Quit Exit CURSOR Family Favorites Ch 12 MOVIES 3 6 8 10 FAMILY FAVORITES MOVIES 3 6 8 10 Ch 3 ...

Page 42: ...o tapes based on motion picture ratings Picture in Picture will also be blocked automatically When TV RATING is selected various types of television programming based on a parental guide ratings will be blocked Picture in Picture will also be blocked automatically Use CANADIAN RATINGS to block various types of movies and television programs based on the two rating systems used in Canada that you f...

Page 43: ...Bar To Quit Exit VIEW VIEW VIEW BLOCK BLOCK BLOCK BLOCK Movie Ratings G PG PG 13 R NC 17 X Not Rated NR Parental Control Enter Secret Code Channel 3 Video Lock Quick Lock Front Panel Lock TV Time Out Movie Ratings TV Ratings Canadian Ratings Eng Canadian Ratings Frn Cursor Cursor SEL CUSTOMIZE SETUP VIDEO AUDIO THEATER Contains no rating Not Rated NR and Not Applicable NA pro grams Movie has not b...

Page 44: ...y designed for a very young audience including children from ages 2 6 Not rated See Customer Caution General audience It contains little or no vio lence no strong language and little or no sex ual dialogue or situations NR TV Y TV Y7 TV G TV PG TV 14 TV MA Parents strongly cautioned This program may contain sophisticated themes intense sexual situation more intense violence and intensely suggestiv...

Page 45: ...able or only way to resolve conflict or encourage children to imitate dan gerous acts which they may see on television Any realistic depictions of violence will be infrequent discreet of low intensity and will show the consequences of the acts Other Content Guidelines There will be no profanity nudity or sexual content General Audience Violence Guidelines Will contain very little violence either p...

Page 46: ...the previous menu 8 General Not recommended for young children Programming intended for a broad audience but contains light or occasional violence that could disturb young children Viewing with an adult is therefore recommended for young children under the age of 8 who can not differentiate between real and imaginary portrayals General Programming intended for audiences of all ages Contains no vio...

Page 47: ...d the screen below will appear NOTE If no remote control button is pressed after ON Timer is activated the TV will automatically turn off after three hours CAUTION Do not use your TV as a deterrent when away from home by using the ON and OFF TIMERS For safety the TV should be turned off when you are away from home 4 EVENT PROG Exit Exit CUSTOMIZE SETUP VIDEO AUDIO THEATER SEL CUSTOMIZE SETUP VIDEO...

Page 48: ... only work with Video 4 input 2 Once the TV has been turned on using the AUTO LINK feature it must be reset before AUTO LINK is used again To do this turn your VCR laserdisc or DVD player OFF This feature is now reset and will turn on your TV as described above 3 When using REMOTE mode any remote control button will substitute for your video input device play button However intended operation is f...

Page 49: ...CUSTOMIZE SETUP VIDEO AUDIO THEATER SEL Exit CUSTOMIZE SETUP VIDEO AUDIO THEATER SEL Cursor Menu To Menu Bar To Quit Menu To Menu Bar To Quit Channel Id Video Id Family Favorites Parental Control 4 Event Program Auto Link Closed Caption Menu Background Closed Caption Display Off On Auto Mode C C Text Channel 1 2 This function allows you to choose from two menu backgrounds Use CURSOR or to highligh...

Page 50: ... will not affect the sub picture Use this function to adjust the level of color in the picture Use this function to adjust flesh tones so they appear natural It may be necessary to adjust TINT to obtain optimum picture quality when using the COMPONENT VIDEO Y PBPR INPUT 4 jacks Use this function to adjust overall picture brightness Use this function to adjust the amount of fine detail in the pictu...

Page 51: ... or channel changes It also maintains natural flesh tones while preserving fidelity of background colors This function will automatically set to on and cannot be turned off when the PERFECT PICTURE function is ON NOISE REDUCTION The NOISE REDUCTION function automatically reduces conspicuous noise in the picture without degrading picture quality This function will automatically set to on and cannot...

Page 52: ...ected and adjusted in the same manner This function controls the high frequency audio to all speakers This function will control the left to right balance of the TV internal speakers and the AUDIO TO HI FI output When RESET is selected press SELECT to return audio adjustments to factory preset conditions AUDIO BASS BALANCE RESET TREBLE Exit Exit 90 50 Bass Treble Balance Reset Advanced Settings 50...

Page 53: ...ER SEL Advanced Settings Stereo Mono Second Audio Program Internal Speakers Auto Noise Cancel Loudness Perfect Volume Adavanced Settings Stereo Mono Second Audio Program Internal Speakers Auto Noise Cancel Loudness Perfect Volume 72 50 Bass Treble Balance Reset Advanced Settings SELECT Cursor Menu To Menu Bar To Quit Menu To Menu Bar To Quit Menu To Menu Bar To Quit Cursor Cursor INTERNAL SPEAKERS...

Page 54: ...nd SPORTS to your preference to increase viewing performance and pleasure depending upon the video program being viewed However if RESET is selected all modes will reset to the initial con ditions as explained above When RESET is selected it will take approximately two seconds to return to factory conditions SPORTS mode Press EXIT to quit menu or CURSOR to return to previous menu Use this function...

Page 55: ...nyl products or cellophane tape on your television Do not touch the screen too often Do not subject the remote control to shocks such as dropping it on the floor etc Physical damage to the precision parts may result Avoid placing the remote control in a high humidity place or getting it wet Do not leave it on or near a heater Excessive heat or moisture may cause the unit to cease operation When th...

Page 56: ...efects in the antenna system such as unshielded leads or connecting several sets to the same antenna without using multiple antenna couplers SNOW If your receiver is located in the fringe area of a television station where the signal is weak your picture may be marred by the appearance of small dots When the signal is extremely weak it may be necessary to install a special antenna to improve the p...

Page 57: ... H E C K T H E S E I T E M S A N D T R Y T H E S E A D J U S T M E N T S No Picture no sound Sound OK picture poor Picture OK sound poor Picture blurred Lines or streaks in picture Poor reception on some channels Picture rolls vertically No color Poor color B e s u r e e x t e r n a l c o n n e c t i o n i s c o r r e c t B e s u r e p o w e r c o r d i s p l u g g e d i n B e s u r e T V i s s w ...

Page 58: ...sumption Refer to rear panel at the back of the TV Antenna input impedance 75 Ohm Channel coverage 181ch VHF Band 2 13 UHF Band 14 69 CATV Mid Band A 5 A 1 A I Super Band J W Hyper Band W 1 W 28 Ultra Band W 29 W 84 Video 1 0Vp p 75 Ohm S Video Luminance Y 1 0Vp p 75 Ohm Chrominance C 0 286Vp p 75 Ohm Audio input Impedance 47k Ohm Average input level 470mVrms Component Video Luminance Y 1 0Vp p 75...

Page 59: ...nt assistance Our service hotline operator will direct you to the Hitachi Authorized Service Facility nearest you Just present proof of purchase and or delivery receipts to the Hitachi Authorized Service Facility and service will be rendered in accordance with the terms of the limited warranty as stated on your warranty card or operating guide Should you have any questions regarding warranty servi...

Page 60: ...g call for a copy 1 800 HITACHI 1 800 448 2244 Au Canada 1 800 HITACHI 1 800 448 2244 Lundi Vendredi L EST 9 00am 7 00pm Samedi L EST 9 00am 5 00pm Pour de plus amples renseignements sur le service durant la période couverte par la garantie sur le fonc tionnement ou pour de l assistance technique communiquez avec La version français de votre manual se trouve a l exterieur de la boîte Si le manuel ...

Page 61: ...NOTES 61 ...

Page 62: ...NOTES 62 ...

Page 63: ...NOTES 63 ...

Page 64: ...QR47635 ...

Reviews: