background image

18

CONNECTION (continued) 

Connecting Procedure (continued) 

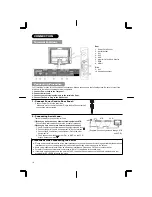
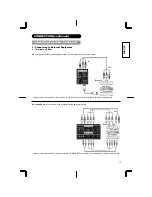
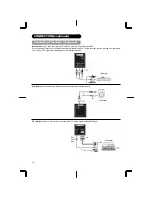
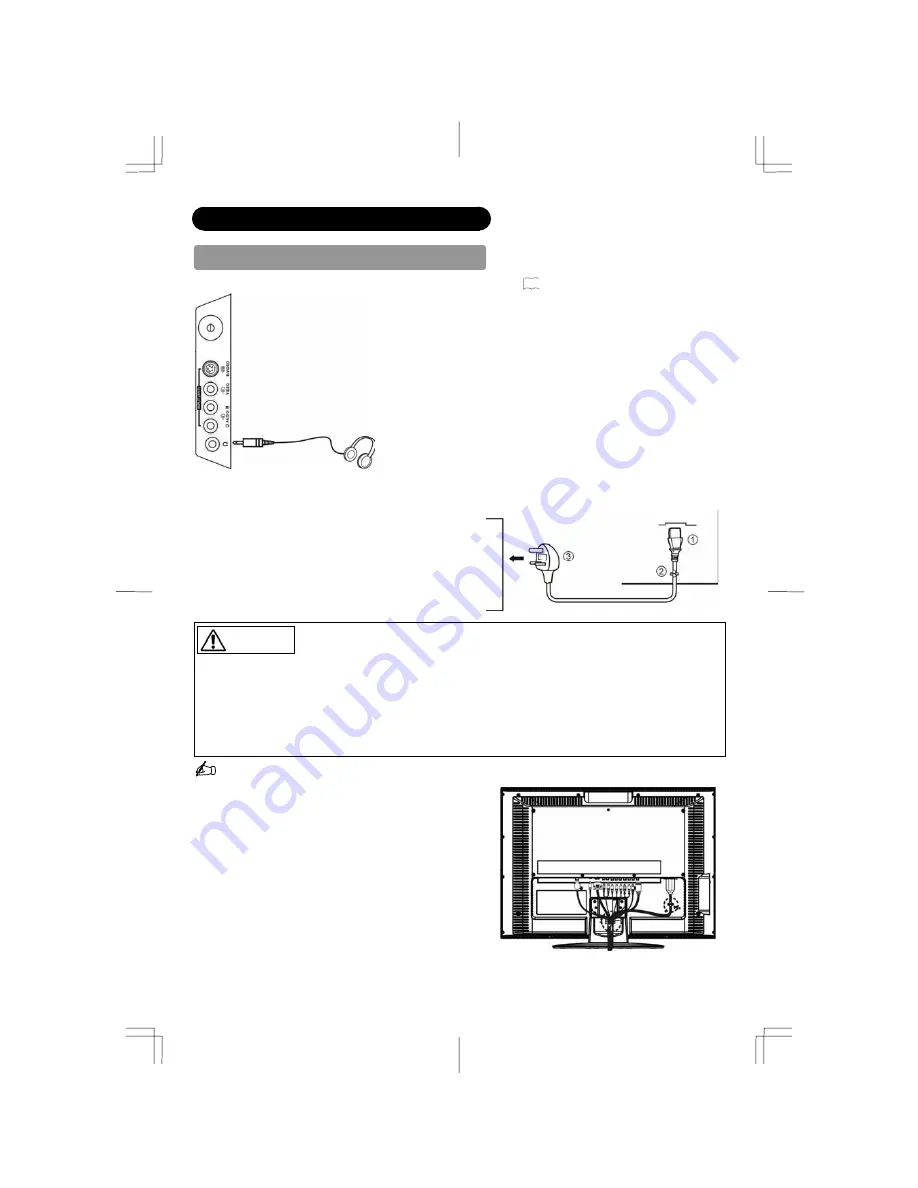
Headphone 

The detail settings can be adjusted from Audio Menu on page

29

.

The audio from the speaker will be muted when connecting the headphone to this terminal.   

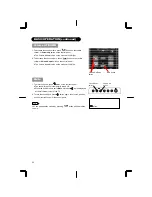
4. Connecting the plug into the wall socket 

Connect the Power Cord after completing all other connections. 
(The type of plug is different from this drawing for some 
countries.)  

(1)  Connect the power cord to this device. 

(2)  Fix the power cord cable to the clamp. 

(3)  Connect the power cord to the power outlet. 

CAUTION

Ɣ

 Use only the Power Cord provided.   

Ɣ

 Do not use a power supply voltage other than that indicated (AC110-240V, 50/60Hz). It may cause fire or electric 

shock.  

Ɣ

 For the LCD panel, a three-core power cord with a ground terminal is used for efficiency protection. Always be sure to 

connect the Power Cord to a three-pronged grounded outlet and make sure that the cord is properly grounded. If you 
use a power source converter plug, use an outlet with a ground terminal and screw down the ground line.   

Ɣ

 Ensure that both ends of power cord are easily accessible.   

Ɣ

 If you have to change the power cord, please use the certified power cord that meets your region’s safety standard.

Information

Ɣ

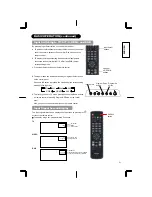
How to secure the cable 

After connecting all of the cable to the terminals, sevure them 
with the band. 
When you secure the cables, please be careful not to tignten 
too much. 

(Mini Stereo Plug) 

Summary of Contents for 37LD9000TA

Page 1: ...elevision Please read this user manual carefully before operating this product To ensure proper operation please read and follow ALL the instructions especially the IMPORTANT SAFETY INSTRUCTIONS and SAFETY PRECAUTIONS Please keep this user manual for future reference ...

Page 2: ... Audio Menu 29 Timer Menu 30 FUNCTION 31 About Teletext 31 Size Switching 32 Audio Switching 34 Power Save Mode 35 TROUBLESHOOTING 36 When Following Messages Appear on the Screen 36 Symptom and Check List 36 PRODUCT SPECIFICATIONS 39 Signal Input 40 Recommended Signal List 41 IMPORTANT SAFETY INSTRUCTIONS z Read this instruction thoroughly z Retain this instruction for future reference z Heed all ...

Page 3: ...Ɣ Before operating this set please fully understand the prerequisite such as specifications or constraints of the hardware and software We are not responsible and have no liability for any loss damage or injury as a result of misuse Ɣ Reproduction copying use modification and or transmission in whole or in part of this manual are prohibited without any prior written permission Ɣ All other products...

Page 4: ... with illustration is intended to constrain the users to follow the indicated actions when handle the product Each illustration within this symbol specifies the contents in detail The figure on the left is an example WARNING There is a risk of fire electric shock or serious injury Unplug the power cord immediately when serious problems happen Serious problems such as z Smoke abnormal odor or sound...

Page 5: ... Do not damage modify twist forcibly bend heat or pull excessively the Power Cord z Do not place heavy objects including the unit itself on top of the Power Cord z If the Power Cord is damaged contact your dealer for repairs or exchange Use only with designated power supply voltage z To prevent the risk of fire and electrical shock operate this product only with the power supply voltage indicated ...

Page 6: ...D Television Ɣ It could cause the partial discoloration or blurring of the image on the CRT based television Ɣ Please install it away from the speaker of the LCD Television Disconnect all of the external connection cables and detach the anti tumble measures before moving the unit Ɣ It may cause fire electrical shock or personal injuries Connect the power plug securely Ɣ Improper connection will ca...

Page 7: ...mmunication failure Please note that this is not malfunction When you dispose this product at the end of its life follow the regulations at your residential area Ɣ For more information contact the local authority or the dealer where you purchased the product Please avoid installing the TV directly on the wooden floor Depending on the quality and condition of floor the desktop stand may stick to th...

Page 8: ...play surface In addition do not impact strongly on the surface of the panel because LCD panel is made with fine processing glass Ɣ Residual image When a still image or menu is displayed on the screen for a short time about a minute and then switches to another image it may leave an after image on the screen The residual image will disappear on its own Ɣ The Usage under the Low Temperature Environm...

Page 9: ...audio visual equipments Enjoy the image from PC with large high definition LCD screen Easy to use On Screen Display system operating with Remote control Low power consumption with Power Saving feature SUPPLIED ACCESSORIES Check the supplied accessories before installation Remove the protection film from the Remote Control before using In case of missing or damaged please contact with dealer immedi...

Page 10: ...ord Socket 3 Terminal Board External Device Connection 4 Control Panel see below for details Please refer to 14 18 for the detailed information for the connections 37LD9000TA Control Panel 1 Sub Power button 2 Menu button 3 Program UP S button 4 Program DOWN T button 5 Volume UP f button 6 Volume DOWN ebutton 7 Input OK button 1 2 3 7 5 4 6 These buttons are located on the top 2 1 5 6 3 4 7 3 2 1 ...

Page 11: ...ssing this button shows the input signal status 14 TV Γ Text Teletext mode can be changed each time pressed in the following sequence TVШTeletextШMix mode 15 Return You can use this to return to the previous menu 16 OK 17 Picture Mode Picture mode can be changed each time pressed in the following sequence DynamicШNaturalШ Cinema 18 Channel Up Down P P 19 CHI II This is exclusively for TV audio A2 ...

Page 12: ...age including fire Ɣ Never mix used and new batteries in the device Ɣ Replace all the batteries in a device at the same time Ɣ Remove the batteries if the remote control is not going to be used for an extended period of time To avoid possible failure read the following instructions and handle the remote control properly Ɣ Do not drop or have an impact on the remote control Ɣ Do not spill water or ...

Page 13: ...round this television in order to avoid increasing the internal temperature Make sure not to block any ventilation holes Do not install the television in the small space such as inside the rack closet or the box Leave more than 10cm of clearance from each side of television and 30cm from the top of television to wall Anti Tumble Measures Install in a stable place and implement safety measure again...

Page 14: ...ad directly into the Socket at rear panel 2 When you have one or more external devices to connect 1 Use RF cable to connect between each equipment and Antenna 2 Connect the Aerial Lead to an equipment In Socket marked 3 Connect the RF cable from the equipment Out to the other equipment In 4 Then connect from the equipment Out to ANT on the LCD screen Socket on marked Example Connecting Antenna thr...

Page 15: ...mposite output If your external device has a S video terminal S VIDEO connection is recommended for higher quality picture AV3 and AV4 can be connected to the equipment with Component output If your external device has a Component terminal COMPONENT connection is recommended for higher quality picture IN OUT Example VCR DVD player Set Top Box IN OUT Example VCR DVD player Set Top Box ...

Page 16: ... to an external television with a 75 Ohm terminal the same image from composite AV1 AV2 or RF signal can be displayed to the external television Sub Woofer terminal can bring the deep bass sound from the external speaker PC terminal D sub 15 pin or audio is connected to PC which allows Analog RGB signal IN OUT Example VCR IN OUT Example Example OUT IN or Mini stereo plug or ...

Page 17: ...adation If your external device has a HDMI terminal HDMI connection is recommended for higher quality picture and sound Ɣ Terminals on Side Since the following terminals are located on the side it is very convenient to use the extra device on a temporary basis after done the connections on the rear panel AV2 can be connected to the equipment with an S Video output and composite output IN OUT Examp...

Page 18: ... other than that indicated AC110 240V 50 60Hz It may cause fire or electric shock Ɣ For the LCD panel a three core power cord with a ground terminal is used for efficiency protection Always be sure to connect the Power Cord to a three pronged grounded outlet and make sure that the cord is properly grounded If you use a power source converter plug use an outlet with a ground terminal and screw down...

Page 19: ...nit The Indicating Lamp Status Check Indicating Lamp Status Power Status Power Switch Status Off Off Main power ШOff Red Standby mode Main power ШOn Sub Power button ШOff Green On Main power ШOn Sub Power button ШOn Orange Power Save mode Main power ШOn Sub Power button ШOn About Power Save mode see Power Save Mode and When Following Messages Appear on the Screen on 35 and 36 for details NOTE Ɣ If...

Page 20: ...e Volume Indicator value on the screen will shift left Volume Up Down button Mute button Mute 1 To mute the sound press button on the remote control Ɣ The sound of the unit is temporarily turned Off Ɣ When the audio mode is set to Mute mute icon will be displayed at the left bottom corner of the TV 2 To turn the sound back press button again or Volume Up button on either remote control or the cont...

Page 21: ...tton is pressed the screen displays corresponding mode by following order TV AV1 AV2 AV3 AV4 RGB HDMI 3 To directly go back to TV mode pressing channel Up Down buttons on remote control or pressing Program UP Down on the control panel Also you can use the numeric buttons on the remote control Program Up button Program Down button Input Select Input Signal Screen Display The input signal status can...

Page 22: ... the item on the MENU page Press OK button to set your selection 5 Use Wor X buttons to adjust the item values or choose options Press OK button to set your selection 6 To exit from the menu press button NOTE The OSD menu screen will be closed automatically when no operation has been made for about 30 seconds MENU button Language Menu Select the language from the list so that you can display the O...

Page 23: ...ttons to input position number 1 125 or channel number C or Z When Auto Tuning Mode is set to position search the frequency by using WX buttons Frequency When Auto Tuning Mode is set to Direct this function is not available grayed out Name 1 Move the cursor to the first digit and select the letters with Ÿź buttons 2 Move to the next digit with Xbutton 3 Press OK button again when you finish inputt...

Page 24: ... change the order of channels as follows 1 Move the cursor to the Channel row you want to change order and then press OK button 2 The color of the letters on the designated line will be turned into green bracket and with 3 Move the designated row by using Ÿź buttons 4 Press OK button to fix the position This function is not available grayed out when the Auto Tuning Mode is set to Direct Teletext L...

Page 25: ... of the signal there is a possibility that the display may not be adjusted in its optimum condition with this function In that case please adjust each iyem manually Image Position Press OK button and ŸźWXbutton to adjust the horizontal and vertical display positions Horizontal Clock 0 100 Minimize the vertical stripes on the screen Clock Phase 0 63 Minimize the blurring of the letters and stripes ...

Page 26: ...ironment by using WX Brightness 0 100 With this function black is adjusted to change the overall brightness by using WX Color 0 100 It can adjust color density based on your preference by using WX Sharpness 0 12 Preferred sharpness can be adjusted by pressing W button for Softer image or X button for Sharper image Tint 45 45 Pressing Wbutton enhances red and weakens green while pressing X button w...

Page 27: ...nd faithfully reproduces the original film images Off Set to Off if the image does not look natural during turning on Off 3D Comb Filter On This is available only when receiving NTSC PAL composite signal This reduces the dot and color blurring in minute scales so that it can reproduce purer color Off Low Middle Black Enhancement High Adjusts the black level compensation Reset Each item on this men...

Page 28: ...htness 0 100 With this function black is adjusted to change the overall brightness by using WX Cool Normal Warm Color Temperature User You can select from 4 settings default depending on the color condition with WXbuttons High Middle Back Light Low Adjust the brightness of the Back Light for the maximum visibility Reset Each item on this menu screen can be restored to the original factory settings...

Page 29: ...quency signals can be boosted while the output signal amplitude is measured Bass 10 10 Adjust the Bass of the sound Treble 10 10 Adjust the Treble of the sound Balance 10 10 Adjust the balance of the sound comes out from right and left side of the speakers Notice When Matrix Surround is enabled adjusting the Balance will not completely mute any one speaker Off Perfect Volume On Automatically adjus...

Page 30: ...ch you may find useful Timer Off Timer ŻŹ Adjust Return Off Selected Items Setup hint Off 30Min 60Min 90Min Off Timer 120Min This function automatically sets the power to Standby mode when the selected time period has elapsed Information One minute before the time you set the screen will display Time off within one minute ...

Page 31: ...Subtitle service directly if the channel has the Subtitle service broadcasting Subtitle To display Hidden text ex The answers of the Quiz or the Game page Press again to close the revealed answer Reveal To return to actual broadcast temporarily while searching for the Teletext page you request When the search is done the designated page will be displayed on the upper left of the screen Press again...

Page 32: ...mage faithfully in the standard vertical size and horizontally squeezed Information Aspect ratio represents horizontal vertical ratio on screen NOTE The size will fix as Full mode and not change when receiving the AV3 4 component signal HDMI signal of 720p 50 720p 60 1080i 50 1080i 60 9 16 3 16 or 21 9 4 CAUTION Using a wide screen television z This television has a screen mode selection feature I...

Page 33: ...UNCTION continued Size Switching continued RGB signal input You can select a suitable size depending on the resolution Full 4 3 Display Area Selection Diagram Display Full 4 3 640X480 VGA 800X600 SVGA 1024X768 XGA ...

Page 34: ... as primary sound and a commentary about a team as the secondary When bilingual program is received sound mode display appears in yellow as shown Each time button is pressed the display is switched in the sequence of following Green Yellow Yellow ˮ ˮ ϰ I Main language Primary Sound II Sub language Secondary Sound ź force mono This selects main language or primary sound Stereo broadcast With stereo...

Page 35: ...s not being used to reduce power consumption by this unit Horizontal Yes No Yes No RGB sync signal Vertical Yes Yes No No PC signal Active normal display Blank no display Operation mode On Off Indicating lamp Lights green Lights orange Returning to operating status z Operate the personal computer then input computer s H sync V sync or press the Sub Power button of the control panel or the remote c...

Page 36: ...is in Standby mode or Power Save mode z Adjust the values in Picture menu and Audio menu 14 18 19 23 35 Snowy picture poor sound z Check the aerial connection and direction z The TV station may have broadcast difficulties z Try another channel 14 Multiple images normal sound z Check the aerial connection and direction z Fine tuning the TV z Check the connection of the external equipments z The TV ...

Page 37: ... It may happen when you use the unit for long hours Turn off the Main Power of the unit for a while Please note that this is not malfunction 39 41 z Image cannot be displayed in the correct position z Press button to check if the input signal of the displayed image is compatible with the specification of the television 25 39 41 z When the VCR is in special playback features Fast forward or Rewind ...

Page 38: ... stripes appear and some of the characters are blurred in RGB mode only abcdefgABCDEFGabcd abcdefgABCDEFGabcd z Try Auto Adjust z If the display condition is not improved with Auto Adjust adjust Horizontal Clock 25 z When the letter string is displayed in full screen all of the characters on the screen is blurred in RGB mode only abcdefgABCDEFGabcd abcdefgABCDEFGabcd z Try Auto Adjust z If the con...

Page 39: ...inal RCA AV3 4 component video input terminal RCA L R audio input terminal RCA HDMI HDMI input terminal Input signals Composite video PAL SECAM NTSC3 58 NTSC4 43 PAL60 Component video 480i 576i 480p 576p 720p 50 720p 60 1080i 50 1080i 60 Output signals OUTPUT MONITOR composite video monitor output terminal RCA OUTPUT MONITOR L R audio monitor output terminal RCA OUTPUT HEADPHONE L R audio monitor ...

Page 40: ...elevision only support H V separate sync signal 12 SDA 13 H sync 14 V sync V CLK 15 SCL S input connector pin specifications Pin Input Signal 1 Y 2 Y GND 3 C 4 C GND Frame GND HDMI connector Input pin specifications Pin Input Signal Pin Input Signal 1 T M D S Data2 11 TMDS Clock Shield 2 T M D S Data2 12 TMDS Clock 3 T M D S Data2 13 CEC 4 T M D S Data1 14 Reserved N C 5 T M D S Data1 15 SCL 6 T M...

Page 41: ...40 x 480 59 94 31 47 25 18 3 SVGA 800 x 600 56 25 35 16 36 0 4 SVGA 800 x 600 60 32 37 88 40 0 5 SVGA 800 x 600 72 19 48 08 50 0 6 XGA 1024 x 768 60 00 48 36 65 0 7 XGA 1024 x 768 70 07 56 48 75 0 z The type of video board or connecting cable used may not allow for correct displays adjustment of Horizontal Position Vertical Position Horizontal Clock and Clock Phase z The television may fail to dis...

Reviews: