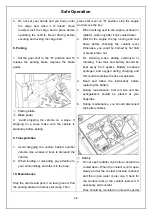


Operating the Vehicle
8-2
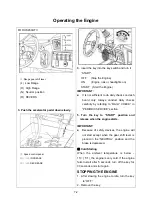
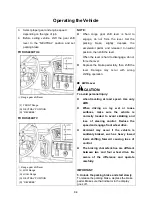
①
Seat belt
2. Selecting light switch position.
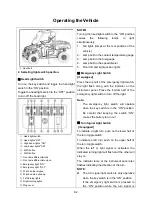
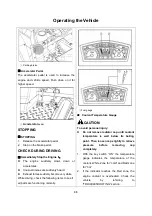
■
Head Light Switch
Turn on the key switch and toggle the head light
switch to the “ON” position.
Toggle the head light switch to the “OFF” position
to turn off the head light.
①
Head light switch
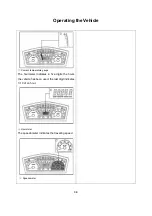
②
Head lights “OFF”
③
High beam lights "ON"
④
Low beam lights "ON"
⑤
4WD button
⑥
2WD button
⑦
Front axle differential lock
⑧
Front axle differential unlock
⑨
Emergency light "ON"
⑩
Emergency light "OFF"
⑪
Winch cable release
⑫
Winch cable pulled up
⑬
Left turning lights
⑭
Right turning lights
⑮
Plug cover
NOTE
:
Turning the head light switch to the “ON” position
causes the following lamps to light
simultaneously.
1. Tail lights (lamps at the rear portions of the
vehicle)
2. Lamp built in the coolant temperature gauge
3. Lamp built in the fuel gauge
4. Lamp built in the speedometer
5. Front left and right position lights
■
Emergency Light Switch
[if equipped]
Press the top half of the emergency light switch,
the light flash along with the indicator on the
instrument panel. Press the bottom half of the
emergency light switch to turn off the light.
Note:
The emergency light switch will operate
when the key switch is in the “ON” position.
Be careful that keeping the switch “ON”
causes the battery to run out.
■
Turn Signal Light Switch
[if equipped]
To indicate a right turn, push on the lower half of
the turn toggle switch.
To indicate a left turn, push on the upper half of
the turn toggle switch.
When the left or right signal is activated, the
indicated turning light will flash and the other will
stay on.
The indicator lamp at the instrument panel also
flashes indicating the direction of the turn.
NOTE:
The turn signal light switch is only operative
when the key switch is in the “ON” position.
If the emergency light switch is pressed to
the “ON” position while the turn signal is
Summary of Contents for HS 400-4
Page 7: ...Introduction HS 400 4 HS 450 1 7 LOCATION OF PARTS...
Page 8: ...Introduction HS 400 4 HS 450 1 8 ILLUSTRATED CONTENTS...
Page 9: ...Introduction HS 400 4 HS 450 1 9...
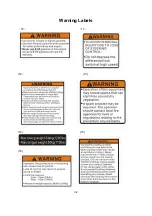
Page 15: ...Warning Labels 3 1 Warning and caution labels 1 2 3 4 5 6 7 8 9...
Page 16: ...Warning Labels 3 2 10 11 12 13 14 15 16...
Page 17: ...Warning Labels 3 3 17...


