background image

Hisense Refrigerator

17

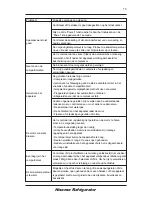
De binnentemperatuur
is te koud
Deuren kunnen niet 
gemakkelijk dicht 
gemaakt worden

Waterdruppels op de 
vloer

Het licht werkt niet

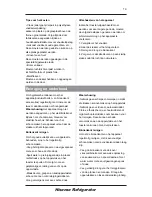
Verhoog de temperatuur door de instructies van het hoofdstuk 
"Besturingspaneel" op te volgen.

Controleer of bovenkant 10-15 mm gekanteld is, zodat de deuren 
zelf kunnen sluiten, of er binnenin iets de deuren verhindert te sluiten.

Als de waterpan (aan de onderzijde van de achterkant van de kast) 
niet goed waterpas kan worden gezet, of de afvoerpijp (deze 
bevindt zich onder de bovenkant van het compressordepot) niet 
goed is gepositioneerd om water in deze pan te leiden, of de 
wateruitloop is geblokkeerd, moet u de koelkast van de muur 
wegtrekken en de pan en de afvoerpijp controleren.

‡0LVVFKLHQLVKHW/('OLFKWEHVFKDGLJG5DDGSOHHJ/('ODPSHQ

vervangen in reiniging en verzorging hoofdstuk.

‡+HWEHVWXULQJVV\VWHHPKHHIWGHOLFKWHQXLWJHVFKDNHOGRPGDWGH

deur te lang open werd gehouden, sluit en open de deur om de 
lichten weer te activeren.

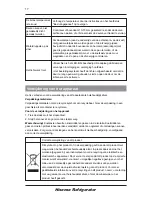
Verwijdering van het apparaat

Het is verboden voor de verwijdering van dit apparaat als huishoudelijk afval.

Verpakkingsmaterialen

9HUSDNNLQJVPDWHULDOHQPHWGHUHF\FOHV\PERRO]LMQUHF\FOHEDDU*RRLGHYHUSDNNLQJLQHHQ
JHVFKLNWHDIYDOFRQWDLQHUWHUHF\FOHUHQ

Voor de verwijdering van het apparaat

1. Trek de stekker uit het stopcontact.
2. Snijd het snoer af en gooi met de stekker weg

Waarschuwing!

 Koelkasten bevatten koelmiddel en gassen in de isolatie. Koelmiddel en 

gassen moeten professioneel worden verwijderd, omdat ze oogletsel of ontstekingen kunnen 
veroorzaken. Zorg ervoor dat slangen van het koelcircuit niet beschadigd zijn, voorafgaand 
aan correcte verwijdering.

Correcte verwijdering van dit product

'LWV\PERRORSKHWSURGXFWRILQGHYHUSDNNLQJJHHIWDDQGDWGLWSURGXFWQLHW

mag worden behandeld als huishoudelijk afval. In plaats daarvan moet het 

ZRUGHQDIJHJHYHQELMHHQLQ]DPHOSXQWYRRUGHUHF\FOLQJYDQHOHNWULVFKHHQ

elektronische apparatuur. Door ervoor te zorgen dat dit product op de correcte 
manier wordt verwijderd, voorkomt u mogelijke negatieve gevolgen voor het 
milieu en de menselijke gezondheid die anders zouden kunnen worden 
veroorzaakt door de onjuiste afvalverwerking van dit product. Voor meer 

JHGHWDLOOHHUGHLQIRUPDWLHRYHUGHUHF\FOLQJYDQGLWSURGXFWQHHPWXFRQWDFWRS

met uw gemeente voor huishoudelijk afval, of met de winkel waar u het 
product heeft gekocht.

Summary of Contents for RS-47WL4SBA/CLA1

Page 1: ......

Page 2: ...nts Farmhouses by clients in hotels motels and other residential types of environment Bed and breakfast types of environment If you feel that the appliance is not operating correctly please check the Troubleshooting page for assistance If still in doubt contact the customer service help line for assistance or to arrange a call out by an authorized service engineer Catering and similar non retail a...

Page 3: ...er allow children to play with t h e a p p l i a n c e b y h a n g i n g o r standing over or on the doors racks shelves and drawers etc Safety about electricity To avoid the risks that are always present when using an electric appliance we recommend that you pay more attention to the instructions about electricity below Unpack the appliance and check through the appliance Should any damage be evi...

Page 4: ... l instruments to avoid eye injuries If it is not functioning correctly consult a qualified registered electrician or replace it in accordance with the cleaning and care chapter Do not use electrical appliances such as ice cream makers inside the food storage compartments of the appliance unless they are approved by the manufacturer Refrigerant The refrigerant isobutene R600a is contained within t...

Page 5: ...nce out of direct sunlight rain or frost Stand the appliance away from heat sources such as stoves fires or heaters Leveling of appliance For sufficient leveling and air circulating in the lower rear section of the appliance the bottom feet may need to be adjusted You can adjust them manually by hand or by using a suitable spanner To allow the doors to self close tilt the top backwards by about 10...

Page 6: ...ld rest it on soft foam packaging or similar material to avoid damaging the backboard of the refrigerator To reverse the door the following steps are generally recommended 1 Stand the refrigerator upright Open the door to take out all door racks to avoid racks damaged and then close the door Door racks 2 Open part on top of the refrigerator body from right side and then take down part and part on ...

Page 7: ... 2 Install the handle cover as the follow figure shows button the buckle firstly and then close the cover from the inside until you hear the sound of popping Note 1 Remove the handle cover as the follow figure shows bend the upper wing and take the upper buckle apart from the handle and so as the other side after that take down the handle cover buckle buckle 6 Place refrigerator flatwise remove pa...

Page 8: ...ing block just removed back to the plastic bag 15 connector and then install part Install part connect the wire 16 Open the door mount door racks and then close it Note Be sure character side of reed switch fits well with coping block 1 2 2 3 9 Screw out the upper hinge axis turn the upper hinge over and fix axis on it Then place it at side for use 10 Exchange wires both in the left and right slot...

Page 9: ...andle 17 Bottle rack 18 Fridge door 19 Fridge door seal 1 Note Due to unceasing modification of our products your refrigerator may be slightly different from this instruction manual but its functions and using methods remain the same Top LED light Flexible wine rack Plastic wine rack Flexi fresh box Common handle RS 47WL4SIA CSA2 Back LED light Optional part list Part Model L L X L Easy handle L X...

Page 10: ...lighting of the icons on display panel starts working If no buttons have been pressed and the doors are closed the backlighting will turn off 3 Holiday longer period Press Super Cool button to activate this function The light will be illuminated Super cool automatically switches off after 6 hours and the refrigerator temperature setting displays 2 C When super cool function is on you can switch it...

Page 11: ...itch the appliance off by pressing Power button for 5 seconds meanwhile the display panel will be turned off Important Do not store any food in the fridge during this time When the appliance is power off you can switch the appliance on by pressing Power button for 1 second and the refrigerator returns to the previous temperature setting 6 hild Lock C You can press the Child L o c k b u t t o n i n...

Page 12: ...egetables It can slide along the shelf Note Please use gentle pressure on left or right side face to move the box along the shelf If required the flexible fresh box can be taken out with its hanger allowing you to adjust the shelf at different heights and save space Wine rack It is for storing bottled wine or drinks It can also slide along the shelf if required Note Please use gentle pressure on l...

Page 13: ...porating liquid in the appliance Place the appliance in a well ventilated humidity free room Please refer to Installing your new appliance chapter If the diagram shows the correct combination for the drawers crisper and shelves do not adjust the combination as this is designed to be the most energy efficient configuration Hints for fresh food refrigeration Do not place hot food directly into t h e...

Page 14: ...cleaning switch the appliance off and remove the plug from the mains socket Exterior cleaning To maintain good appearance of your appliance you should clean it regularly Wipe the digital panel and display panel with a clean soft cloth Spray water onto the cleaning cloth instead of spraying directly on the surface of the appliance This helps ensure an even distribution of moisture to the surface Cl...

Page 15: ... Door seal cleaning Replacing the LED light Warning The LED light must not be replaced by the user If the LED light is damaged contact the customer helpline for assistance To replace the LED light the below steps can be followed 1 Unplug your appliance 2 Remove light cover by pushing up and out 3 Hold the LED cover with one hand and pull it with the other hand while pressing the connector latch 4 ...

Page 16: ...r other compartments Gurgling sound similar to water boiling Popping noise during automatic defrosting Clicking noise before the compressor starts Other unusual noises are due to the reasons below and may need you to check and take action The cabinet is not level The back of appliance touches the wall Bottles or containers fallen or rolling It is normal to frequently hear the sound of the motor it...

Page 17: ...terials Packaging materials with the recycle symbol are recyclable Dispose of the packaging into a suitable waste collection container to recycle it Before disposal of the appliance 1 Pull out the mains plug from the mains socket 2 Cut off the power cord and discard with the mains plug Warning Refrigerators contain refrigerant and gases in the insulation Refrigerant and gases must be disposed of p...

Page 18: ...Español MANUAL DE INSTRUCCIONES Antes de poner en marcha la unidad lea atentamente el manual y consérvelo para referencia futura ...

Page 19: ...D XQ uso doméstico y aplicaciones similares como Zonas de cocina para el personal en tiendas oficinas y otros entornos de trabajo clientes de hoteles moteles y otros tipos de entornos residenciales Servicios de alojamiento y desayuno Aplicaciones de catering y similares 6L FRQVLGHUD TXH HO HOHFWURGRPpVWLFR QR funciona correctamente busque ayuda en la página de localización de averías Si las dudas ...

Page 20: ...QLxRV MXHJXHQ FRQ HO electrodoméstico colgándose o subiéndose a las puertas parrillas estantes y cajones Instrucciones de seguridad sobre electricidad 3DUD HYLWDU ORV ULHVJRV SUHVHQWHV HQ el uso de electrodomésticos le recomendamos que lea y aplique las instrucciones sobre peligros eléctricos que se indican más adelante HVHPEDOH UHYLVH HO HOHFWURGRPpVWLFR 6L apreciase algún daño no conecte el elec...

Page 21: ...QWUR GH ORV FRPSDUWLPHQWRV GH DOPDFHQDPLHQWR GH FRPLGD GHO DSDUDWR D PHQRV TXH HVWpQ KRPRORJDGRV SRU HO IDEULFDQWH 1R PLUH GLUHFWDPHQWH D OD OX VLWXDGD GHQWUR GHO FRPSDUWLPHQWR GHO IULJRUtILFR FRQ LQVWUXPHQWRV ySWLFRV SDUD HYLWDU OHVLRQHV HQ ORV RMRV 6L QR IXQFLRQD FRUUHFWDPHQWH FRQVXOWH FRQ XQ HOHFWULFLVWD DXWRUL DGR R VXVWLW DOD VHJ Q VH LQGLFD HQ HO FDStWXOR OLPSLH D PDQWHQLPLHQWR Refrigerante ...

Page 22: ... HO HOHFWURGRPpVWLFR OHMRV GH OD OX solar lluvia o rocío Coloque el electrodoméstico lejos de fuentes de calor como estufas hogueras o calentadores Nivelación del electrodoméstico Para nivelar correctamente el electrodoméstico y que el aire circule adecuadamente deberá ajustar las patas de la parte trasera del frigorífico Se pueden ajustar a mano o utilizando la llave adecuada 3DUD TXH ODV SXHUWDV...

Page 23: ...e trasera para acceder a la base lo proteja con espuma de embalaje o material similar para evitar daños en el panel trasero Le recomendamos que siga los siguientes pasos pasos cambiar el lado de apertura 1 Coloque el frigorífico de pie Abra la puerta y saque todos los estantes procure no dañarlos y a continuación cierre la puerta 2 Abra la pieza ķ situada en la parte superior de la estructura del ...

Page 24: ...rta Tope Tornillos autorroscantes 6 Coloque el frigorífico sobre una superficie plana y quite la pieza Ĺ A continuación extraiga el tornillo ĺ Quite las piezas ĸ y ķ 7 Atornille la bisagra inferior cámbiela al orificio contiguo y a continuación atorníllela con la arandela 8 Regrese al paso 6 cambie la pieza ķ a la izquierda y la pieza ĸ a la derecha A continuación sujételas con el tornillo ĺ Por ú...

Page 25: ...acaba de quitar Nota Asegúrese de que el interruptor de láminas encaja bien en el bloque de contacto 15 Monte la pieza ķ conecte el conector del cable ĸ y a continuación monte la pieza Ĺ 16 Abra la puerta coloque los estantes y a continuación ciérrela 9 Afloje el eje de la bisagra superior dele la vuelta a la tapa de la bisagra superior y sujétele el eje A continuación colóquela en el lado de uso ...

Page 26: ...erduras 9 Control de humedad 10 Cajón para verduras antihumedad 11 Patas regulables 12 Estante cubierto para la leche 13 Bandeja para huevos dentro 14 Estante intermedio 15 Botellero dentro 16 Tirador 17 Estante para botellas 18 Puerta del frigorífico 19 Junta de goma del frigorífico Luz LED superior Luz LED trasera Botellero flexible Botellero de plástico Tirador Tirador básico Sistema antihumeda...

Page 27: ...ctrodoméstico 2 Superfrío El modo superfrío enfría los alimentos mucho más rápido lo que la conserva fresca durante más tiempo 3XOVH HO ERWyQ 6XSHUIUtR SDUD DFWLYDU HVWD función Se encenderá la luz D IXQFLyQ VXSHUIUtR VH GHVFRQHFWD automáticamente después de 6 horas y la temperatura del frigorífico se ajusta a 2ºC XDQGR HVWi DFWLYDGD OD IXQFLyQ VXSHUIUtR VH puede desactivar pulsando el botón Super...

Page 28: ... para apagarlo XDQGR HO IULJRUtILFR HVWi HQ PDUFKD OR SRGUi apagar pulsando el botón de encendido durante 5 segundos Mientras tanto se apagará la pantalla Importante Durante este tiempo no guarde alimentos en el electrodoméstico XDQGR HO HOHFWURGRPpVWLFR HVWi DSDJDGR OR podrá encender pulsando el botón de HQFHQGLGR GXUDQWH XQ VHJXQGR O UHIULJHUDGRU volverá al ajuste de temperatura anterior 6 Bloqu...

Page 29: ...YRV TXHVR PHUPHODGD SDVWHOLWRV IUXWDV YHUGXUDV 6H GHVOL D SRU OD HVWDQWHUtD Nota 3UHVLRQH VXDYHPHQWH KDFLD L TXLHUGD GHUHFKD SDUD PRYHU OD ILDPEUHUD SRU HO HVWDQWH 6L IXHUD QHFHVDULR OD ILDPEUHUD VH SXHGH VDFDU SDUD DMXVWDU HO HVWDQWH D GLIHUHQWH DOWXUD DVt DKRUUDU HVSDFLR Botellero 6LUYH SDUD FRORFDU ERWHOODV GH YLQR R EHELGDV 6H GHVOL D SRU OD HVWDQWHUtD HQ FDVR GH necesidad Nota 3UHVLRQH VXDYHP...

Page 30: ...LFR VH SXHGH PRQWDU FRQ HO congelador 6H SXHGHQ PRQWDU FRQ ODV SLH DV GH PRQWDMH FRPR HVWDV TXH VH VXPLQLVWUDQ Trucos y consejos útiles Consejos para ahorrar energía H UHFRPHQGDPRV TXH VLJD ODV VLJXLHQWHV instrucciones para ahorrar energía 3URFXUH HYLWDU TXH ODV SXHUWDV VH TXHGHQ DELHUWDV GHPDVLDGR WLHPSR SDUD TXH QR VH pierda la energía VHJ UHVH GH TXH HO HOHFWURGRPpVWLFR HVWi OHMRV GH IXHQWHV GH...

Page 31: ...LH D DEUDVLYRV R GLVROYHQWHV FRPR EHQFLQD LFKRV SURGXFWRV SRGUtDQ GDxDU OD VXSHUILFLH GHO HOHFWURGRPpVWLFR SURYRFDU XQ LQFHQGLR Limpieza interior HEH OLPSLDU HO HOHFWURGRPpVWLFR SRU GHQWUR UHJXODUPHQWH 6HUi PiV IiFLO GH OLPSLDU VL KD SRFRV DOLPHQWRV GHQWUR URWH HO LQWHULRU GHO FRQJHODGRU FRQ XQD VROXFLyQ GpELO GH ELFDUERQDWR D FRQWLQXDFLyQ DFODUH FRQ DJXD XVDQGR XQD HVSRQMD R XQD ED HWD URWH KDVWD...

Page 32: ...amente las juntas después de limpiarlas Precaución El electrodoméstico se deberá conectar nuevamente solo cuando se hayan secado completamente las juntas de las puertas Cambio de la luz LED Advertencia El usuario no debe cambiar la luz LED Si se funde la luz LED póngase en contacto con el servicio de atención al cliente para obtener ayuda Para cambiar la luz LED se pueden seguir los siguientes pas...

Page 33: ...s XUEXMHR VLPLODU DO DJXD KLUYLHQGR 6RQLGR KXHFR GXUDQWH HO GHVFRQJHODGR DXWRPiWLFR 6RQLGR GH FOLF DQWHV GH TXH DUUDQTXH HO FRPSUHVRU Existen otros ruidos no habituales que se deben a las causas expuestas a continuación y deberá revisarlos y tomar las acciones necesarias O FRPSDUWLPHQWR QR HVWi D QLYHO D SDUWH WUDVHUD GHO HOHFWURGRPpVWLFR WRFD OD SDUHG DV ERWHOODV R FDMRQHV VH FDHQ R JLUDQ Es norm...

Page 34: ...PR EDVXUD GRPpVWLFD Materiales de embalaje Los materiales con el símbolo de reciclaje son reciclables Deposite el material de embalaje en el contenedor de residuos adecuado para su reciclaje Antes de la eliminación del electrodoméstico 1 Saque el enchufe de la toma de corriente 2 Corte el cable de alimentación y quite el enchufe Advertencia Los frigoríficos contienen líquidos y refrigerante en el ...

Page 35: ...MODE D EMPLOI POUR L UTILISATEUR Français Avant faire fonctionner cet appareil s il vous plaît lisez attentivement ce manuel et conservez le pour référence ultérieure ...

Page 36: ...ations similaires telles que dans les zones cuisine du personnel au sein de boutiques bureaux et autres environnements de travail dans des fermes hôtels motels et autres environnements résidentiels des environnements de type chambres d hôtes Restauration et utilisations semblables au commerce en gros 6L YRXV SHQVH TXH YRWUH DSSDUHLO QH fonctionne pas correctement veuillez consulter OD SDJH pSDQQDJ...

Page 37: ...aient de provoquer des blessures en cas de chute 1 DXWRULVH MDPDLV OHV HQIDQWV j MRXHU DYHF l appareil en se suspendant ou en montant aux portes clayettes tablettes et tiroirs etc Sécurité en matière d électricité 3RXU pYLWHU OHV ULVTXHV WRXMRXUV OLpV j l utilisation d appareils électriques nous vous recommandons de prêter particulièrement attention aux consignes de sécurité en matière d électrici...

Page 38: ...V TXH GHV VRUEHWLqUHV DX VHLQ GHV FRPSDUWLPHQWV GH VWRFNDJH GH GHQUpHV VDXI V LOV VRQW DSSURXYpV SDU OH IDEULFDQW ILQ G pYLWHU OHV ULVTXHV GH OpVLRQV RFXODLUHV QH UHJDUGH SDV GLUHFWHPHQW DYHF GHV LQVWUXPHQWV G RSWLTXH OD ODPSH VLWXpH GDQV OH FRPSDUWLPHQW GX UpIULJpUDWHXU 6L HOOH QH IRQFWLRQQH SDV FRUUHFWHPHQW FRQVXOWH XQ pOHFWULFLHQ TXDOLILp DJUpH RX UHPSODFH OD HQ VXLYDQW OHV LQVWUXFWLRQV GX FKDS...

Page 39: ...r les taux d humidité élevés 1 H SRVH SDV O DSSDUHLO j OD OXPLqUH GLUHFWH du soleil à la pluie ou au gel N installez pas l appareil à proximité de sources de chaleur telles que des cuisinières cheminées ou radiateurs Nivelage de l appareil 3RXU XQH PLVH j QLYHDX GH O DSSDUHLO HW XQH circulation d air suffisante dans la partie inférieure arrière de l appareil les pieds de O DSSDUHLO SHXYHQW QpFHVVL...

Page 40: ...n mousse souple ou sur un support similaire afin d éviter d endommager le panneau arrière du réfrigérateur Pour inverser la porte les étapes suivantes sont généralement recommandées 1 Mettre le réfrigérateur en position verticale Ouvir la porte pour sortir toutes les étagères afin d éviter d éventuels dégâts causés puis fermer la porte 2 Ouvrir la partie ķ au dessus du réfrigérateur depuis le côté...

Page 41: ...ée Cache trou Arrêt de porte Bloc d arrêt Vis auto taraudeuses 6 Placer le réfrigérateur à plat enlever la partie Ĺ et desserrer les vis ĺ Enlever les parties ķ et ĸ 7 Dévisser la charnière inférieure replacer la au niveau du trou adéquate puis vissez et monter la rondelle 8 Remonter simplement à l étape 6 modifier la partie ķ à gauche et la partie ĸ à droite puis fixer les avec les vis ĺ Enfin in...

Page 42: ...marqué du R dans la sac plastique Replacer le couvercle supérieur dans le sac en plastique Remarque Assurez vous que le coté de l interrupteur magnétique est correctement placé sur le couvercle supérieur 15 Installez la partie ķ branchez le fil de connexionĸ puis installez la partie Ĺ 9 Dévisser l axe supérieur de charnière tourner la charnière supérieure et fixer d axe sur elle Puis le placer de ...

Page 43: ...rôle de l humidité 10 Bac à légumes frais 11 Pieds réglables 12 Support couvert des produits laitiers 13 Plateau à œufs intérieur 14 Etagère du milieu 15 Porte bouteilles intérieur 16 Poignée facile 17 Porte bouteilles 18 Porte du réfrigérateur 19 Joint de porte frigo Lumière LED avant Rétro éclairage LED Casier à vin souple Casier à vin en plastique Poignée facile Poignée principale Boîte fraîche...

Page 44: ...entre 2 C et 8 C le panneau de contrôle affichera la valeur correspondante selon la séquence suivante 2 Super Fraîcheur La fonction Super Fraîcheur permet de réfrigérer vos aliments bien plus rapidement et ainsi de conserver la nourriture plus longtemps SSX H VXU OH ERXWRQ 6XSHU UDvFKHXU ª pour activer cette fonction La lumière s allumera HWWH IRQFWLRQ V pWHLQGUD DXWRPDWLTXHPHQW DX bout de 6 heure...

Page 45: ...WHXU IRQFWLRQQH YRXV SRXYH pWHLQGUH O DSSDUHLO HQ DSSX DQW VXU ERXWRQ 3RZHU SHQGDQW VHFRQGHV HW OH SDQQHDX G DIILFKDJH VHUD GpVDFWLYp Important Ne pas entreposer de la nourriture GDQV OH UpIULJpUDWHXU SHQGDQW FHWWH SpULRGH RUVTXH O DSSDUHLO HVW KRUV GH WHQVLRQ YRXV SRXYH PHWWUH O DSSDUHLO HQ PDUFKH HQ DSSX DQW VXU ERXWRQ 3RZHU SHQGDQW VHFRQGH OH UpIULJpUDWHXU UHYLHQGUD DORUV j OD température précé...

Page 46: ...vous permettant d ajuster le SODWHDX j GLIIpUHQWHV KDXWHXUV HW DLQVL économiser de l espace Porte bouteilles O SHUPHW GH VWRFNHU OHV ERXWHLOOHV GH YLQ RX les boissons O SHXW DXVVL JOLVVHU OH ORQJ GX SODWHDX VL nécessaire Boîte Fraîcheur Flexible OOH HVW DGDSWpH SRXU UDQJHU OHV DOLPHQWV GH SHWLWH WDLOOH FRPSULV OHV XIV OH IURPDJH OH beurre confiture les petits gâteaux et des fruits ainsi que les lé...

Page 47: ...pUDWHXU SHXW rWUH LQVWDOOp DYHF XQ congélateur associé O SHXW rWUH LQVWDOOp HQ XWLOLVDQW GHV SLqFHV d installation fournies similaires Conseils pour économiser de l énergie 1RXV YRXV UHFRPPDQGRQV GH VXLYUH OHV LQVWUXFWLRQV SUpVHQWpHV FL GHVVRXV SRXU économiser de l énergie DQV OD PHVXUH GX SRVVLEOH pYLWH GH ODLVVHU la porte ouverte trop longtemps pour conserver de l énergie VVXUH YRXV TXH O DSSDUH...

Page 48: ... YRXV OH QHWWR H 5LVTXH G pOHFWURFXWLRQ YDQW GH QHWWR HU pWHLJQH O DSSDUHLO HW GpEUDQFKH O DOLPHQWDWLRQ pOHFWULTXH Nettoyage extérieur 3RXU TX LO FRQVHUYH VRQ DVSHFW YRWUH DSSDUHLO GRLW rWUH QHWWR p UpJXOLqUHPHQW VVX H OH SDQQHDX QXPpULTXH HW OH SDQQHDX G DIILFKDJH DYHF XQ FKLIIRQ GRX HW SURSUH 3XOYpULVH O HDX VXU OH FKLIIRQ SOXW W TXH GH SXOYpULVHU GLUHFWHPHQW VXU OD VXUIDFH GH O DSSDUHLO HOD DLG...

Page 49: ...yage Attention L appareil ne doit être rallumé qu après que les joints soient entièrement secs Remplacer le voyant LED Avertissement Le voyant LED ne doit pas être remplacé par l utilisateur Si le voyant LED est endommagé veuillez contacter l assistance client pour demander de l aide Pour remplacer le voyant LED vous pouvez suivre les étapes suivantes 1 Débranchez votre appareil 2 Retirez le couve...

Page 50: ...es nécessaires DUPRLUH Q HVW SDV j QLYHDX DUULqUH GH O DSSDUHLO HVW HQ FRQWDFW DYHF OH PXU HV ERXWHLOOHV RX GHV UpFLSLHQWV VRQW WRPEpHV RX URXOHQW Il est normal d entendre le bruit du moteur fréquemment il devra fonctionner plus fort dans les circonstances suivantes D WHPSpUDWXUH HVW UpJOpH VXU XQH YDOHXU SOXV EDVVH TXH QpFHVVDLUH 8QH JUDQGH TXDQWLWp G DOLPHQWV HQFRUH FKDXGV D pWp SODFpH DX VHLQ G...

Page 51: ...nager Matériaux d emballage HV PDWpULDX G HPEDOODJH SRUWDQW OH V PEROH GH UHF FODJH VRQW UHF FODEOHV HWH O HPEDOODJH GDQV OH FRQWHQHXU j GpFKHWV DSSURSULp SRXU OH UHF FOHU Avant la mise au rebut de l appareil pEUDQFKH O DOLPHQWDWLRQ pOHFWULTXH 2 Coupez le cordon d alimentation et jetez le avec la prise Attention Les réfrigérateurs contiennent du réfrigérant et des gaz au sein de l isolant Ceux ci ...

Page 52: ...ISTRUZIONI PER L USO Italiano Le raccomandiamo di leggere attentamente questo manuale d uso e di conservarlo per futuro riferimento ...

Page 53: ...LR q VWDWR FRQFHSLWR SHU uso domestico e applicazioni simili come UHH DGLELWH D FXFLQD SHU LO SHUVRQDOH LQ negozi uffici e altri ambienti di lavoro Case coloniche Utilizzo da parte di clienti in hotel motel e altri ambienti di tipo residenziale PELHQWL WLSR EHG DQG EUHDNIDVW Catering e applicazioni simili Ɣ 6H VL ULWLHQH FKH LO IULJRULIHUR QRQ IXQ LRQL correttamente controllare la pagina Risoluzio...

Page 54: ...andosi o salendo su porte cestelli ripiani cassetti ecc Sicurezza elettrica 3HU HYLWDUH ULVFKL FKH SRVVRQR essere sempre presenti quando si utilizza un apparecchiatura elettrica si raccomanda di prestare massima attenzione alle istruzioni sull elettricità riportate di seguito Ɣ 5LPXRYHUH LO IULJRULIHUR GDOO LPEDOOR H controllarlo con attenzione In caso di danni evidenti non collegare il frigorifer...

Page 55: ... TXDOL JHODWLHUH DOO LQWHUR GHJOL VFRPSDUWL SHU OD FRQVHUYD LRQH GHJOL DOLPHQWL GHO IULJRULIHUL D PHQR FKH QRQ DXWRUL DWR GDO FRVWUXWWRUH Ɣ 1RQ ILVVDUH GLUHWWDPHQWH OD OXFH SRVWD DOO LQWHUQR GHOOR VFRPSDUWR GHO IULJRULIHUR FRQ VWUXPHQWL RWWLFL SHU HYLWDUH GDQQL DJOL RFFKL 6H HVVD QRQ IXQ LRQD FRUUHWWDPHQWH FRQVXOWDUH XQ HOHWWULFLVWD TXDOLILFDWR R VRVWLWXLUOD VHFRQGR TXDQWR ULSRUWDWR QHO FDSLWROR 3...

Page 56: ...GEBRUIKSAANWIJZING Nederlands Voordat u het apparaat gebruik deze gebruiksaanwijzing aandachtig doorlezen en bewaren voor toekomstig gebruik ...

Page 57: ...JHEUXLN en vergelijkbare toepassingen zoals Personeelsruimten en keuken in winkels kantoren en andere werkomgevingen Boerderijen voor gasten in hotels motels en andersoortige residentiële omgevingen Bed and Breakfast type omgevingen Catering en vergelijkbare non retail toepassingen OV X GHQNW GDW KHW DSSDUDDW QLHW FRUUHFW werkt raadpleegt u dan de pagina Troubleshooting voor hulp In geval van twij...

Page 58: ...of over de deuren rekken planken of laden etc te hangen of staan Veiligheid over elektriciteit Bij gebruik van een elektrisch apparaat dienen enkele belangrijke voorzorgsmaatregelen te worden genomen namelijk 3DN KHW DSSDUDDW XLW HQ FRQWUROHHU DOOHV Mocht er schade duidelijk zijn steek het apparaat dan niet in maar neem direct contact op met de winkel waar u het apparaat gekocht heeft Houd in dit ...

Page 59: ...UGHOHQ PRHWHQ ZRUGHQ JHEUXLNW HEUXLN JHHQ HOHNWULVFKH DSSDUDWHQ RDOV LMVPDFKLQHV LQ GH RSEHUJYDNNHQ YRRU YRHGVHO YDQ KHW DSSDUDDW WHQ LM H LMQ JRHGJHNHXUG GRRU GH IDEULNDQW 1LHW PHW RSWLVFKH LQVWUXPHQWHQ GLUHFW LQ KHW ODPSMH LQ GH NRHONDVW NLMNHQ RP RRJOHWVHO WH YRRUNRPHQ OV KHW QLHW JRHG ZHUNW UDDGSOHHJ GDQ HHQ JHNZDOLILFHHUGH JHUHJLVWUHHUGH HOHNWULFLHQ RI YHUYDQJ KHW LQ RYHUHHQVWHPPLQJ PHW KHW K...

Page 60: ...DWV RP hoge vochtigheid te voorkomen RXG KHW DSSDUDDW XLW GLUHFW RQOLFKW UHJHQ of vorst Zet het apparaat niet in de buurt van warmte bronnen zoals kachels of haarden Nivellering van het apparaat Voor voldoende nivellering en luchtcirculatie in het achterste gedeelte van het apparaat kunnen de onderste voetjes worden aangepast U kunt deze handmatig of met behulp van een passende sleutel aanpassen D...

Page 61: ...t u deze op zijn rug legt om toegang te krijgen tot de onderkant om beschadiging van het achterpaneel van de koelkast te voorkomen Om de deur te keren worden de volgende stappen aangeraden 1 Zet de koelkast rechtop Open de deur en haal alle opbergvakken eruit om te voorkomen dat deze beschadigd worden en doe dan de deur dicht 2 Open deel ķ rechts bovenop de koelkast en verwijder daarna deel Ĺ en d...

Page 62: ... schroeven 6 Leg de koelkast plat verwijder deel Ĺ en draai daarna schroeven ĺ los Verwijder deel ĸ en deel ķ 7 Schroef het onderste scharnier los verplaats naar het montagegat schroef vast en monteer ring 8 Ga terug naar stap 6 verplaats deel ķ naar links en deel ĸ naar rechts en draai ze vervolgens vast met schroeven ĺ Installeer tenslotte deel Ĺ Onderste scharniergedeelte rechts Voet voorkant v...

Page 63: ...astic zak Opmerking Zorg ervoor dat de zichtzijde van de reed schakelaar goed in de houder zit 15 Installeer deel ķ sluit de bedrading aan ĸ en installeer vervolgens deel Ĺ 16 Open de deur monteer de rekken en sluit de deur 9 Schroef de bovenste scharnieras los verplaats het bovenste scharnier naar de andere kant en monteer de as erop Leg daarna apart voor gebruik 10 Sluit de draden van zowel de l...

Page 64: ... plus 8 Afdekplateau crisper 9 Schuifknop Vochtregeling 10 Moisture fresh crisper groentelade 11 Verstelbare voetjes onderkant 12 Afgedekt zuivelrek 13 Eierrekje binnenin 14 Middenrek 15 Flessenhouder binnenin 16 Gemakkelijke handgreep 17 Flessenrek 18 Koelkastdeur 19 Deurafdichting koelkast Ledlamp boven Ledlamp onder Flexibel wijnrek Kunststof wijnrek Gemakkelijke handgreep Gewone handgreep Flex...

Page 65: ...r van het apparaat 15 C Belangrijk Bewaar gedurende deze tijd geen voedsel in de koelkast OV GH YDNDQWLHIXQFWLH LV LQJHVFKDNHOG kunt u het apparaat uitschakelen door op een willekeurige toets van de Holiday Fridge en Super Cool knop te drukken De koelkasttemperatuur zal terugkeren naar de vorige instelling Gebruik uw apparaat volgens de volgende bedieningsvoorschriften het apparaat beschikt over d...

Page 66: ...en door de Power knop gedurende 5 seconden in te drukken Het display wordt intussen uitgeschakeld Belangrijk HZDDU JHGXUHQGH GH H WLMG geen voedsel in de koelkast OV KHW DSSDUDDW LV XLWJHVFKDNHOG NXQW X het apparaat inschakelen door de Power knop gedurende 1 seconde in te drukken De koelkast keert terug naar de eerder ingestelde temperatuur 6 Kinderslot 8 NXQW RS GH NQRS OLOG RFN drukken voor het ...

Page 67: ...SODWHDX VFKXLYHQ Opmerking Oefen zachte druk uit op de linker of rechterzijde om de box langs het plateau te verschuiven Indien nodig kan de flexibele fresh box met houder er uit genomen worden zodat u het plateau op verschillende hoogten kunt plaatsen om ruimte te besparen Wijnrek LW LV YRRU KHW EHZDUHQ YDQ IOHVVHQ ZLMQ RI frisdrank LW NDQ LQGLHQ JHZHQVW RRN ODQJV KHW plateau schuiven Opmerking O...

Page 68: ...NDVW VDPHQ PHW HHQ YULH HU JHwQVWDOOHHUG ZRUGHQ H H NDQ ZRUGHQ JHwQVWDOOHHUG PHW LQVWDOODWLHRQGHUGHOHQ DOV JHOHYHUG Energiebesparende tips LM UDGHQ X DDQ GH RQGHUVWDDQGH WLSV WH YROJHQ RP HQHUJLH WH EHVSDUHQ 3UREHHU WH YHUPLMGHQ GH GHXU YRRU ODQJHUH WLMG RSHQ WH ODWHQ RP HQHUJLH WH EHVSDUHQ RUJ GDW KHW WRHVWHO XLW GH EXXUW VWDDW YDQ ZDUPWHEURQQHQ LUHFW RQOLFKW HOHNWULVFKH RYHQ RI IRUQXLV HWF 6WHO ...

Page 69: ...NWULFLWHLWVQHW WLMGHQV KHW VFKRRQPDNHQ HYDDU YRRU HOHNWULVFKH VFKRN 6FKDNHO YRRU KHW VFKRRQPDNHQ KHW DSSDUDDW XLW HQ KDDO GH VWHNNHU XLW KHW VWRSFRQWDFW Buitenkant reinigen 2P KHW JRHGH XLWHUOLMN YDQ XZ DSSDUDDW WH EHKRXGHQ PRHW X KHW UHJHOPDWLJ VFKRRQPDNHQ 9HHJ KHW GLJLWDOH SDQHHO HQ ZHHUJDYHSDQHHO PHW HHQ VFKRQH DFKWH GRHN 6SXLW ZDWHU RS UHLQLJLQJVGRHNMH LQ SODDWV UHFKWVWUHHNV RS KHW RSSHUYODN Y...

Page 70: ...eurafdichtingen volledig droog zijn kan het toestel worden ingeschakeld Het ledlampje vervangen Waarschuwing Het ledlampje mag niet door de gebruiker vervangen worden Als het ledlampje beschadigd is neem dan contact op met de klantenservice voor hulp Volg de volgende om het ledlampje te vervangen 1 Trek de kabel van het apparaat uit het stopcontact 2 Verwijder het beschermkapje van het lampje door...

Page 71: ... wijten aan de onderstaande redenen moet u controleren en u moet actie te ondernemen H NDVW VWDDW QLHW ZDWHUSDV H DFKWHUNDQW YDQ KHW DSSDUDDW UDDNW GH PXXU OHVVHQ RI YHUSDNNLQJHQ JHYDOOHQ RI UROOHQ Het is normaal om regelmatig het geluid van de motor te horen meer in de volgende gevallen 7HPSHUDWXXULQVWHOOLQJ ODJHU GDQ QRGLJ URWH KRHYHHOKHGHQ ZDUPH OHYHQVPLGGHOHQ LMQ RQODQJV opgeslagen in het appa...

Page 72: ...fval Verpakkingsmaterialen 9HUSDNNLQJVPDWHULDOHQ PHW GH UHF FOH V PERRO LMQ UHF FOHEDDU RRL GH YHUSDNNLQJ LQ HHQ JHVFKLNWH DIYDO FRQWDLQHU WH UHF FOHUHQ Voor de verwijdering van het apparaat 1 Trek de stekker uit het stopcontact 2 Snijd het snoer af en gooi met de stekker weg Waarschuwing Koelkasten bevatten koelmiddel en gassen in de isolatie Koelmiddel en gassen moeten professioneel worden verwi...

Page 73: ...MANUAL DE OPERAÇÃO DO UTILIZADOR Antes de operar esta unidade leia minuciosamente este manual e guarde o para referência futura Português ...

Page 74: ...informados quanto à sua utilização correcta e segurança Ɣ VWH DSDUHOKR IRL IHLWR SDUD VHU XVDGR HP casas Cozinha de staff em lojas oficinas e outros ambientes de trabalho Quintas de clientes em hotéis motéis e outros tipos de moradias Bed and breakfast type of environments Catering e aplicações de não retalho semelhantes Ɣ DVR R DSDUHOKR QmR HVWLYHU IXQFLRQDQGR corretamente verifique o tópico Solu...

Page 75: ...o muito quente Ɣ 1mR FRORTXH DUWLJRV HP FLPD GR DSDUHOKR porque eles podem causar machucados se caírem Ɣ 1XQFD SHUPLWD TXH FULDQoDV EULQTXHP com o aparelho se pendurando ou ficando na porta prateleiras gavetas e etc Segurança relative à electricidade 3DUD HYLWDU ULVFRV TXH HVWmR sempre presentes ao usarmos um aparelho eléctrico recomendamos que você preste bem atenção às instruções sobre electrici...

Page 76: ... DSDUHOKRV HOpFWULFRV FRPR XP SDUD ID HU JHODGRV GHQWUR GR FRPSDUWLPHQWR GH FRPLGDV GR DSDUHOKR VH QmR IRU DXWRUL DGR SHOR IDEULFDQWH Ɣ 1mR ROKH GLUHWR QD OX ORFDOL DGD QR FRPSDUWLPHQWR GR UHIULJHUDGRU FRP LQVWUXPHQWRV ySWLFRV SDUD HYLWDU GDQRV DRV ROKRV 6H HOD QmR HVWLYHU IXQFLRQDQGR FRUUHFWDPHQWH FRQVXOWH XP HOHFWULFLVWD TXDOLILFDGR RX IDoD D WURFD GH DFRUGR FRP DV LQVWUXo HV GR FDStWXOR FXLGDGR...

Page 77: ...ade Ɣ 1mR FRORTXH R DSDUHOKR j OX VRODU directa na chuva ou geada Mantenha o aparelho distante de fontes de calor como fogões fogos ou radiadores Nivelamento do aparelho Ɣ Para um nivelamento suficiente e circulação de ar na secção traseira inferior do aparelho os pés inferiores poderão ter que ser ajustado Pode ajustá los manualmente ou usando uma chave de fendas adequada Ɣ 3DUD SHUPLWLU TXH DV S...

Page 78: ...ve colocá la na embalagem de espuma ou num material semelhante para evitar danificar o painel traseiro do frigorífico Para inverter a porta recomendamos os seguintes passos 1 Coloque o frigorífico direito Abra a porta superior para retirar todas as prateleiras da porta para evitar danificar as prateleiras e depois feche a porta 2 Abra a parte ķ no topo do corpo do frigorífico do lado direito e dep...

Page 79: ...ta da porta Bloqueio Parafusos auto roscantes 6 Coloque o frigorífico com a parte achatada para baixo remova a parte Ĺ e depois desaperte os parafusos ĺ Remova a parte ĸ e a parte ķ 7 Desaperte a dobradiça inferior mude a para o sítio do orifício próximo e depois aperte e fixe a arruela 8 Basta retomar o passo 6 mudar a parte ķ para a esquerda e a parte ĸ para a direita e depois fixá las com paraf...

Page 80: ...ar no saco plástico Nota Certifique se de que o lado com caracteres do botão de lingueta encaixa bem no bloco de coroamento 15 Instale a parte ķ ligue o conector de fio ĸ e depois instale a parte Ĺ 16 Abra a porta instale as prateleiras da porta e depois feche a 9 Desaperte o eixo da dobradiça superior rode a dobradiça superior e fixe o eixo na mesma Depois coloque a de lado para usar 10 Mude os f...

Page 81: ...e de controlo de humidade 10 Compartimento refrescante de humidade 11 Pés inferiores reguláveis 12 Prateleira para laticínios com tampa 13 Tabuleiro de ovos interior 14 Prateleira do meio 15 Porta garrafas interior 16 Pega fácil 17 Prateleira de Garrafas 18 Porta do frigorífico 19 Vedação da porta do frigorífico Luz LED superior Luz LED traseira Prateleira flexível para vinho Prateleira de plástic...

Page 82: ...or do aparelho 1 Frigorífico Prima Frigorífico para definir a temperatura do frigorífico entre os 2 C e os 8 C conforme precisar e o painel de controlo vai mostrar valores correspondentes de acordo com a seguinte sequência 2 Super gelado A posição super gelado faz com que o frigorífico resfrie a comida muito mais rapidamente mantendo a comida fresca por mais tempo Ɣ Pressione o botão Super gelado ...

Page 83: ...relho premindo o botão Potência durante 5 segundos entretanto o mostrador apagar se á Importante Não guarde comida no IULJRUtILFR GXUDQWH HVWH WHPSR Ɣ 4XDQGR R IULJRUtILFR HVWLYHU GHVOLJDGR pode ligar o aparelho premindo o botão 3RWrQFLD GXUDQWH VHJXQGR H R IULJRUtILFR YROWDUi j GHILQLomR GH WHPSHUDWXUD DQWHULRU 6 Segurança para crianças 3RGH SUHPLU R ERWmR 6HJXUDQoD SDUD FULDQoDV QR FDVR GH FULDQ...

Page 84: ... do lado esquerdo ou direita para mover a caixa ao ORQJR GD SUDWHOHLUD 6H IRU SUHFLVR D FDL D flexível para frescos também pode ser retirada para fora com este suporte permitindo lhe ajustar a prateleira a alturas diferentes e poupar espaço Prateleira para garrafas de vinho Ɣ 6HUYH SDUD DUPD HQDU JDUUDIDV GH YLQKR ou bebidas Ɣ Também pode deslizar ao longo da prateleira se for preciso Nota Faça um...

Page 85: ...HU D JDUUDID 3RGH FRORFi OR QD prateleira intermédia ou inferior da porta e ID r OR GHVOL DU SDUD D HVTXHUGD RX GLUHLWD FRQIRUPH SUHIHULU Instalar frigoríficos aos pares Ɣ 2 VHX IULJRUtILFR SRGH VHU LQVWDODGR FRP FRQJHODGRU DRV SDUHV Ɣ Pode ser instalado por partes de LQVWDODomR IRUQHFLGDV FRPR HVWD Sugestões e conselhos úteis Conselhos para economizar energia 5HFRPHQGDPRV TXH YRFr VLJD RV VHJXLQW...

Page 86: ...HULJR GH FKRTXH HOpFWULFR 2 DSDUHOKR QmR GHYH HVWDU OLJDGR j FRUUHQWH GXUDQWH D OLPSH D QWHV GHVOLJXH R DSDUHOKR H UHPRYD D ILFKD GD WRPDGD RX GHVOLJXH R GLVMXQWRU RX IXVtYHO Limpeza exterior 3DUD PDQWHU R VHX DSDUHOKR HP ERP HVWDGR HOH GHYH VHU OLPSDGR UHJXODUPHQWH LPSH R LQWHULRU H WRGRV RV DFHVVyULRV LQWHUQRV FRP iJXD PRUQD H VDEmR QHXWUR VVR DMXGD D PDQWHU D KXPLGDGH GD VXSHUItFLH LPSH WRGR R ...

Page 87: ...Aviso A lâmpada LED não pode ser substituída pelo utilizador Se a lâmpada LED estiver danificada contacte a linha de apoio ao cliente para obter assistência Para substituir a lâmpada LED deverá seguir os seguintes passos 1 Desligar o aparelho da ficha 2 Remover a tampa da lâmpada empurrando a para cima e para fora 3 Segurar na tampa do LED com uma mão e puxá la com a outra mão enquanto pressiona a...

Page 88: ...er ou de outro compartimento Ɣ 6RP GH iJXD IHUYHQGR Ɣ 6RP GXUDQWH R GHVFRQJHODPHQWR DXWRPiWLFR Ɣ 6RP GH FOLTXH DQWHV TXH R FRPSUHVVRU FRPHFH D IXQFLRQDU Outros ruídos invulgares são devido aos motivos abaixo e podem precisar ser de alguma atitude Ɣ 2 DSDUHOKR QmR HVWi QLYHODGR Ɣ 2 DSDUHOKR WRFD D SDUHGH Ɣ DUUDIDV H HPEDODJHQV FDLQGR RX URODQGR É normal ouvir o som do motor ele precisa funcionar ma...

Page 89: ...lixo doméstico Material da embalagem Os materiais de embalamento com o símbolo de reciclagem são recicláveis Coloque a embalagem num recipiente de recolha adequado para a reciclar Antes de eliminar o aparelho 1 Desligue a ficha de alimentação eléctrica da tomada 2 Corte o cabo de alimentação eléctrica e elimine o Cuidado Frigoríficos possuem gás refrigerante A parte que possui gás deve ser elimina...

Page 90: ......

Reviews: