background image


FCC Information and Copyright 


This equipment has been tested and found to comply with the limits for a Class B digital device, 

pursuant to part 15 of the FCC Rules. 

These limits are designed to provide reasonable protection against harmful interference in a residential 

installation. This equipment generates, 

uses and can radiate radio frequency energy and, if not installed and used in accordance with the 

instructions, may cause harmful interference 

to radio communications. However, there is no guarantee that interference will not occur in a particular 

installation. If this equipment does 

cause harmful interference to radio or television reception, which can be determined by turning the 

equipment off and on, the user is 

encouraged to try to correct the interference by one or more of the following measures: 

—Reorient or relocate the receiving antenna. 

—Increase the separation between the equipment and receiver. 

—Connect the equipment into an outlet on a circuit different from that to which the receiver is 

connected. 

—Consult the dealer or an experienced radio/TV technician for help. 


15.19 Labelling requirements.


This device complies with part 15 of the FCC Rules. Operation is subject to the 
following two conditions: 
(1)This device may not cause harmful interference, and   
(2) this device must accept any interference received, including interference that may 
cause undesired operation. 
 

changes or modifications not expressly approved by the party responsible for compliance could 

void the user's authority to operate the equipment. 


FCC RF warning 

statement: the device has been evaluated to meet general RF exposure 

requirement , The device can be used in portable exposure condition without restriction.


Summary of Contents for Titan YH5-7DTB4A

Page 1: ...YH5 7DTB4A Titan User Manual July 2013...

Page 2: ...Important safety precautions Always follow these basic safety precautions when using the unit This will reduce the risk of product damage and personal injury Do not disassemble repair or modify the u...

Page 3: ...Chapter One Overview 1 1 Appearance...

Page 4: ...1 2 Buttons Ports 1 Power Button 7 Micro0SD Port 2 Headphone Port 3 5mm 8 LCD Screen 3 Micro USB Port 9 Camera 4 Power Jack 5VDC 5 Volume Up Button 6 Volume Down Button...

Page 5: ...by Short press the power button to standby the tablet when the tablet is powered ON Wake up Short press the power button to wake the screen up when the tablet is powered ON and in standby mode 1 5 Loc...

Page 6: ...Drag to the right to unlock shown below Drag to the left to enter the Camera Video mode from the lock screen 1 6 Home Screen Info 1 7 Text Input...

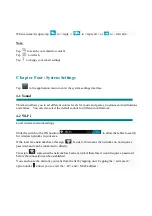
Page 7: ...To toggle caps lock ON OFF double tap Chapter Two Internet 2 1 Browser Internet browsing requires a local wireless network If there are network issues please contact your network operator or the serv...

Page 8: ...he internet To enter in a URL tap the input area to bring up the soft keyboard then type in the website Chapter Three Applications 3 1 Camera Video Camera Tap in the application menu to enter the came...

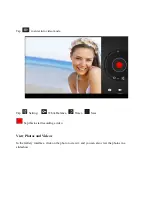
Page 9: ...Tap to enter camera settings White Balance Exposure Save Video...

Page 10: ...into video mode Tap Setting White Balance Timer Save Tap this to start recording a video View Photos and Videos In the Gallery interface click on the photo to view it and you can also view the photos...

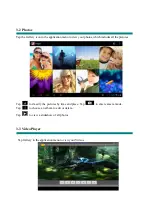
Page 11: ...ur photos which includes all the pictures Tap to classify the pictures by time and place Tap to enter camera mode Tap to choose an album to edit or delete Tap to view a slideshow of all photos 3 3 Vid...

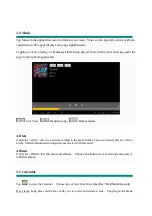
Page 12: ...w Random song Repeat modes Artists Under the artist tab it is sorted according to the artist s name Tap on an artist and you will see all the related albums music song lists associated with this artis...

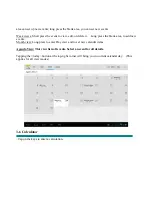
Page 13: ...he blank area to add new events Month view Long press to enter Day view and to set new calendar items Agenda View This view lists all events Select an event for all details Tapping the today button at...

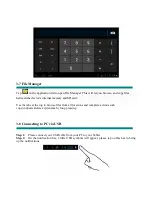
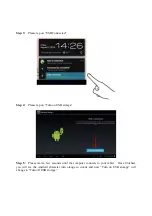
Page 14: ...card Use the tabs at the top to browse files from all locations and complete actions such copy cut paste delete zip rename by long pressing 3 8 Connecting to PC via USB Step 1 Please connect your USB...

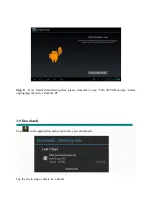
Page 15: ...lease tap on Turn on USB storage Step 5 Please wait a few seconds until the computer connects to your tablet Once finished you will see the Android character turn orange in colour and now Turn on USB...

Page 16: ...ed transferring files please remember to tap Turn off USB storage before unplugging the device from the PC 3 9 Downloads Tap in the application menu open view your downloads Tap the file to stop or de...

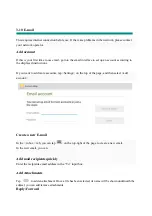
Page 17: ...ns If you want to add more accounts tap Settings on the top of the page and then select add account Create a new E mail In the inbox tab you can tap on the top right of the page to create a new email...

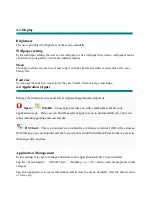
Page 18: ...default sounds for different notifications 4 2 Wi Fi Local wireless network settings Slide the switch to the ON position to allow the tablet to search for wireless networks in your area If the local a...

Page 19: ...elopment Opera 1Mobile These apps provides you with a marketplace for all your application needs Here you can find thousands of apps for you to download directly onto your tablet including gaming and...

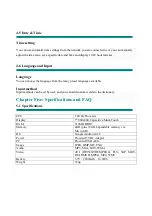
Page 20: ...ble Input method Input methods can be set by user and you can add custom words to the dictionary Chapter Five Specifications and FAQ 5 1 Specifications CPU 1 2GHz Processor Display 7 800x480 Capacitiv...

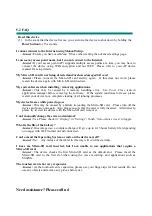
Page 21: ...all running processes My device freezes while powering on Answer This may be caused by a failure in reading the Micro SD card Please turn off the device and power on again Also please ensure that the...

Page 22: ...tains a built in lithium battery and should not be disposed of in normal household waste The battery in this device is not intended to be removed by the individual or end user For disposal and recycli...

Page 23: ...ct the interference by one or more of the following measures Reorient or relocate the receiving antenna Increase the separation between the equipment and receiver Connect the equipment into an outlet...

Reviews: