
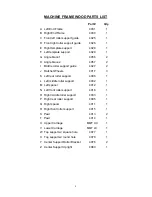


7
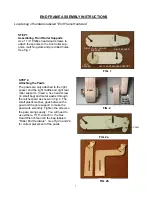
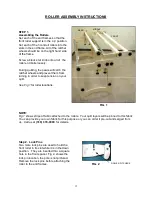
END FRAME ASSEMBLY INSTRUCTIONS
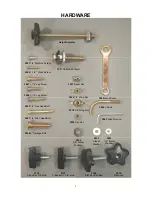
Locate bag of hardware labeled “End Frame Hardware”
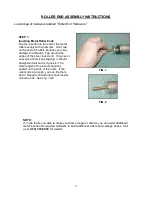
STEP 1.
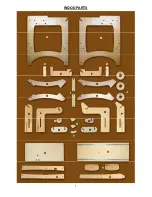
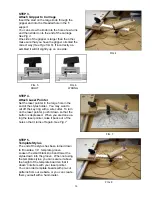
Assembling Front Roller Supports
Use 1 1/4” Phillips head wood screws to
attach the spacers to the front roller sup-
ports, matching slots and pre drilled holes.
See Fig. 1
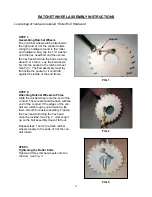
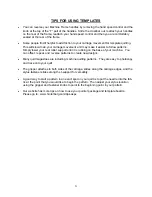
STEP 2.
Attaching the Pawls
The pawls are only attached to the right
spacer and the right middle and right rear
roller supports. Insert a hex head screw
(in small bag) and metal washer through
the ratchet pawl as shown in
Fig. 2.
The
small plastic washer, goes between the
pawl and the pole support to make the
pawl work smoothly. Tighten the screw so
the pawl swings easily. You will need to
use either a 7/16” wrench or the Hex
Head Wrench found in the bag labeled
“Roller End Hardware”.
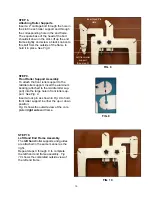
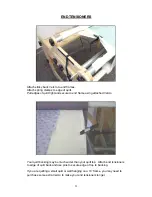
See Fig 2a and 2b
for correct placement of the pawls.
FIG. 2
PAWL
FRONT
ROLLER
SUPPORT
FIG. 1
RIGHT FRONT ROLLER
SUPPORT
RIGHT SPACER
LEFT FRONT ROLLER SUPPORT
LEFT
SPACER
FIG. 2a
PAWL
FIG. 2b